【Cyber Command】Virtual Stealth Threat Analytics (vSTA) Deployment on AWS Guide_V3.0.63
Introduction
Abbreviations and Conventions
In this document, STA refers to the Sangfor Stealth Threat Analytics device.
Installation and Deployment
Installation
-
Obtain the STA image file (AWS supports .ova and .vmdk files. Here, the .ova file is used as an example.)
AWS supports only STA 3.0.63EN and later. -
Upload the STA image file to an Amazon S3 Bucket.
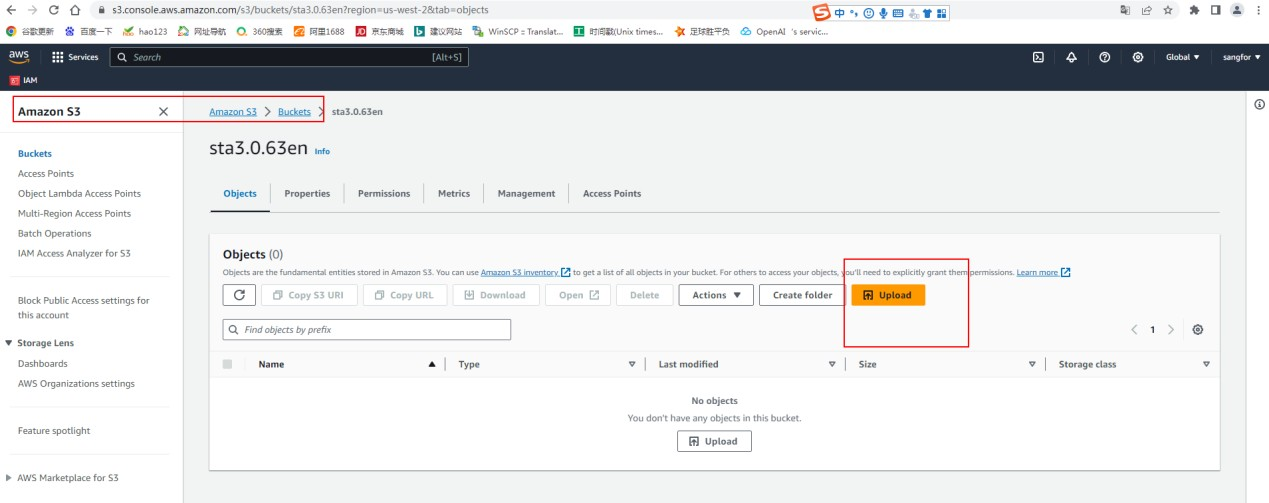
-
Convert the image file into Amazon Machine Image (AMI).
-
Create a .json file named containers.json.
In the example, the image format is .ova, the name of the Amazon S3 bucket is zpl-aws, and the image name is STA3.0.67EN.ova. Create a .json file named containers.json, as shown below.
[{
"Description": "VM import first CLI task", "Format": "OVA",
"UserBucket": { "S3Bucket": "zpl-aws",
"S3Key": "STA3.0.67EN.ova"
}}]
Note:
Set Format to the actual image format, for example, OVA.
Set S3Bucket to the name of the bucket where the image belongs.
Set S3Key to the full name of the image.
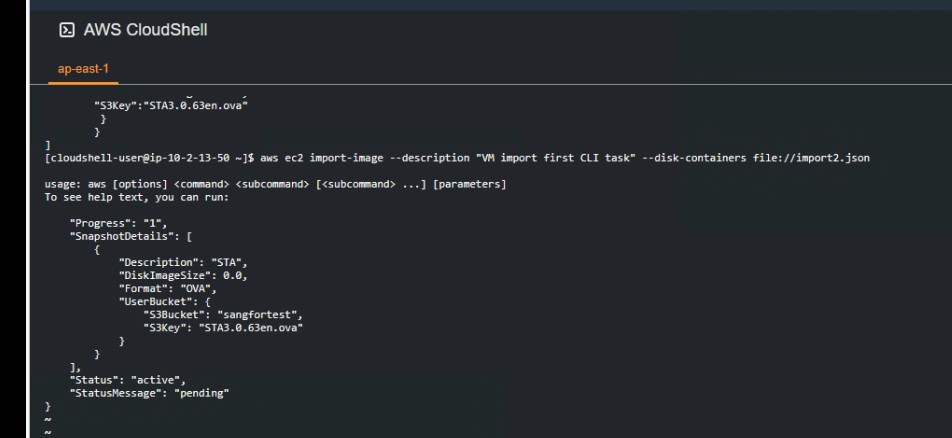
- Run the conversion command.
In AWS CloudShell, run the following command, as shown in the figure below.
aws ec2 import-image --description "VM import first CLI task" --disk-containers file://containers.json
Note:
- Enter the absolute path after file://.
- If the command is successfully executed, the import task ID (ImportTaskId) will be included in the returned JSON string, which can be used to query the task’s progress and result.
-
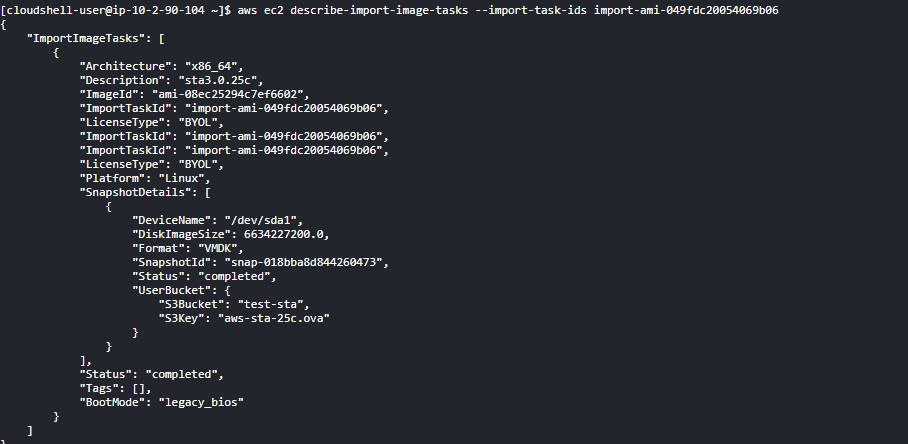
Query the task’s progress.
Run theaws ec2 describe-import-image-tasks --import-task-ids import- ami-XXXcommand.The conversion is successful if completed is returned in Status, as shown in the figure below.
Note:
Status Description:
active: The import task is running.
deleting: The import task is being canceled.
deleted: The import task is canceled.
updating: The import status is being updated.
validating: The imported image is being verified.
validated: The imported image is verified.
converting: The imported image is being converted into an AMI.
completed: The import task is completed, and the image file is converted into AMI for use.
- Confirm the information on the AWS Management Console.
Log in to the AWS Management Console, go to Compute > EC2 > Snapshots, and select Owned by me from the drop-down list. Then, you can view the imported image, as shown in the figure below.

Create a Key Pair
Log in to the AWS Management Console, go to Compute > EC2 > Key pairs, and click Create key pair. Then, enter the Name and select the Private key file format, for example, .ppk, and click Create key pair, as shown in the figure below.
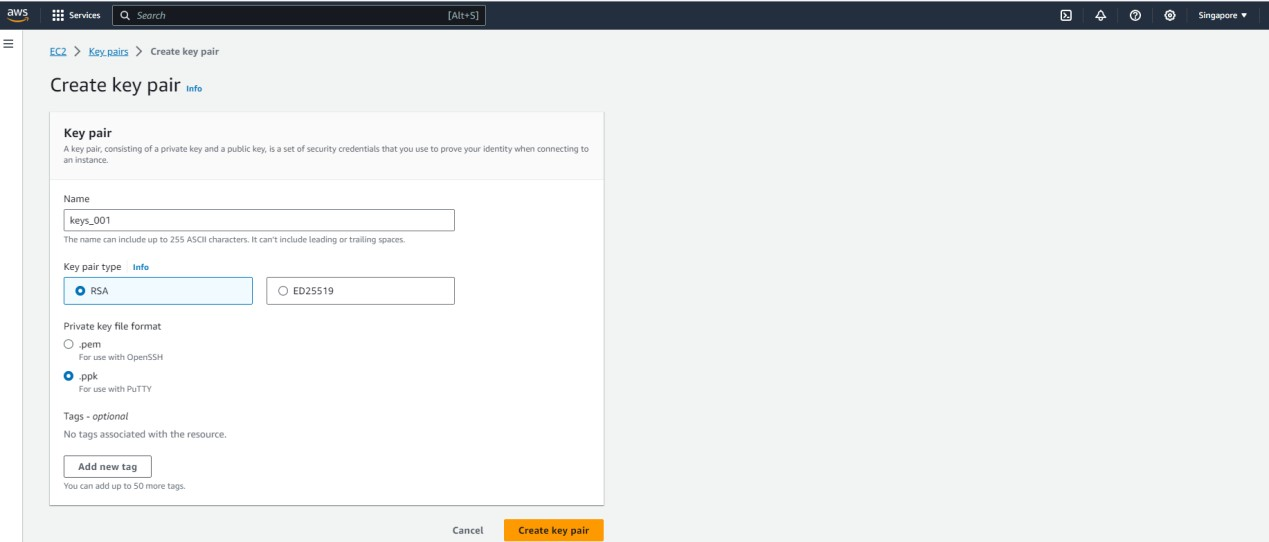
Note:
- If you select .pem, OpenSSH is required.
- If you select .ppk, PuTTY is required.
Launch an Instance
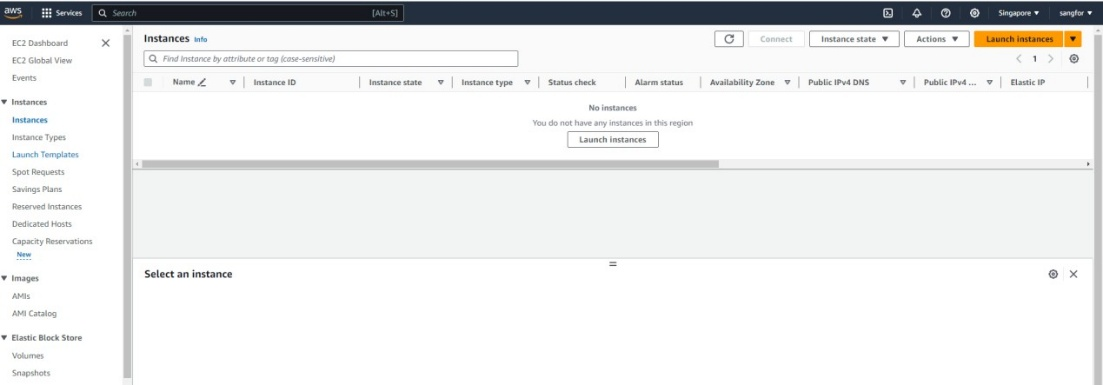
- Log in to the AWS Management Console, go to Compute > EC2 > Instances, and click Launch instances, as shown in the figure below.
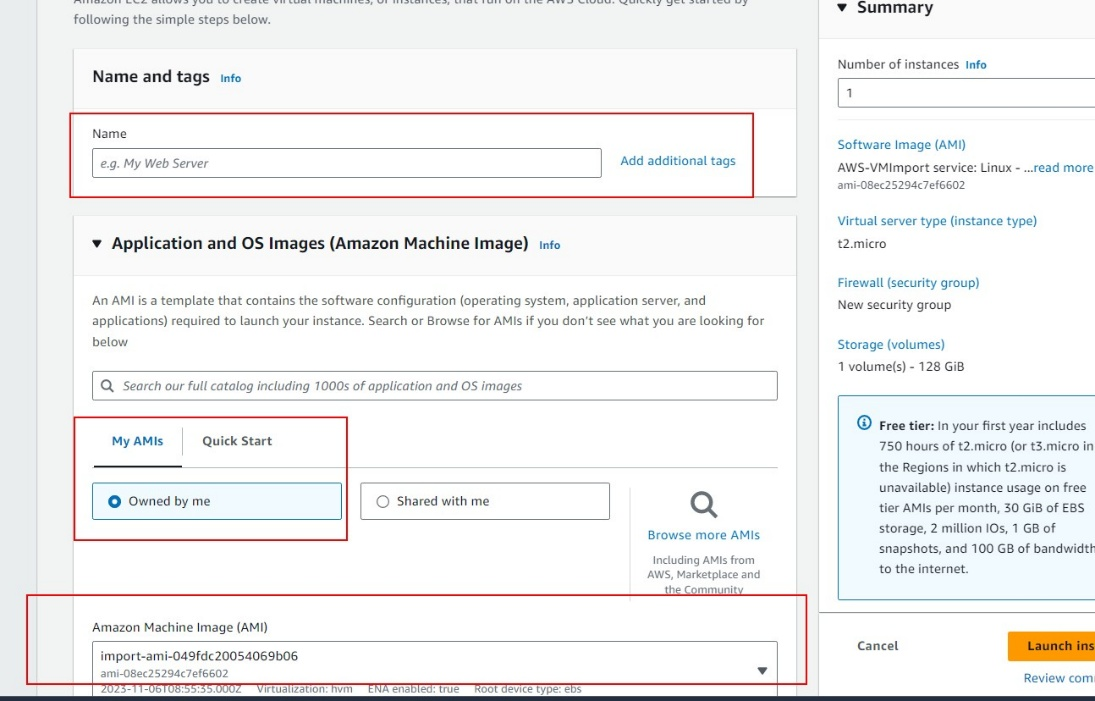
- In the Amazon Machine Image (AMI) section, select the AMI that was imported earlier, as shown in the figure below.
- Select the corresponding CPU and memory specifications. For details, see the table below.
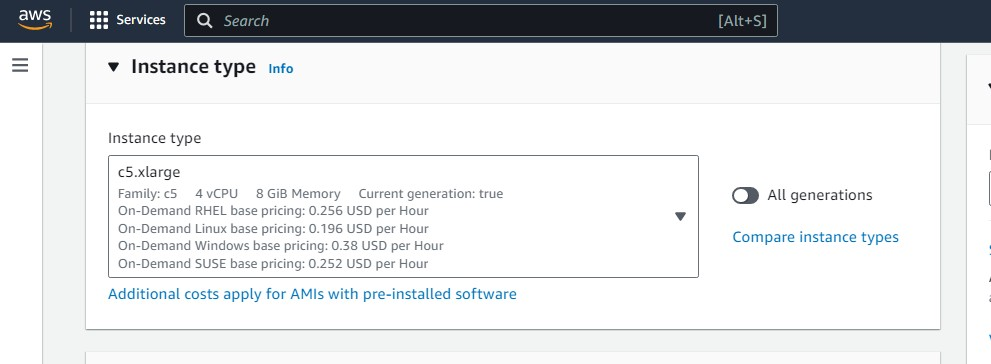
| Deployment Scale | Recommended Instance Type | Recommended Disk Size |
|---|---|---|
| Small | c5.xlarge (4 vCPU and 8 GiB RAM) | 128 GB + 200 GB |
| Medium | c5.2xlarge (8 vCPU and 16 GiB RAM) | 128 GB + 500 GB |
| Large | c5.4xlarge (16 vCPU and 32 GiB RAM) | 128 GB + 1,000 GB |
- Configure the Key pair (login), which was created previously, and the Network Settings.

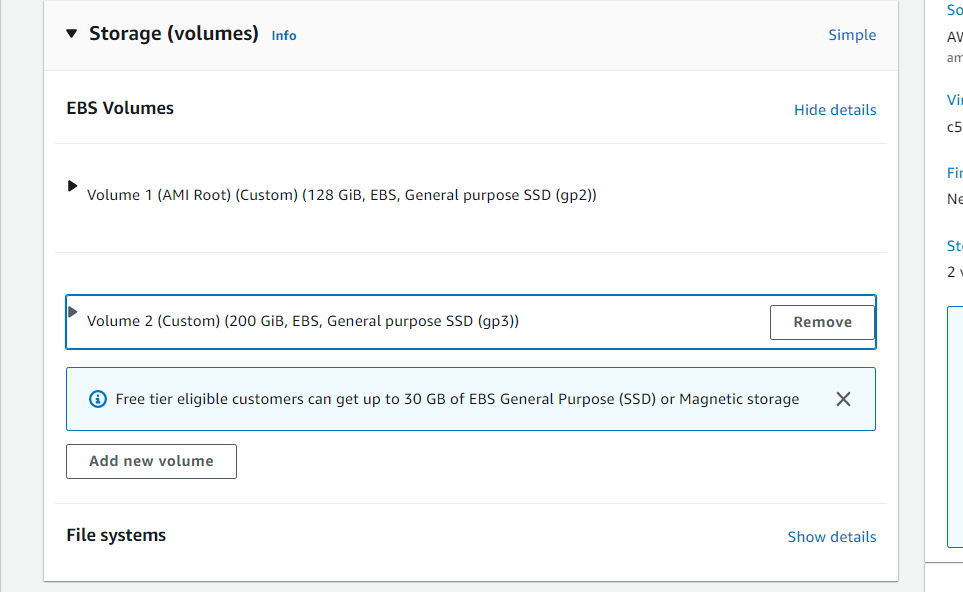
- Configure the disk size of the instance. For details, see the table below.
| Deployment Scale | Recommended Instance Type | Recommended Disk Size |
|---|---|---|
| Small | c5.xlarge (4 vCPU and 8 GiB RAM) | 128 GB + 200 GB |
| Medium | c5.2xlarge (8 vCPU and 16 GiB RAM) | 128 GB + 500 GB |
| Large | c5.4xlarge (16 vCPU and 32 GiB RAM) | 128 GB + 1,000 GB |
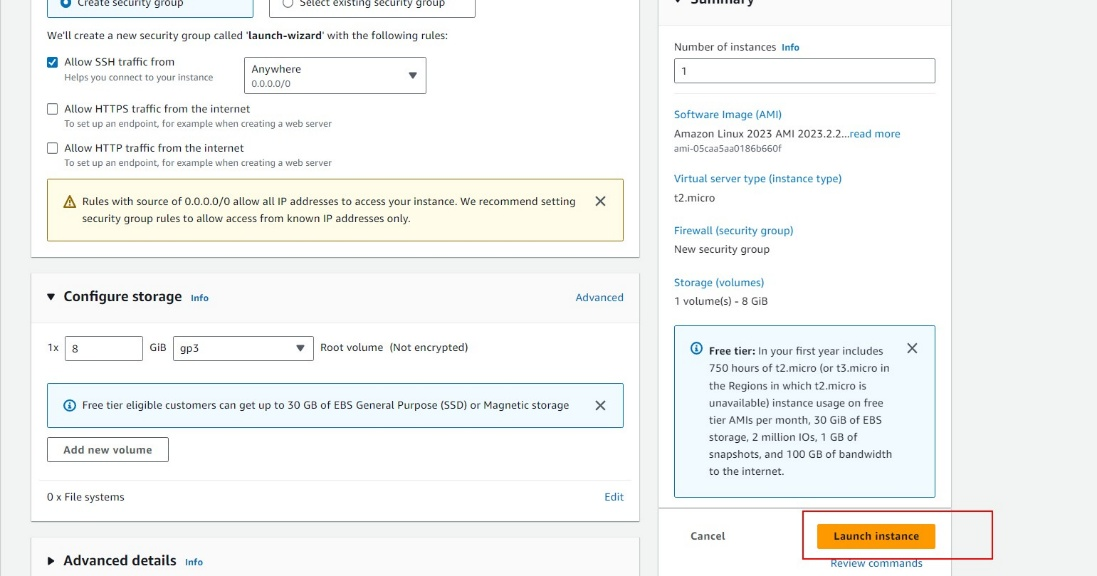
- Click Launch instance.

Check the Results
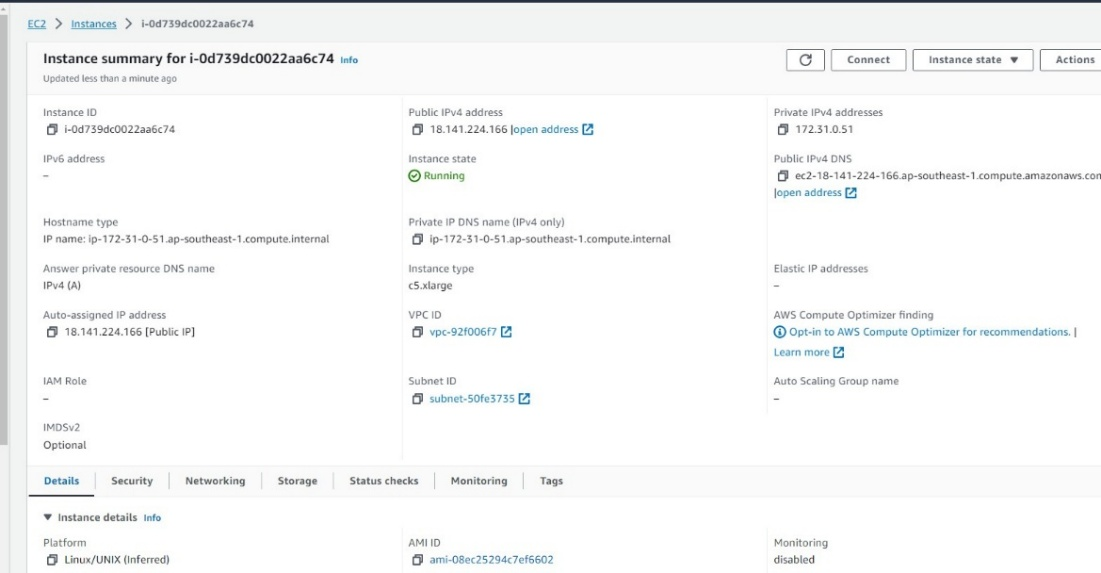
- On the Instances page, click the Instance ID to enter the details page, as shown in the figures below.
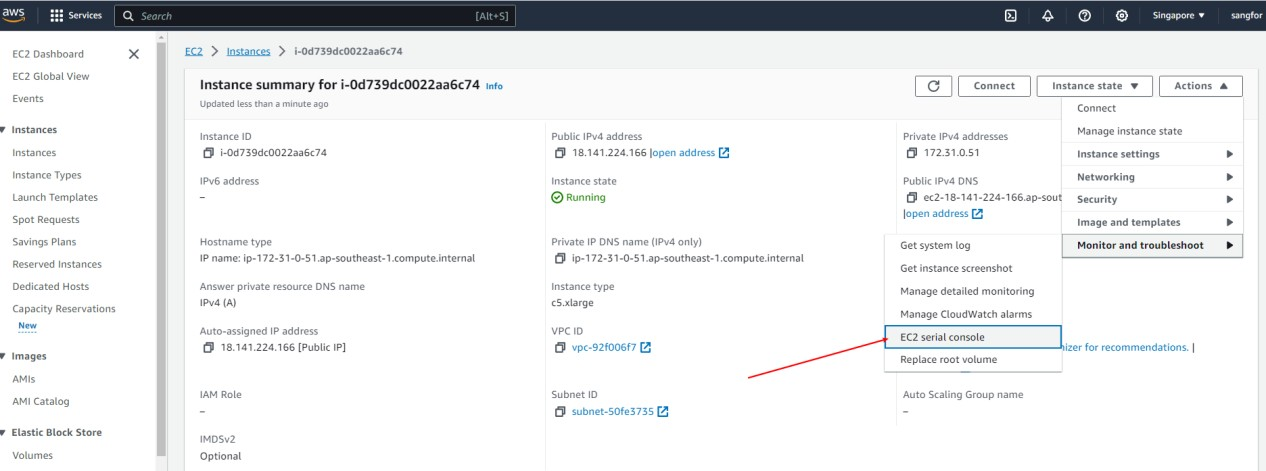
- Click Actions > Monitor and troubleshoot > EC2 serial console and press ALT + F5, as shown in the figure below.
- You may also use the console mode to add the IP address.
Press ALT + F5 to display the screen below.
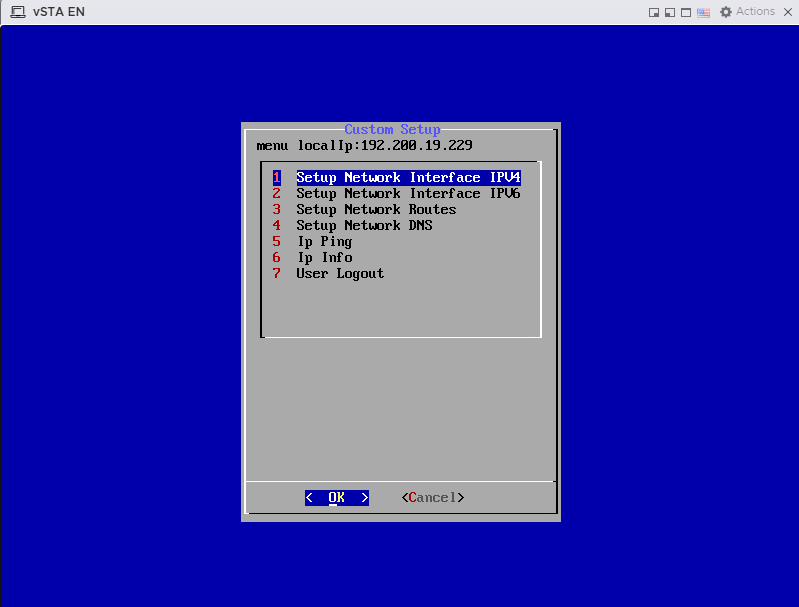
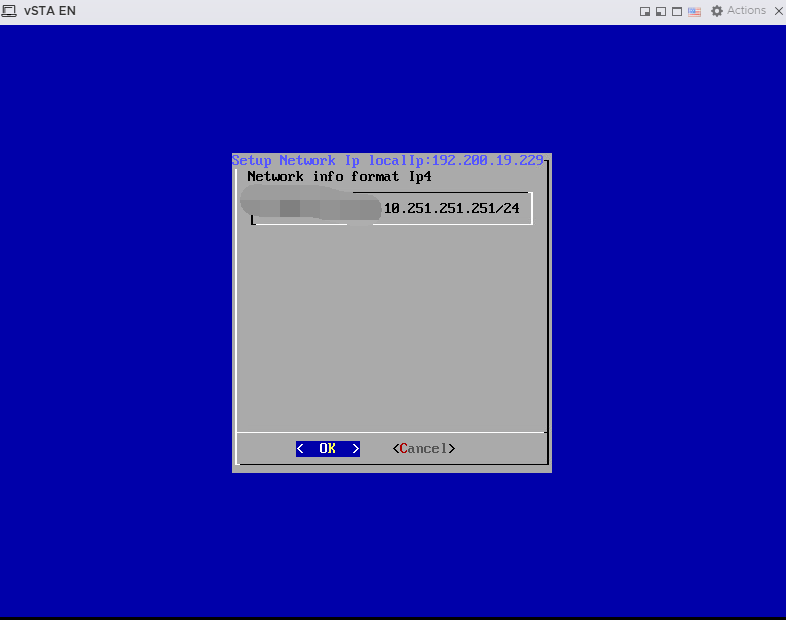
- On the Custom Setup screen, select Setup Network Interface IPV4 to set up the IPv4 address with the following format:
NetworkIP/segment Space reservedIP/segment
For example, 192.168.1.123 is assigned to STA, you are required to input 192.168.1.123/24 10.251.251.251/24, where 10.251.251.251 is the reserved IP address for the management port, with a space separating both IP addresses.
-
On the Add static route localIp screen, press Menu 3 to continue the routing and set the default static route to route to the correct gateway.
-
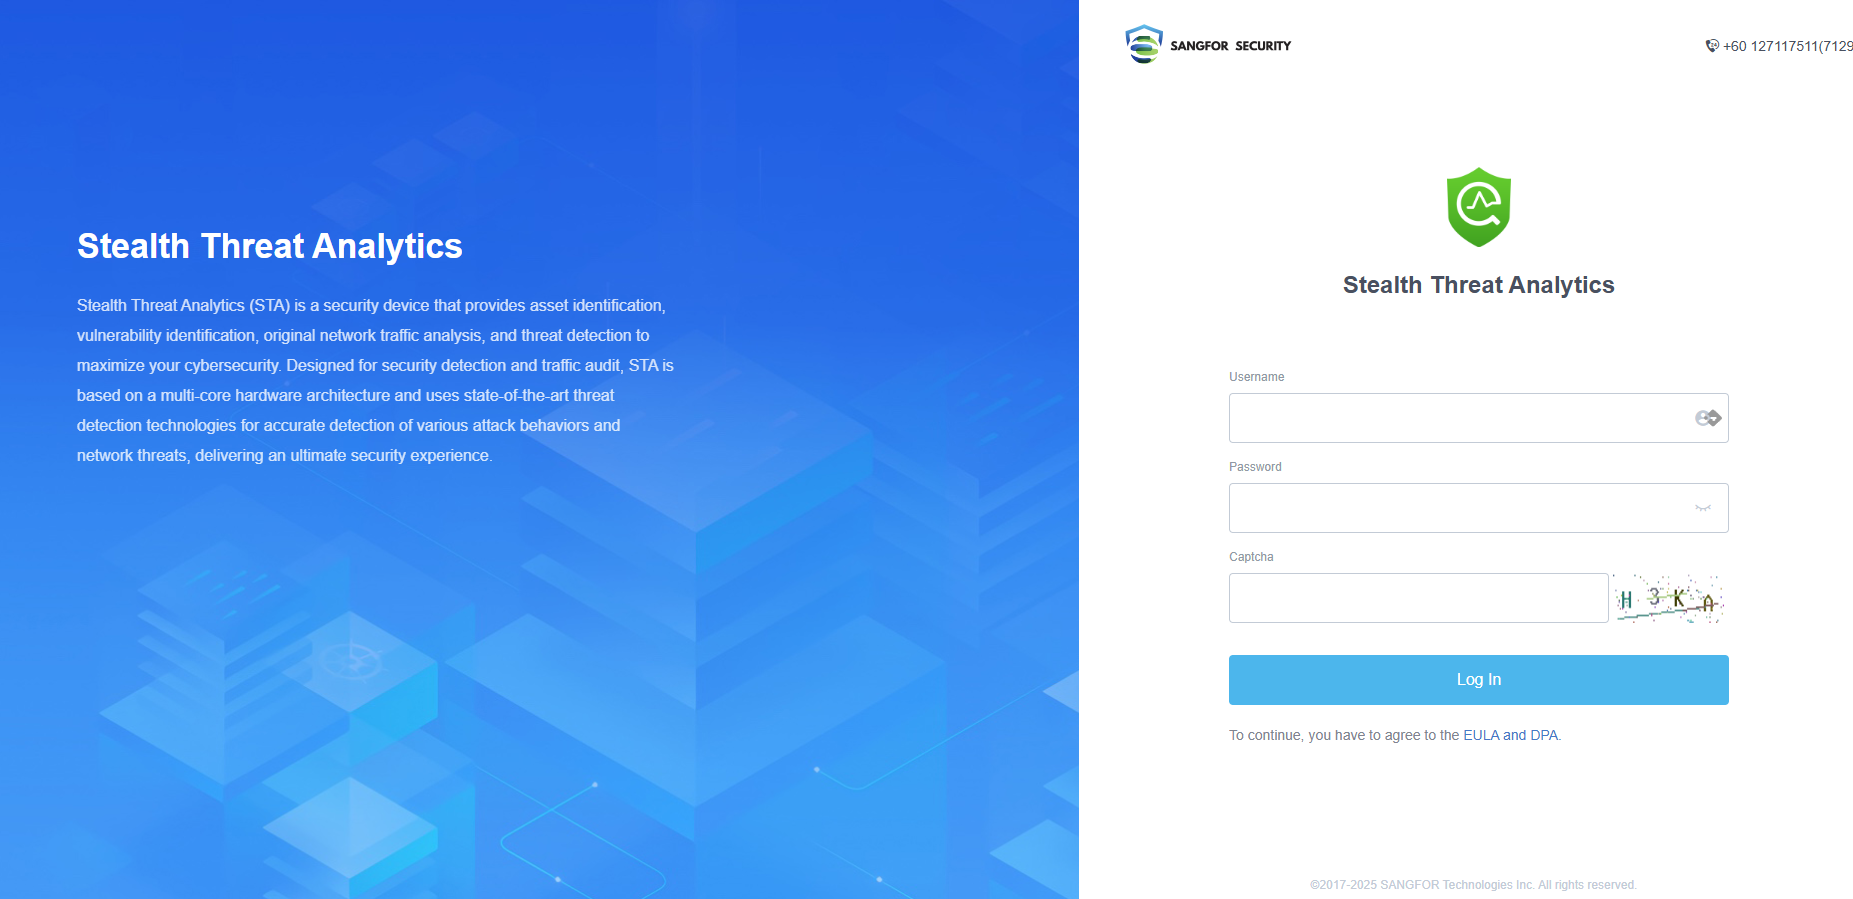
Log in via a webpage: Enter https://public IP address:4431 in the browser and open the STA login page. Log in with the default username (admin) and password (admin), as shown in the figure below.
Note:
- If the instance is restarted, the public IP address may change. To keep the public IP address unchanged, you need to purchase AWS services and configure a fixed Elastic IP address.
- If the account that creates the instance is not filed, ports 443, 80, and 8080 are inaccessible through the public IP address.
STA Traffic Mirroring
Create a Network Interface for STA
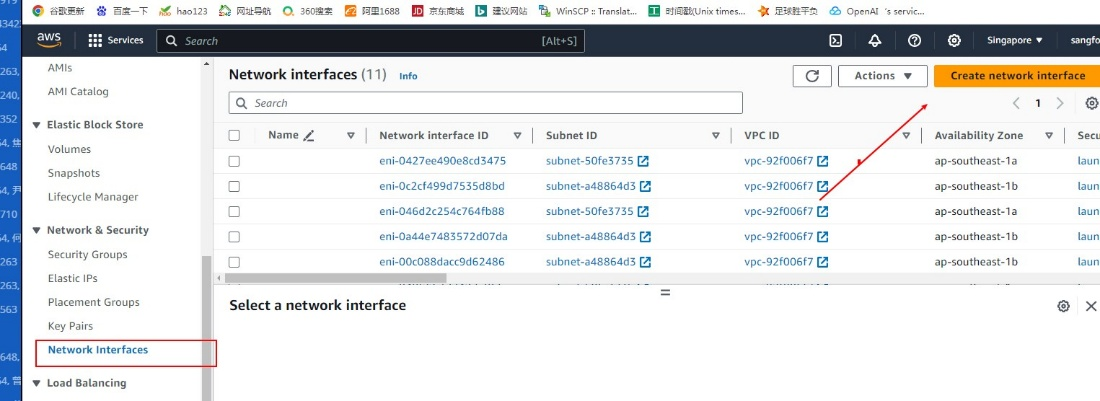
- Log in to the AWS Management Console, go to Compute > EC2 > Network & Security > Network Interfaces, and click Create network interface.
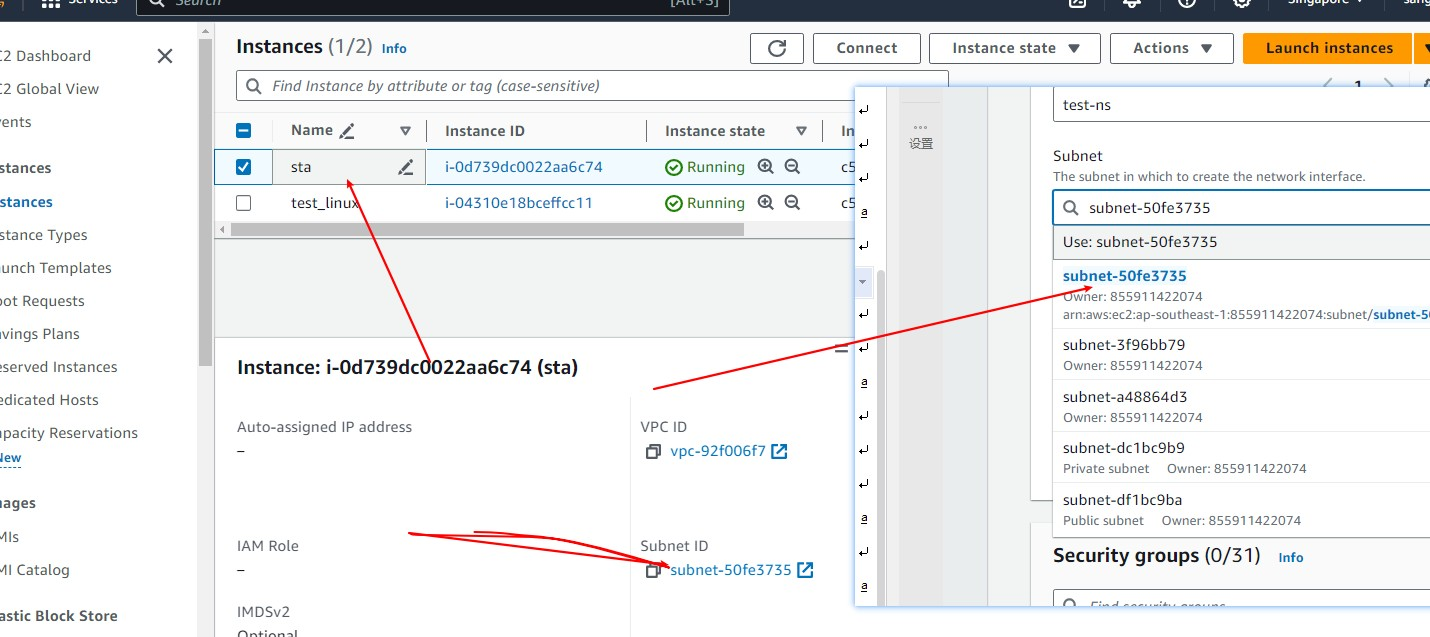
- The Subnet ID corresponding to the instance is required for network interface creation.
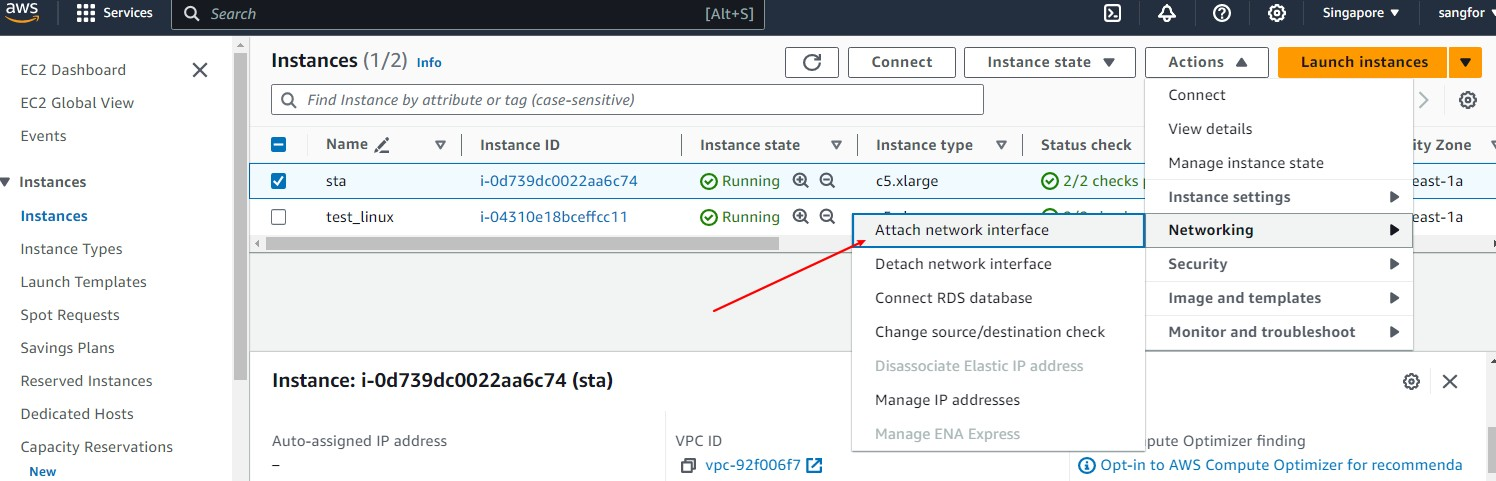
- On the Instances page, select Actions > Networking > Attach network interface.
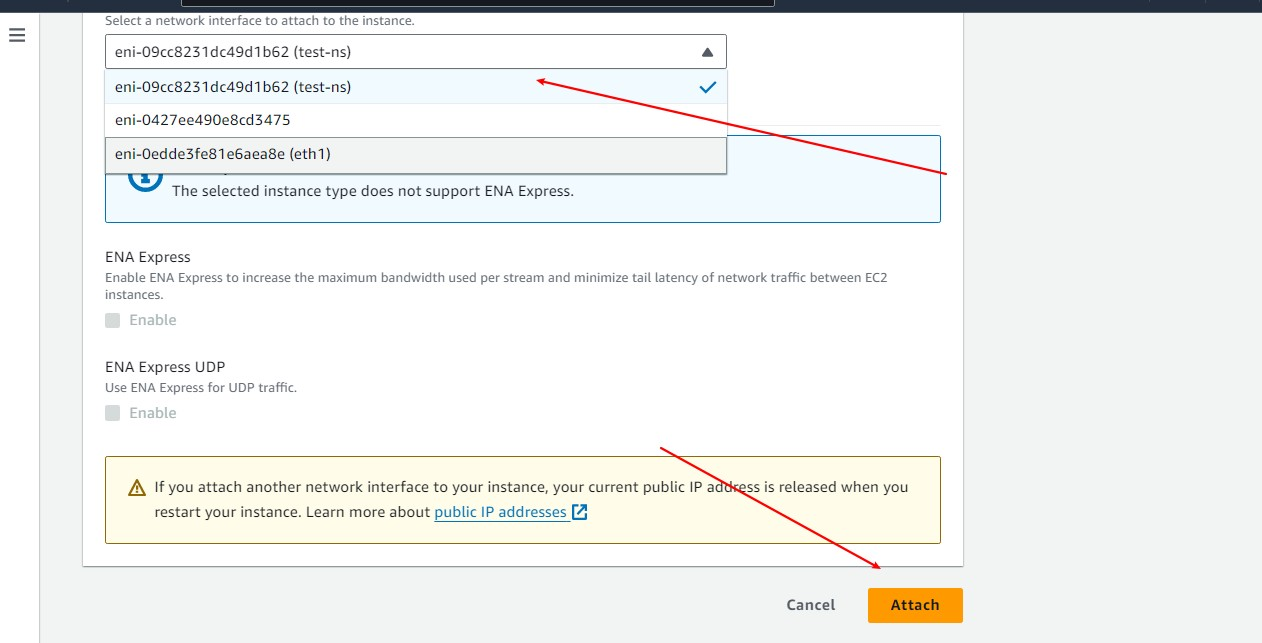
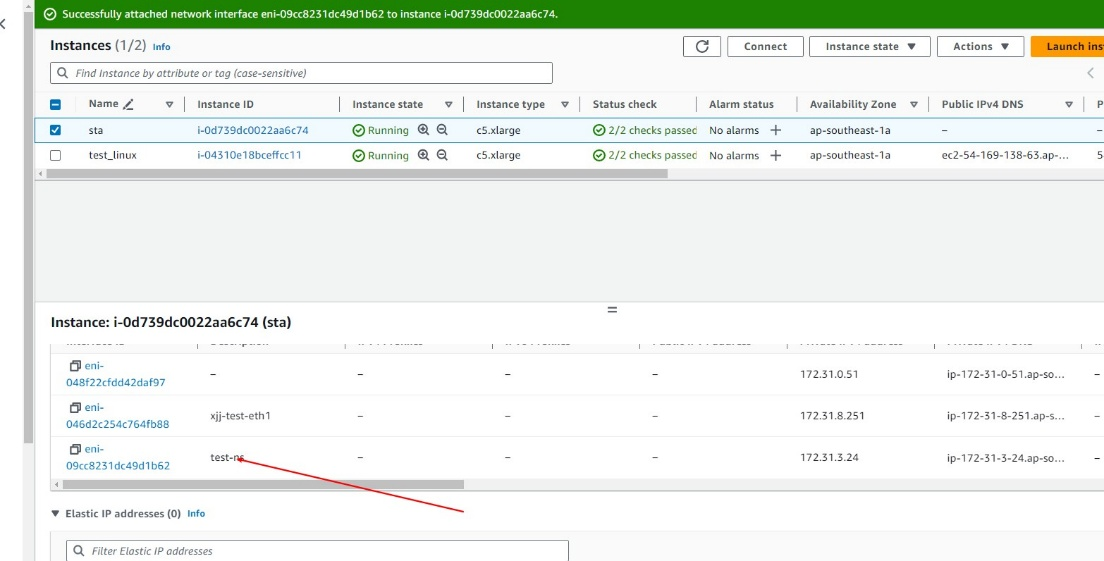
- Select the created network interface and click Attach to attach it to your instance.
- Check whether the network interface is attached successfully.
Mirror Traffic from Other Instances to the STA Image’s Network Interface
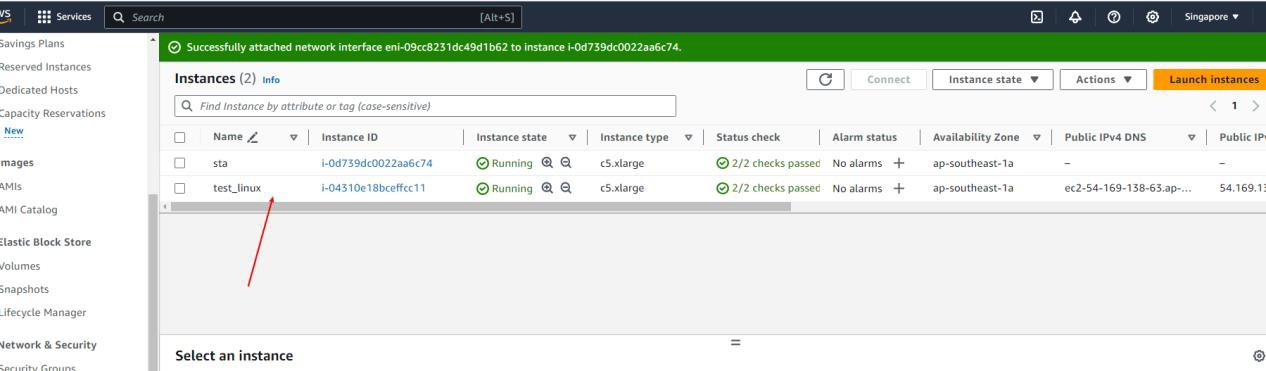
- Launch a Linux instance.
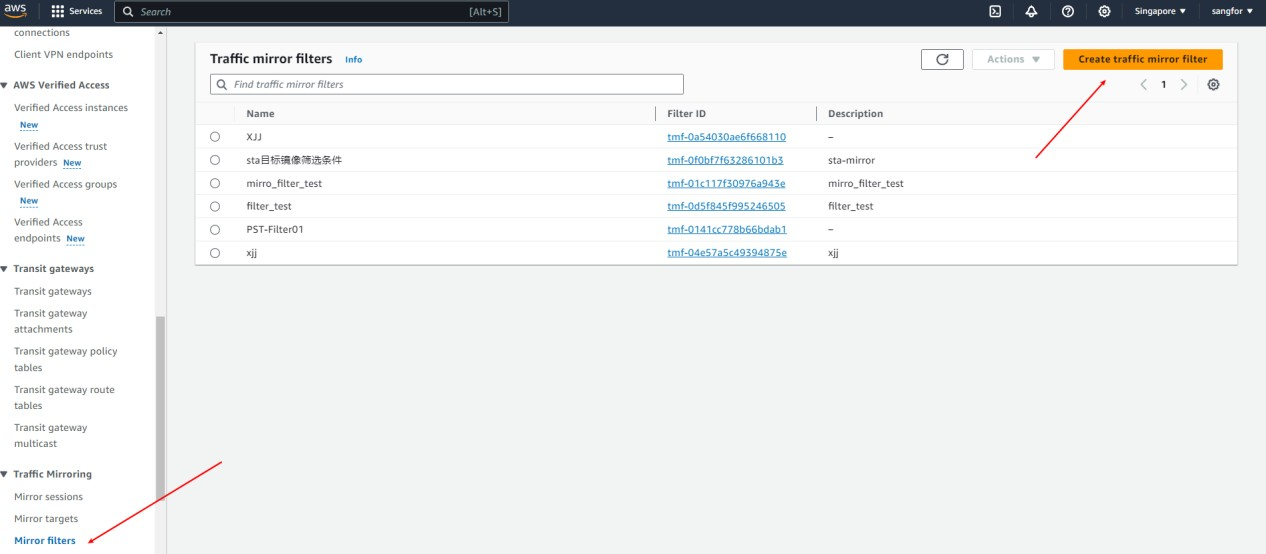
- Go to VPC > Traffic Mirroring > Mirror filters and click Create traffic mirror filter.
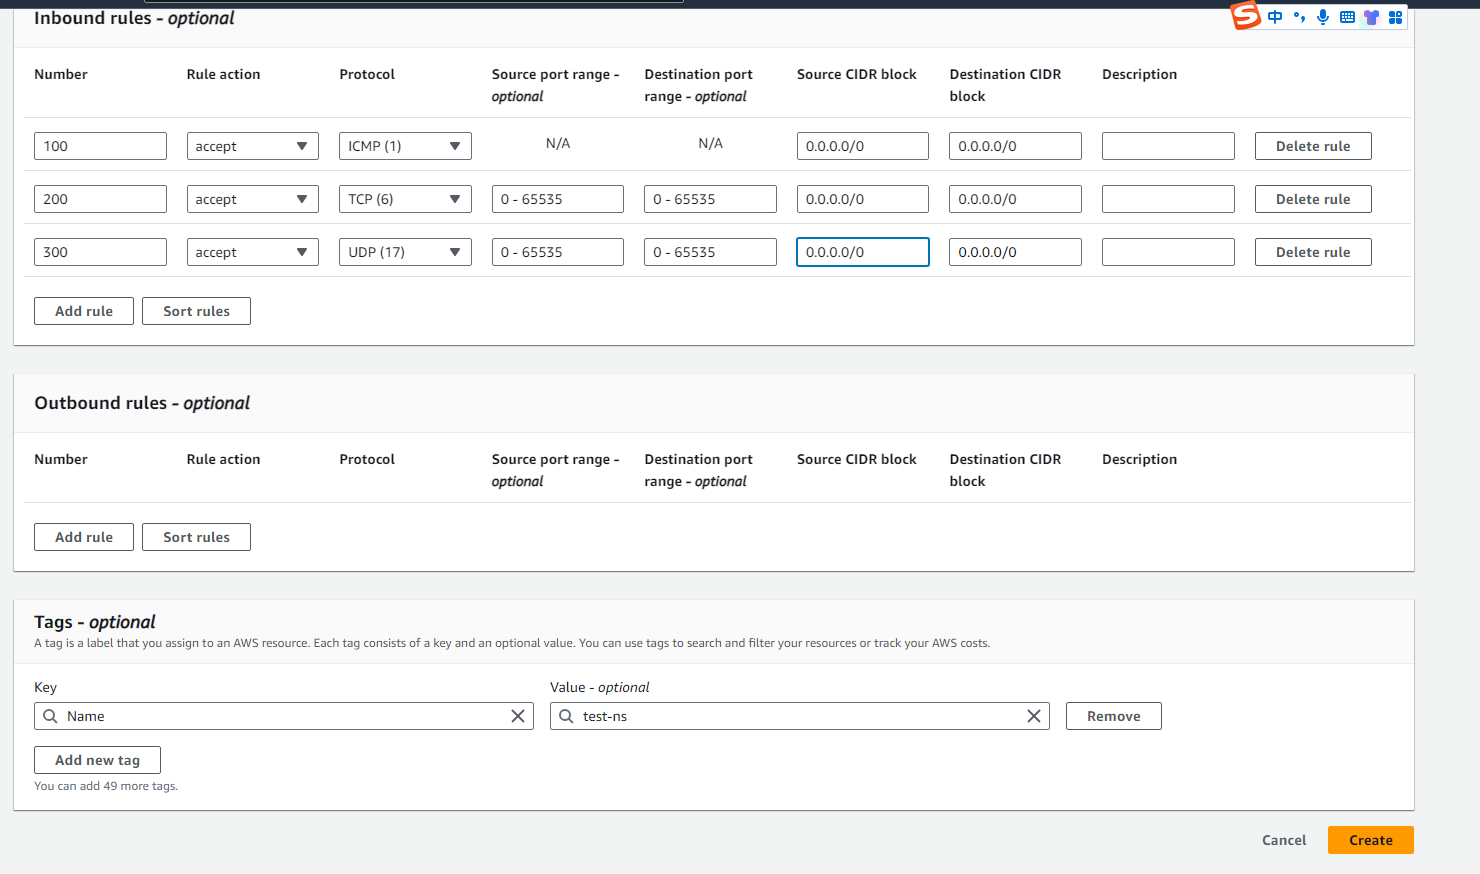
- In the Inbound rules section, allow all traffic.
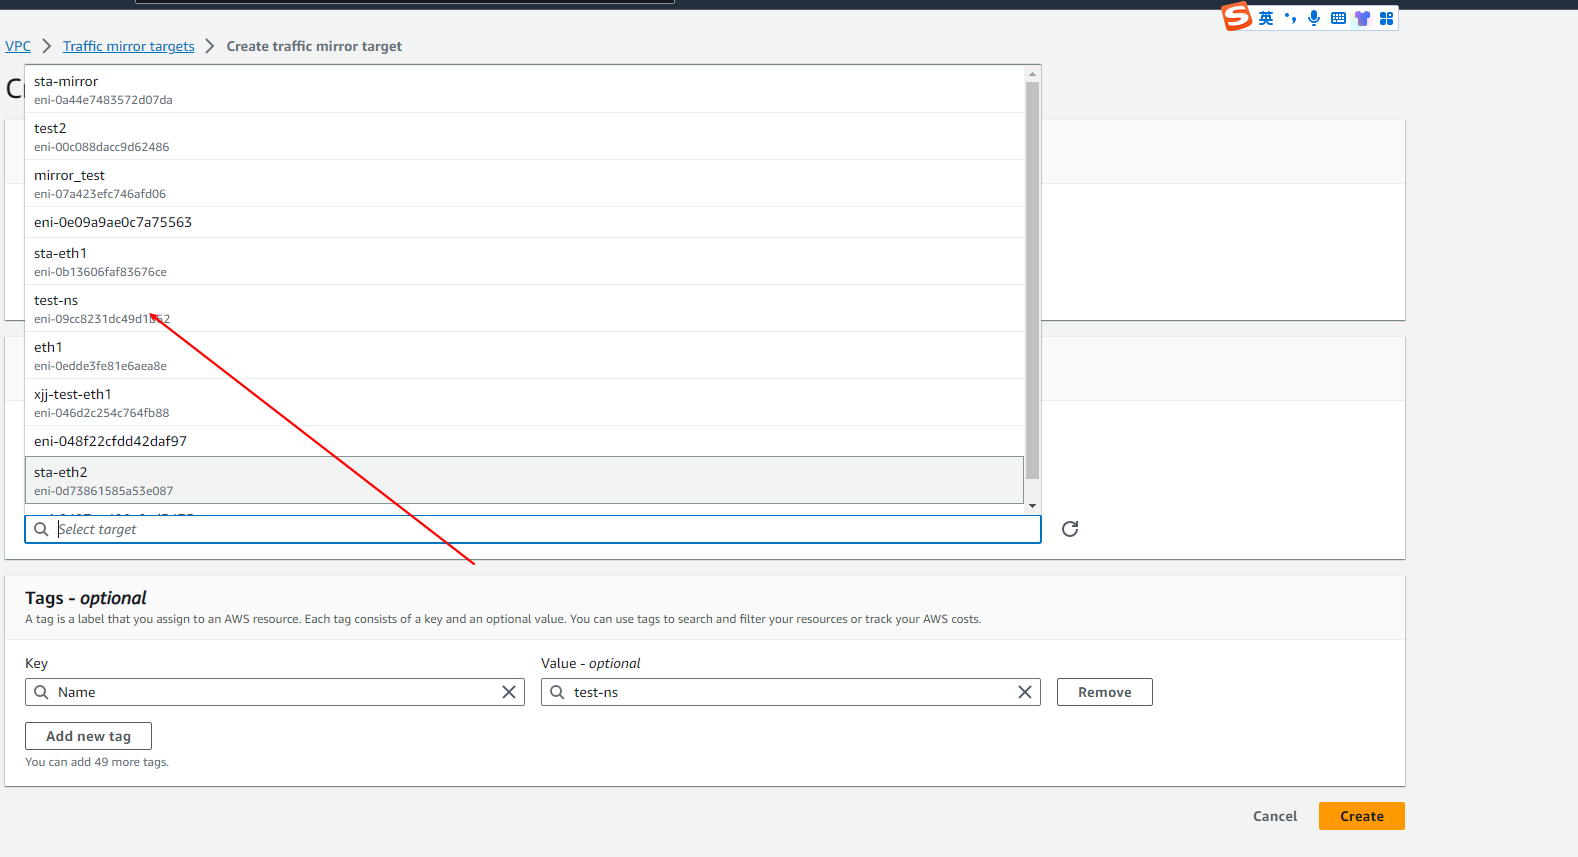
- Go to VPC > Traffic Mirroring > Mirror targets and click Create traffic mirror target.
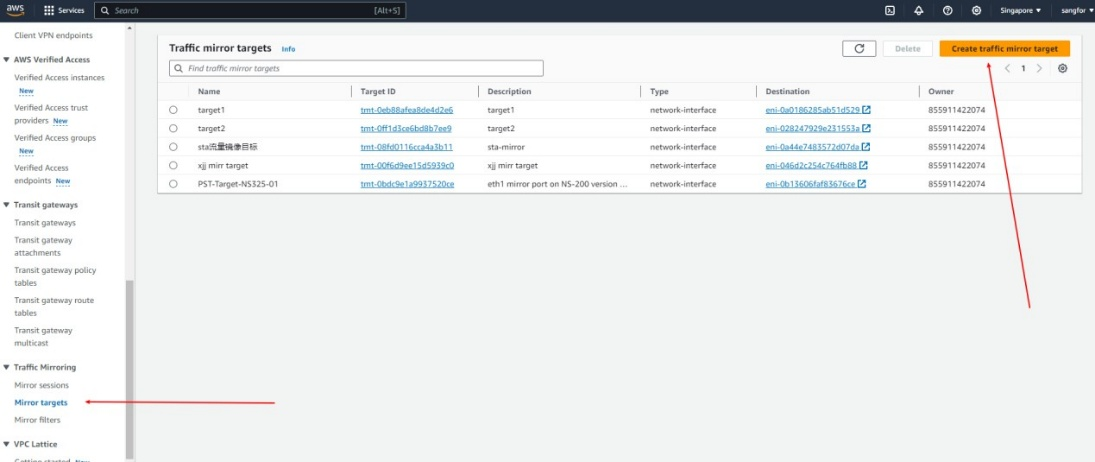
- Select the network interface that was created earlier.
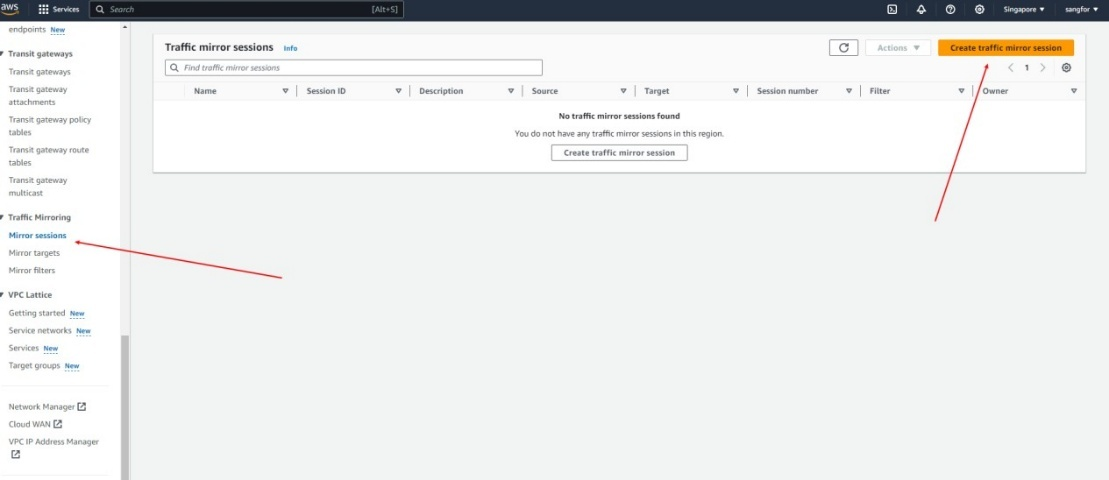
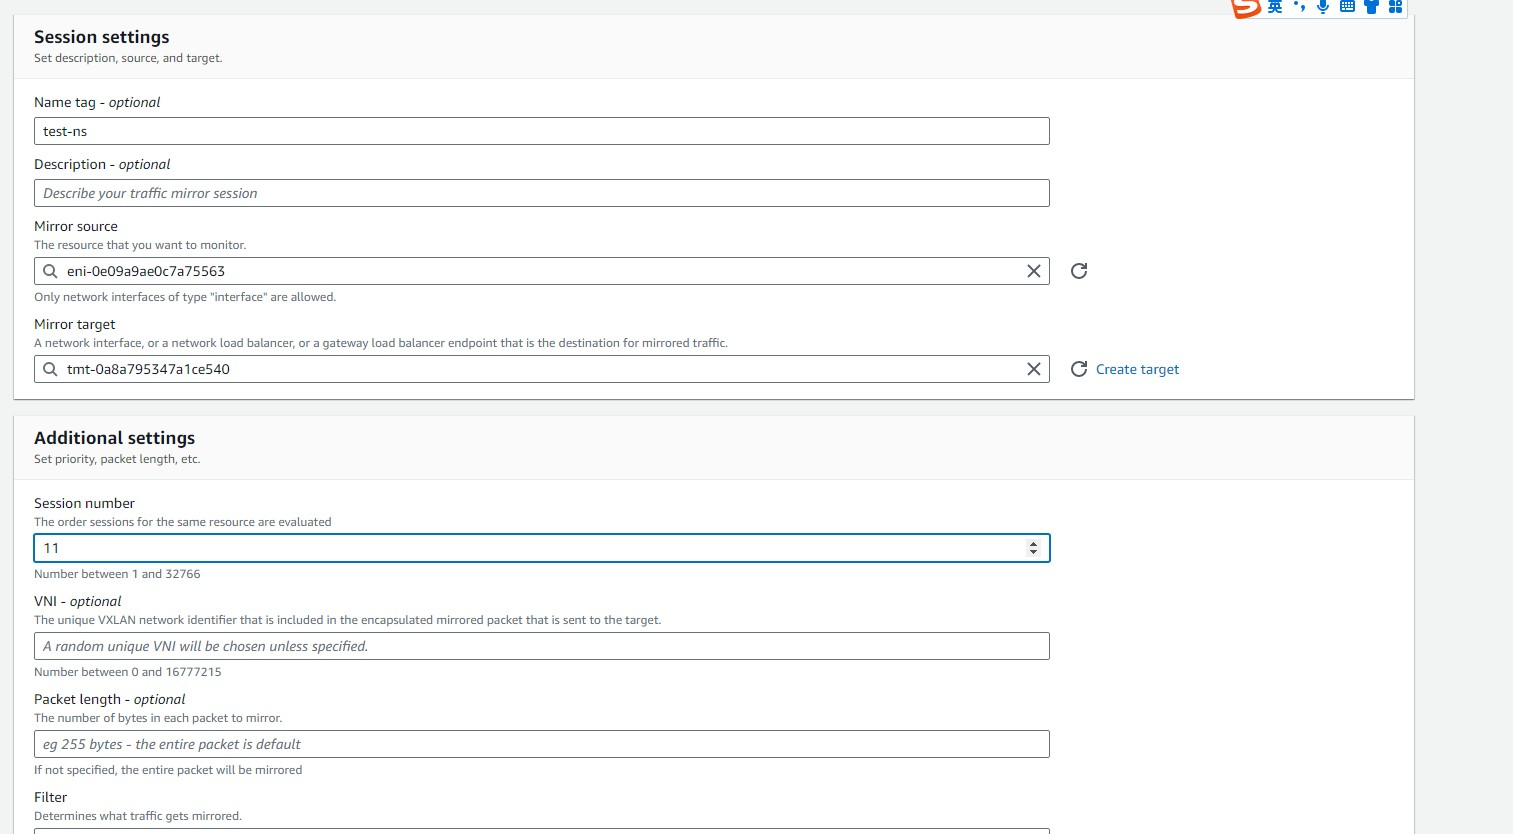
- Go to VPC > Traffic Mirroring > Mirror sessions and click Create traffic mirror session.
- In the Session settings section, set Mirror source to the network interface of the Linux instance, set Mirror target to the network interface of the target created in the previous steps, and set Filter to the filter created in the previous steps.
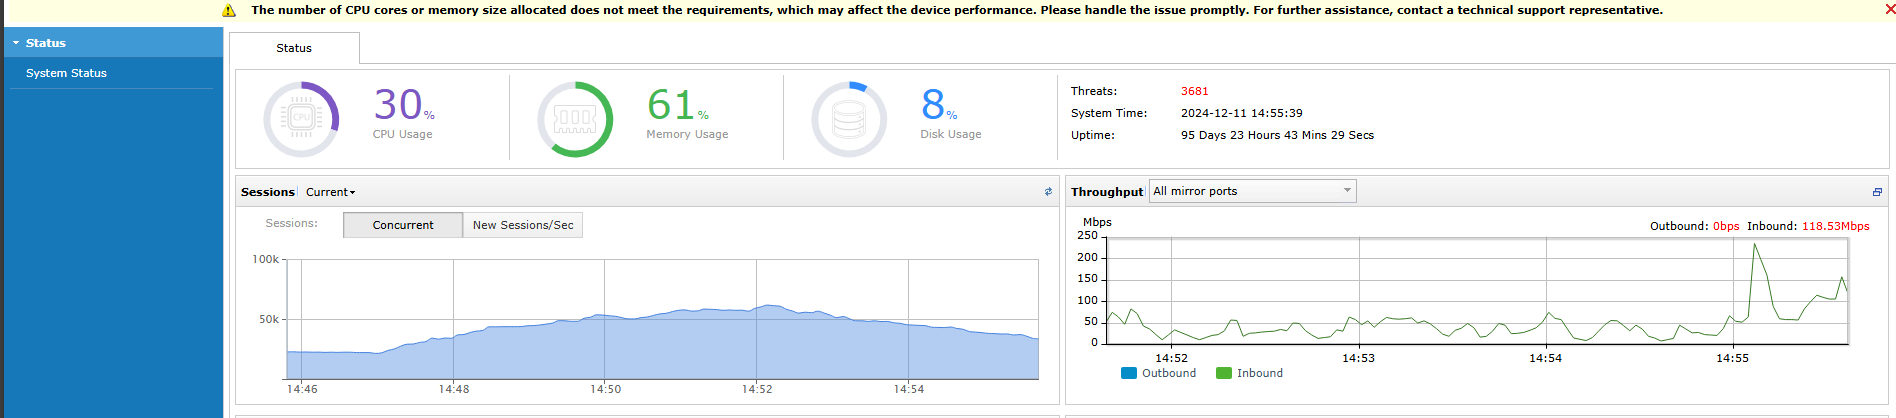
Verify Traffic Mirroring
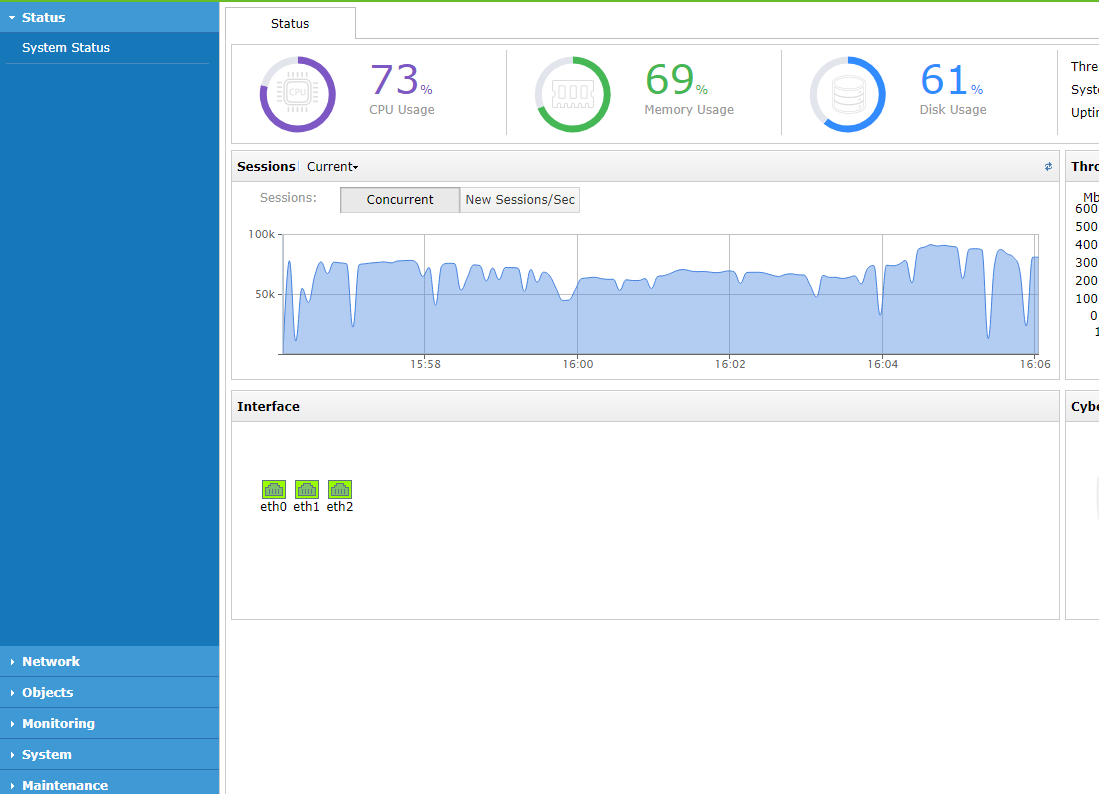
After the deployment, you can check whether the network traffic is mirrored successfully. If it is successful, the throughput will be displayed in the mirror port section of the STA web console.