【ES】Best Practices: Multi-Branch Deployment Solutions_V3.7.12
Scenarios
For large companies, there are usually multiple branches. Endpoints on headquarter and branches need to install Endpoint Secure to ensure the endpoints’ security. Managing and Upgrading the Endpoint Secure Agents is challenging for large-scale networks.
Scenario 1:
Centralized management is implemented for Endpoint Secure Agents on all endpoints. Endpoint Secure Agent installation and virus database updates cannot occupy dedicated line bandwidth so as not to affect business.
Scenario 2:
Each branch structure independently manages the Endpoint Secure Agent and is cascaded with the headquarters Endpoint Secure Manager components. The headquarters Endpoint Secure Manager can view the assets and security status of the branches and uniformly assign/adjust licensing for each branch.
Best Practices
Scenario 1
Centralized management is implemented for Endpoint Secure Agents on all endpoint PCs. Agent installation and virus database updates cannot occupy dedicated line bandwidth so as not to affect business.
Solution
-
The headquarters deploys an Endpoint Secure Manager to manage the Endpoint Secure Agents of all branches centrally.
-
The branches deploy the Endpoint Secure Manager as the virus database update server for each branch’s Endpoint Secure Agent.
-
Branches install Agent through the offline installation package and connect to the headquarters Endpoint Secure Manager for centralized management. Avoid downloading the installation components from the headquarters Endpoint Secure Manager through a dedicated line, occupying the dedicated line’s bandwidth and thus affecting business.
Note:
If every branch endpoint updates the virus database via the headquarters Endpoint Secure Manager, it will occupy the bandwidth. Therefore, you can update the branch endpoints virus database through the branch edge connected to the cloud virus database server. By implementing this method, deploying an Endpoint Secure Manager as the virus database update server is unnecessary.
Configuration Steps
-
The headquarters deploys the Endpoint Secure Manager and purchases licenses according to the total number of endpoints(including the endpoints in the headquarters and branches).
-
The Endpoint Secure Manager is deployed in each branch and cascaded with the headquarters Endpoint Secure Manager group. The headquarters Endpoint Secure Manager assigns a license to the branch (the purpose is to allow the Endpoint Secure Manager to update the virus database).
-
The headquarters Endpoint Secure Manager establish groups for each branch and configures an automatic grouping strategy based on IP. Each group corresponds to a branch.
-
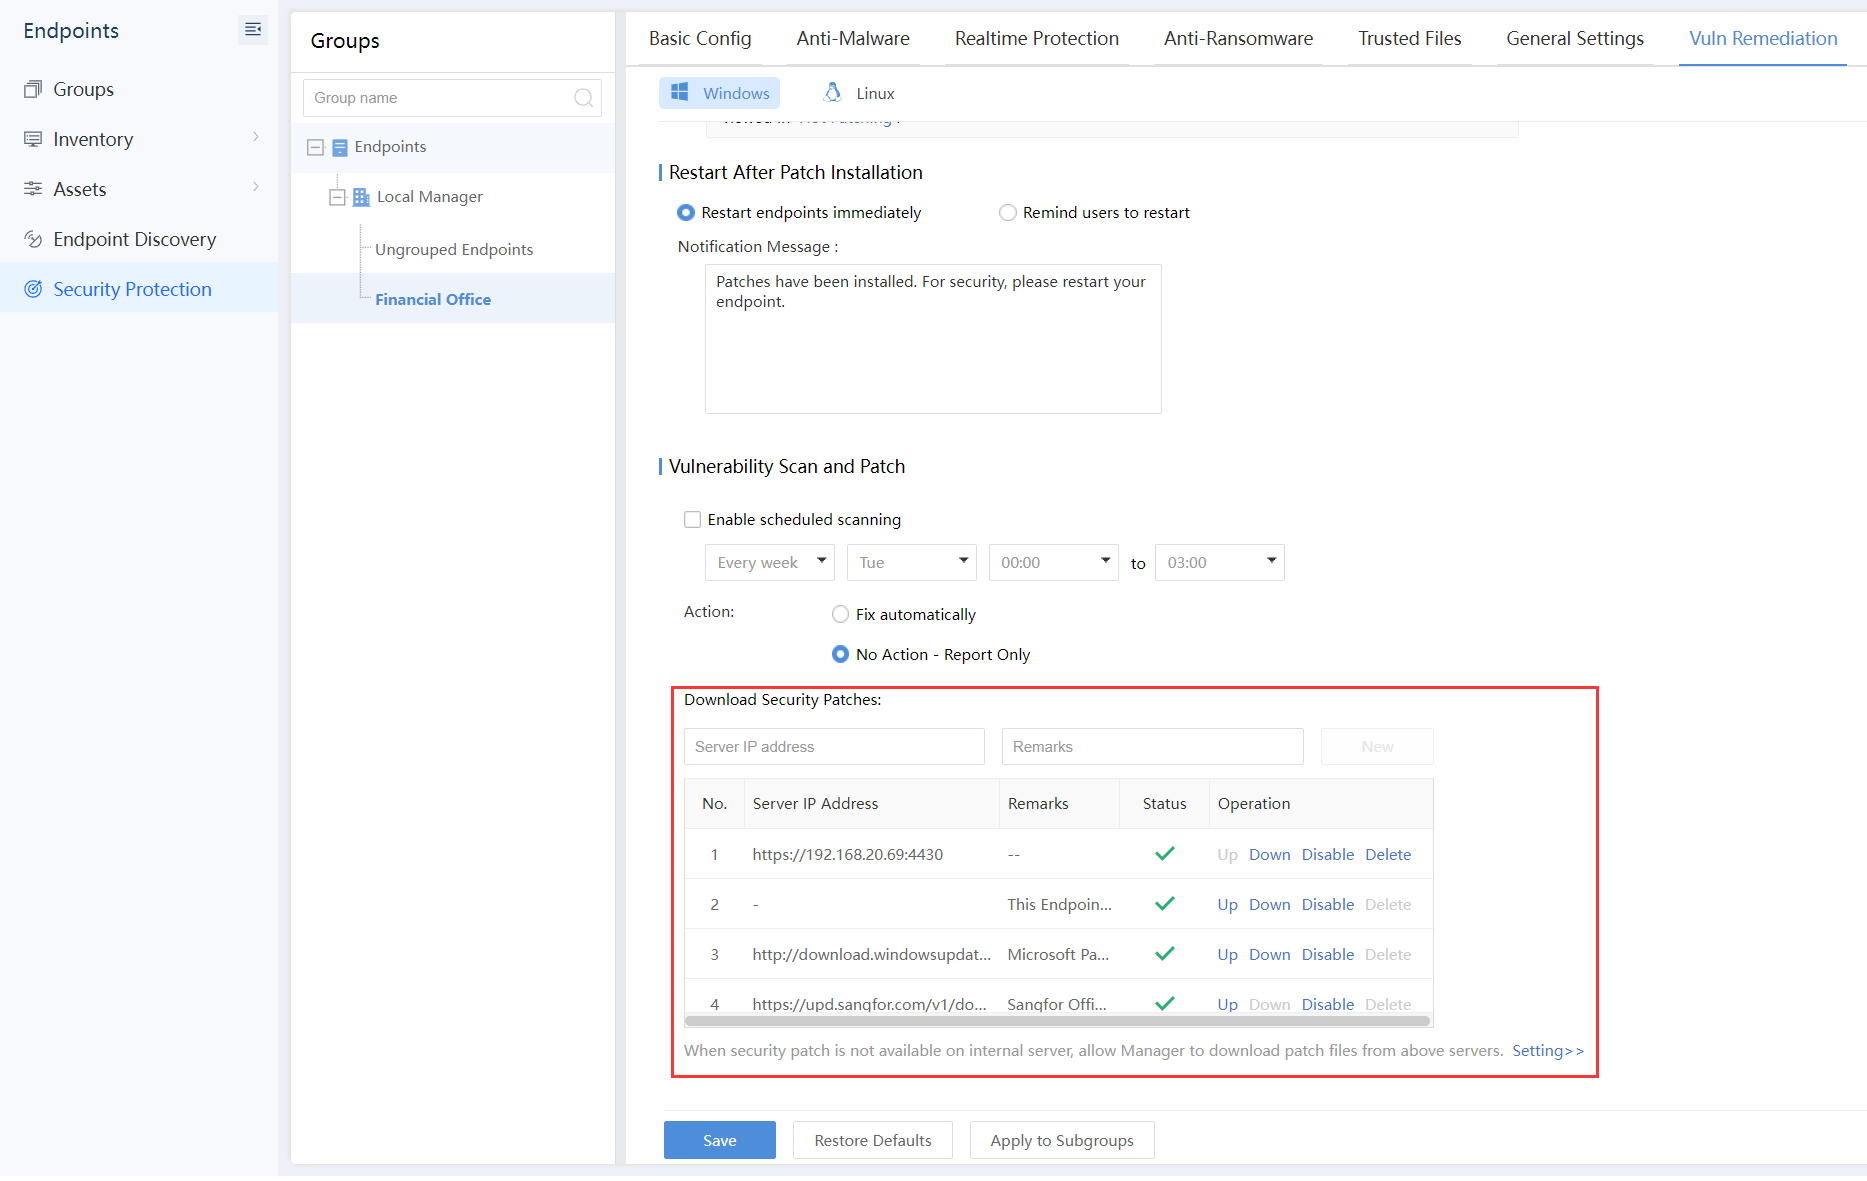
Edit each group strategy on the headquarters Endpoint Secure Manager, and configure the Server IP Address as the branch Endpoint Secure Manager address, as shown in the figure below:
-
The administrator distributes the full offline package to the endpoint and installs it.
Note:
The naming of the installation package is in this format: edr_installer_IP_4430.exe, where IP is the IP address of the headquarters Endpoint Secure Manager. The IP must be configured as the IP of the headquarters Endpoint Secure Manager for the endpoints to connect to the headquarters Endpoint Secure Manager for centralized management.
Scenario 2
Each branch structure independently manages the Agent and is cascaded with the headquarters Endpoint Secure Manager components. The headquarters Endpoint Secure Manager can view the assets and security status of the branches and uniformly assign/adjust licensi for each branch.
Solution
-
Deploy the Endpoint Secure Manager at the headquarters and cascade the branch Endpoint Secure Manager deployment. Assign or dynamically adjust the licensing for the branch, check and view the assets and security status of the branch.
-
Deploy the Endpoint Secure Manager at the branch, which is cascaded with the headquarters Endpoint Secure Manager.
Configuration Steps
-
The headquarters deploys the Endpoint Secure Manager and purchases licenses according to the total number of endpoints(including the endpoints in the headquarters and branches).
-
Each branch deploys an Endpoint Secure Manager without licensing as the license is allocated or dynamically allocated by the headquarters;
-
Headquarters and branches are cascaded. Licenses are allocated according to the actual situation of each branch. The specific steps are as follows:
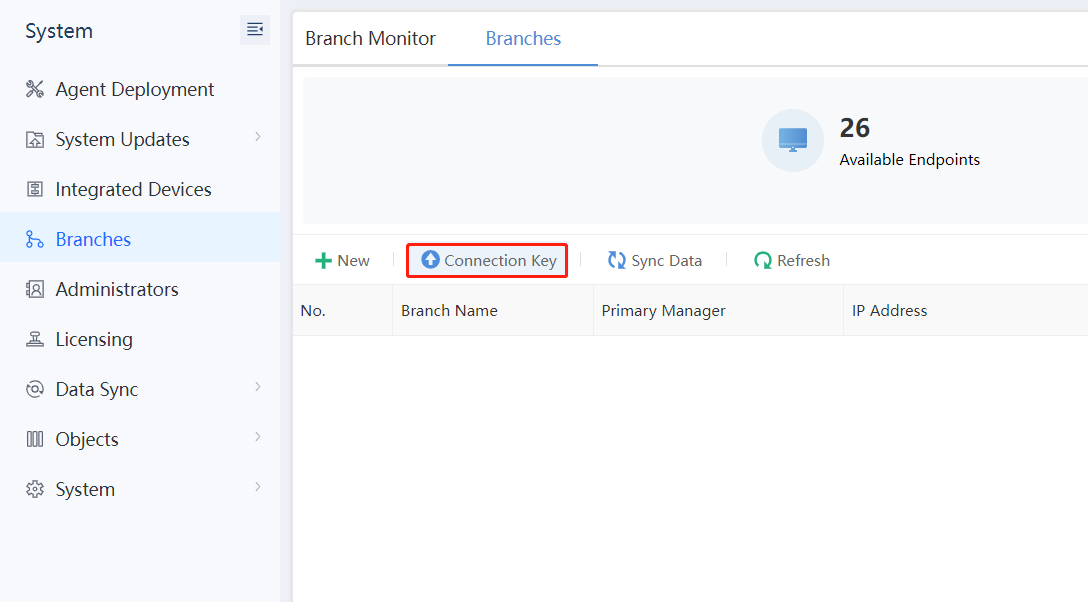
a) Generate the Connection Key on the branch Endpoint Secure Manager.
b) Log in to the branch Endpoint Secure Manager. Navigate to System > Branches > Branches, and click Connection Key, as shown in the figure below.
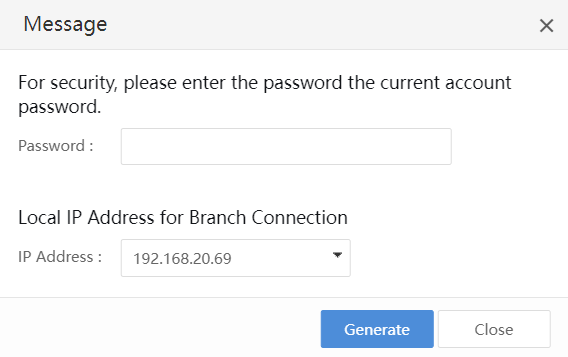
c) Enter the Password of the current console account and click Generate to generate a Connection Key, as shown in the figure below.

Click Copy to copy the Connection Key to the headquarters platform to complete the cascade connection.
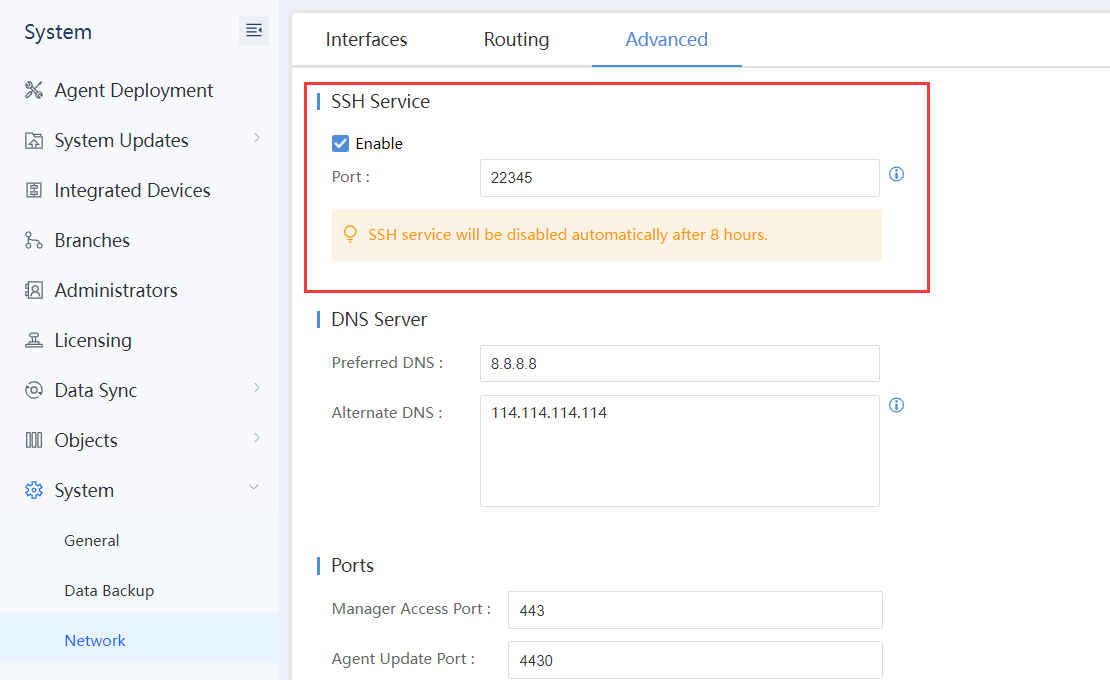
d) Enable the SSH Service on the branch Endpoint Secure Manager.
Log in to the branch Endpoint Secure Manager. Navigate to System > System > Network > Advanced, and enable SSH Service, as shown in the figure below.
e) Complete the cascading connection on the headquarters Endpoint Secure Manager.
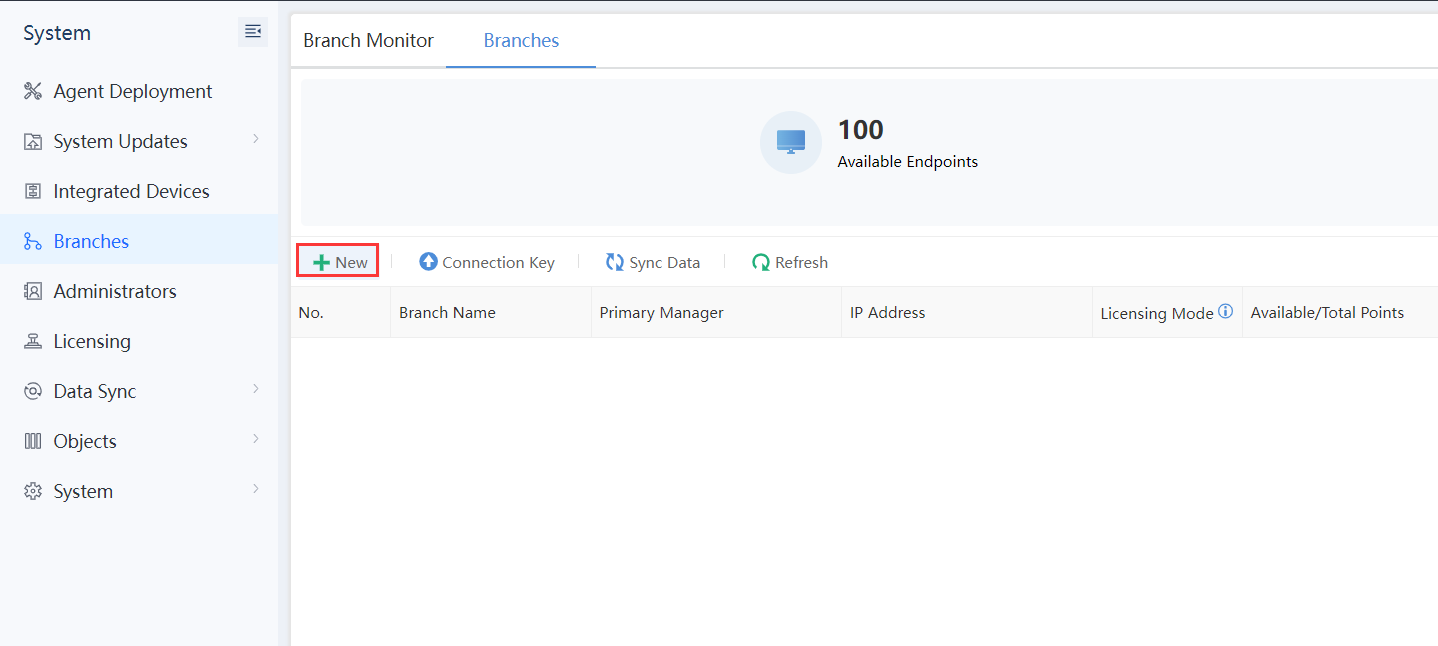
Log in to the headquarters Endpoint Secure Manager. Navigate to System > Branches > Branches, and click New, as shown in the figure below.
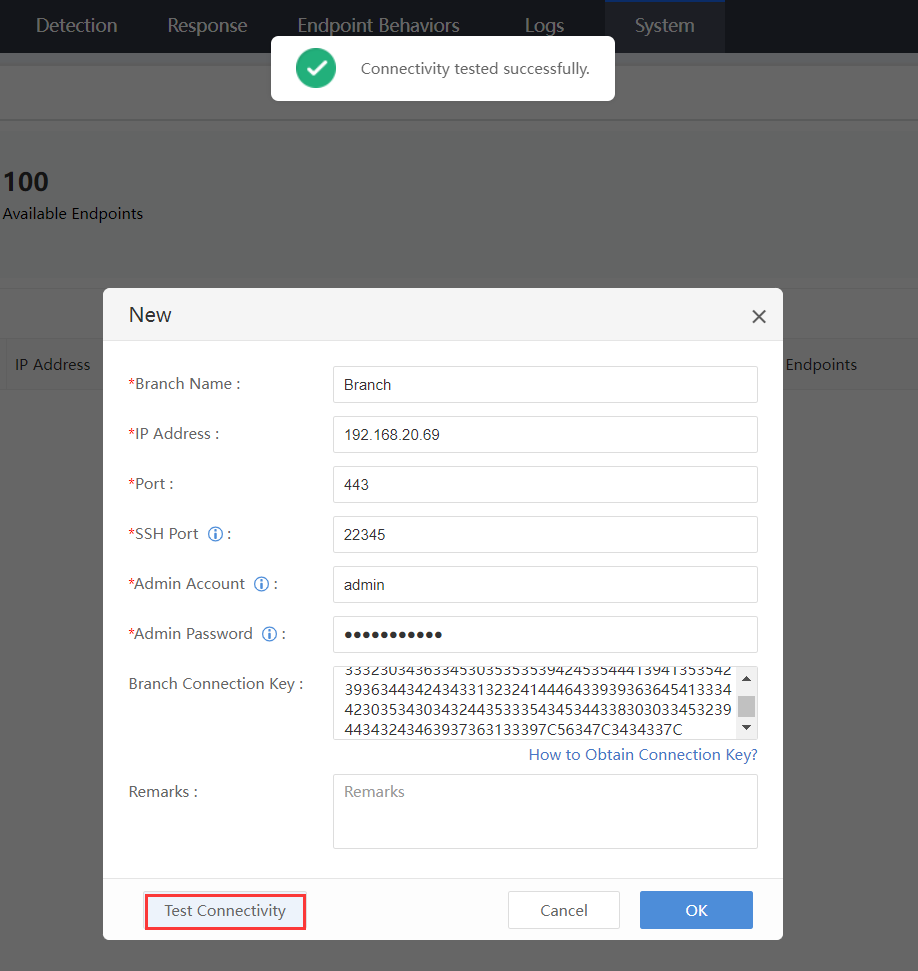
Fill in the branch name, branch IP, port, SSH port, admin account, admin password, and Branch Connection Key. Click Test Connectivity to test the connection and click OK.
f) Cascade licensing
The headquarters Endpoint Secure Manager and branch Endpoint Secure manager form a cascade deployment. Therefore, you only have to purchase licenses for the headquarters Endpoint Secure Manager, as the headquarters can dynamically allocate the licensing to the branches.
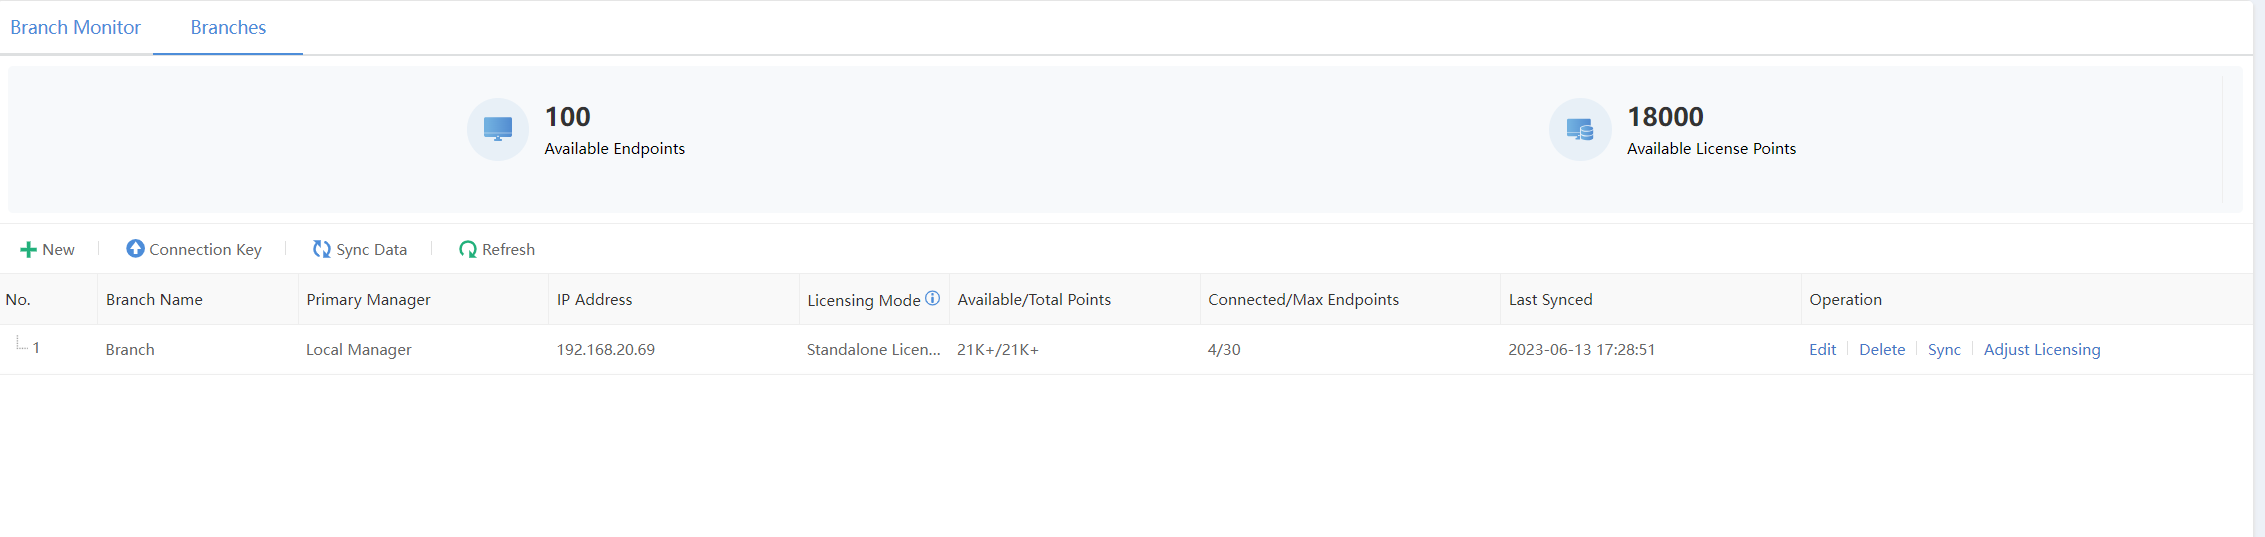
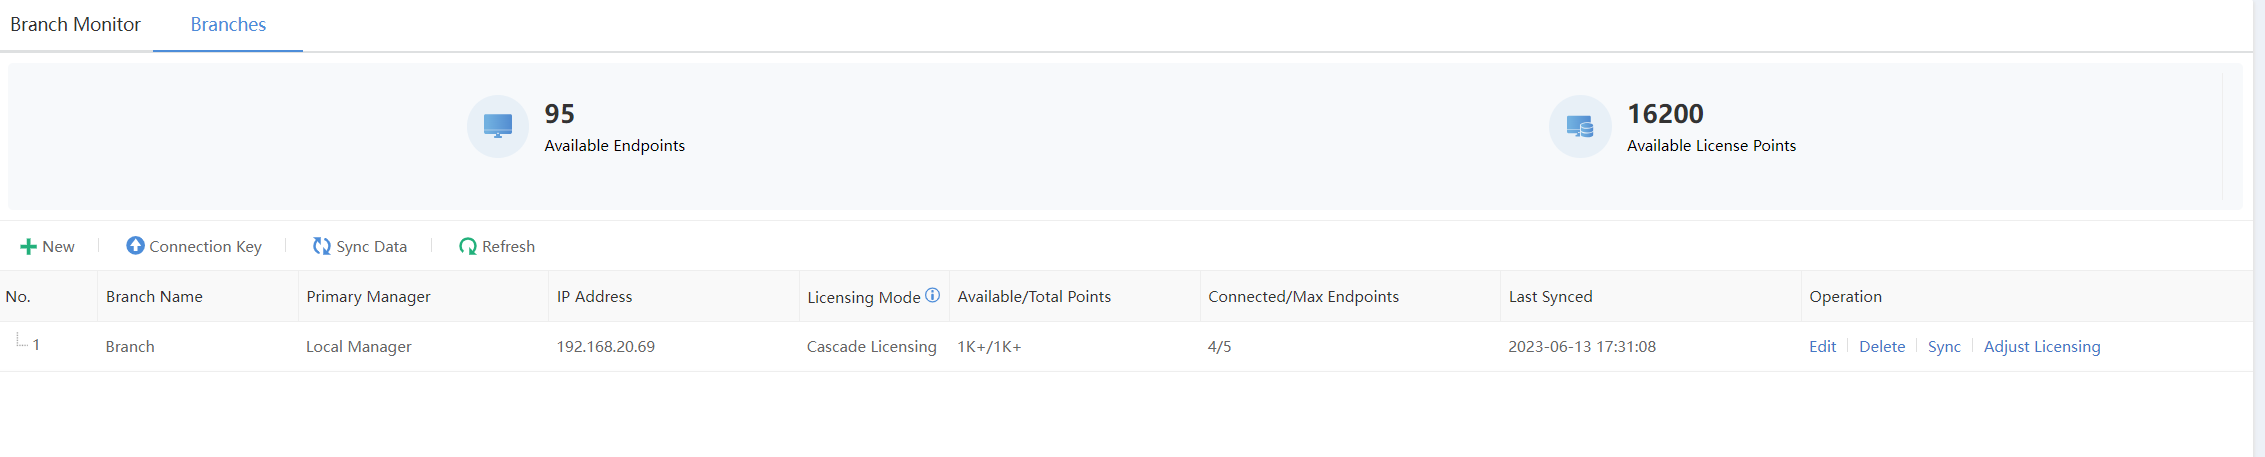
Navigate to System > Branches > Branches to dynamically adjust the licensing, as shown in the figure below.

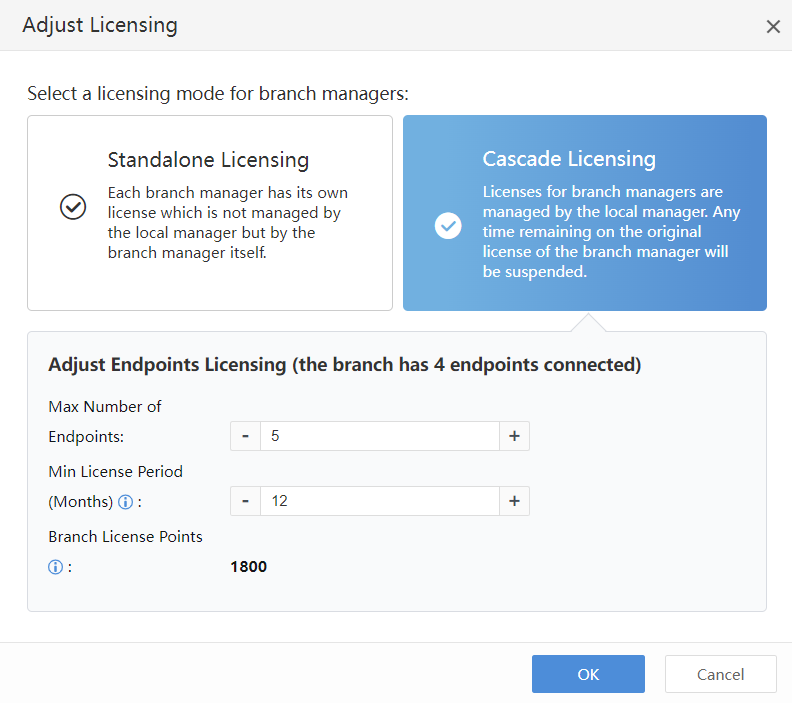
The cascade licensing is successfully adjusted, as shown in the figure below.
-
Navigate to Endpoints > Groups to create new groups for branches at the headquarters Endpoint Secure Manager and enable Auto Grouping based on IP.
-
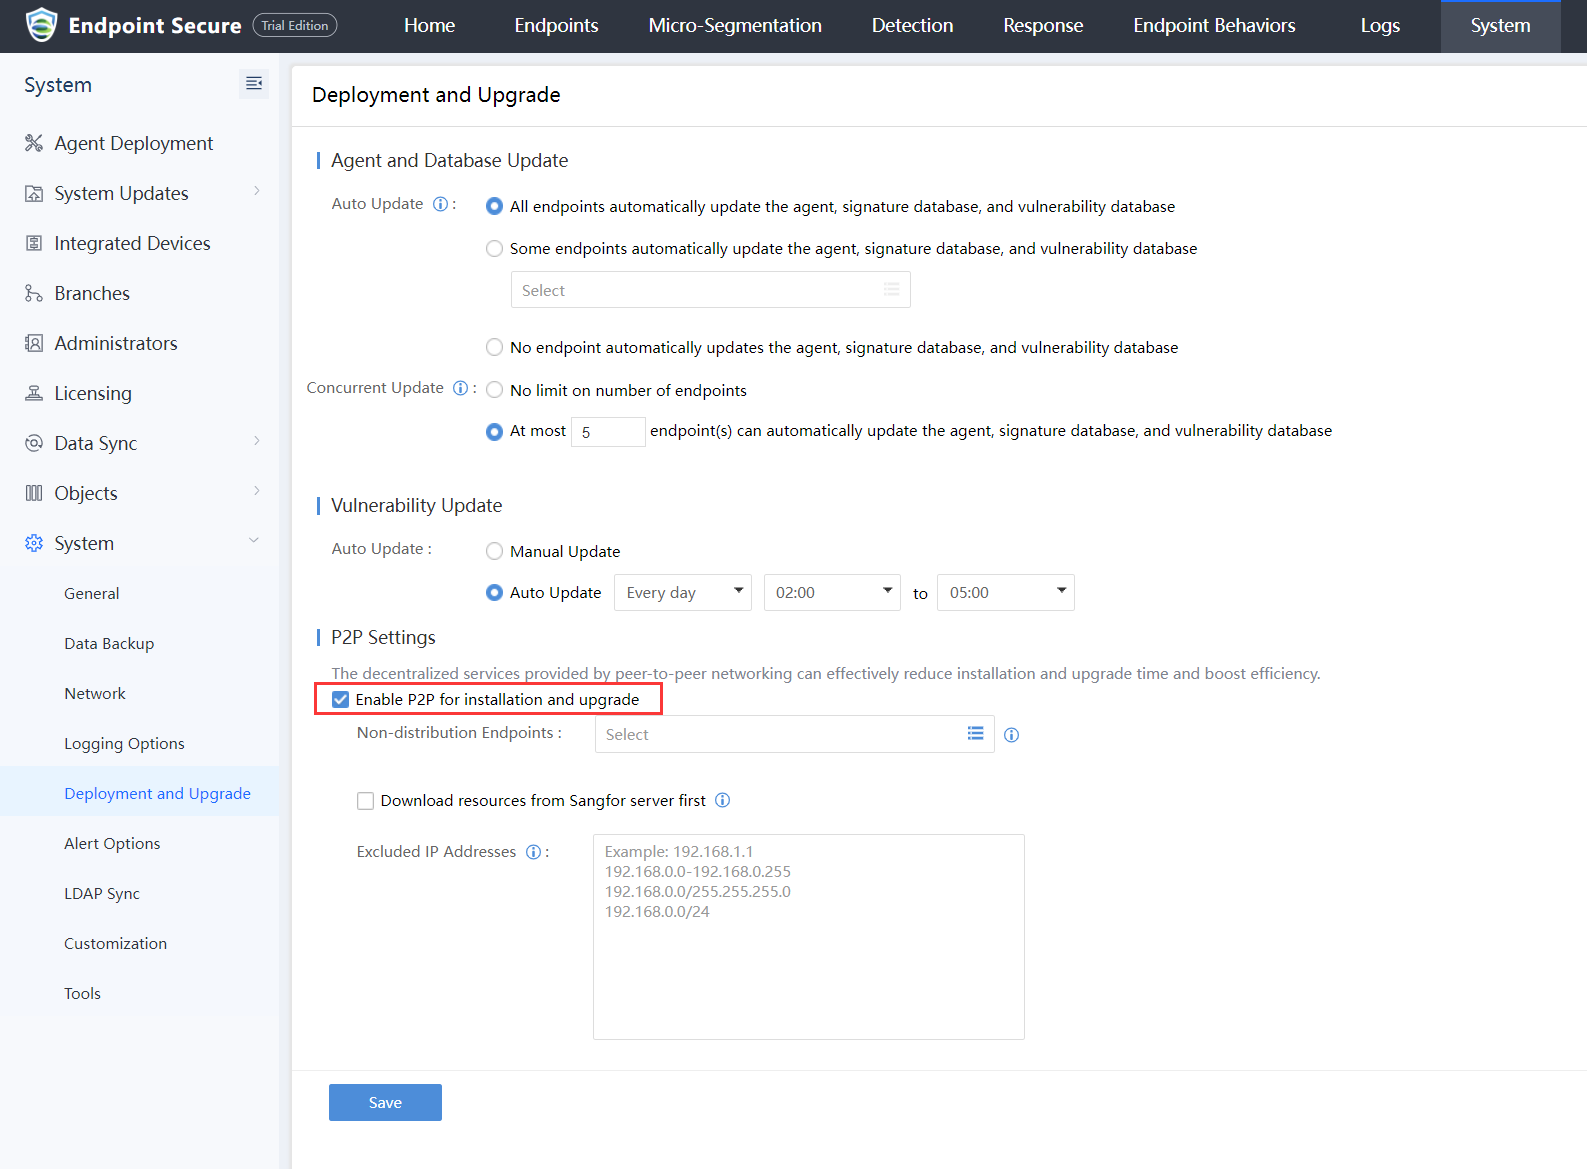
Navigate to System > System > Deployment and Upgrade > P2P Settings to Enable P2P installation and online upgrade on the headquarters and branches Endpoint Secure Manager, as shown in the figure below.
- The branch’s endpoints download and install the installation packages from their branch Endpoint Secure Manager online.