【ES】Best Practices: Ransomware Solutions Based on Process Injection Protection and Backup_V6.0.2
Introduction
Ransomware attacks infect systems and encrypt files and folders to prevent access to important systems and data. Next, threat actors demand ransom for a decryption key that provides access.
Many ransomware attacks succeed because the malware can neutralize backup applications, including the operating systems’ features that copy your files. However, you can still use backup to protect against ransomware.
A backup and recovery strategy, as part of an overall ransomware protection strategy, can help you protect your data and avoid paying ransom using backup solutions outside the reach of attackers. It can help you quickly and efficiently recover business-critical data and resume normal operations.
The backup and recovery can:
- Mitigate advanced ransomware threats.
- Detection based on static and dynamic behaviors, especially advanced attacks, will not be 100% accurate.
- Address early encryption on non-honeypot files.
Value for Customers
- Proactively defending against ransomware does not need to be resolved with decryption tools.
- 100% confidence that Sangfor can protect their assets
- Improve business efficiency and compliance.
Prerequisites
- Prepare a Windows testing device and install an endpoint secure agent.
- Prepare ransom samples, interference tools, and injection tools. Please refer to the attachment.
Note:
- The testing process requires running virus samples, so the testing environment and business environment must be isolated to avoid affecting customer business.
- It is recommended to complete the snapshot backup of the test computer in advance and restore it after the test is complete.
Best Practices
Configuration Steps
Ransomware Honeypot
Step 1. Disable the Realtime File Protection of the group where the testing machine is located. Navigate to the Security Protection > Real-time Protection to turn it off, as shown below. 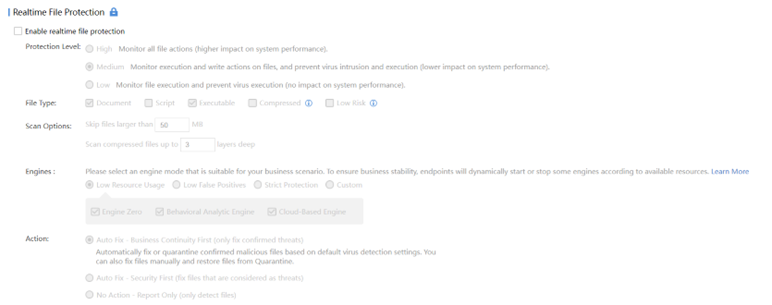
Step 2. Navigate to the Security Protection > Anti Ransomware, and enable the Ransomware honeypot, as shown below.
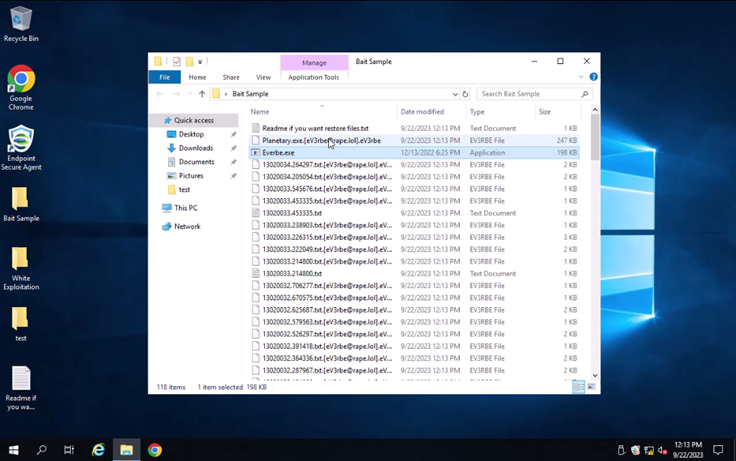
Step 3. Unzip the Ransomware Protection_Bait Sample (Password sangfor).zip to the testing PC, and the unzip password is sangfor. Change the extracted ransomvirus suffix to .exe and run the sample file.
Observe the lower right corner of the testing PC. Endpoint Secure agent detects a ransomware virus and pops up an alert box. (ensure the Mute Notifications is not enabled), and that the normal files of the test computer have not been encrypted. 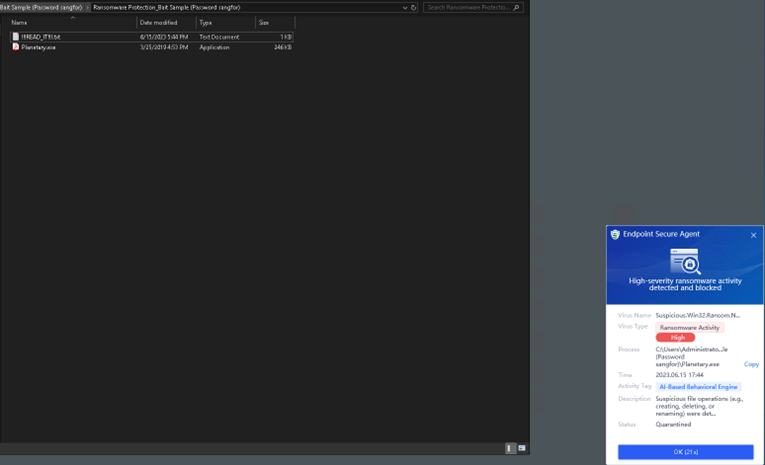
Test Result
By running the ransomware virus, the Endpoint Secure agent can detect the ransomware virus and pop up an alert box, and the normal files of the test computer have not been encrypted.
Ransomware Behavior Detection(Process Exploitation)
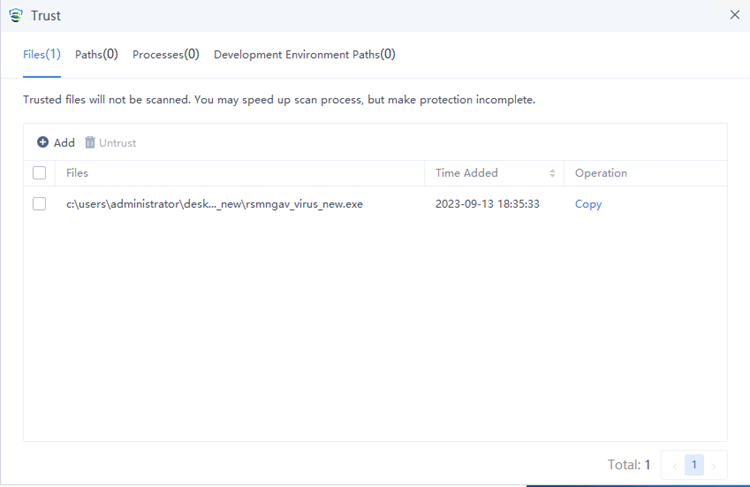
- Add ransomware samples to the whitelist to prevent Endpoint Secure static detection capabilities and ransomware honeypot capabilities from being detected, which will affect subsequent ransomware behavior detection results, as shown below.
- Use the interference tool (inject_xor.exe) to interfere with the rsmngav_virus_new sample (usually, it is impossible to detect it statically after encrypted interference), as shown below.
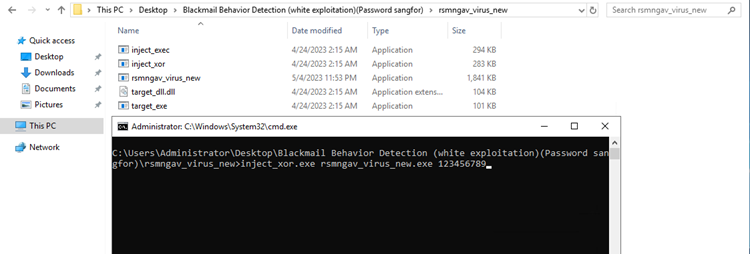
- Use the injection tool (inject_exec.exe) to inject the interfered rsmngav_virus_new sample into explorer.exe, as shown below.
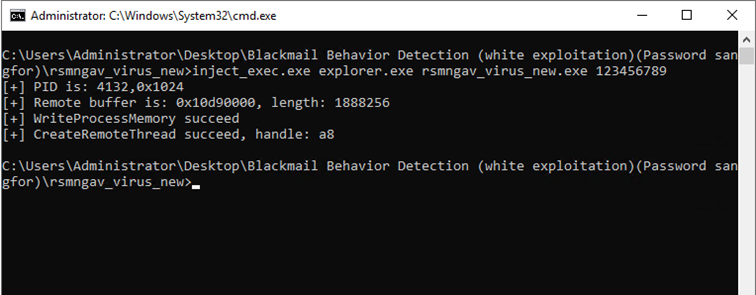
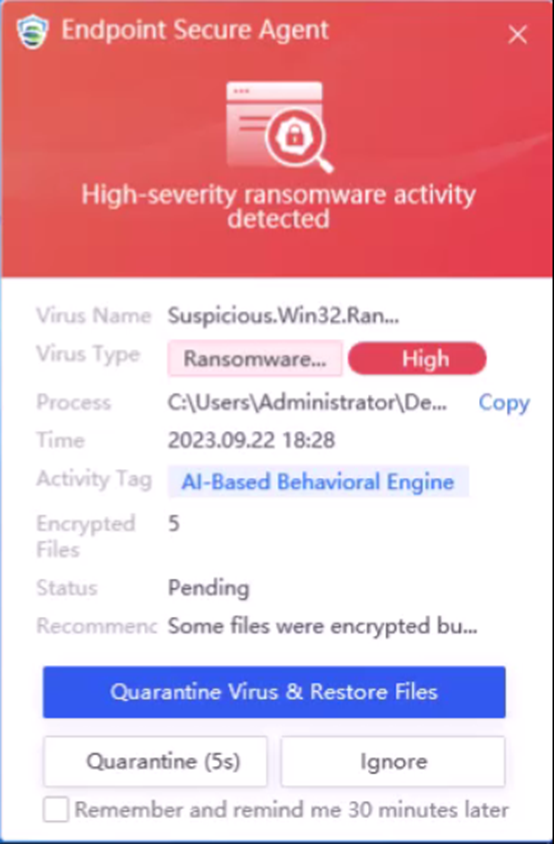
- After successfully injected, the explorer automatically restarts and pulls up the ransomware sample for encryption. The Endpoint Secure ransomware behavior detection capability detects and immediately stops the encryption activity, as shown in the figure below.
Test Result
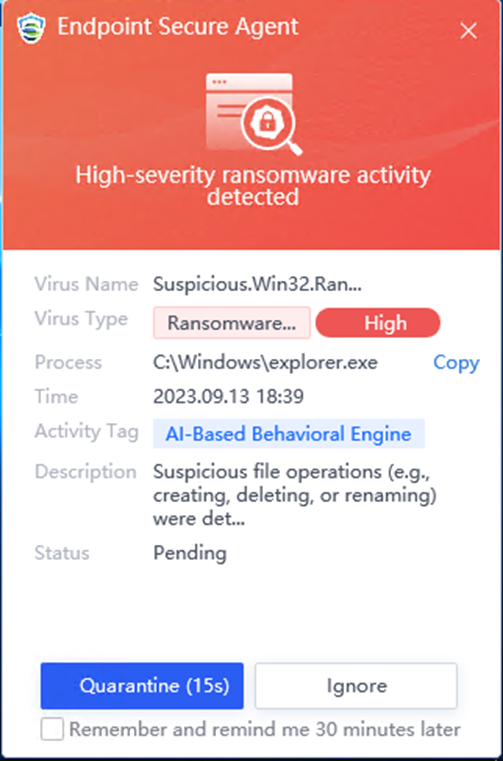
Endpoint Secure ransomware behavior detection capability can detect new attack methods such as ransomware virus encryption obfuscation and whitelist process injection. When a ransomware virus is injected into a whitelist process, and the whitelist process pulls up the ransomware, the Endpoint Secure ransomware behavior detection capability detects the encryption behavior of the ransomware virus in real-time and blocks it. The alert window in the lower right corner of the endpoint will prompt, as shown below.
Ransomware Backup Files
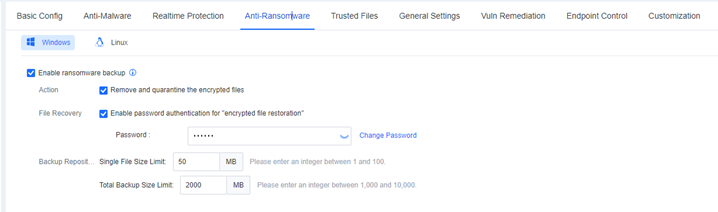
- Navigate to Security Protection > Policies > Anti-Ransomware Protection, and enable ransomware backup, then enable the Remove and quarantine the encrypted files and Enable password authentication for "encrypted file restoration", as shown below.

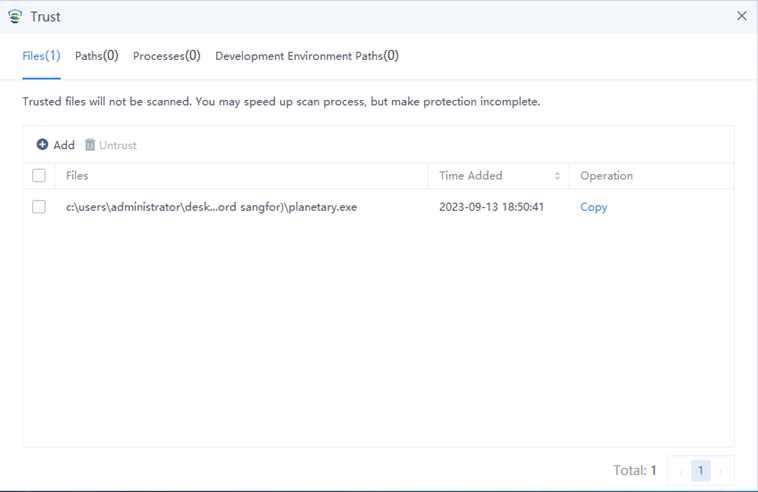
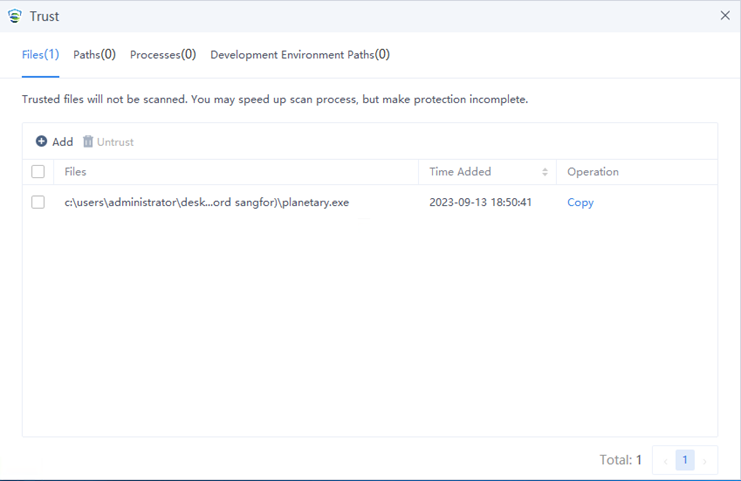
- Extract the ransomware sample to the desktop of the testing PC, and the unzip password is sangfor. Change the Ransomware Sample_Backup sample to the suffix .exe and add it to the trust files list (to prevent real-time file monitoring and ransomware bait, which will affect the ransomware backup testing effect), as shown below.
- Navigate to Security Protection > Policies > Anti-Ransomware Protection, and enable ransomware backup, then enable the Remove and quarantine the encrypted files and Enable password authentication for "encrypted file restoration", as shown below.
- Extract the ransomware sample to the desktop of the testing PC, and the unzip password is sangfor. Change the Ransomware Sample_Backup(Password sangfor).zip sample to the suffix .exe and add it to the trust files list (to prevent real-time file monitoring and ransomware bait, which will affect the ransomware backup testing effect), as shown below.
- Prepare some normal files and put them on the desktop.
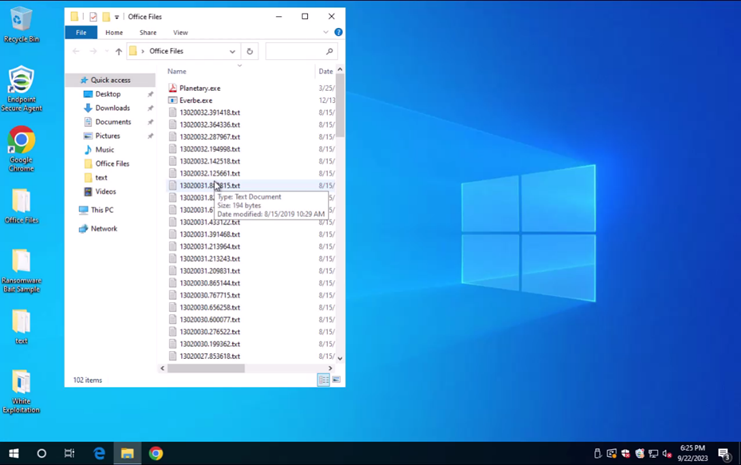
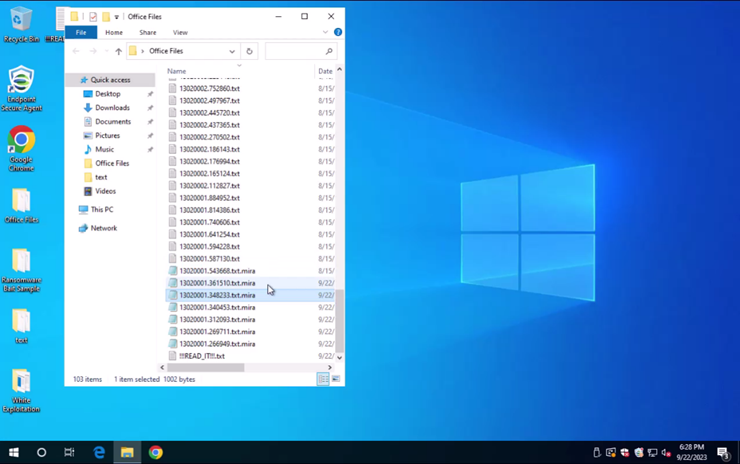
- Double-click to run the ransomware virus. The ransomware behavior is detected and intercepted. At this time, some existing files are encrypted (the original files have been backed up), as shown below.
- You can see that some files are already infected.

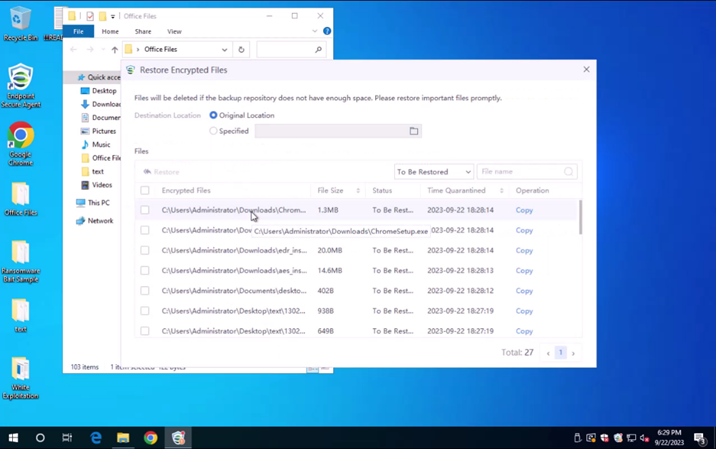
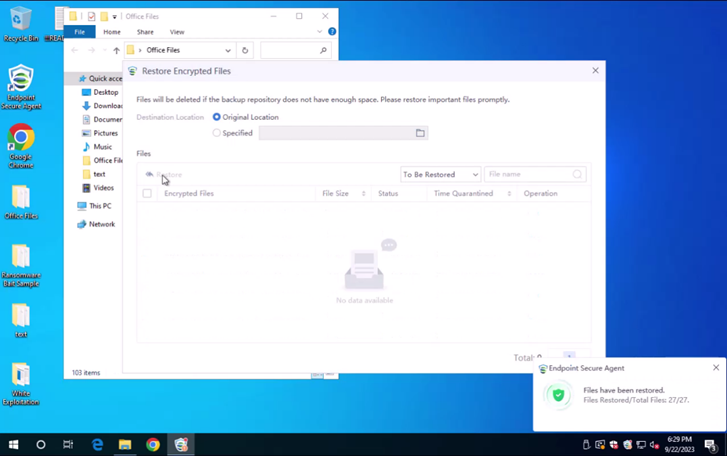
- Some encrypted files can be recovered through Ransomware Backup, as shown below.
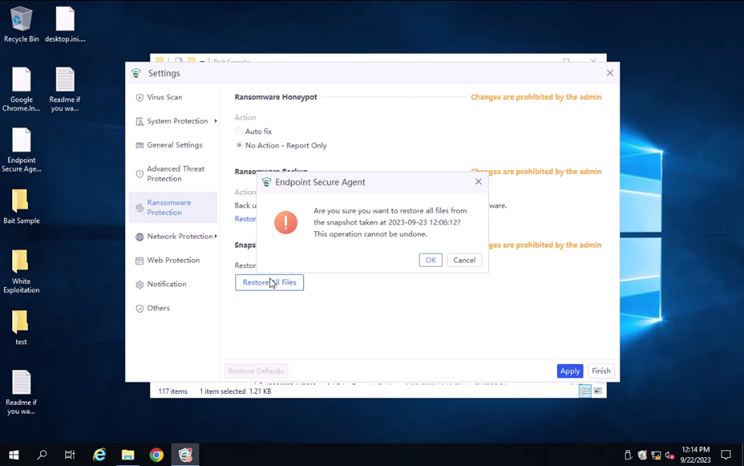
Ransomware Snapshot Backup
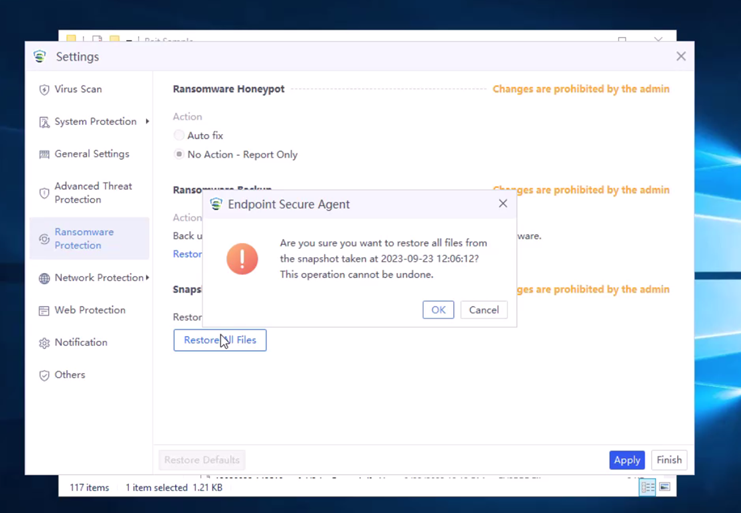
- Configure the Anti-Ransomware in the folder where the testing server is located. Navigate to Security Protection > Policies > Anti-Ransomware in Web Console, and enable snapshot-based ransomware recovery.

- Adjust the Windows testing server time to 11:55 a.m. (a quick backup snapshot is taken at 12 p.m. every day. To see the effect, you need to adjust the time to before 12 p.m.).
- Log in for about 15 minutes and check the snapshot generation status. The screenshot below shows that the snapshot has been generated.
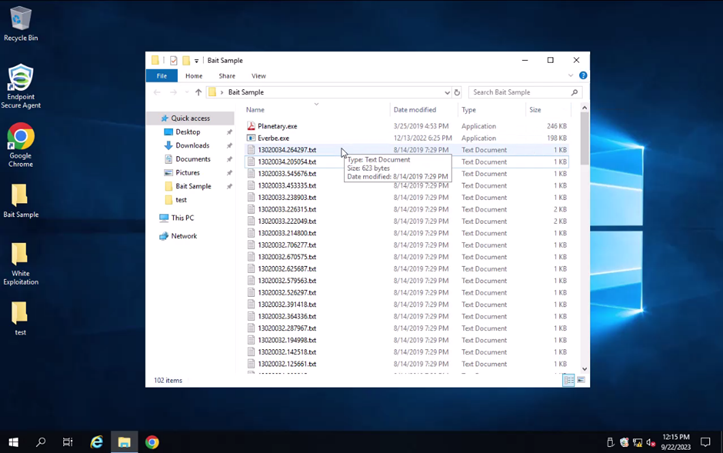
- After creating any new file on the desktop, you can see that the ransomware virus has encrypted some files.

- Click Restore All Files to restore the snapshot with one click and observe whether the snapshot restoration is successful.
Precautions
- The snapshot function only supports Windows server except for Windows Server 2003 systems.
- The snapshot is backed up at 12 p.m. daily and takes about 10 minutes.