【HCI】Release Notes_V6.10.0
Hyper-Converged Infrastructure(HCI)
Overview
Features
- DRS2.0: Sangfor HCI DRS 2.0 can intelligently schedule the load for the next two hours based on the resource history of the node or VM in the past five days. It can refer to the scores from the two dimensions of the node and the virtual machine to ensure the service’s optimal effect. A rich indicator score estimation can ensure that the service reliability level does not decrease after migration and improves performance.
- HA2.0: Sangfor HCI HA2.0 function comprehensively optimizes the detection capability, which can help users discover more failure risks (including hardware, platform, and application) and help users deal with them in advance. The HA trigger changes from passive to active. If an unhealthy host or physical network anomaly is detected, the migration mechanism can be actively triggered to migrate the virtual machine to a healthy host. It Increases and ensures the effectiveness of the HA mechanism. There are alerts and prompts for the failure of the virtual machine HA.
- Agentless backup: Based on the OpenAPI interface and data disk access SDK(SFVDDK) provided by HCI, third-party backup applications can configure and operate the data of the virtual machines and the disk to backup and recover the virtual machines service. Third-party backup applications can back up virtual machines without installing plug-ins/agents on the HCI or virtual machines.
- CPU scheduling optimization: Important virtual machines will be scheduled first, occupying other ordinary virtual machines’ resources. When computing resources are limited, it will prioritize the computing performance of essential services.
- Turbo acceleration based on SPDK: The average latency of large-block mixed read and write of virtual machines is reduced from 4ms to 2ms through Turbo acceleration technology based on SPDK-vHost, and the throughput efficiency is improved by about 50%. Small-block IOPS has increased by more than 20%, with a significant improvement.
- RDMA storage network: RDMA is used in the storage private network of the virtual storage platform. It is deployed in the storage client and server processes for cross-node network communication and provides a communication mechanism similar to TCP. After enabling the RDMA, it can replace the TCP network to realize data transmission, reduce the network latency between the storage client and the server, and significantly improve the performance of the virtual storage platform and throughput of the storage client and the server.
- vTPM: Microsoft requires that TPM 2.0 be enabled to install and operate the Win11 operating system. TPM encrypts clients’ sensitive data. Since HCI also needs to host VDI desktops, vTPM is used to achieve this.
- Hot change of virtual machines: Supports enabling and disabling High Priority virtual machines in the powered-on state. Supports disabling memory reclaiming in the powered-on state. It supports hot changes in disk allocation mode, from thin allocation to dynamic allocation/pre-allocation and dynamic allocation to pre-allocation.
- External storage space reclamation: Space reclamation can be enabled on the virtual machine editing page. The effect is the same as that of the virtual machine running on the virtual storage volume.
- vCPU model: Supports core2duo and Haswell instruction sets, of which Haswell is a newer version of the instruction set, which can provide users with cloud platform support for higher version instruction sets to meet their business needs, such as installing specific operating systems(RedHat Enterprise Linux9.0 and above), or specific business applications such as k8s.
- Optimized hot migration: Support to enable CPU clock speed limit for cross-cluster hot migration and intra-cluster hot migration.
- User secure login: IP access restrictions added. Non-whitelisted IPs cannot access the HCI login page. Multiple clusters use the same authentication key for the same username.
Others
- If HCI has been managed by SCP (earlier than SCP6.7.30) before upgrading to HCI6.9.0, please upgrade SCP to SCP6.7.30 and above (including SCP6.9.0) before upgrading HCI.
- After upgrading SCP6.7.0 to SCP6.7.30 and above (including SCP6.9.0), please contact Sangfor Support for further inspection.
- Since SCP6.8.0 has been containerized, to upgrade an earlier version to SCP6.8.0 or SCP6.9.0, please add a disk (400 GB) to the platform for container image storage so that databases will not be affected by disk IO from container images.
Warning:
The offline licensing(virtual key) method is supported only when SCP6.8.0 is deployed on HCI6.8.0 or later.
When using a virtual key to upgrade to SCP6.8.0, the original license key file will become invalid, and required to renew the license key with the new device info. This licensing method is supported only when SCP6.8.0 is deployed on HCI6.8.0 or later. Therefore, resource pools of earlier versions may cause SCP licensing to fail.
It is required to use the licensing method with a USB key if aSecurity needs to be licensed.
Upgrade Methods
Active Upgrade (Quick Upgrade)
A quick upgrade is applicable to upgrade scenarios with the same host OS kernel version and is commonly used for upgrading a minor version to another of the same series (for example, 6.7.0_R2 > 6.7.0_R3) or upgrading one version to another released within a short period of time (for example, 6.7.0 > 6.8.0). Specifically, all physical nodes are directly upgraded without changing the run location and running status of VMs in the cluster. With the process active restart technology, a quick upgrade will only cause a business system jitter, which will last for 3 seconds or shorter and will not interrupt the business system. A quick upgrade of the cluster takes a shorter time to complete.
A quick upgrade is mainly applicable to the following versions (and is commonly used for upgrading some of them):
| Current Version | Target Version |
|---|---|
| HCI6.7.0_R1_EN/R2_EN | HCI6.8.0 |
| HCI6.7.0_R1/R2/R3_EN | HCI6.9.1 |
| HCI6.8.0/R1/R2 | HCI6.9.1 |
| HCI6.9.0 | |
| HCI6.7.0_R1_EN/R2_EN | HCI6.10.0 |
| HCI6.8.0/R1/R2 | HCI6.10.0 |
| HCi6.9.0/6.9.1 | HCI6.10.0 |
Rolling Active Upgrade
In the event of host OS changes or kernel or driver version upgrades, all clustered nodes must be restarted, which will cause business service interruption. With live migration technology, rolling active upgrades can significantly minimize the impacts on the services.
The rolling upgrade’s functionality is migrating the VMs running on a node that needs to be upgraded to other nodes or clusters through live migration before restarting the node or cluster so that business services will not be interrupted. A rolling upgrade will not affect the business services, except that the live migration of VMs during the upgrade can cause business service fluctuations for about 1 second, and the overall upgrade process can be arranged.
The rolling upgrade will migrate production VMs running on nodes that need to be upgraded to other nodes in the same cluster and then migrate them back after the upgrade is complete and the upgraded nodes are restarted. The cluster to be upgraded must have sufficient resources.
Offline Upgrade
Offline upgrade requires all clustered nodes to be restarted. All clustered nodes must be restarted in the event of host OS changes or kernel or driver version upgrades. The cluster restart requires all business VMs to be shut down, making the business system unavailable. The offline upgrade is mainly applicable to the following versions (and is commonly used for upgrading some of them):
| Current Version | Target Version |
|---|---|
| HCI6.0.0_R5_EN | HCI6.8.0 |
| HCI6.3.0_R1/R2/R3_EN | HCI6.8.0 |
| HCI6.0.0_R5_EN | HCI6.9.1 |
| HCI6.3.0_R1/R2/R3_EN | HCI6.9.1 |
| HCI6.0.0_R5_EN | HCI6.10.0 |
| HCI6.3.0_R1/R2/R3_EN | HCI6.10.0 |
Upgrade Path
Resource Pool Upgrade
Recommended Upgrade Path for HCI:
5.8.3~6.0.0_R4 → Offline Upgrade → 6.0.0_R5 → Offline Upgrade → 6.10.0
6.0.0 R5-6.3.0_R3 → Offline Upgrade → 6.10.0
6.8.0-6.8.0 R2 → Active Upgrade(Quick/Rolling) → 6.10.0
6.9.0 → Active Upgrade(Quick/Rolling) → 6.10.0
6.9.1 → Active Upgrade(Quick/Rolling) → 6.10.0
The Versions Can Be Upgraded to HCI6.10.0:
| aCloud 6.0.0 Series | 6.0.0_R5_EN | – | – | – | Offline Upgrade |
|---|---|---|---|---|---|
| HCI6.0.1 Series | 6.0.1_EN | 6.0.1_R1_EN | – | – | Offline Upgrade |
| HCI6.1.0 Series | 6.1.0_EN | – | – | Offline Upgrade | |
| HCI6.2.0 Series | 6.2.0_EN | 6.2.70_EN | – | – | Offline Upgrade |
| HCI6.3.0 Series | 6.3.0_EN | 6.3.0_R1_EN | 6.3.0_R2_EN | 6.3.0_R3_EN | Offline Upgrade |
| HCI6.7.0 Series | 6.7.0_EN | 6.7.0_R2_EN | 6.7.0_R3_EN | – | Active Upgrade |
| HCI6.8.0 Series | 6.8.0 | 6.8.0_R1 | 6.8.0_R2 | – | Active Upgrade |
| HCI6.9.0 Series | 6.9.0 | 6.9.1 | – | – | |
| HCI6.10.0 Series | 6.10.0 | – | – | – |
NFV Components Upgrade
Please upgrade the NFV components first if their version is lower than the version listed in the following table before upgrading the HCI.
| Device | Version | HCI6.9.0 | Classic Network | VPC | Notes |
|---|---|---|---|---|---|
| vAD | vAD6.6 | √ | √ | – | |
| vAD | vAD7.0.9_R1 | √ | √ | √ | |
| vNGAF | vNGAF7.1_R3 | √ | √ | – | |
| vNGAF | vNGAF8.0.8 | √ | √ | – | Upgraded from vNGAF7.1_R3 is supported. |
| vNGAF | vNGAF8.0.17 | √ | √ | √ | Support from vNGAF8.0.8 is supported. To use a customized version of vNGAF8.0.17, please install the upgrade package first and then the custom package. |
| vNGAF | vNGAF8.0.26 (20200929) |
√ | √ | √ | Version patched supports both being installed using SSL service packs and being deployed. |
| vIAG | vIAG11.9 | √ | √ | – | Must re-deploy. |
| vIAG | vIAG12.0.14 | √ | √ | – | Upgrade from vIAG11.9 is supported. |
| vIAG | vIAG13.0.73 | √ | √ | – | Recommend deploying this version of vIAG. Upgrade from the previous version is not supported due to insufficient partition size. |
| vSSL | vSSL7.6.0 | √ | √ | – | |
| vSSL | vSSL7.6.8_R2 (20200928) |
√ | √ | √ | Support to deploy or upgrade by using the product upgrade package. |
Upgrade Impacts
The impacts of upgrading HCI will vary depending on the upgrade method. For details, see the table below:
| Method | Impacts on Services | Impacts on Customer O&M | Impacts on Customer Network |
|---|---|---|---|
| Quick Upgrade | A business system jitter will last for 3 seconds or shorter. | O&M personnel should not log in to the platform for operation and maintenance during the upgrade. | None |
| Rolling Upgrade | The business system performance will degrade (about 10 seconds) during migration, and I/O operations will be suspended for about 1 second. | O&M personnel should not log in to the platform for operation and maintenance during the upgrade. The upgrade will take about 40 minutes per node. |
None |
| Offline Upgrade | All VMs and NFV devices must be shut down before an offline upgrade. After the upgrade, they cannot be powered on before all 6.9.0 features take effect. The downtime will be around 1 hour. | O&M personnel should not log in to the platform for operation and maintenance during the upgrade. | None |
- The production VM can work after the platform is upgraded to 6.10.0 through a quick upgrade. However, the new version driver has not been activated yet. You have to enter each cluster node in Maintenance Mode and restart them one by one during off-peak hours. The relevant features are described in the table below:
| Upgrade Path | The impacts of not restarting the host | Remarks |
|---|---|---|
| 6.7.0_EN > 6.8.0 | None | None |
| 6.8.0 > 6.10.0 | Speed optimizations for VM cold migration do not take effect. | Changes to the kernel are not upgraded. |
| 6.8.0 > 6.10.0 | Non-ATS storage cannot be mounted. | Changes to the driver module are not applied. |
- After the cluster is upgraded to the target version with Active Upgrade (both Quick and Rolling Upgrade), the virtual machine is in "compatibility mode," and some functions will be restricted. It is required to enter the virtual machine details page and click the More > Upgrade VM Compatibility button. This process will restart the virtual machine to make the new version take effect:
Note:
Do not restart the VM directly.
Batch operations are supported in 6.10.0.
| Original Version | Restricted function after Upgrade |
|---|---|
| 6.0.0_R5_EN | Maximum memory support 960G Does not support editing the GuestOS of the virtual machines Does not support L3-cache Does not support disk space reclamation Does not support virtual machine anti-escape Does not support using virtio network cards when virtual machines do not have vmtools installed |
| 6.2.0_EN, 6.3.0_R1/R2_EN | Does not support editing the GuestOS of the virtual machines Does not support L3-cache Does not support disk space reclamation Does not support virtual machine anti-escape Does not support using virtio network cards when virtual machines do not have vmtools installed |
Upgrade Instruction for Customers
- Before an upgrade, shutting down other virtual machines is recommended to ensure the business continuity of critical VMs. Please check and record VMs that can be shut down in the table below:
| System | Application Service | Run Location | Remarks |
|---|---|---|---|
| XX front end | Tomcat | XX.XX.XX.XX | XXXX |
- Before an upgrade, please confirm whether NFV devices need to be upgraded. Evaluate and arrange the time and personnel for the upgrade.
| NFV Component | NFV Device Name | Run Location | Current Version | Target Version | Shutdown Allowed |
|---|---|---|---|---|---|
| NGAF | Egress firewall | XX.XX.XX.XX | XX.X.X | XX.X.X | Yes |
-
An offline upgrade may take 4 to 6 hours. Please make appropriate time arrangements in advance and notify the business department to stop accessing the platform during the upgrade.
-
During the upgrade, customers’ O&M personnel should not log in to the platform for operation and maintenance.
Implementation Procedure
Quick Upgrade
| Type | Item | Estimated Time | Check with √ When Complete |
|---|---|---|---|
| Preparing for Upgrade | Check upgrade path | ||
| Preparing for Upgrade | Obtain the latest aDeploy version | ||
| Preparing for Upgrade | Prepare HCI update package | ||
| Preparing for Upgrade | Check version information | ||
| Preparing for Upgrade | Prepare license key | ||
| Preparing for Upgrade | Read upgrade notes(in the release notes) | ||
| aSecurity Upgrade | Upgrade aSecurity before upgrading MGR | About 30 minutes | |
| aNI Upgrade | Upgrade Network Insight (aNI) on HCI | About 30 minutes | |
| HCI Upgrade Process | Make sure there are no ongoing tasks | 5 minutes | |
| HCI Upgrade Process | General page check | 10 minutes | |
| HCI Upgrade Process | Health check | 10 minutes | |
| HCI Upgrade Process | Enable maintenance mode | 1 minute | |
| HCI Upgrade Process | Environment check before upgrading HCI | 5 minutes | |
| HCI Upgrade Process | Upload HCI update package/Verify software edition | 3 minutes | |
| HCI Upgrade Process | Distribute update package | Package size * Number of nodes/Transfer rate | |
| HCI Upgrade Process | Pre-upgrade check | 15 minutes. The time varies according to virtual storage capacity. The larger the storage capacity is, the longer the upgrade process takes. | |
| HCI Upgrade Process | Control plane active upgrade | 11 minutes | |
| HCI Upgrade Process | VM active upgrade | 5 seconds for every 5 VMs with vmTools installed. 2 minutes for each VM without vmTools installed. |
|
| HCI Upgrade Process | Virtual storage active upgrade | Number of clustered nodes*10 minutes | Related to the scale and load of VMs |
| HCI Upgrade Process | Active upgrade for virtual network | 5 minutes | Related to the scale and load of VMs |
| HCI Upgrade Process | Apply new virtual storage version | Number of clustered nodes*10 minutes | Related to the scale and load of VMs |
| HCI Upgrade Process | Check business | 30 minutes | |
| HCI Upgrade Process | License after upgrade | 5 minutes |
Rolling Upgrade
| Type | Item | Estimated Time | Check with √ When Complete |
|---|---|---|---|
| Preparing for Upgrade | Check upgrade path | ||
| Preparing for Upgrade | Obtain the latest aDeploy version | ||
| Preparing for Upgrade | Prepare HCI update package | ||
| Preparing for Upgrade | Check version information | ||
| Preparing for Upgrade | Prepare license key | ||
| Preparing for Upgrade | Read upgrade notes(in the release notes) | ||
| aSecurity Upgrade | Upgrade aSecurity before upgrading MGR | About 30 minutes | |
| aNI Upgrade | Upgrade Network Insight (aNI) on HCI | About 30 minutes | |
| HCI Upgrade Process | Make sure there are no ongoing tasks | 5 minutes | |
| HCI Upgrade Process | General page check | 10 minutes | |
| HCI Upgrade Process | Health check | 10 minutes | |
| HCI Upgrade Process | Environment check before upgrading HCI | 5 minutes | |
| HCI Upgrade Process | Upload HCI update package/Verify software edition | 3 minutes | |
| HCI Upgrade Process | Distribute update package | Packet size/Transfer rate-Packet size*2/Transfer rate | |
| HCI Upgrade Process | Pre-upgrade check | 15 minutes | The larger the virtual storage capacity is, the longer the upgrade process takes. |
| HCI Upgrade Process | Enable Maintenance Mode for the cluster | 1 minute | |
| HCI Upgrade Process | Control plane active upgrade | 25 minutes | |
| HCI Upgrade Process | Disable Maintenance Mode for the cluster | 1 minute | |
| HCI Upgrade Process | Live migration of VMs across nodes in the same cluster | 3 minutes for each VM | The migration time of each VM varies according to the data volume and I/O status when the VM is running. |
| HCI Upgrade Process | Enable Maintenance Mode for nodes | 1 minute | Related to the cluster size and workload. |
| HCI Upgrade Process | Virtual storage active upgrade | 10 minutes | Related to the cluster size and workload. |
| HCI Upgrade Process | Active upgrade for virtual network | 5 minutes | Related to the cluster size and workload. |
| HCI Upgrade Process | Restart server manually | 10 minutes | Related to the cluster size and workload. |
| HCI Upgrade Process | Disable Maintenance Mode for nodes | 1 minute | Related to the cluster size and workload. |
| HCI Upgrade Process | Repeat the preceding steps (starting from the live migration of VMs) | About 40 minutes for each node | |
| HCI Upgrade Process | Check business | 30 minutes | |
| HCI Upgrade Process | License after upgrade | 5 minutes |
Offline Upgrade
| Type | Item | Estimated Time | Check with √ When Complete |
|---|---|---|---|
| Preparing for Upgrade | Check upgrade path | ||
| Preparing for Upgrade | Obtain the latest aDeploy version | ||
| Preparing for Upgrade | Prepare HCI update package | ||
| Preparing for Upgrade | Check version information | ||
| Preparing for Upgrade | Prepare license key | ||
| Preparing for Upgrade | Read upgrade notes(in the release notes) | ||
| aSecurity Upgrade | Upgrade aSecurity before upgrading MGR | About 30 minutes | |
| aNI Upgrade | Upgrade Network Insight (aNI) on HCI | About 30 minutes | |
| HCI Upgrade Process | Make sure there are no ongoing tasks | 2 minutes | |
| HCI Upgrade Process | General page check | 10 minutes | |
| HCI Upgrade Process | Health check | 5 minutes | |
| HCI Upgrade Process | Shut down all VMs | 20-30 minutes | |
| HCI Upgrade Process | Shut down all NFV devices | 10 minutes | |
| HCI Upgrade Process | Enable maintenance mode | 1 minute | |
| HCI Upgrade Process | Check environment for upgrade | 1 minute | |
| HCI Upgrade Process | Upload HCI update package | 1 minute | |
| HCI Upgrade Process | Verify the update package via the QR code | 1 minute | |
| HCI Upgrade Process | Distribute update package | Package size * Number of nodes/Transfer rate | |
| HCI Upgrade Process | Check environment | 15 minutes | |
| HCI Upgrade Process | Perform offline upgrade | 30 minutes | |
| HCI Upgrade Process | Power on VM | 10 minutes | |
| HCI Upgrade Process | Check business | 5 minutes |
Note:
The larger the cluster is, the longer it takes to convert the configuration file and the longer the upgrade time.
Post Upgrade Check
HCI Platform
PIC: Sangfor engineer
- Perform a health check on the HCI platform (Virtual Storage Data Check must be selected) and ensure all services work.
- Use aDeploy to perform a health check on the HCI platform and fix all issues according to the solutions.
- Install all SPs for the corresponding version according to check results of aDeploy.
Application System
PIC: Sangfor engineer and customer’s O&M personnel
- Check whether all VMs installed with a guest OS are working and whether there are alerts, suspended, or failed VMs.
- Check whether the guest OS or console of VMs can be accessed and whether the file system works well.
- Check whether all application services are available and running without an unexpected shutdown, restart, etc.
- Analyze the causes of all the anomalies detected above and handle them promptly.
Business System
PIC: Sangfor engineer and customer’s business personnel
- Verify whether services provided by the business system can be accessed by performing some common operations to see whether anomalies occur.
- Verify business system data by performing data addition, deletion, modification, and query to see whether anomalies occur.
- Verify the privileges of the business system by performing unauthorized operations to see whether anomalies occur.
- Analyze the causes of all the anomalies detected above and handle them promptly.
Rollback
The HCI platform is the infrastructure of business systems, and its upgrade process is relatively complicated. Arrange technical support engineer to ensure a smooth upgrade. During the upgrade, a team must be assigned to troubleshoot issues at different upgrade stages and confirm whether rollback is required. The specific rollback scenarios and upgrade stages are shown in the table below (rollback must be performed under the guidance of the R&D personnel):
| Item | Impacts on Services | Rollback Mechanism |
|---|---|---|
| aSecurity upgrade | None | Cancel the upgrade for rollback |
| aNI upgrade | None | Cancel the upgrade for rollback |
| Environment check before upgrading HCI | None | N/A |
| Upload/Distribute update package | None | Cancel the upgrade for rollback |
| Pre-upgrade check | None | Cancel the upgrade for rollback |
| Enable Maintenance Mode for the cluster | None | Disable Maintenance Mode for the cluster |
| Control plane active upgrade | None | Cancel the upgrade for rollback |
| VM active upgrade | IO fluctuation for 1 second | Cancel the upgrade for rollback |
| Virtual storage active upgrade | IO fluctuation for 1-3 seconds | Cancel the upgrade for rollback |
| Active upgrade for virtual network | IO fluctuation for 1 second | Cancel the upgrade for rollback |
| Apply storage features of the new version | None | Perform rollback according to the actual situation |
| Check business | Depending on the check method | N/A |
| License after upgrade | None | Revoke license |
Note:
If the current version is earlier than 5.8.6/6.7.0 and needs to be upgraded to a version later than 5.8.6/6.7.0, contact a Sangfor technical support representative in advance to ensure a smooth upgrade.
If the HCI upgrade fails, do not close the upgrade page and contact a Sangfor technical support representative for rollback.
Upgrade Guide
Upgrade Instructions
Upgrade Steps
Please follow the following steps to upgrade:

Upgrade Sequence

Upgrade Notes
General scenarios:
-
Before upgrading, please use the latest version of aDeploy (download address: https://download.sangfor.com/Download/Tools/aDeploy/aDeploy-server-en-install.zip to perform a pre-upgrade check and install a pre-upgrade check package.
-
If the current version is earlier than 5.8.6/6.7.0 and needs to be upgraded to a version later than 5.8.6/6.7.0, to ensure a smooth upgrade, contact a Sangfor technical support representative in advance.
-
A rolling active upgrade to HCI6.10.0 will automatically restart the physical server. Therefore, a manual restart is not needed.
-
Before upgrading, please ensure the license key is valid. Otherwise, the platform cannot be upgraded.
-
When upgrading from 6.8.0, 6.8.0R1, 6.8.1, and 6.9.0 (without patching) to 6.10.0 with a rolling upgrade, the node will not be automatically restarted during the upgrade. After patching, the upgrade will have a rolling upgrade effect with automatic host restart. 6.8.0R2 does not require patching, and the rolling upgrade will also automatically restart the host.
SP Installation:
-
If the current version contains custom packages (package name: Custom-XXX), please contact a Sangfor technical support representative for upgrade evaluation.
-
If the current version contains SPs (package name: sp-XXX), it can be upgraded directly.
Graphics Cards:
- If the current version is earlier than 6.7.0, a GRID driver (supported versions 10.2 and 13.2) must be reimported again after the upgrade. After the HCI platform is upgraded and restarted, import a GRID driver for nodes as needed and then restart the nodes. Driver updates are also required for business VMs and will take effect after they are restarted.
- If graphics cards are used in versions earlier than 6.2.0, aGPU license key is required after the upgrade. Otherwise, GPU-related features cannot be used.
iSCSI Virtual Disks
- HCI cannot be upgraded when it provides services as an iSCSI server. Before upgrading, please go to iSCSI clients to disconnect all related connections.
Offline Upgrade
- During the pre-upgrade check for an offline upgrade, if "A VM is running on the node. Please shut down the VM and try again." is prompted, you can ignore this problem temporarily. Before an official upgrade, all virtual devices must shut down and run a pre-upgrade check again.
Low latency scenario
- When upgrading from HCI6.9.1 to subsequent versions, the low latency mode does not support active upgrades by default. Before upgrading, you must shut down all virtual machines and perform an offline upgrade.
Upgrade Preparations
Packages, Documents, and Tools
Packages:
| Name | Description | Obtain Through |
|---|---|---|
| HCI6.10.0 update package | Used for upgrading from an earlier version to HCI6.10.0. | Sangfor Community https://community.sangfor.com/plugin.php?id=service:download&action=view&fid=47#/12/all |
| HCI6.10.0 Witness node update package (stretched cluster) | Used for upgrading from an earlier version to HCI Witness 6.10.0. | Sangfor Community https://community.sangfor.com/plugin.php?id=service:download&action=view&fid=47#/12/all |
Documents:
| Name | Description | Obtain Through |
|---|---|---|
| HCI6.10.0 User Manual | Describes basic O&M and configuration in HCI. | Sangfor Knowledge Base https://knowledgebase.sangfor.com/indexPage?module=645 |
| aDeploy User Guide | Provides instructions for using aDeploy. | Sangfor Knowledge Base https://knowledgebase.sangfor.com/indexPage?module=645 |
Tools:
| Name | Description | Obtain Through |
|---|---|---|
| Chrome/Edge | The browser to access HCI and SCP web console. | Obtain from the internet. |
| PuTTY/MobaXterm | An SSH client for troubleshooting if needed. | Obtain from the internet. |
| MD5 | Used for verifying the integrity of the upgrade package. | Check it when downloading the package file. |
| aDeploy | Used for pre-upgrade checks and other checks with aDeploy. | Sangfor Community https://community.sangfor.com/plugin.php?id=service:download&action=tool |
| License Key | 1. For a version earlier than HCI5.8.3, please apply for a new HCI license key. 2. If the NFV devices need to be upgraded according to Chapter 2.1.2.2 NFV Components. Please apply for a new NFV license key. 3. Before upgrading, please confirm that the customer’s license is not expired. Otherwise, the environment needs to be renewed. 4. Before upgrading, please check that the original NFV license key has not expired. Otherwise, the license needs to be renewed. |
Contact corresponding personnel to obtain or confirm. |
Environment Information
Fill in the corresponding IP information in the table below.
| Type | Classification | IP Address | Netmask | Remarks(ETH) |
|---|---|---|---|---|
| HCI | The IP address for the management network | |||
| HCI | The IP address for the overlay network | |||
| HCI | The IP address for the storage area network | |||
| HCI | Elastic IP pool | |||
| Physical server | BMC/IPMI NIC | |||
| Ethernet switch | The IP address for the management interface |
Customer Resources Coordination
During the upgrade, O&M personnel should not log in to the platform for operation and maintenance.
An offline upgrade may take 4 to 6 hours. Please make an appropriate time arrangement in advance and prepare for service interruption during the upgrade to reduce impact.
Before the active upgrade, please confirm whether NFV component versions need to be upgraded and evaluate the required upgrade time.
Please coordinate resources in advance according to the following requirements to ensure a smooth upgrade:
-
Determine when to upgrade and fully prepare for service interruption during the upgrade to reduce impact.
-
Obtain contact information of the responsible persons.
-
Ensure a computer (with Internet access and a stable connection to the device) is ready. Ensure the computer can install and run the upgrade client software.
| Type | Name | Contact | Responsible For |
|---|---|---|---|
| Sangfor Technologies Inc. | Upgrading HCI and SCP | ||
| Customers | Coordinating resources and upgrade time. (Upgrade time: ) | ||
| Customers | Ensure O&M personnel will not log in to the platform for operation and maintenance. | ||
| Customers | Arrange persons responsible for application systems to handle service opening and verification issues. |
Pre-upgrade Check
Health Check
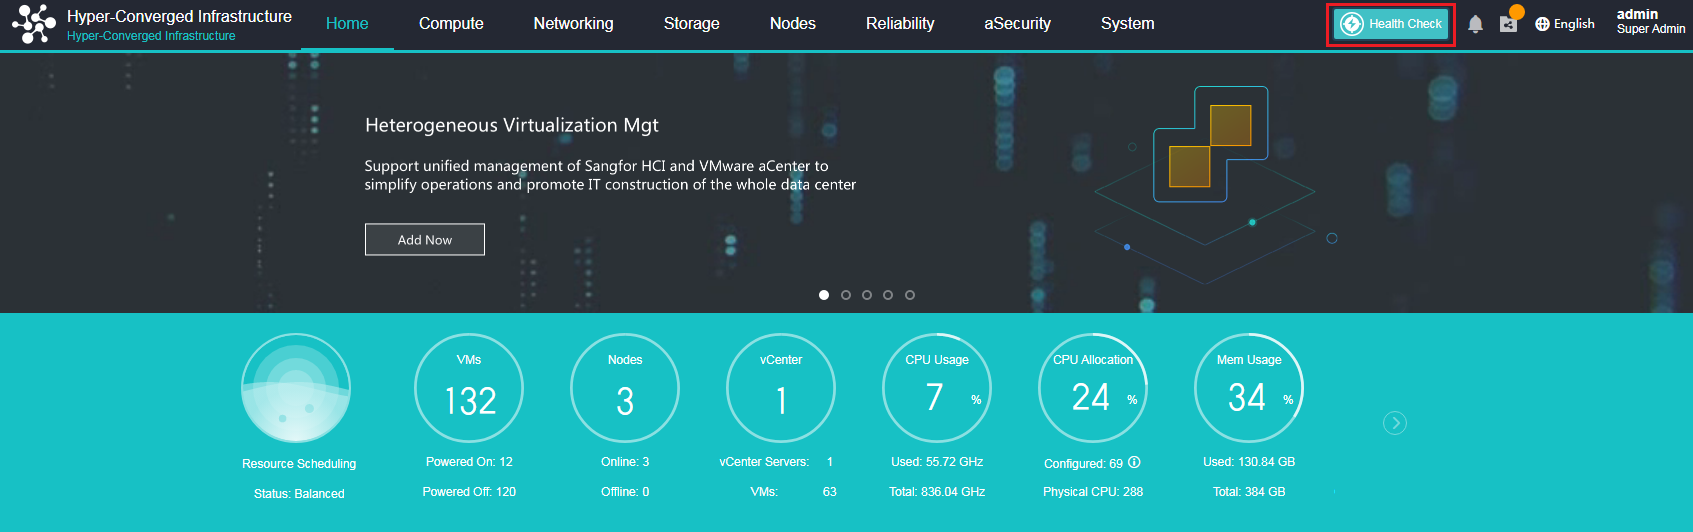
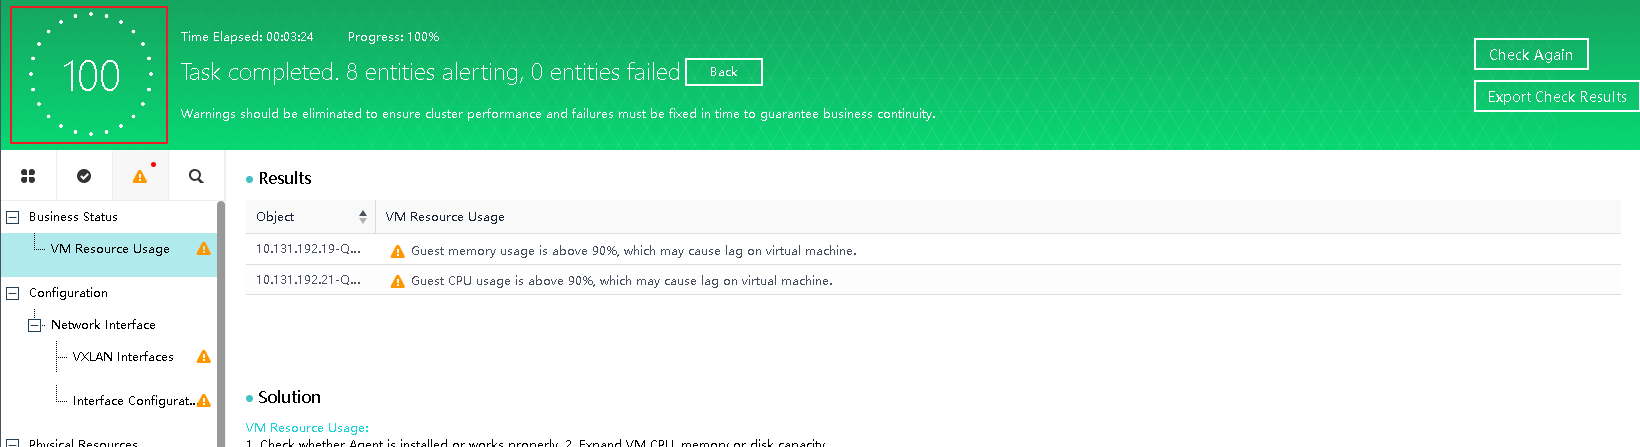
Click Health Check on the home page to go to the health check page. In addition to the default entities, select Virtual Storage Data and click Start. After the check is complete, if the score is lower than 100 points, handle the identified problems according to the check results and solutions, and then perform a Health Check again. Before upgrading, please confirm that the health check score is 100 points.
Check with aDeploy
Apart from health check features, aDeploy supports checking common problems of customers. It optimizes the platform-based check mechanism and can check the environment before upgrading. If faults or alerts are reported, please handle the faults and alerts for the cluster before upgrading.
Refer to Chapter 1.2.3.1 Packages, Documents, and Tools, for the download link.
HCI Pre-Upgrade Check
One week before upgrading HCI for a customer, please visit the customer or establish a remote connection to check whether the customer’s environment meets the upgrade requirements using the pre-upgrade check package. This will help facilitate the subsequent upgrade process and does not require downtime. Make sure a pre-upgrade check is done before an official upgrade. If the pre-upgrade check for an official upgrade fails, it is recommended that the upgrade be rescheduled.
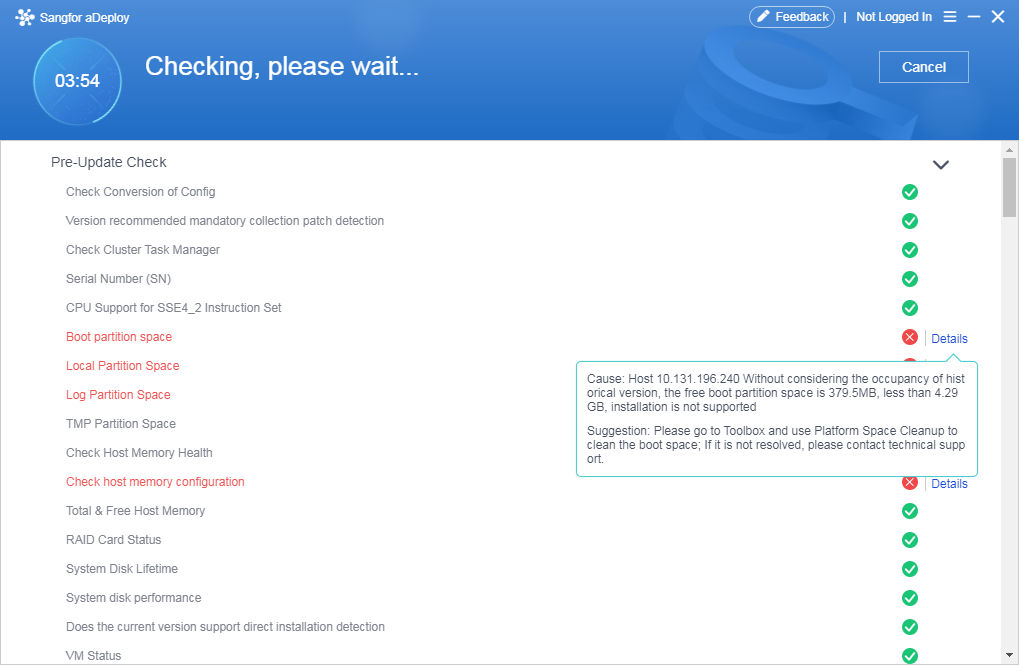
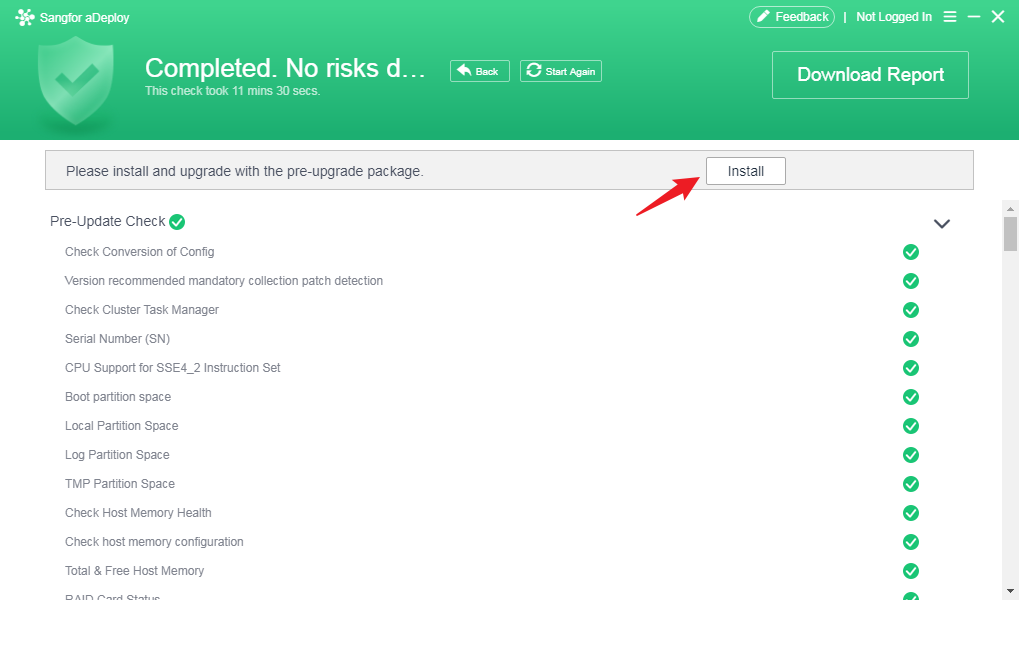
Step 1. Use aDeploy to perform a pre-upgrade check and wait for the check to complete. Click Details next to the failed entities and handle them according to the solutions. Perform the pre-upgrade check again until all the entities pass the check.
Notice:
SP pre-installation check is prohibited after the pre-upgrade check. Else, HCI will request you to run the pre-upgrade check again.
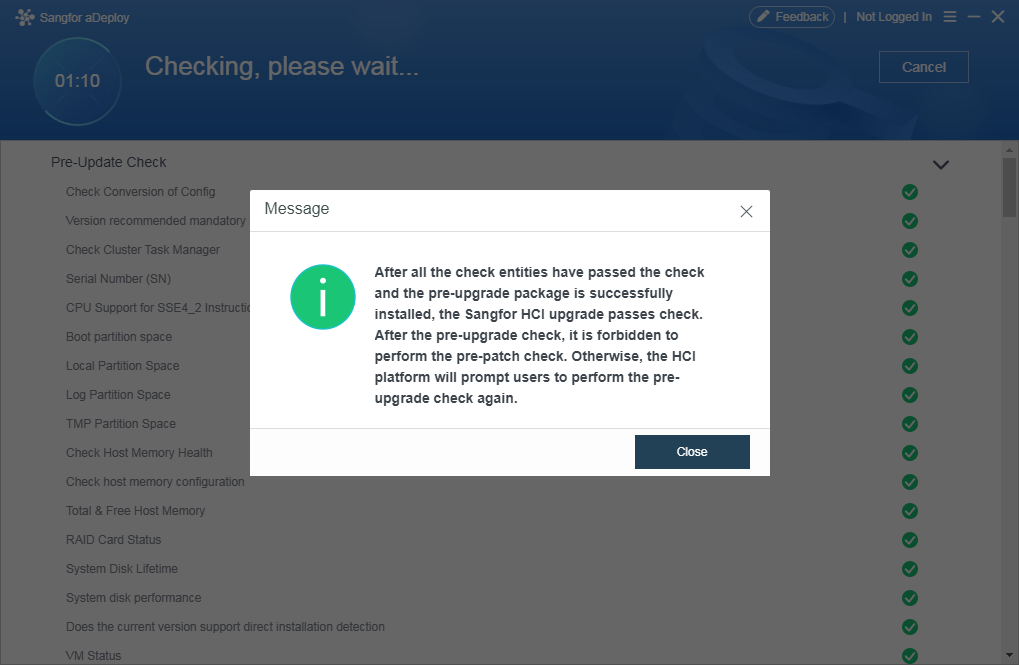
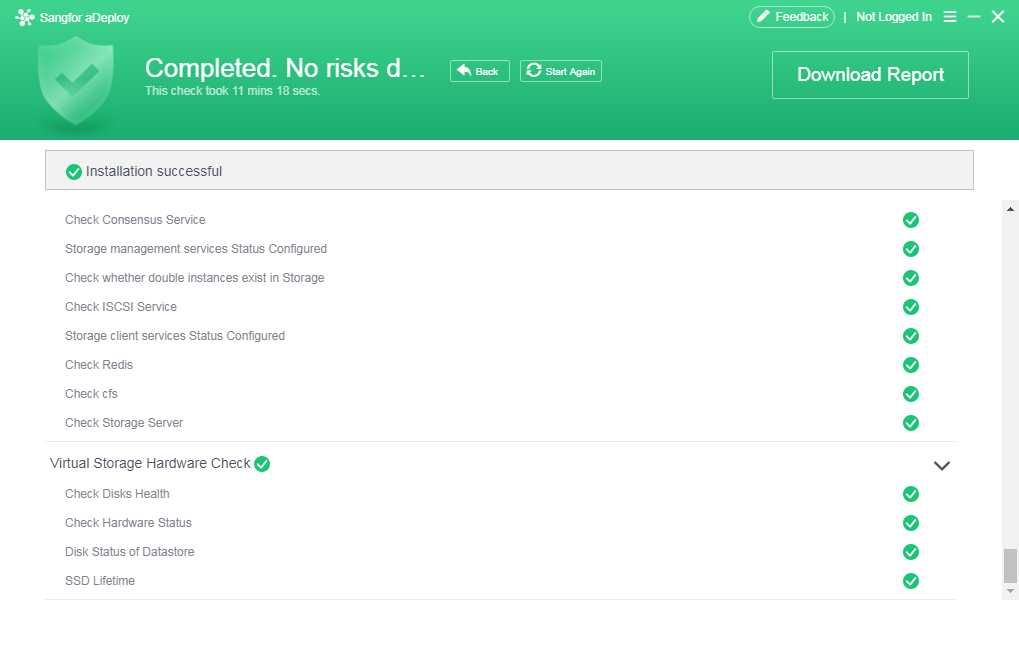
Step 2. After all the entities pass the check, click Install and wait for the installation to complete.
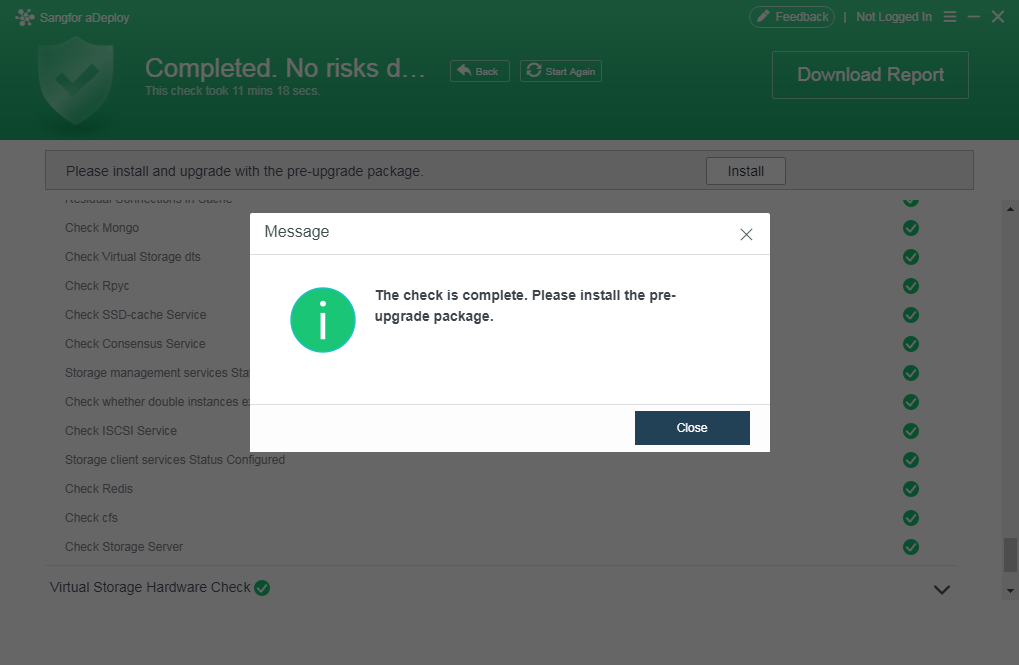
- Troubleshooting instructions
a. For an offline upgrade, a message will be displayed after the pre-upgrade check is completed, indicating that a VM is running on the node. You may ignore this message temporarily. Before an official upgrade, all virtual devices must shut down, and run a pre-upgrade check again.
b. If the pre-upgrade check fails and a message indicates the pre-upgrade check failure, please contact a Sangfor technical support representative.
c. If a clustered node fails the pre-upgrade check and the pre-upgrade check does not proceed for more than 10 minutes, please contact a Sangfor technical support representative.
d. In versions earlier than HCI6.9.0, VM names can only contain digits, spaces, letters, Chinese characters, and special characters (()【】_-.+()@). Invalid VM names will cause the pre-upgrade check to fail.
Upgrade Procedure
aSecurity Upgrade
- Upgrade aSecurity
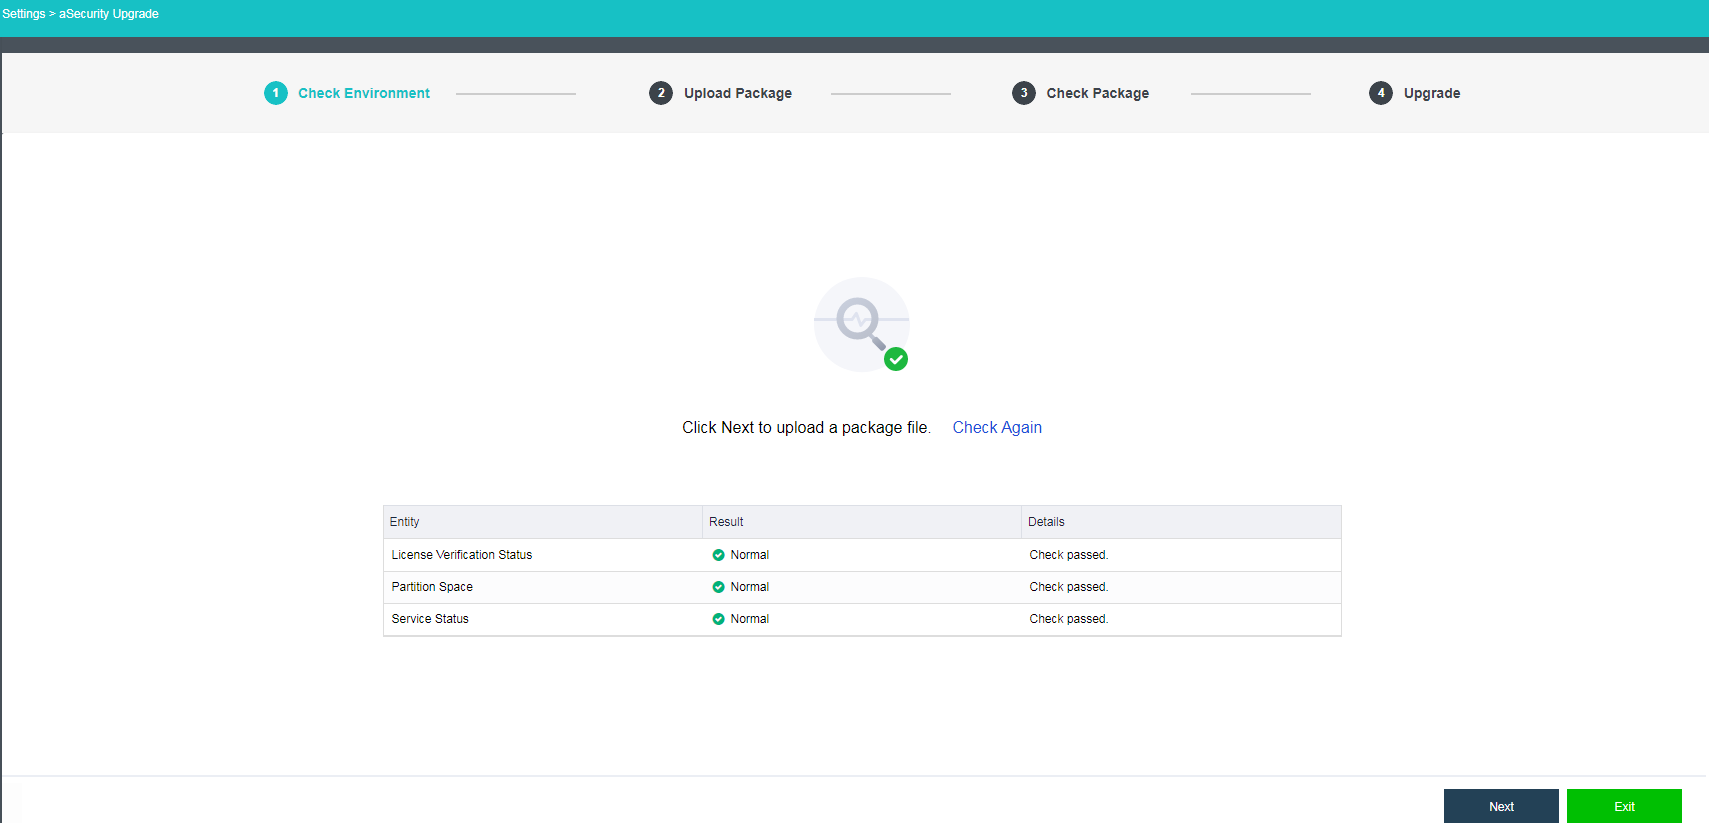
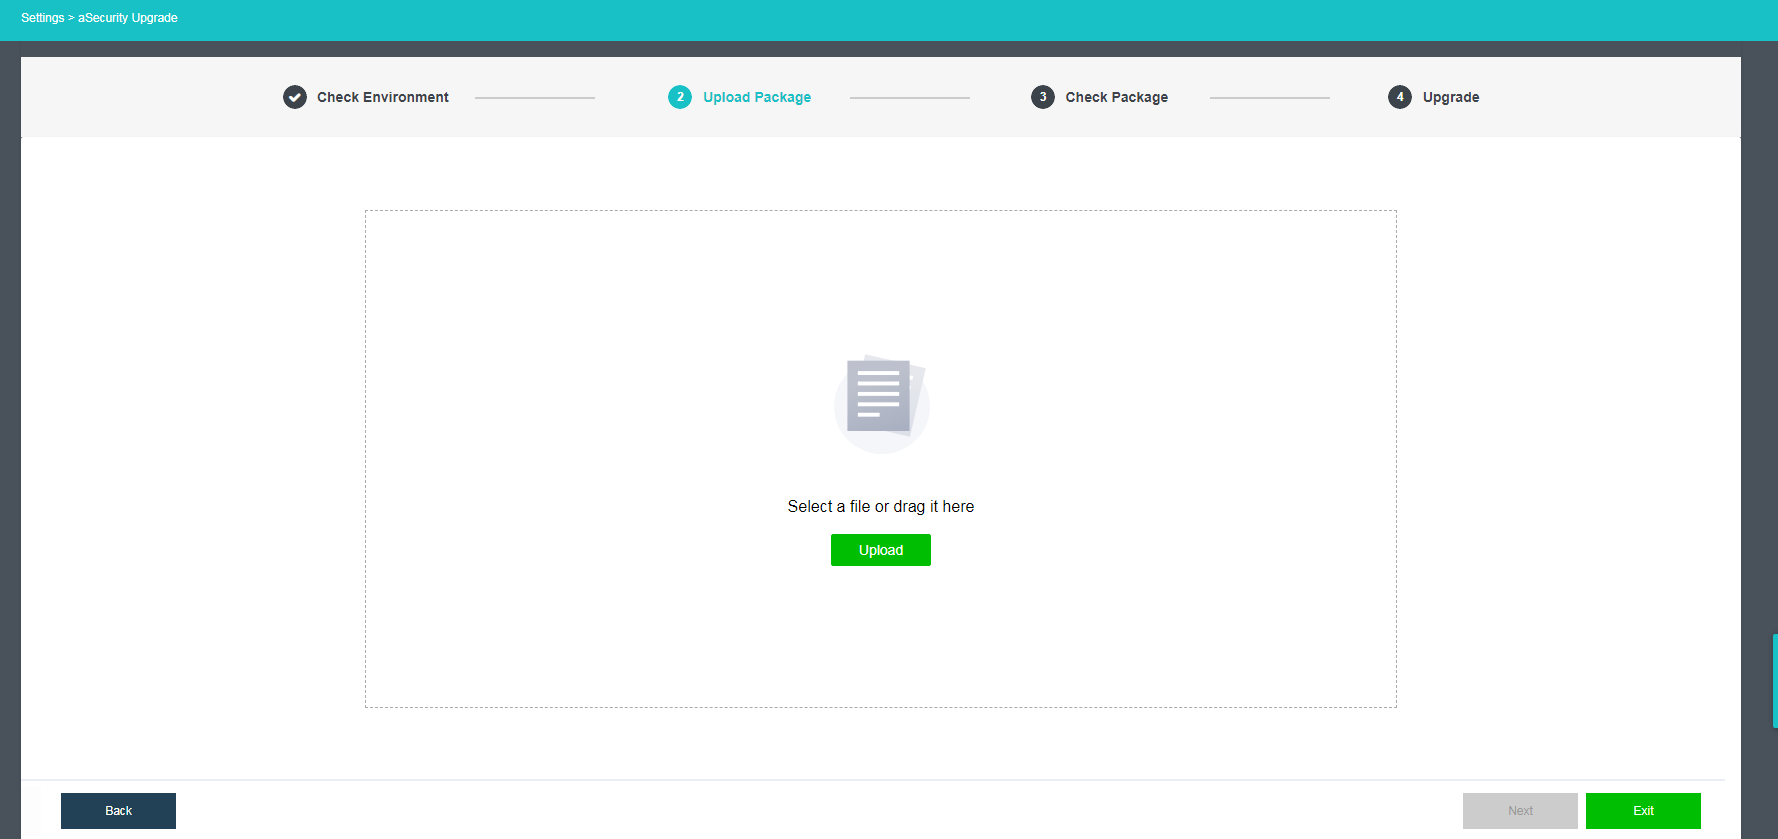
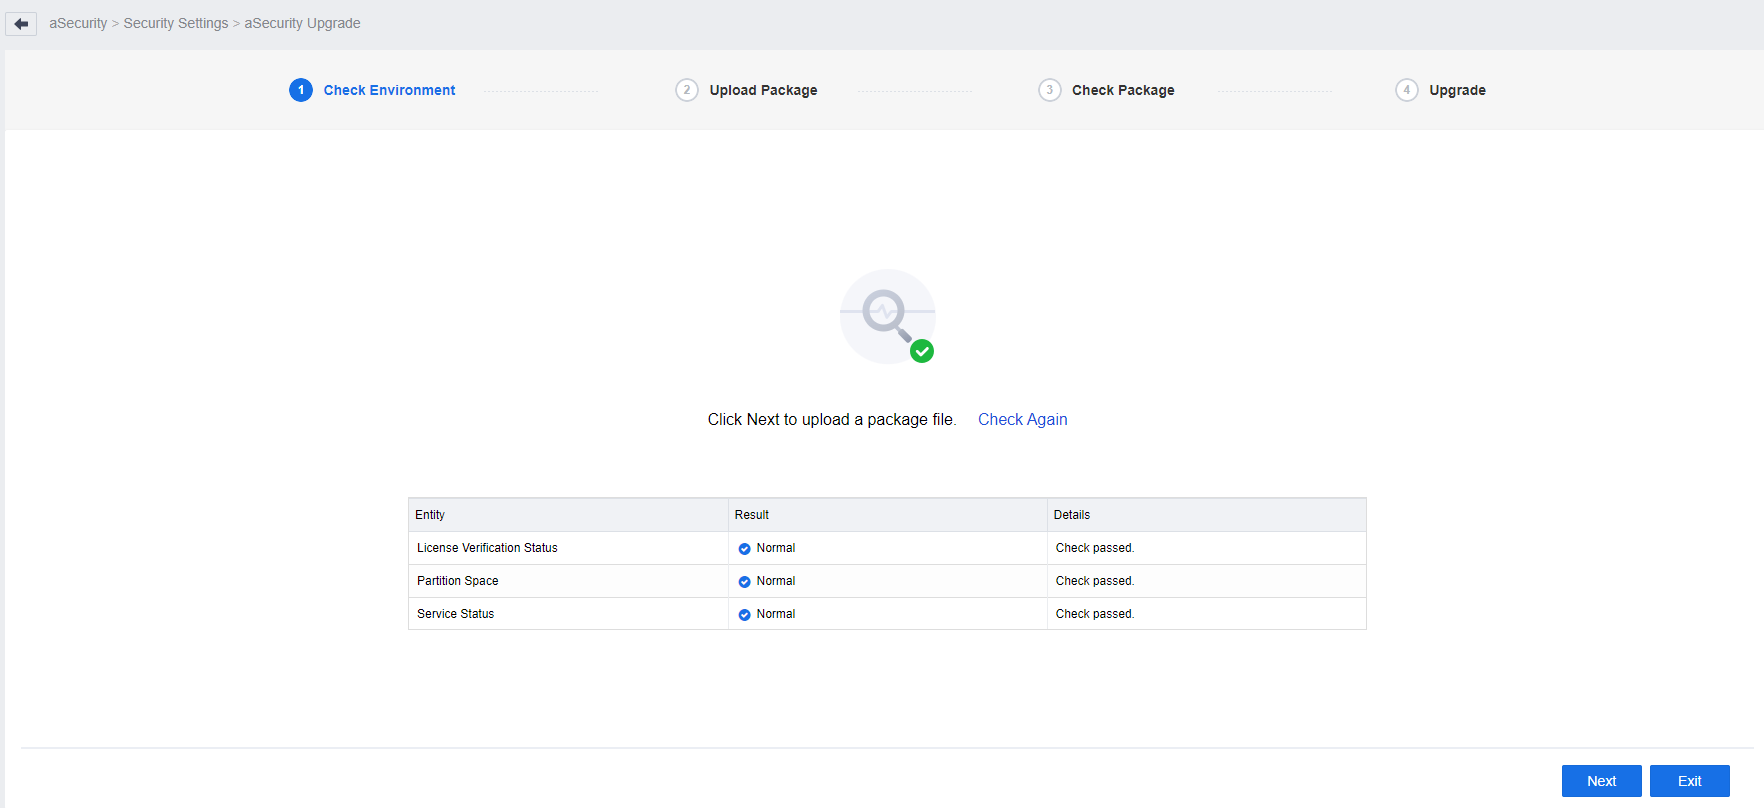
Step 1. Go to aSecurity > Settings > aSecurity Upgrade and click Upgrade.
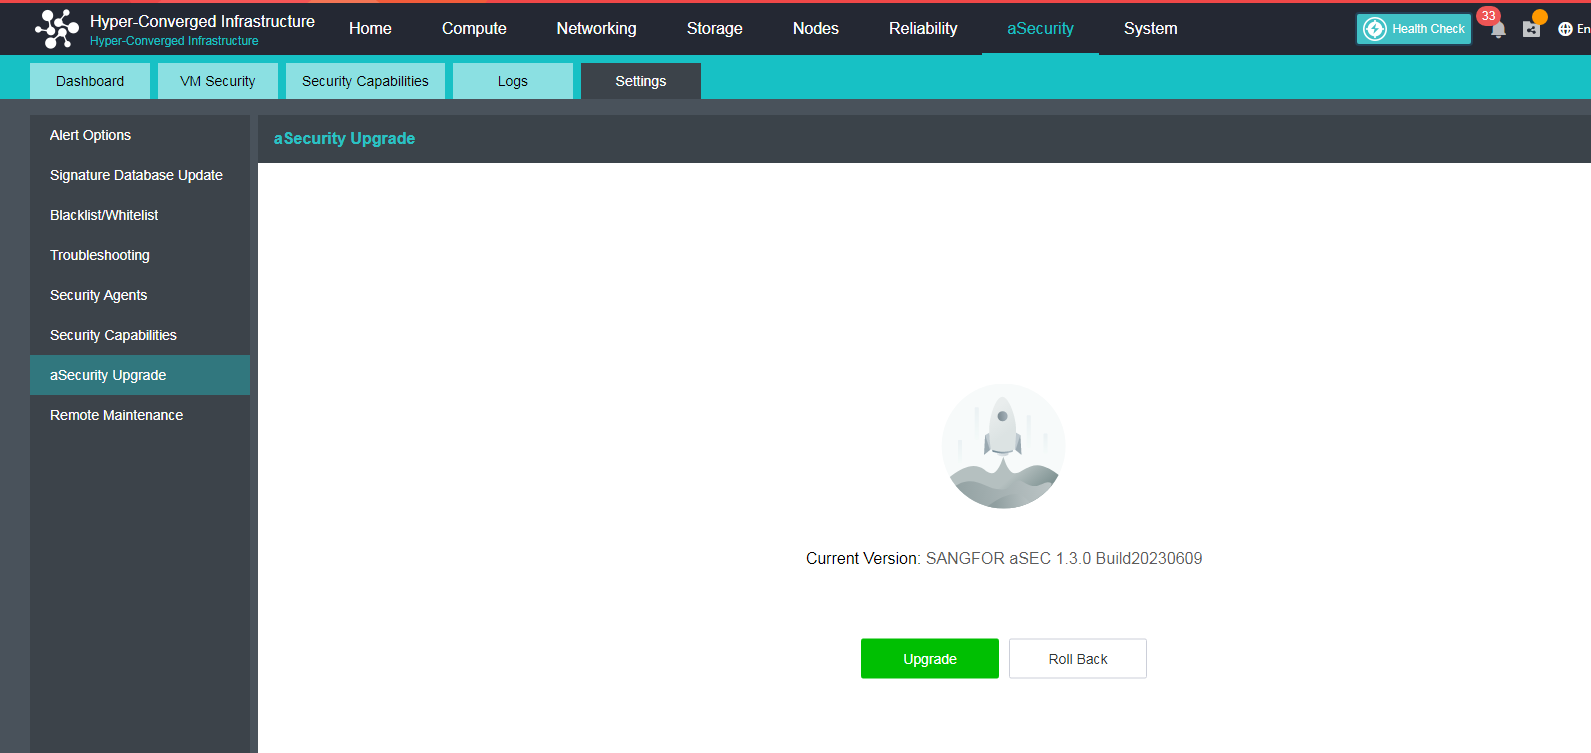
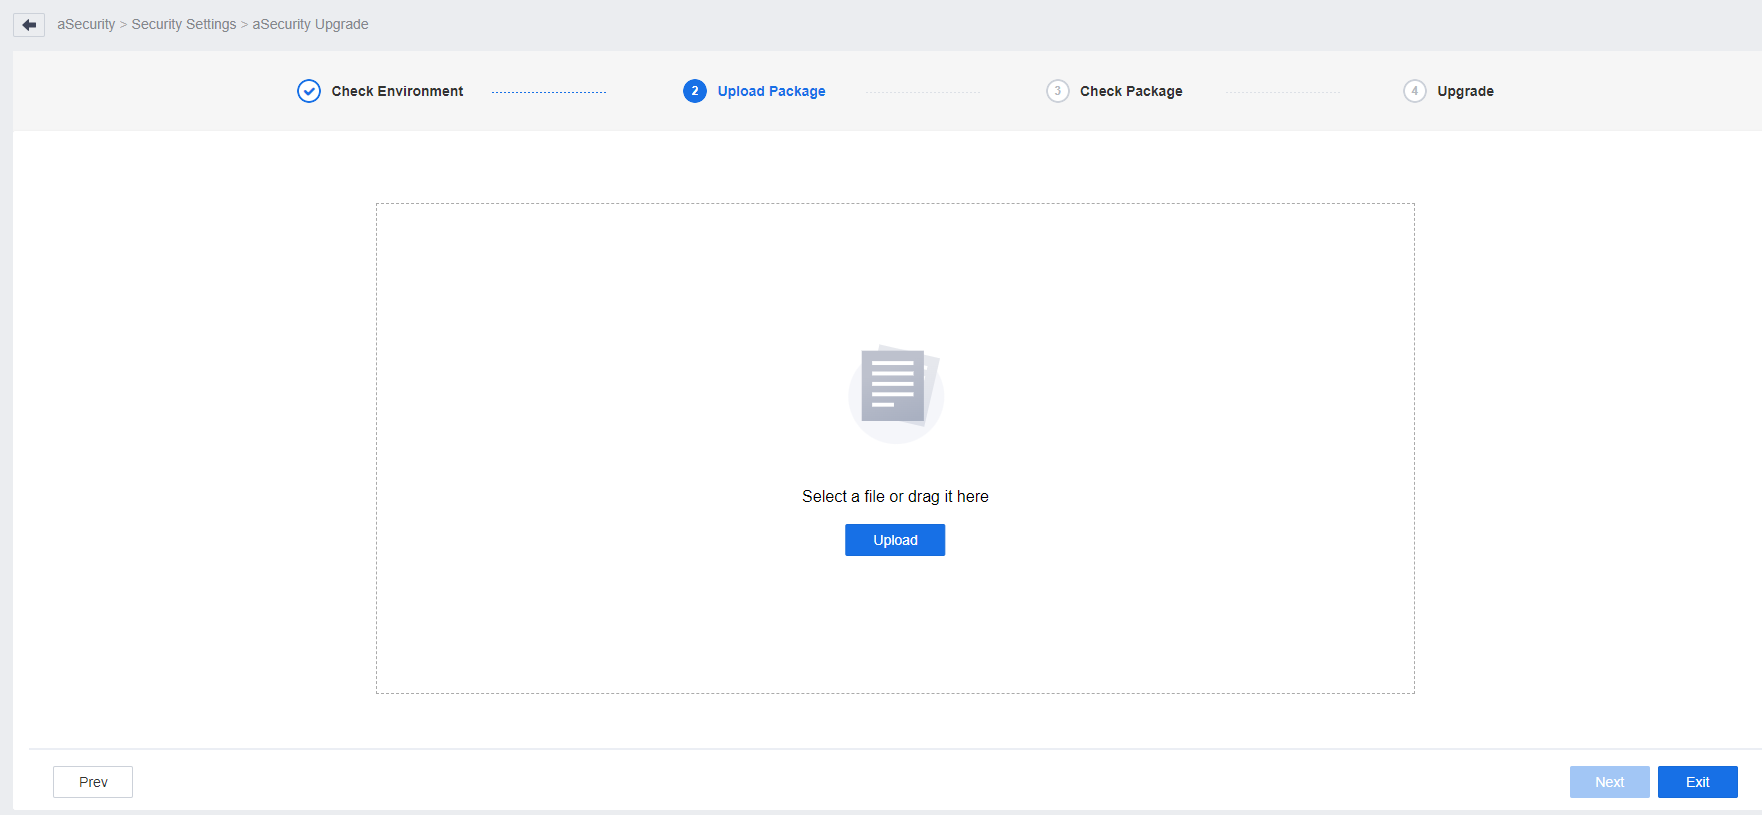
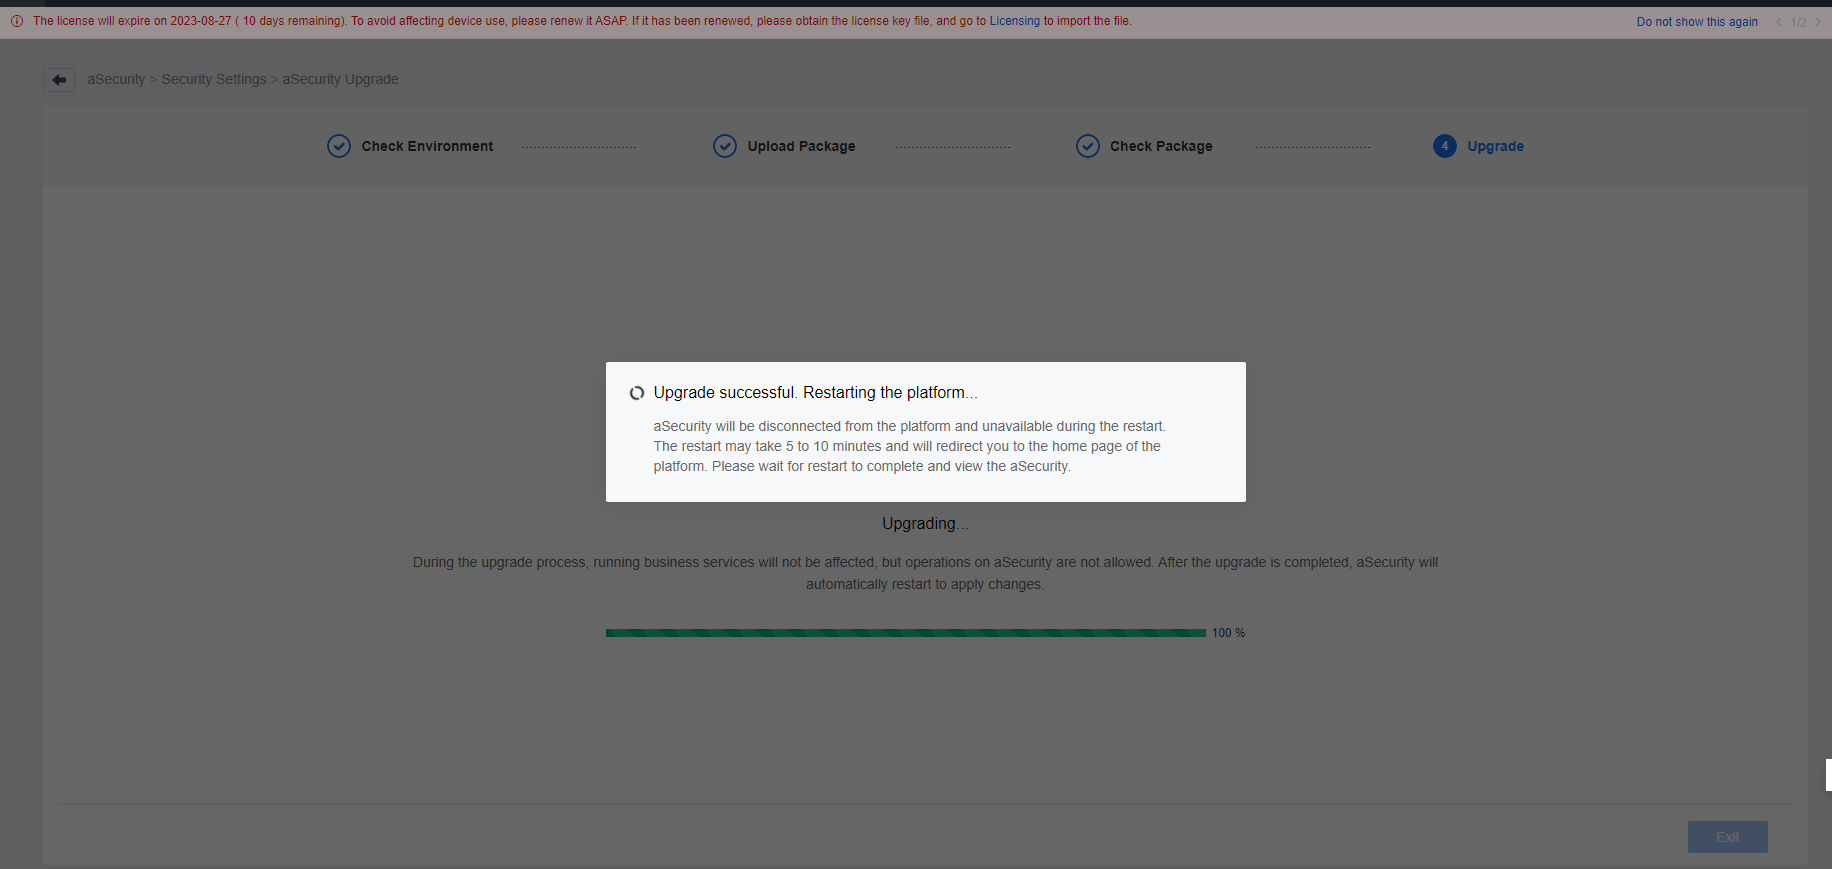
Step 2. Click Next to import the update package. Click Next after a successful import. If the update package passes the verification, click Upgrade and wait for the upgrade to complete. aSecurity will automatically restart after the upgrade is complete. The upgrade process will take about 30 minutes.
Step 3. After the upgrade, platform authentication, and licenses must be obtained again to use aSecurity capabilities.
- Upgrade Security Protection Manager(Endpoint Secure)
To upgrade Security Protection Manager(Endpoint Secure), kindly contact Sangfor Technical Engineer for assistance.
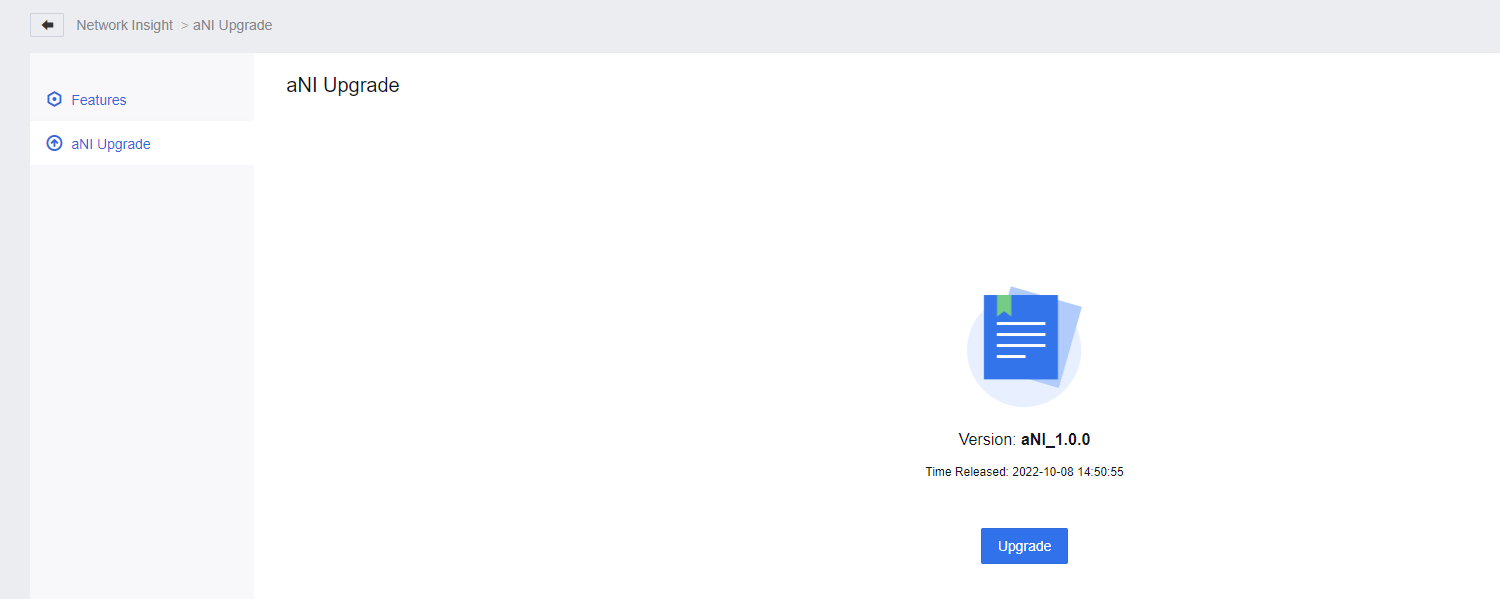
aNI Upgrade
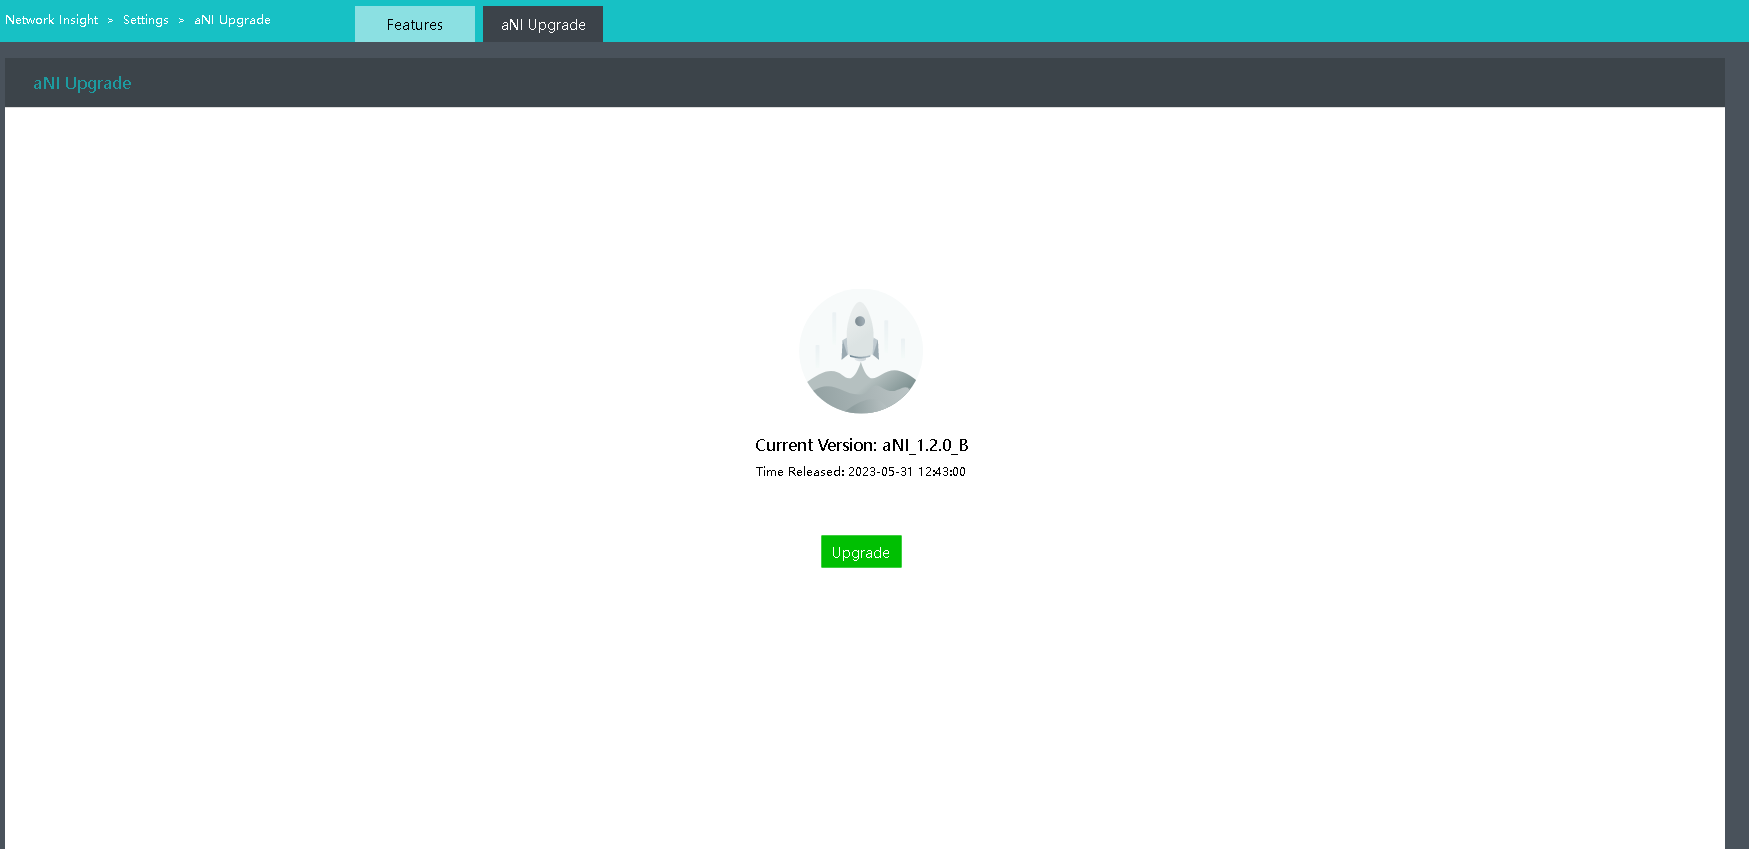
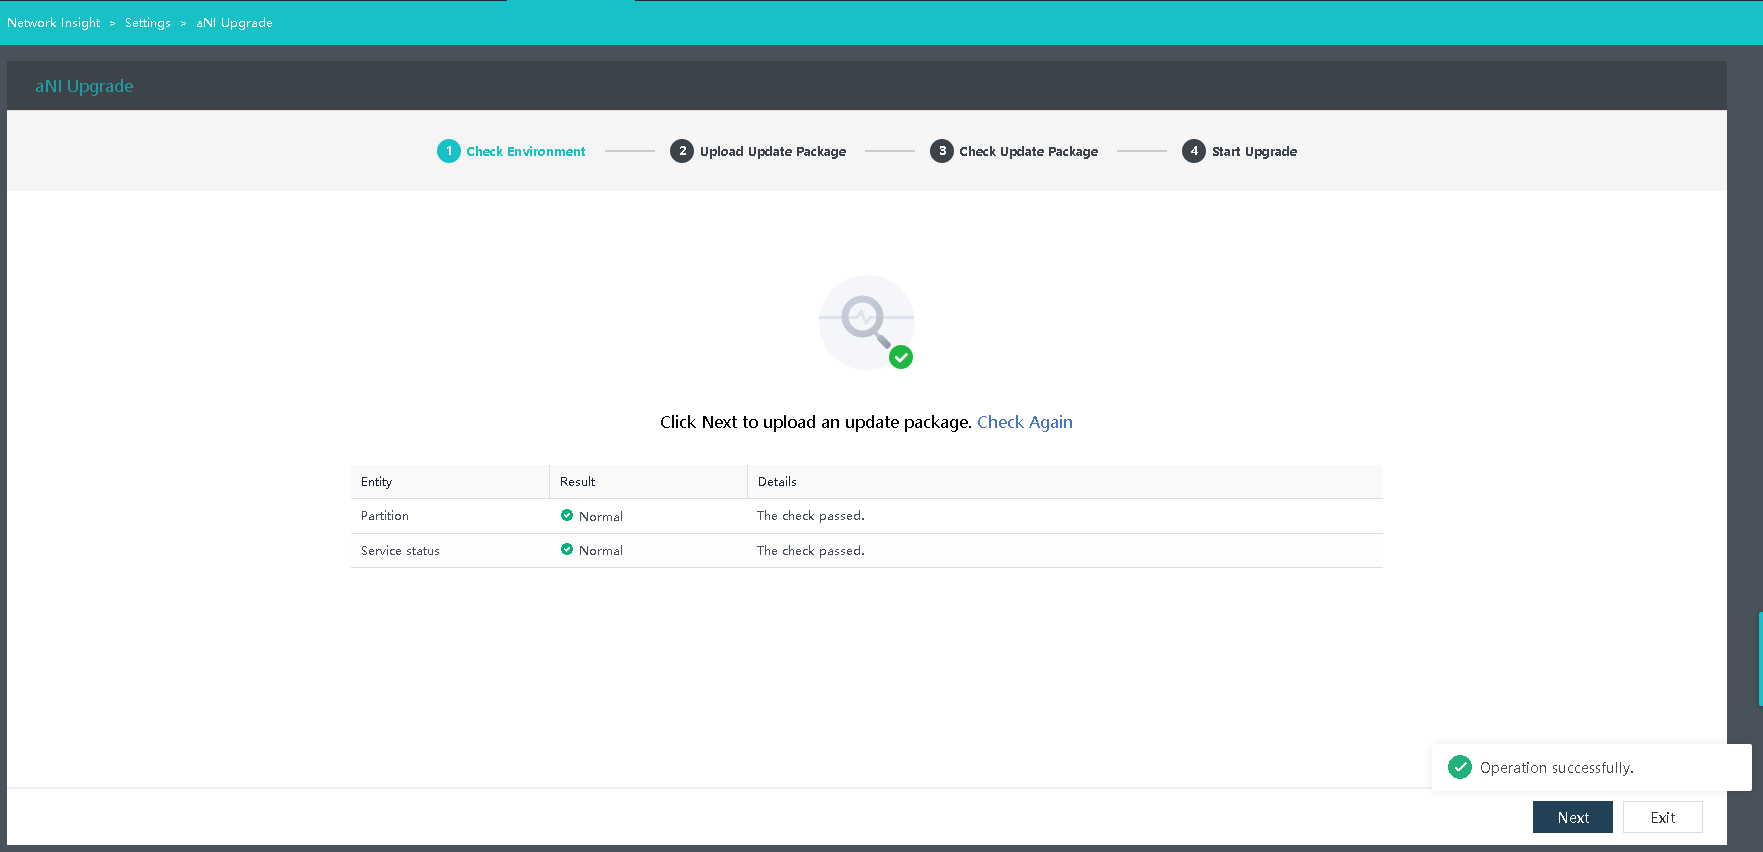
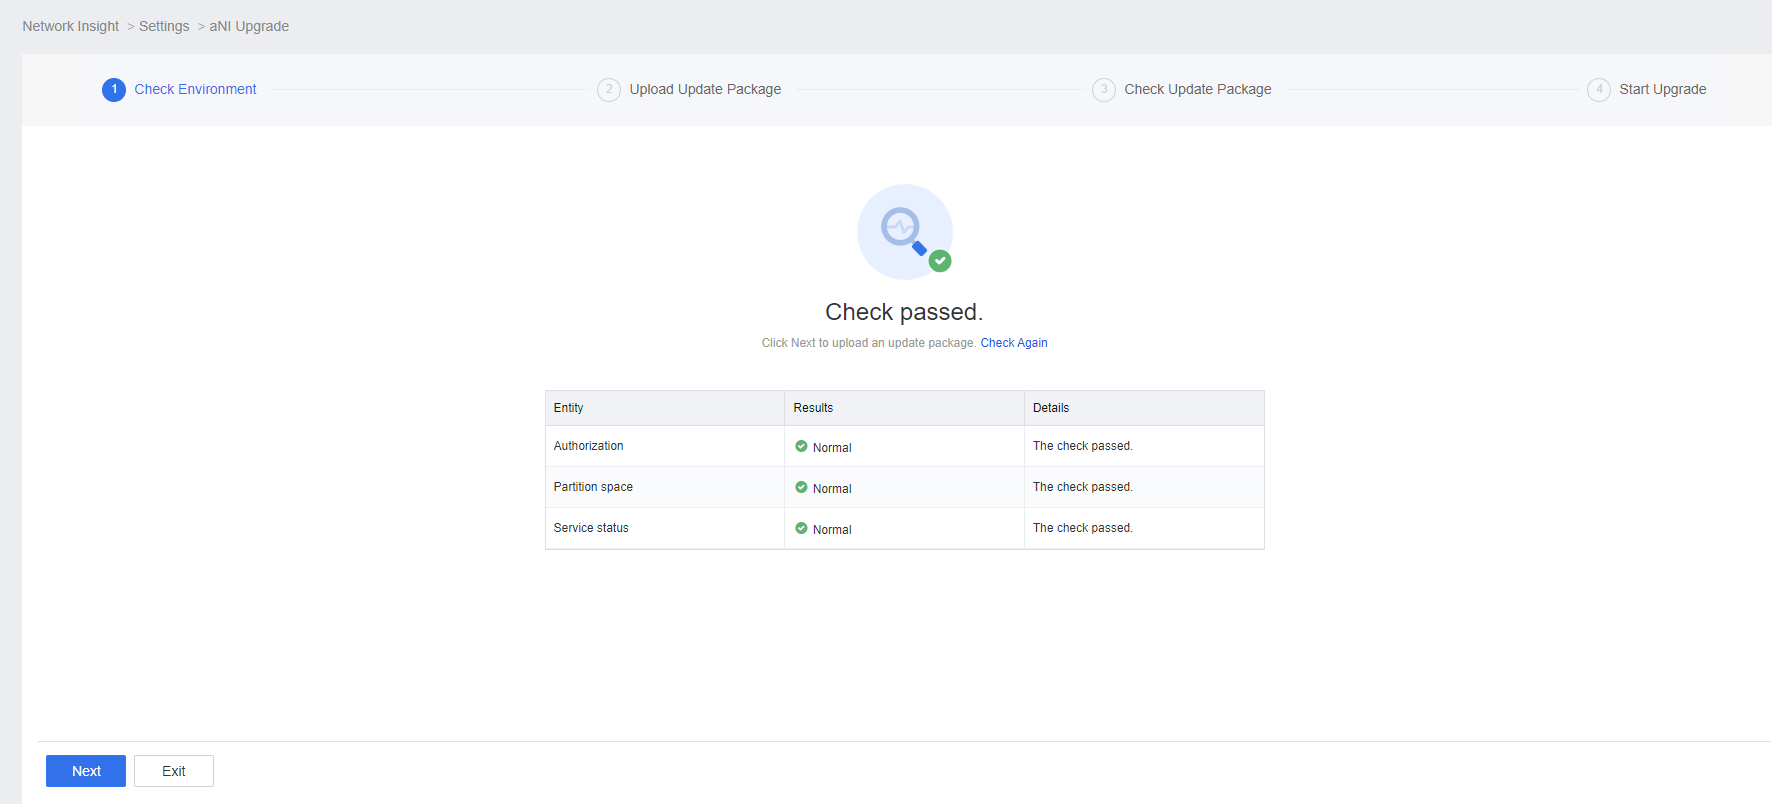
- Go to Networking > Network Insight > Settings > aNI Upgrade and click Upgrade.
-
Wait for the environment check to complete.
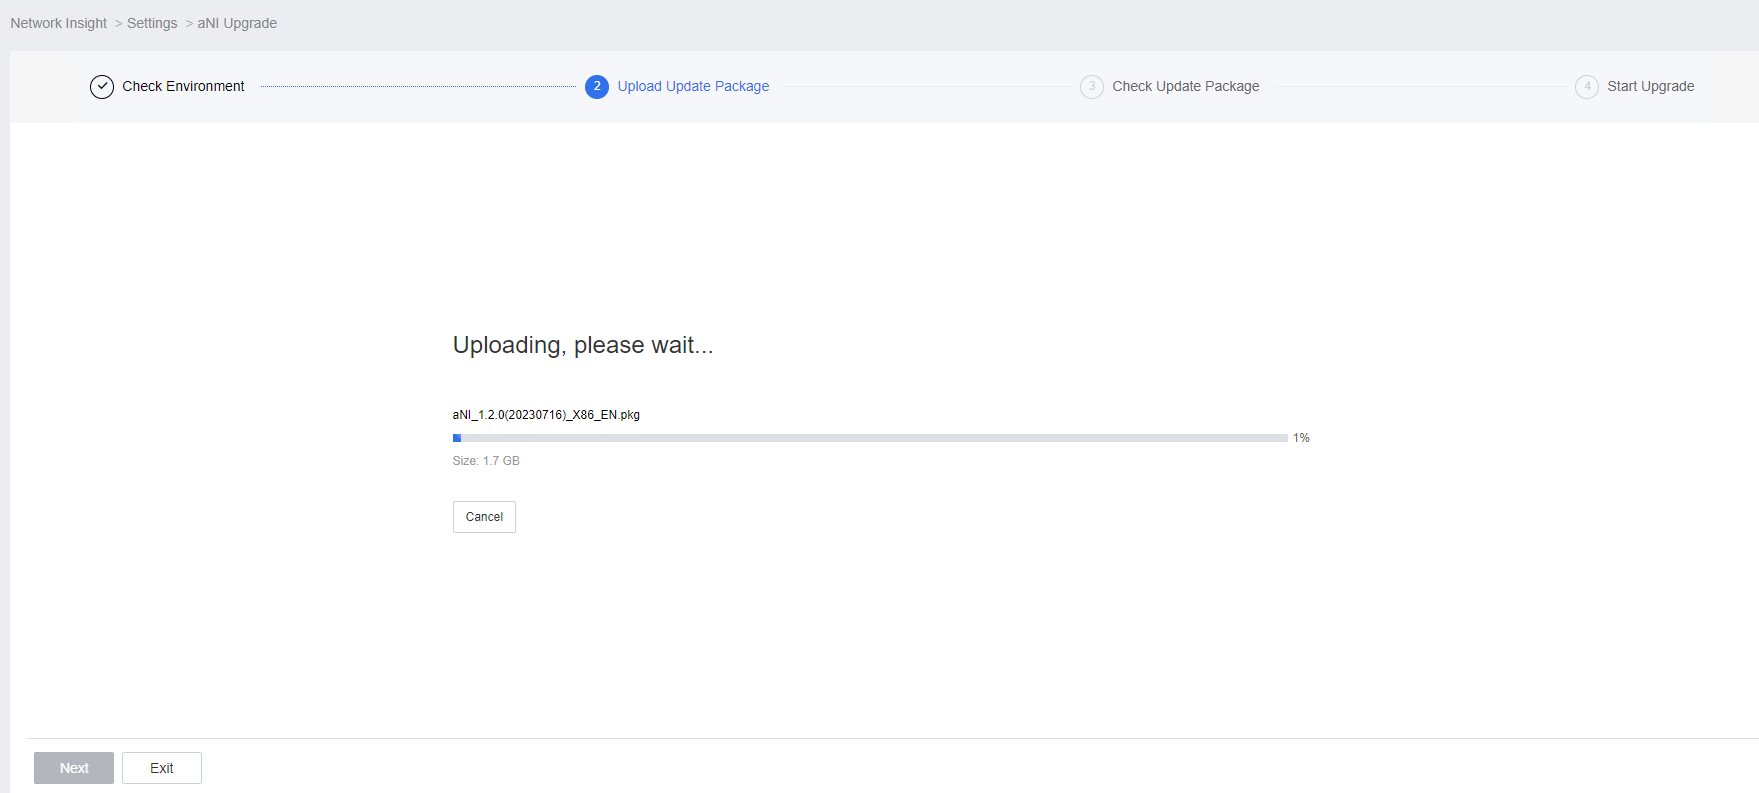
-
Upload the update package.
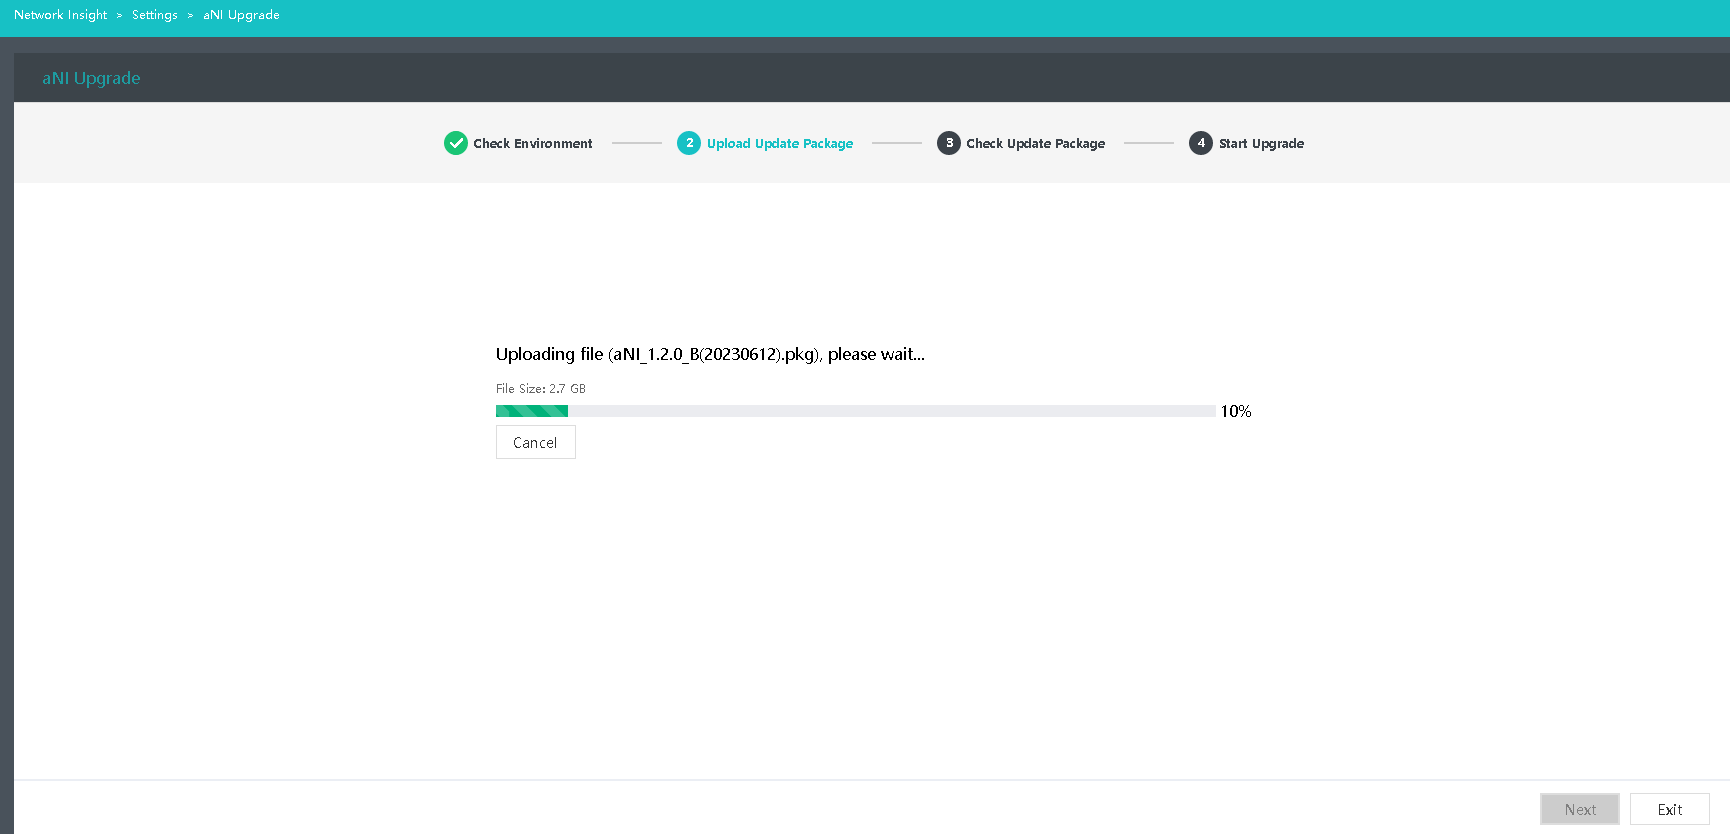
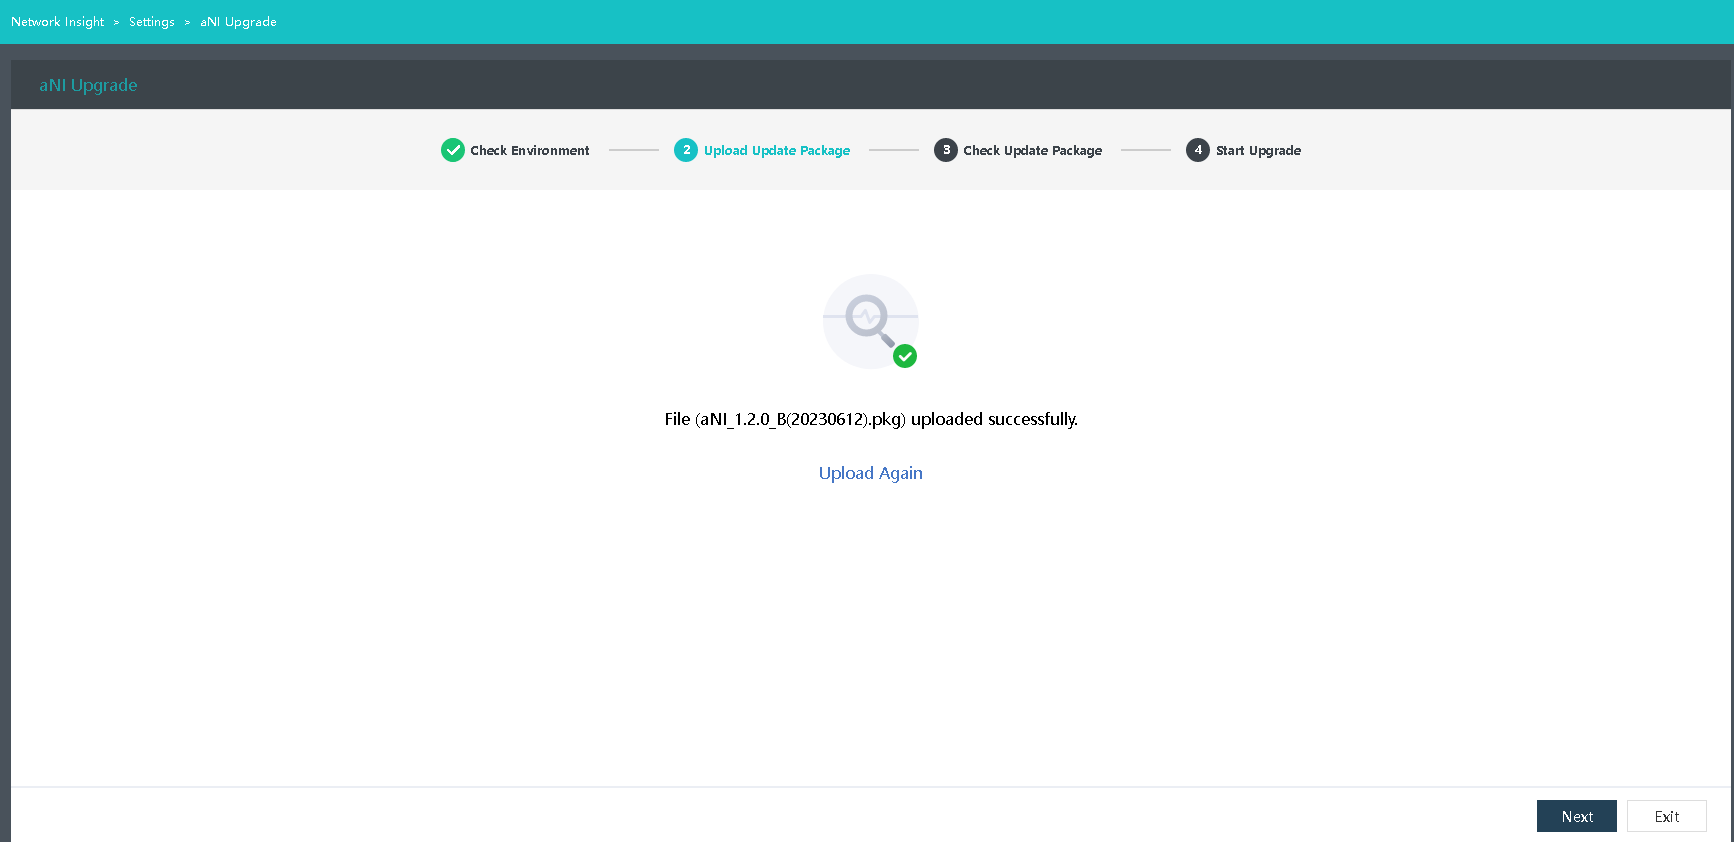
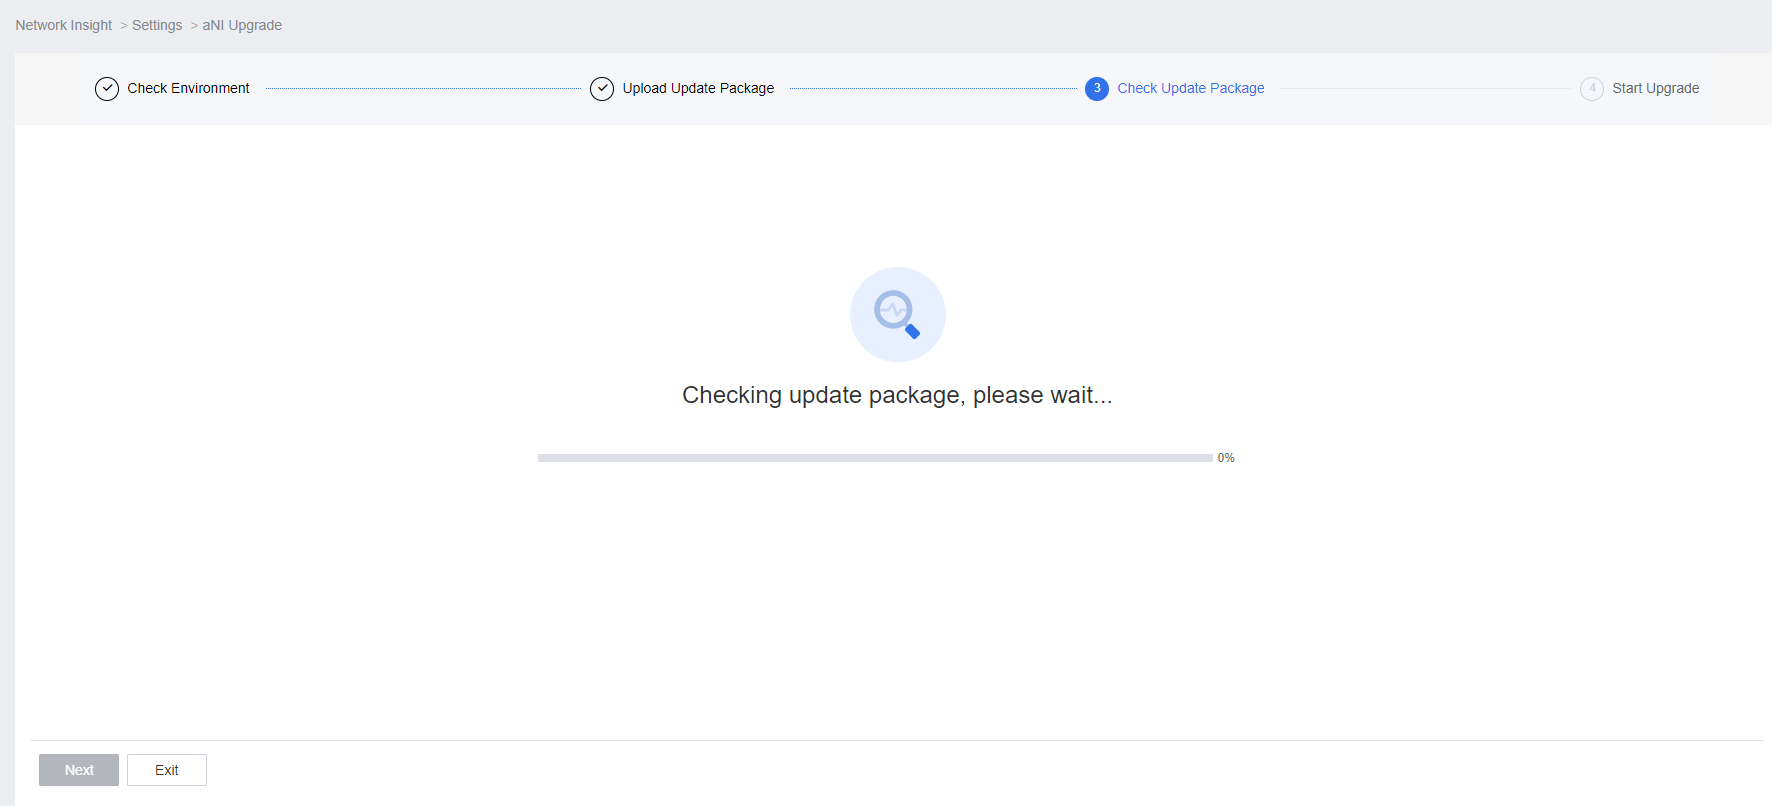
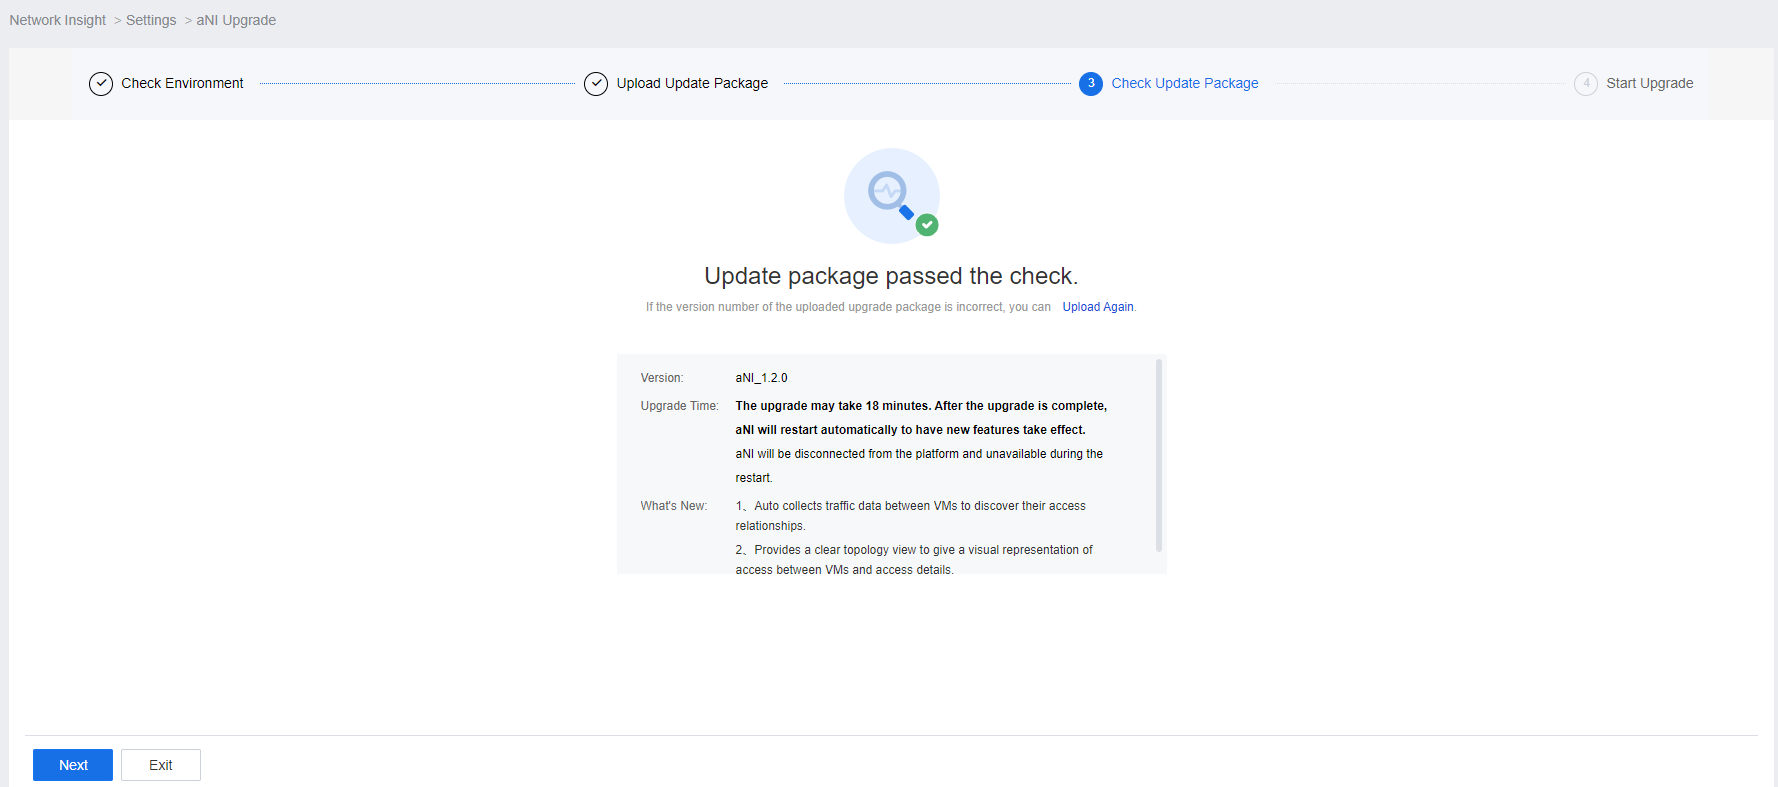
- Wait for the update package check to complete.
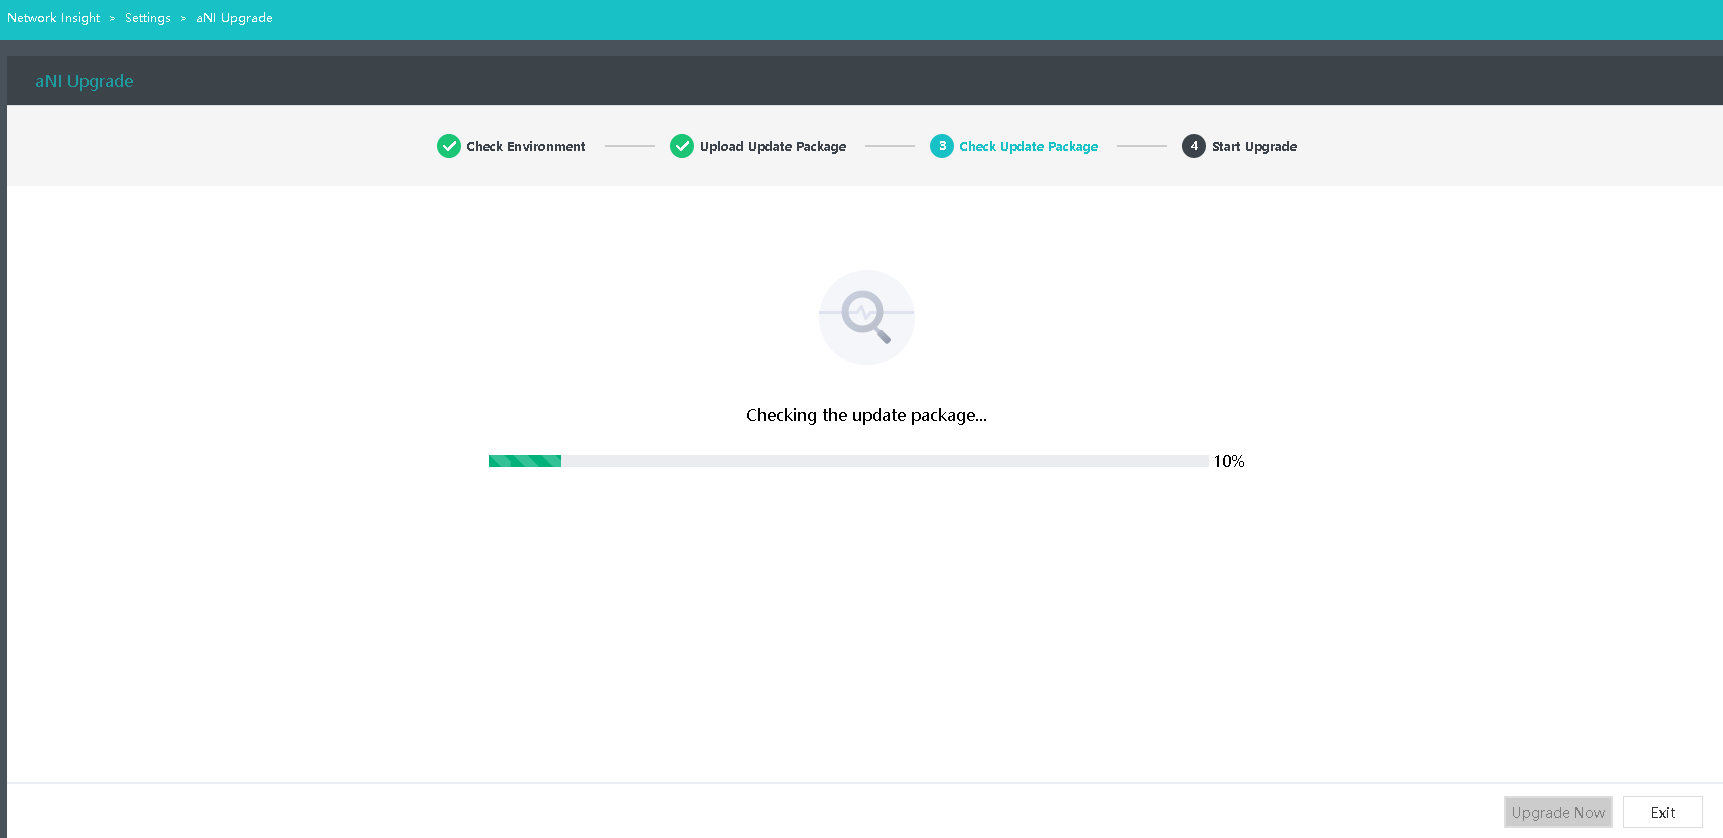
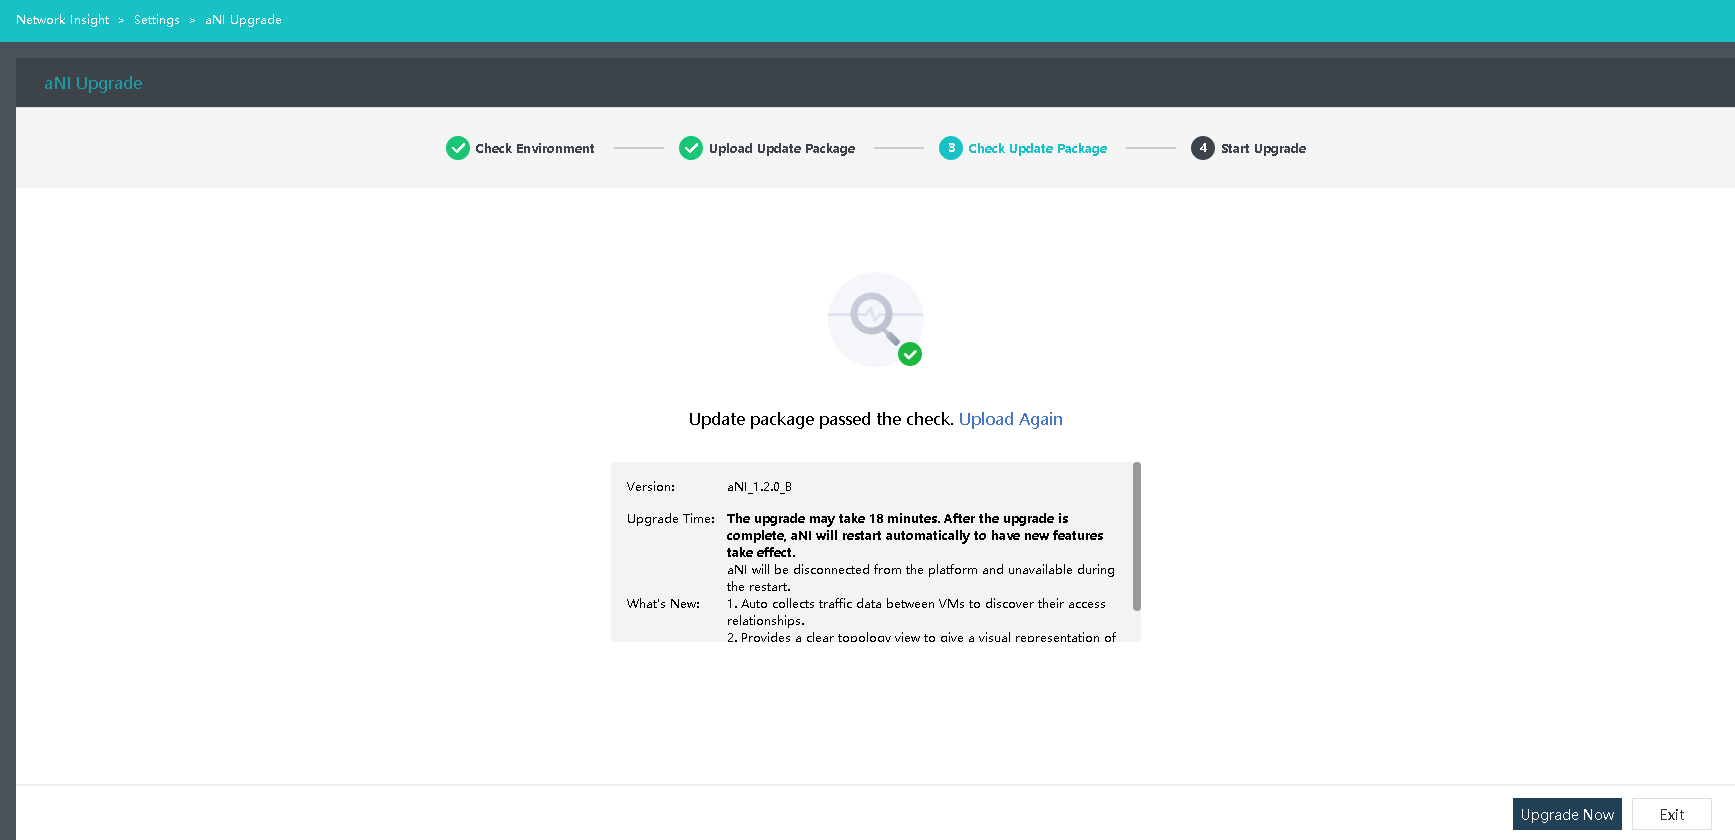
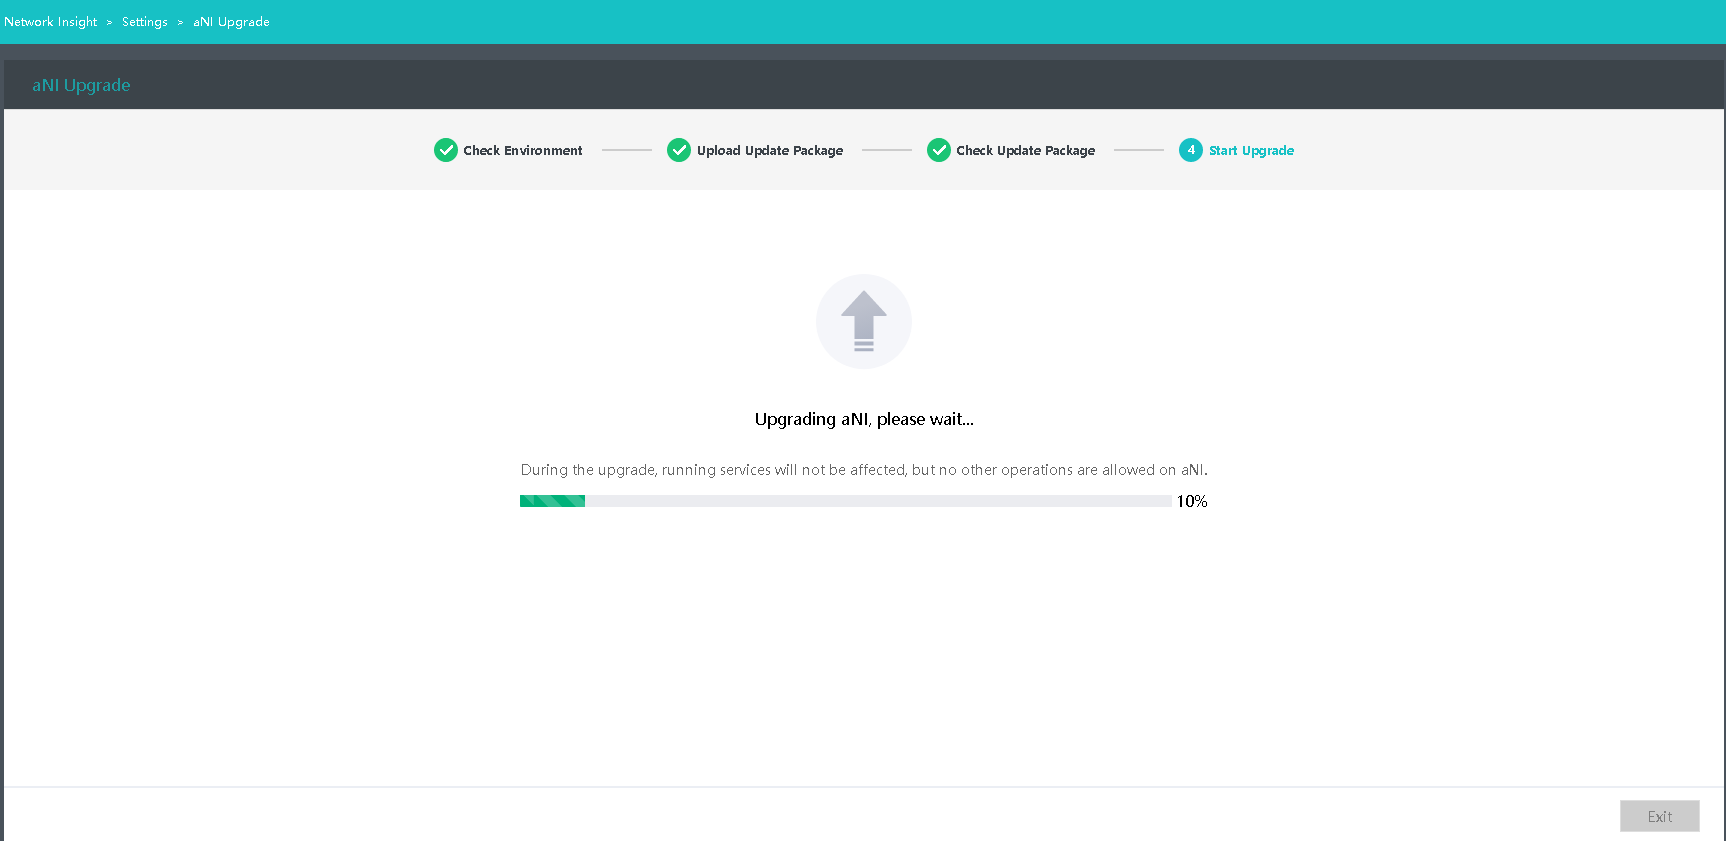
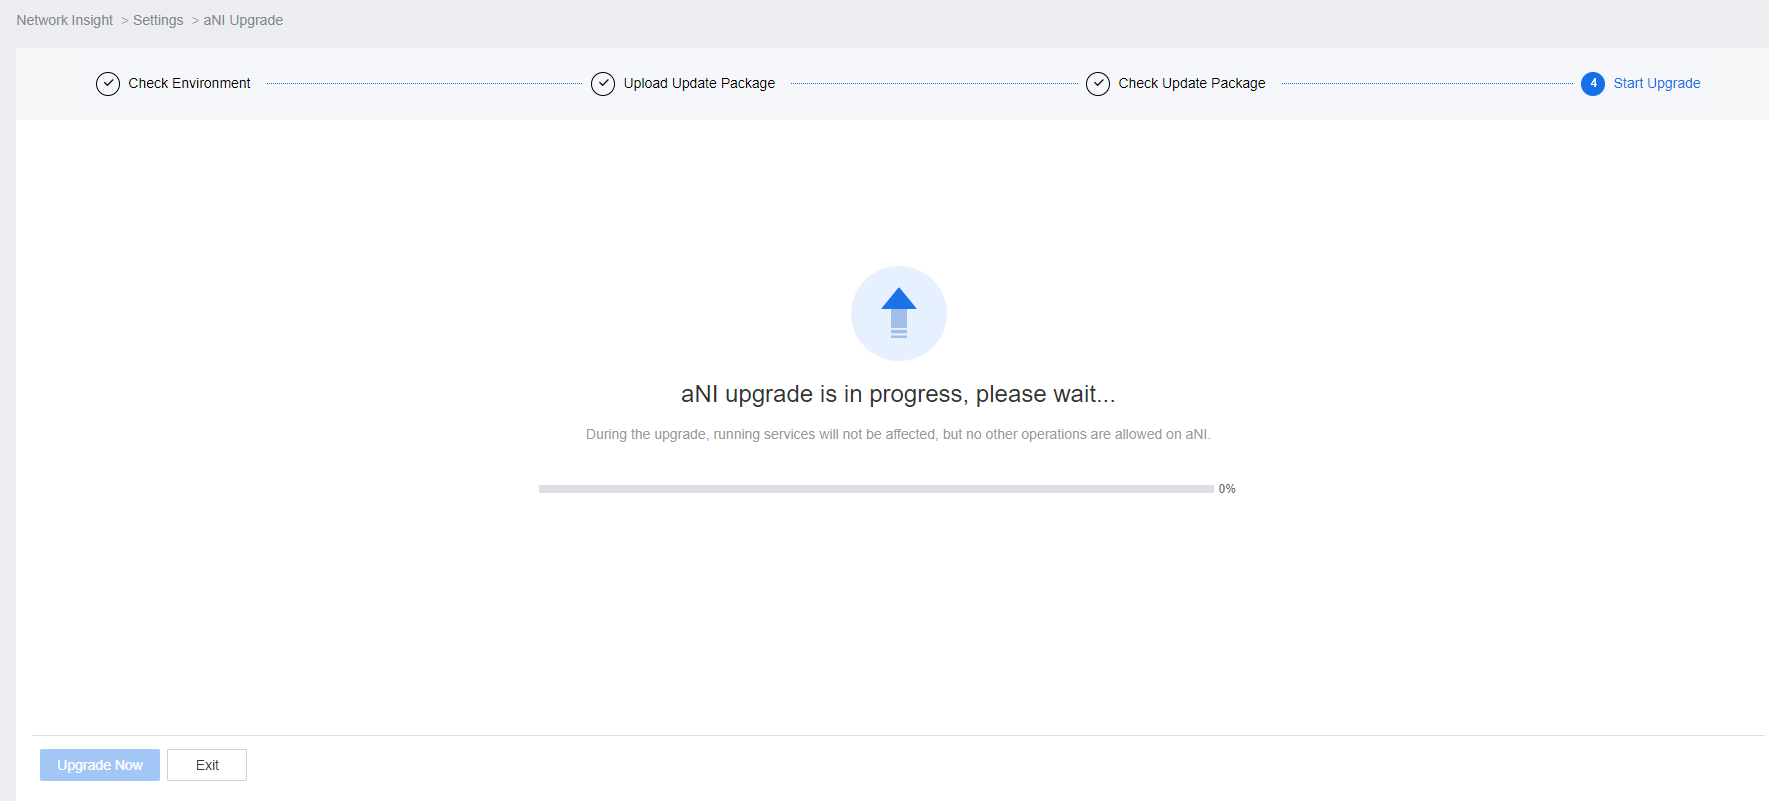
-
Start the upgrade.
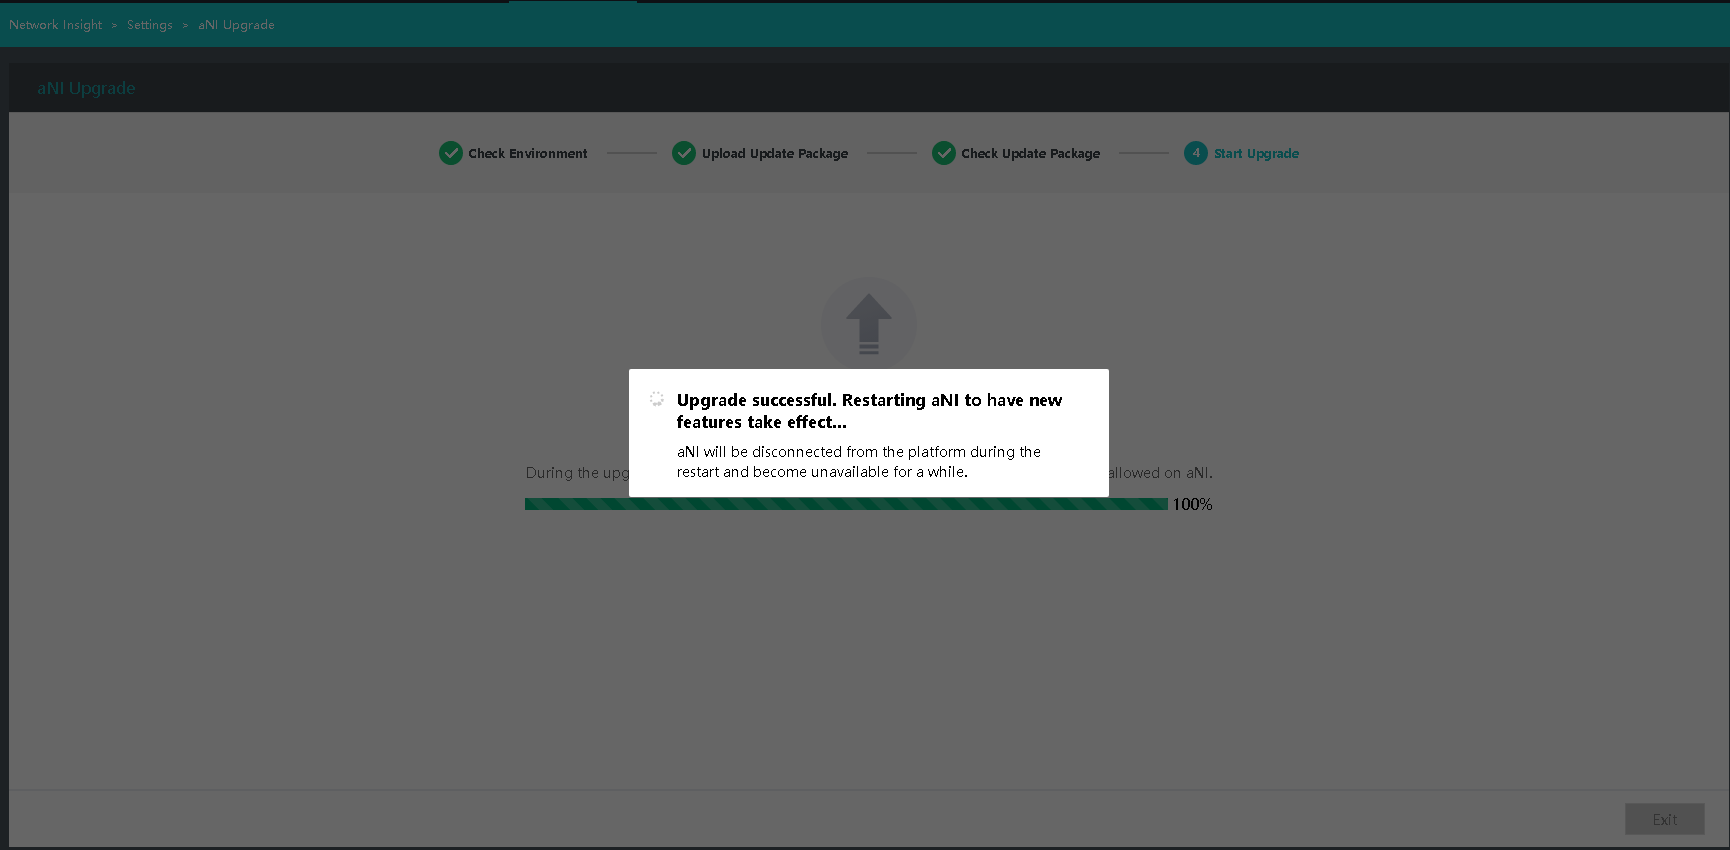
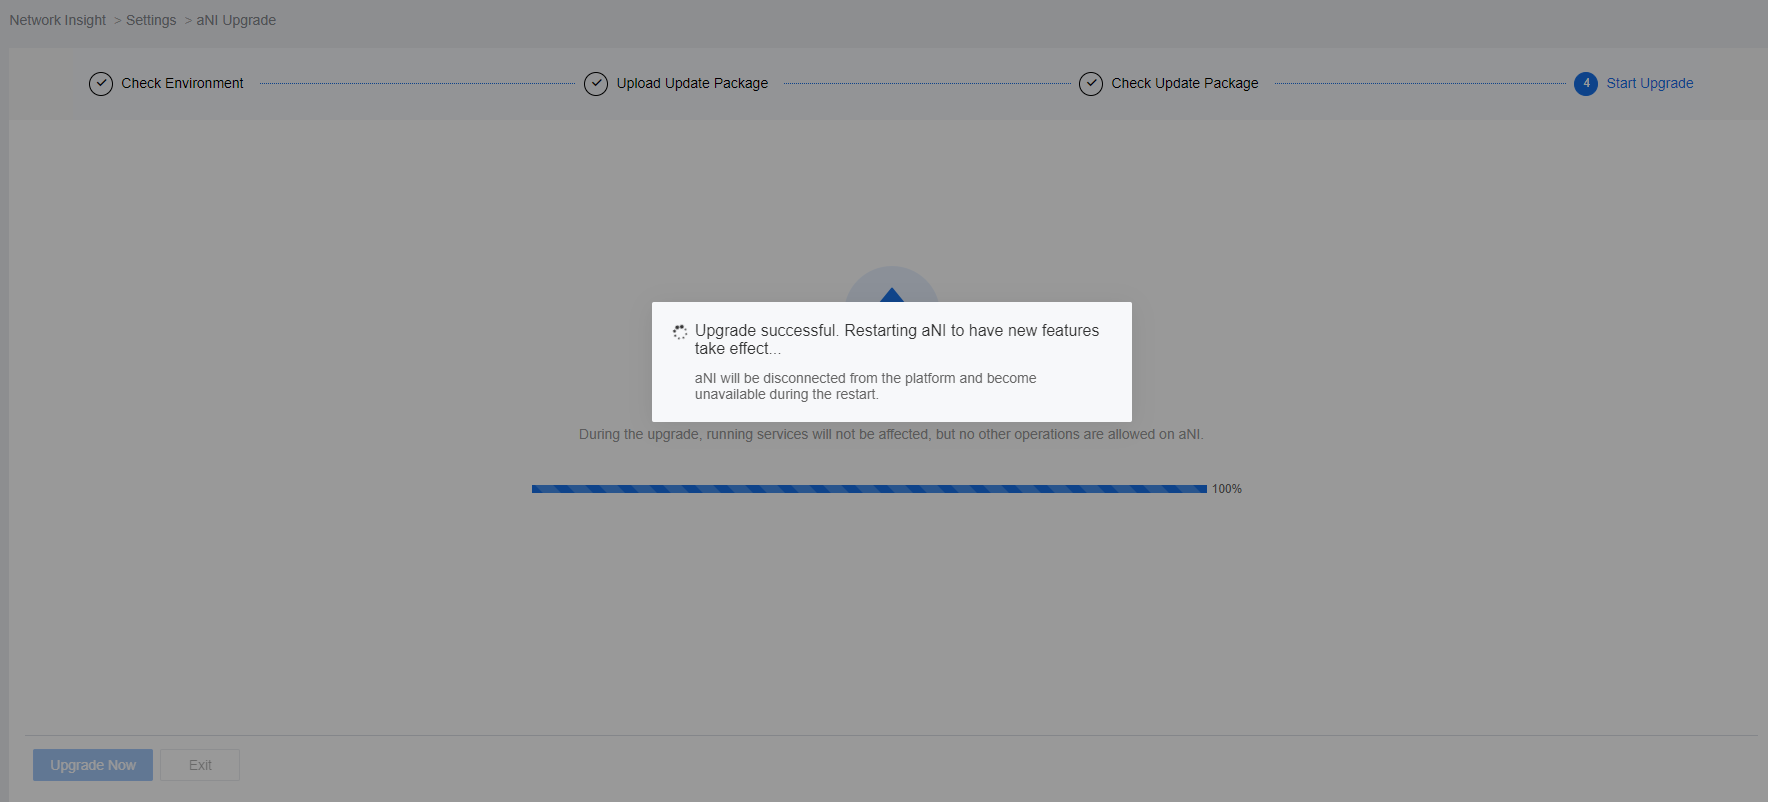
-
Restart aNI.
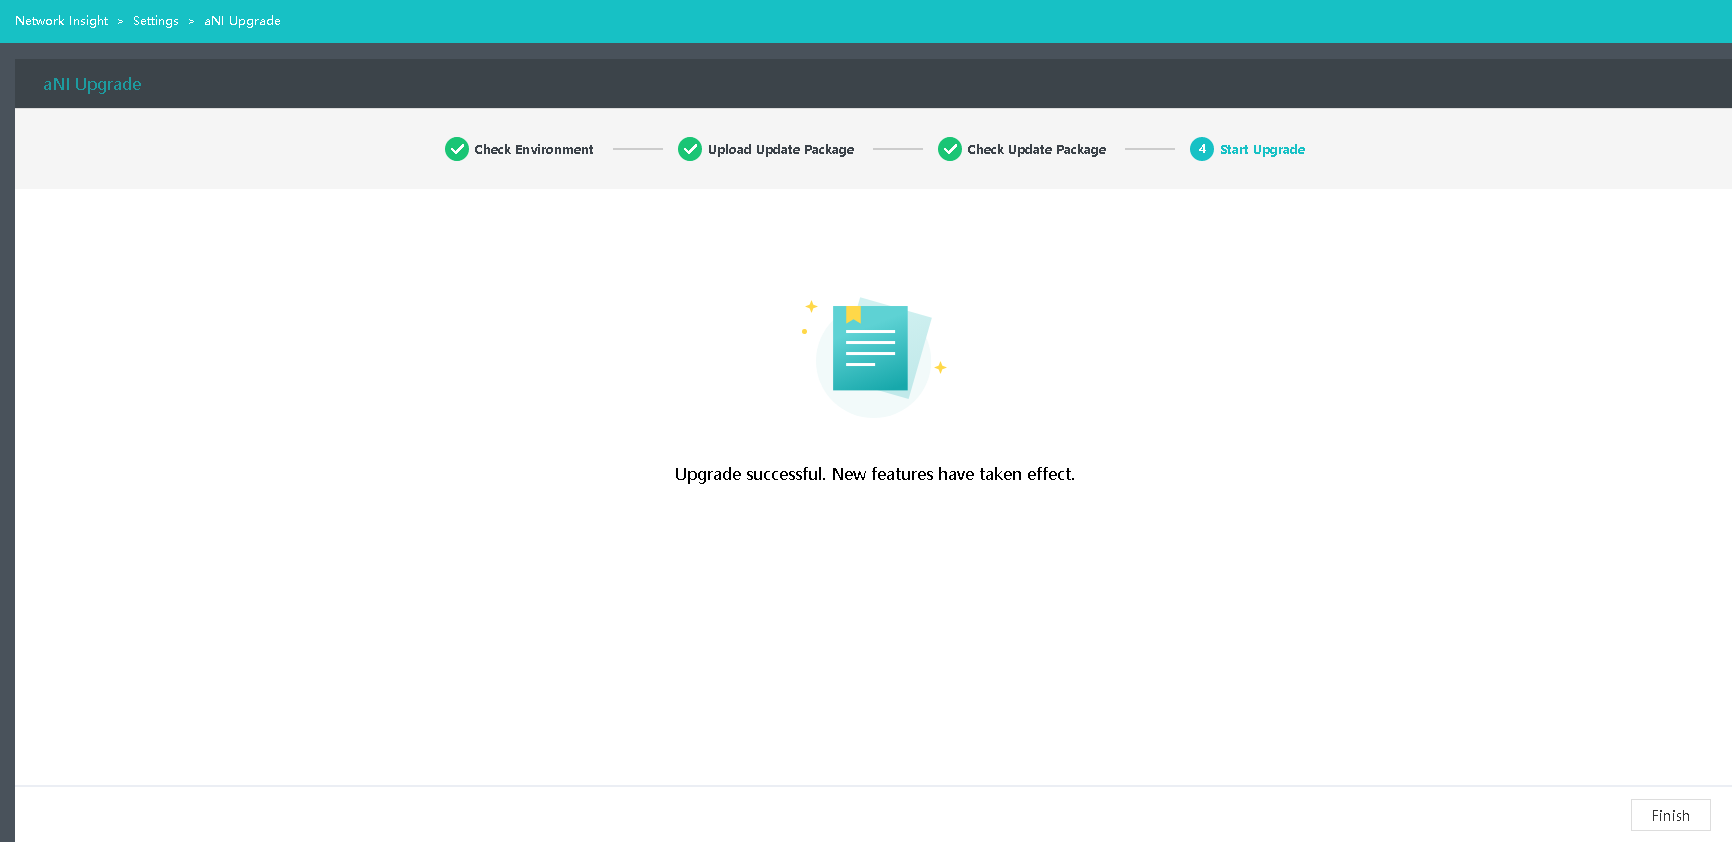
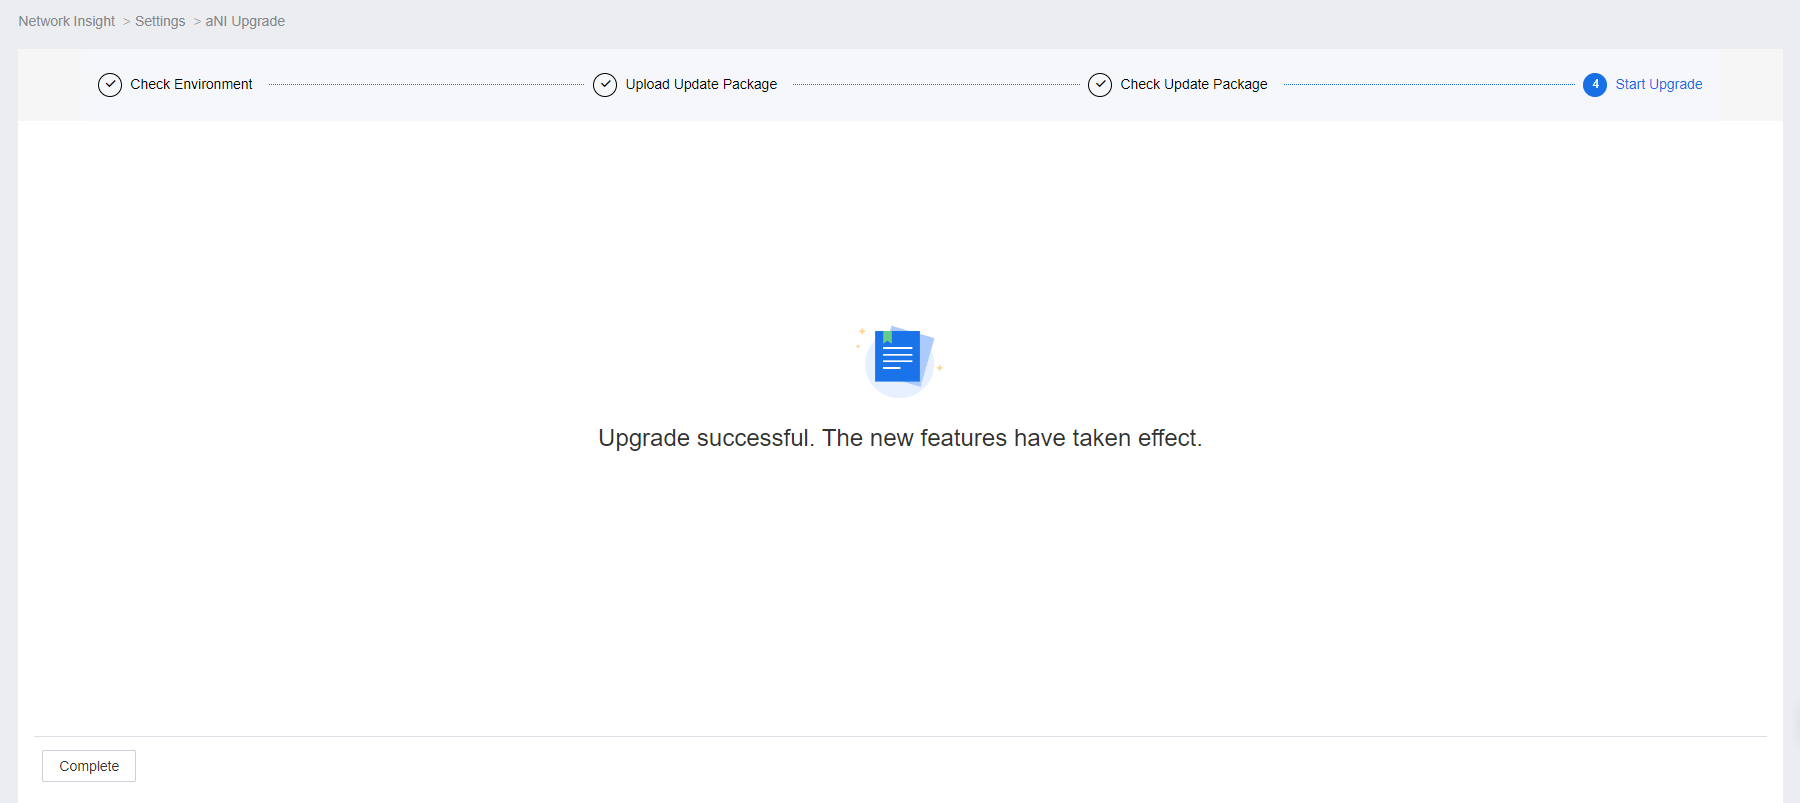
-
The upgrade is complete.
NFV Component Upgrade
Refer to the upgrade guide for corresponding products for the upgrade procedure for NFV components.
Witness Node Upgrade
Please upgrade the witness node before upgrading the stretched cluster or "2+1" cluster environment (skip the following steps if the HCI cluster is non-stretched).
-
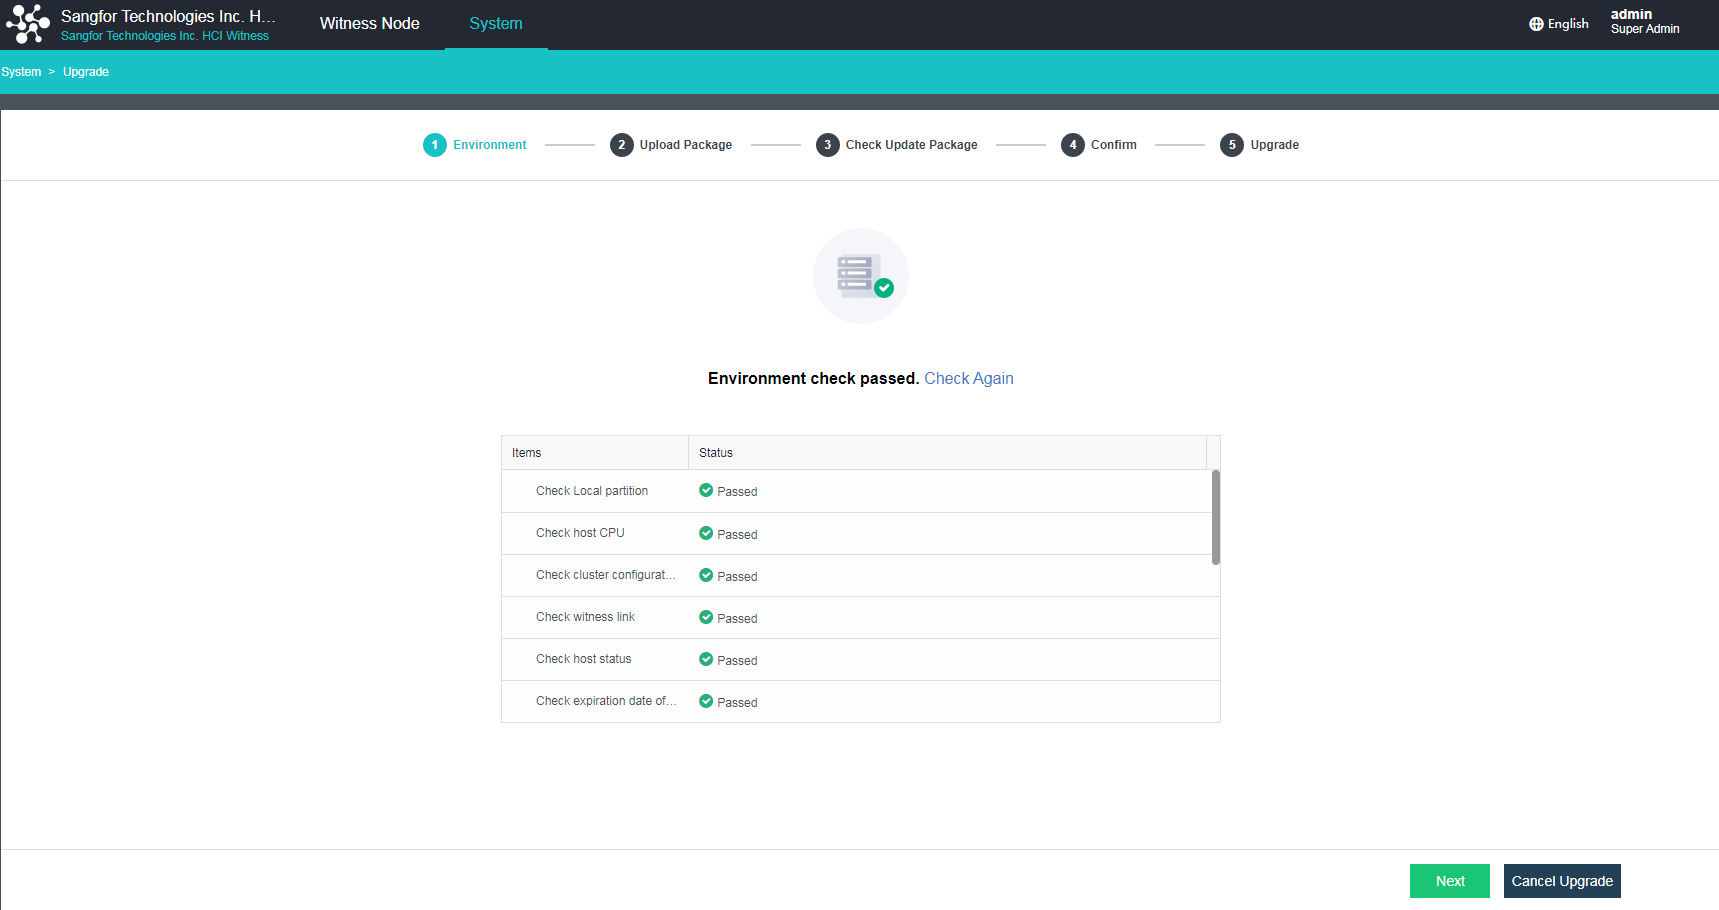
Go to the witness node management page and click Upgrade.
-
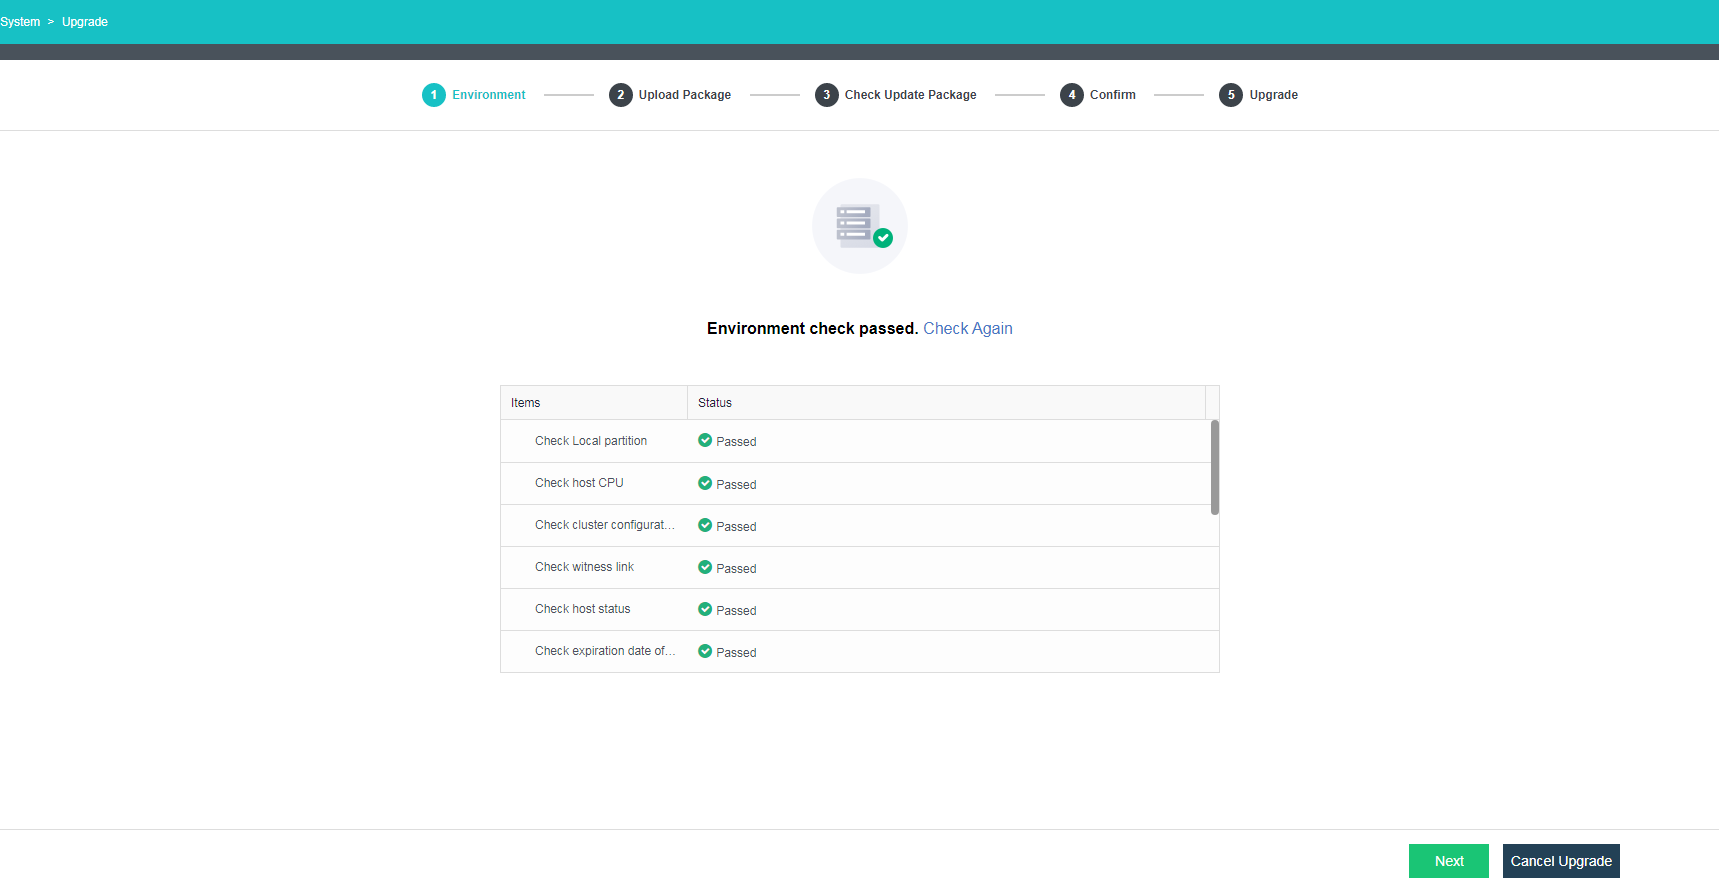
The witness node will enter cluster upgrade mode during the upgrade, and the cluster environment check will be performed.
-
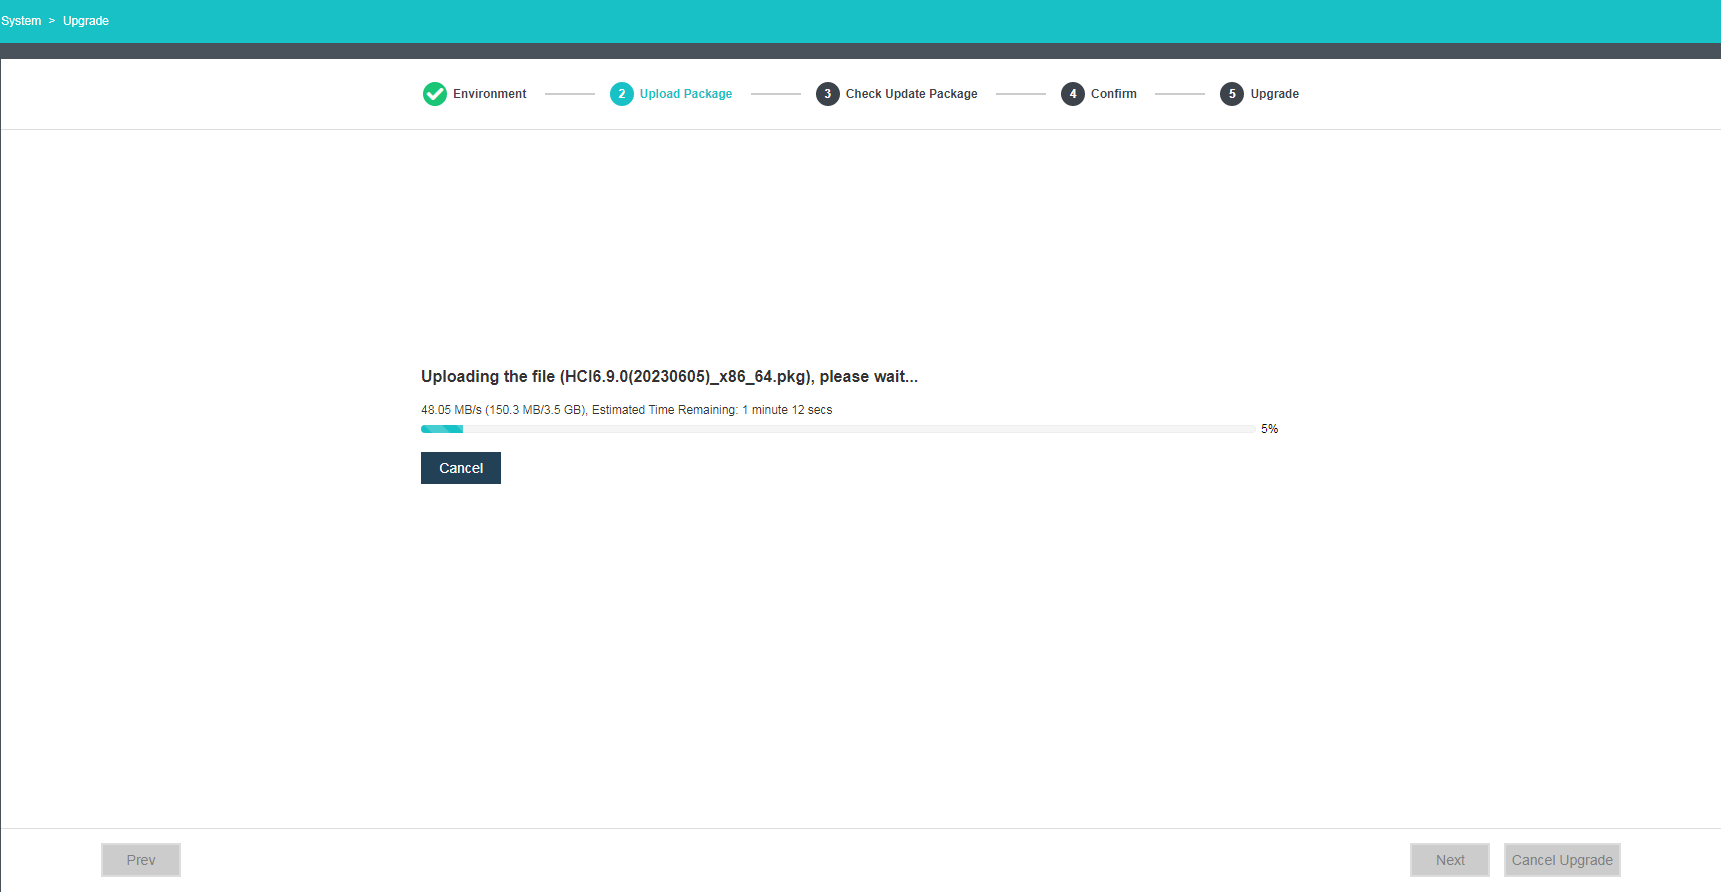
Upload the witness node update package.
-
Check the update package. (If the current version does not support the active upgrade using the update package, click Next to perform an offline upgrade. If the active upgrade is supported, please wait until all checking steps are finished before the upgrade. If any step fails, fix the issues first.)
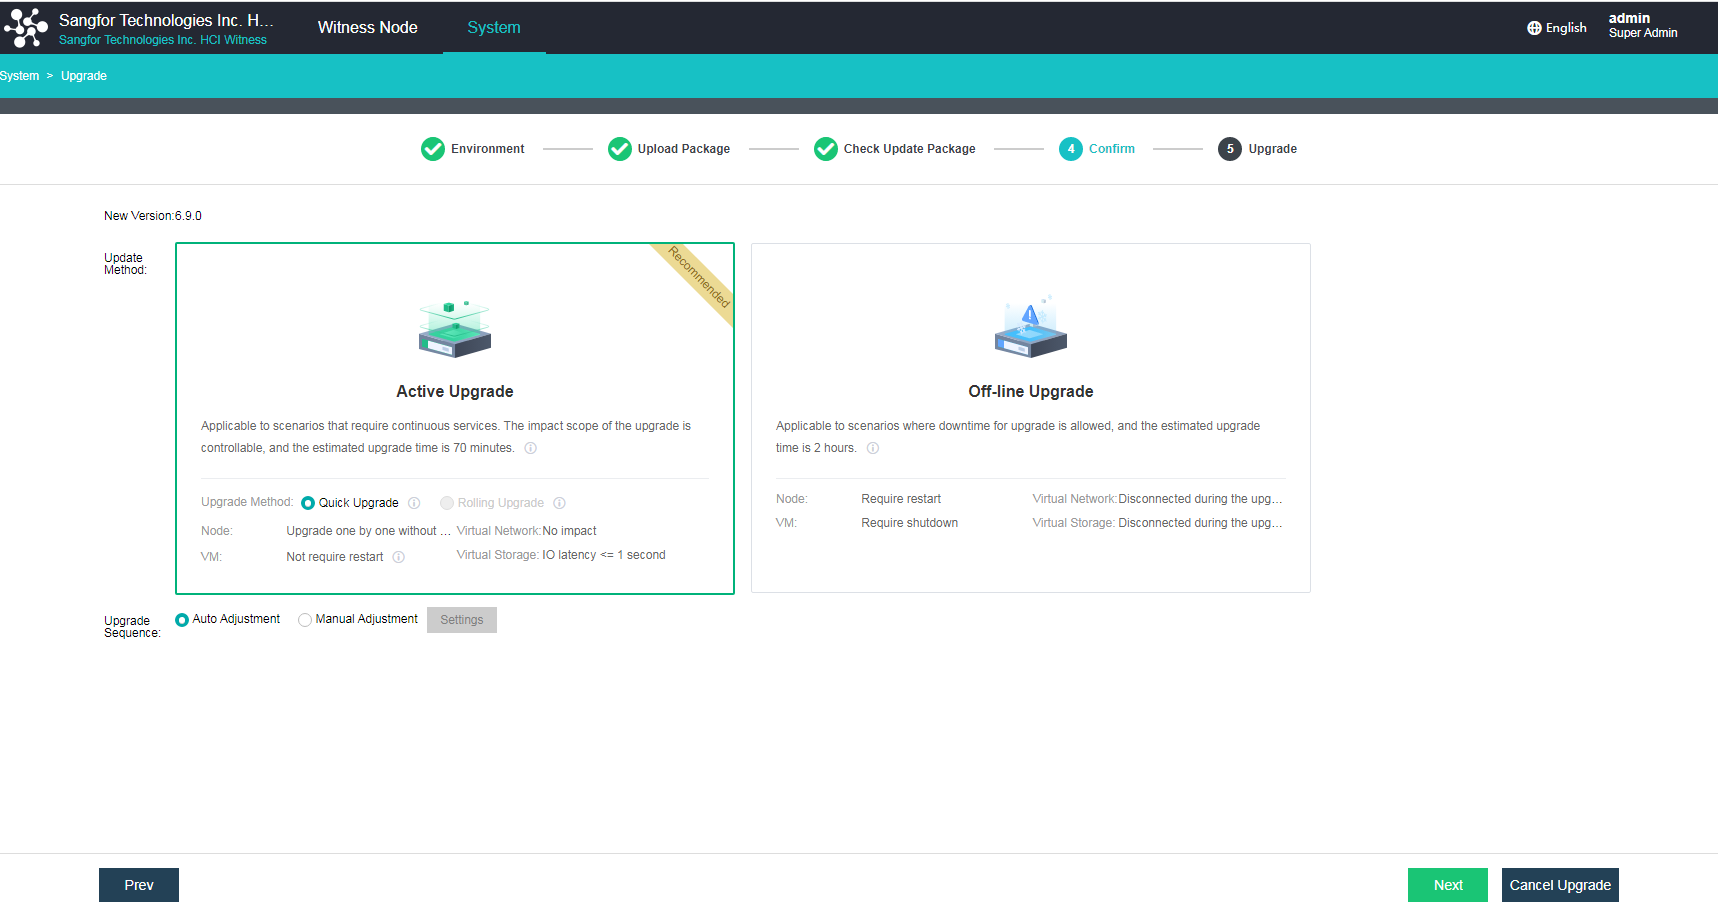
Active Upgrade
- After confirming that the update package is correct, click Next.
-
During the control plane upgrade, you will be logged out. Please wait about 1 minute and then reload the page to log in again.

-
The upgrade is complete.
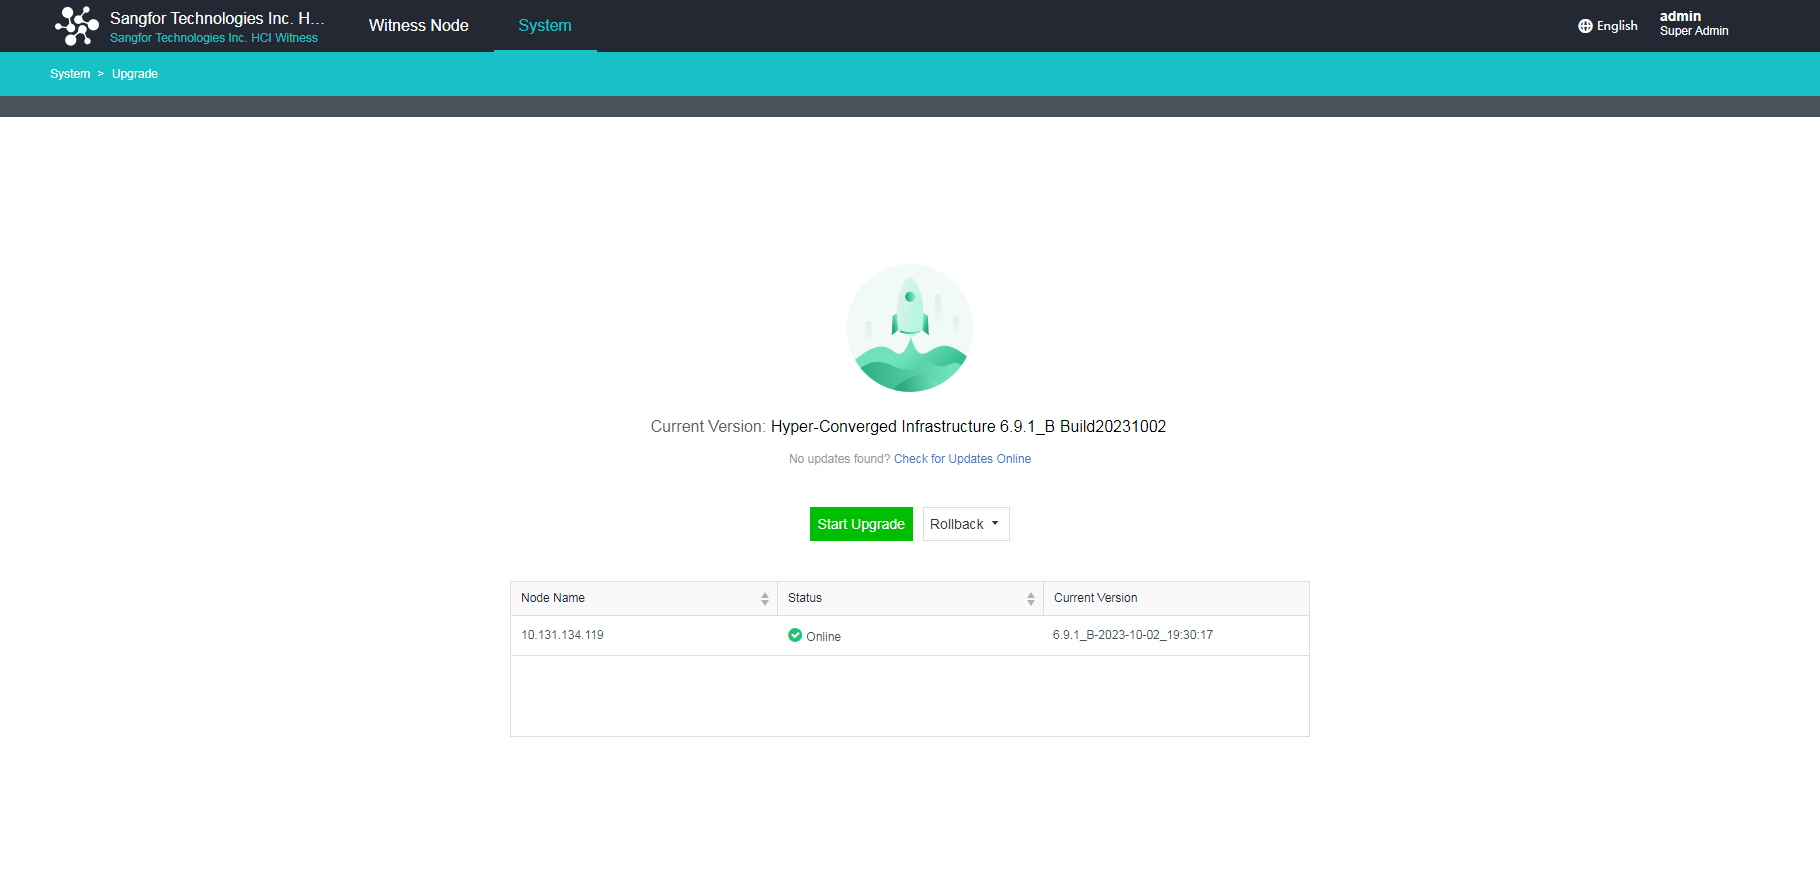
-
Check that the current version is the latest version.
After the upgrade, please wait for the background of the witness node to take effect before upgrading other nodes in the cluster.
Offline Upgrade
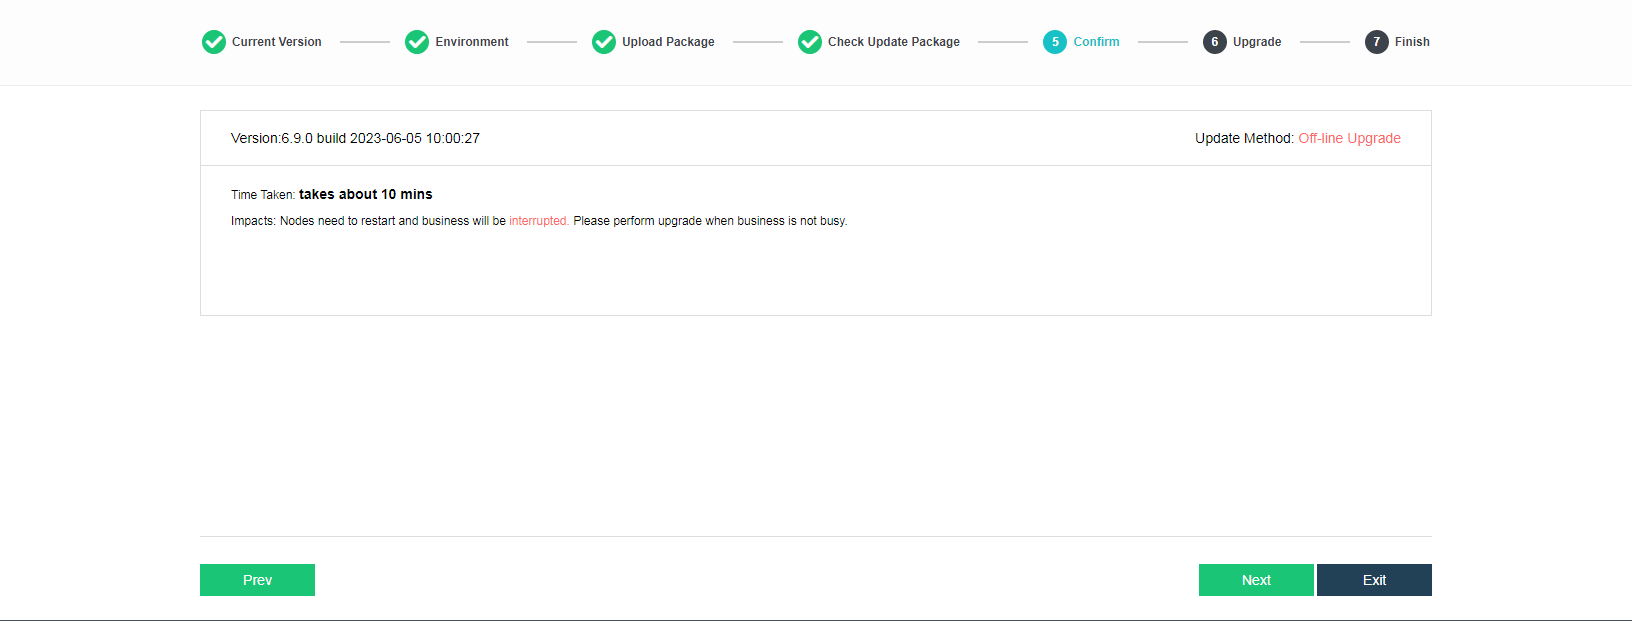
- After confirming that the update package is correct, click Next.
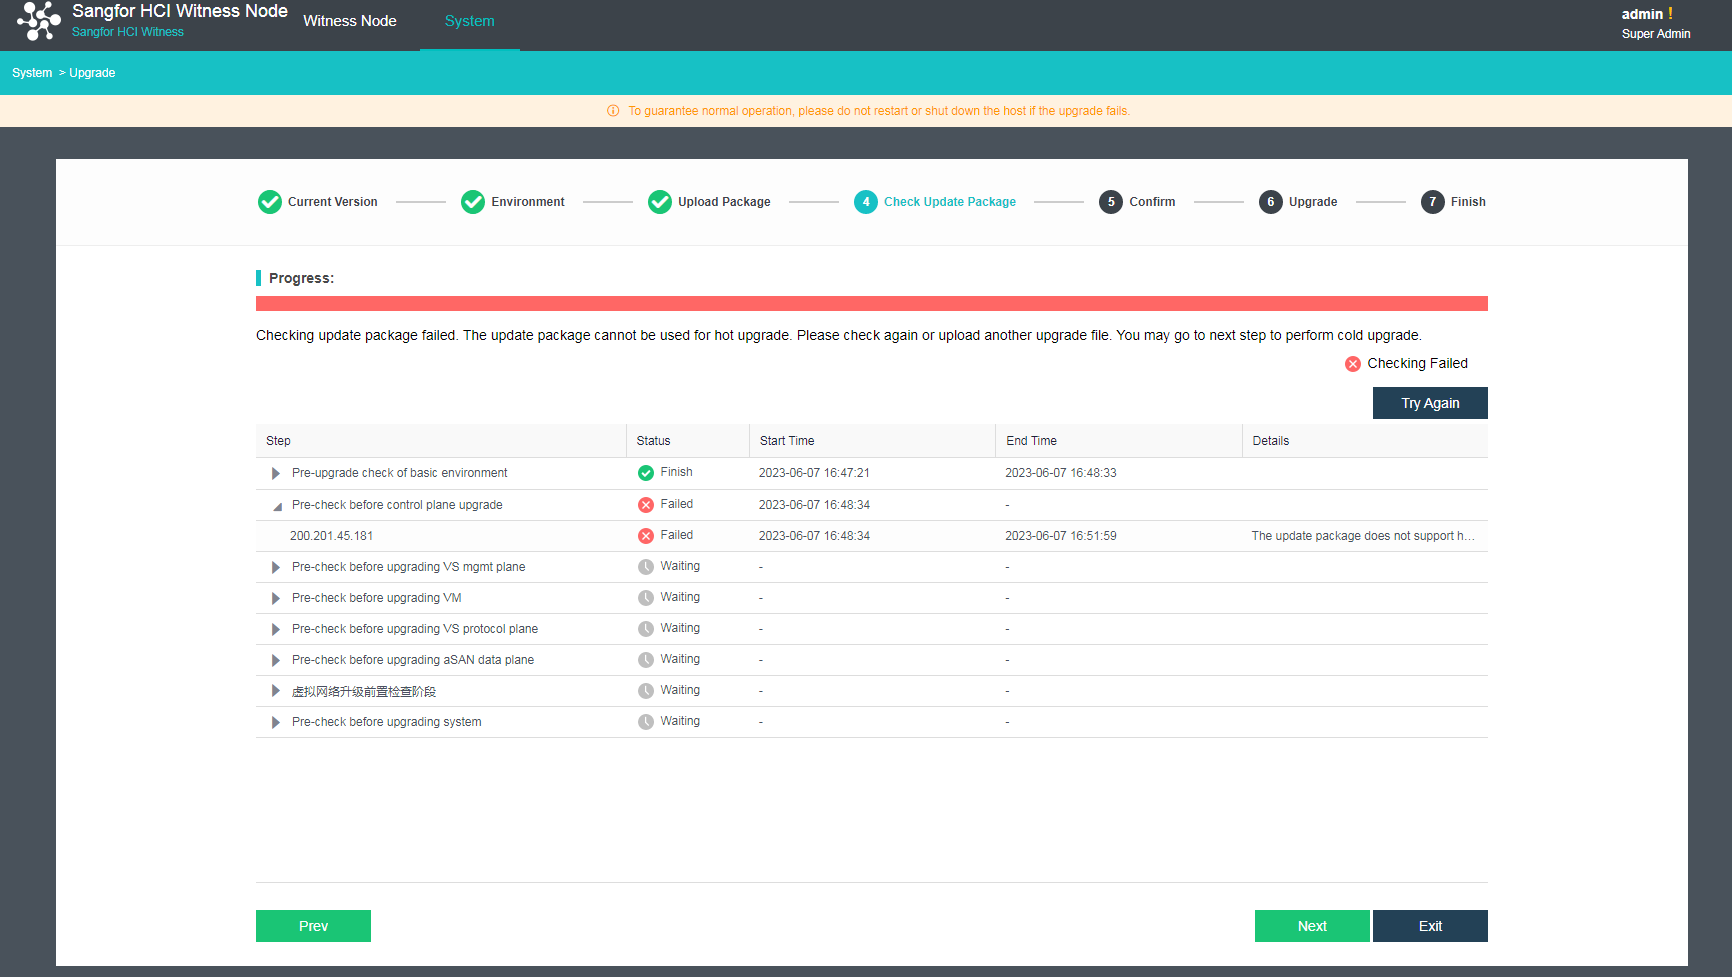
-
The offline upgrade requires all nodes to be restarted, which will cause business service interruption.

-
Click Next to start the upgrade.

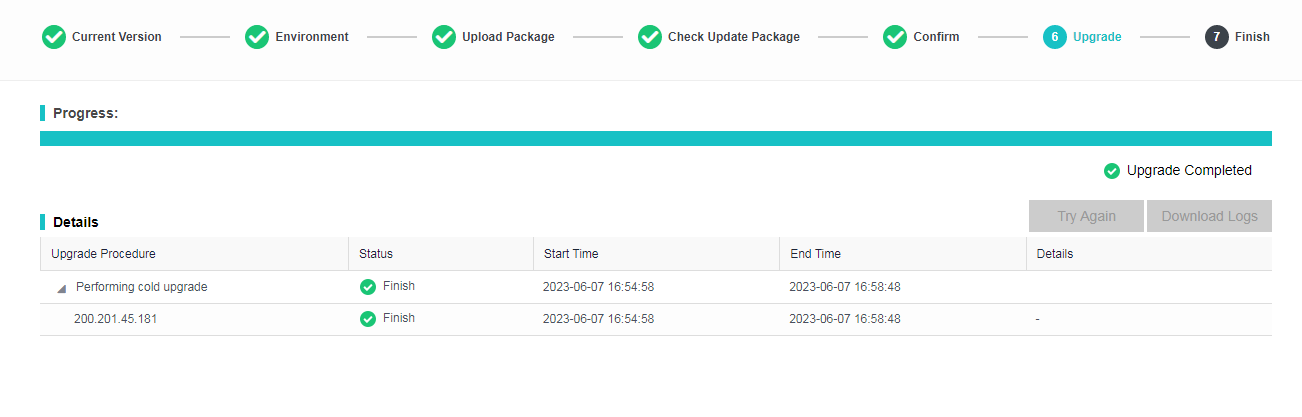
-
The progress of the upgrade is shown in the figure below.

-
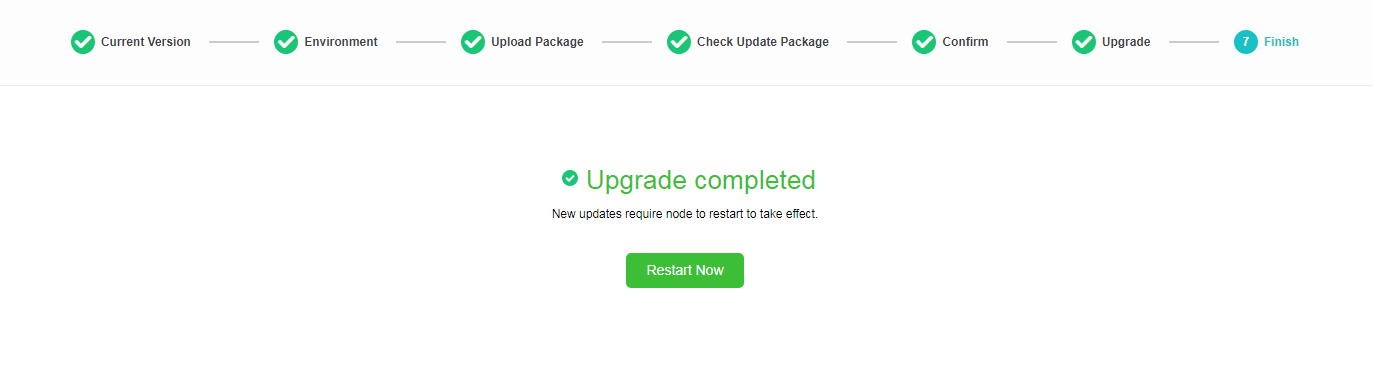
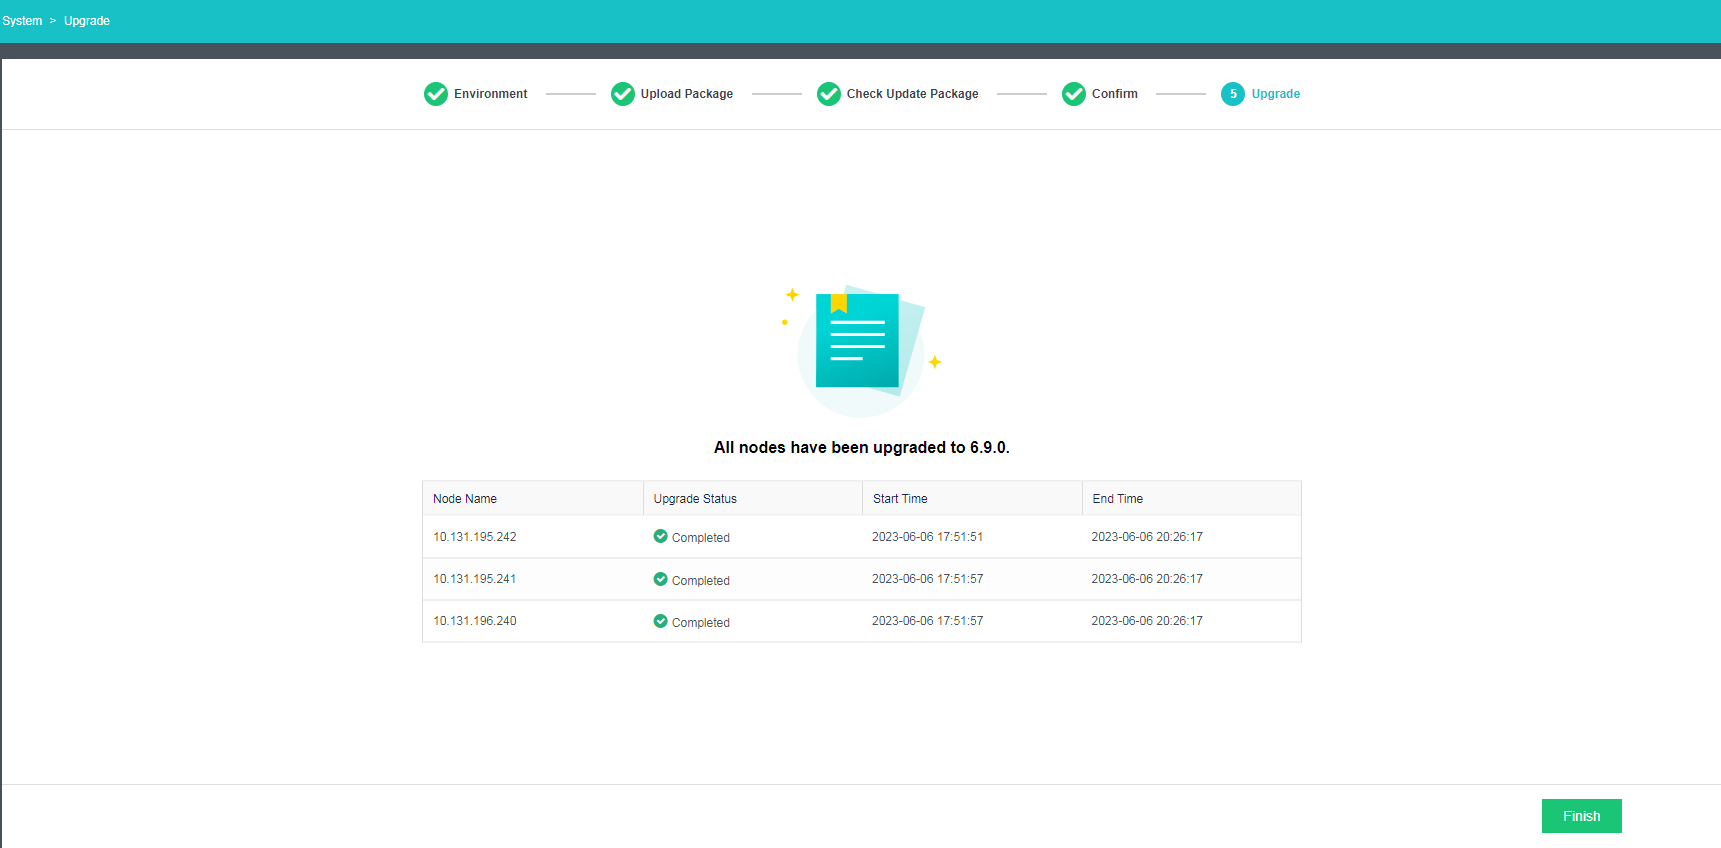
The upgrade is complete.
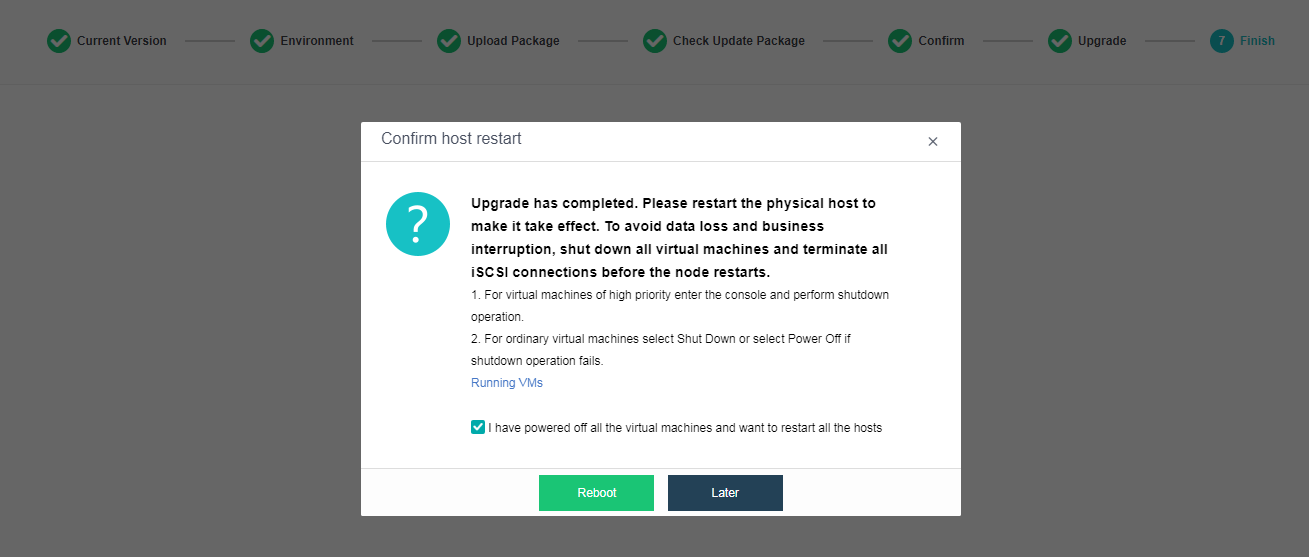
-
Restart the nodes.

Notice:
After the offline upgrade of the witness node is complete and the witness node is restarted, its status will still be displayed as offline. It is because the version of the witness node is inconsistent with other nodes in the cluster. To solve this problem, please upgrade other nodes.
HCI Upgrade
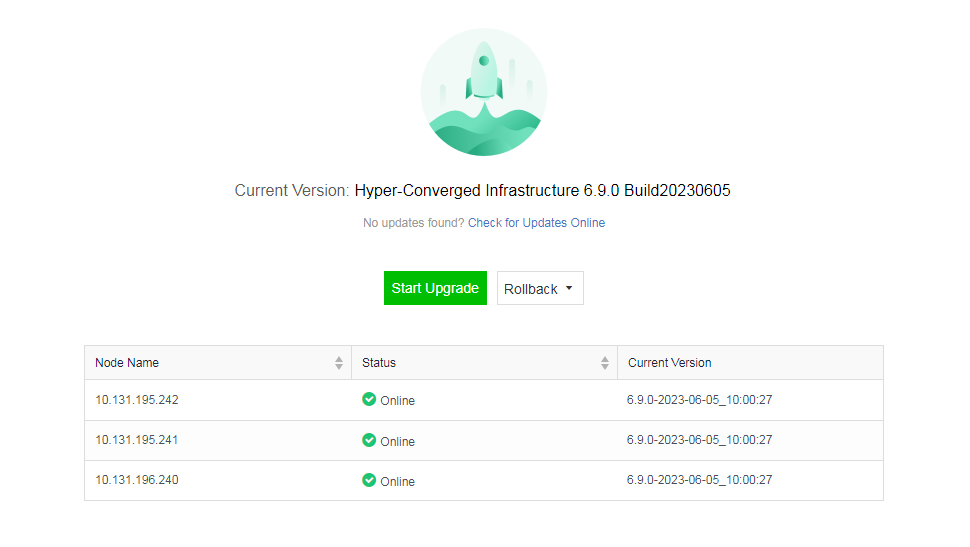
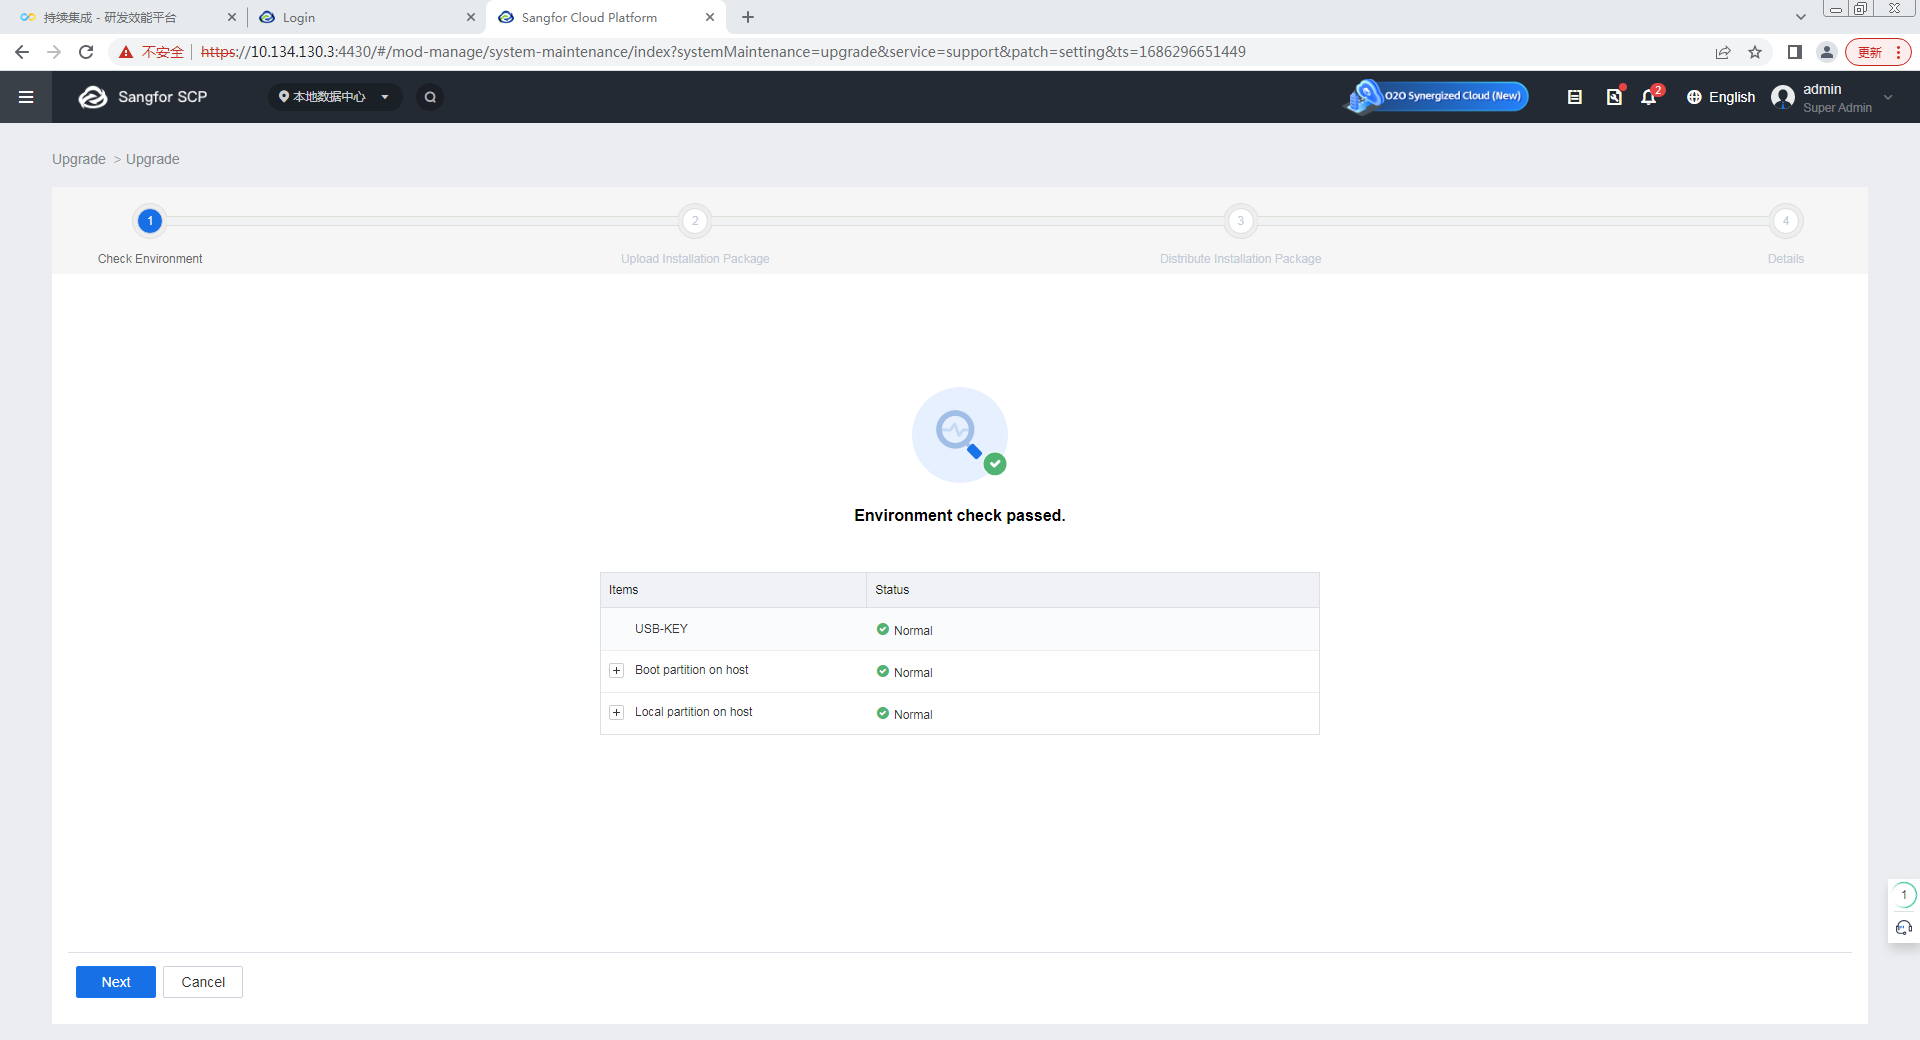
- Use aDeploy to perform the pre-upgrade check and install the pre-upgrade check package (see Chapter 1.2.4.3 HCI Pre-Upgrade Check), then go to System > Upgrade and click Start Upgrade. The cluster will enter Maintenance Mode and run the environment check.

Notice:
After the pre-upgrade check package is installed, a suffix will be displayed in Current Version, as shown in the figure above.
- Click Start Upgrade. The environment check starts.
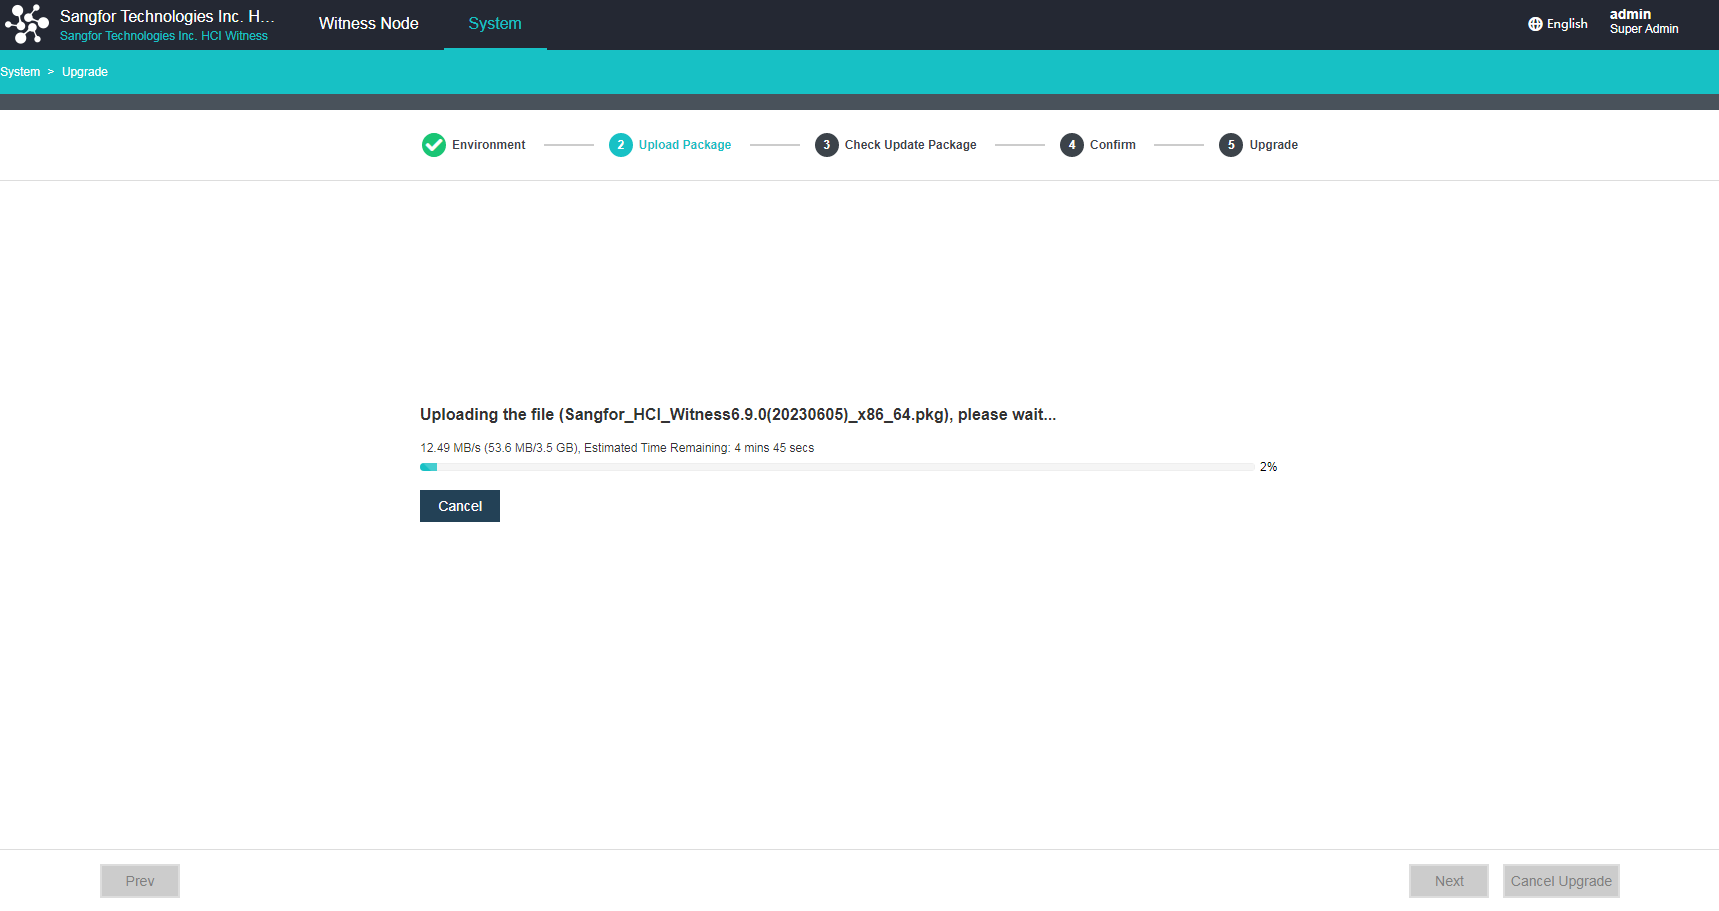
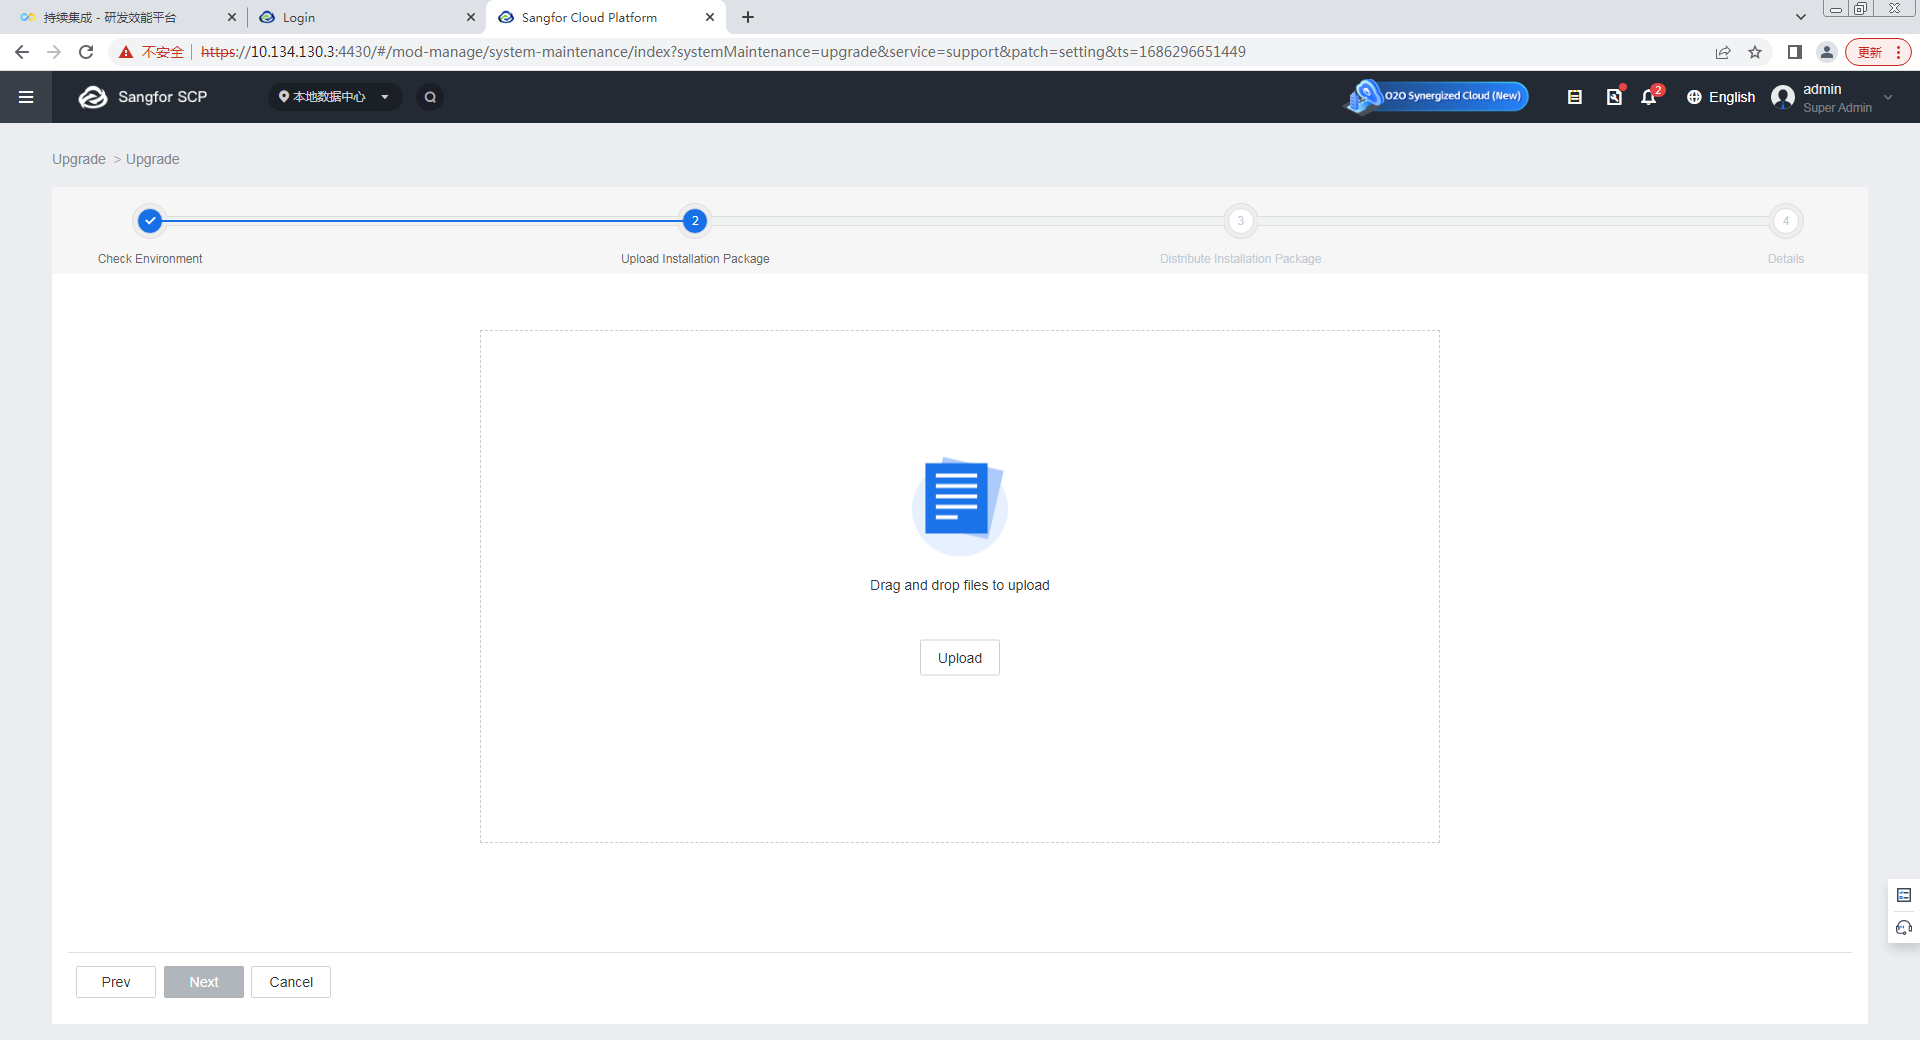
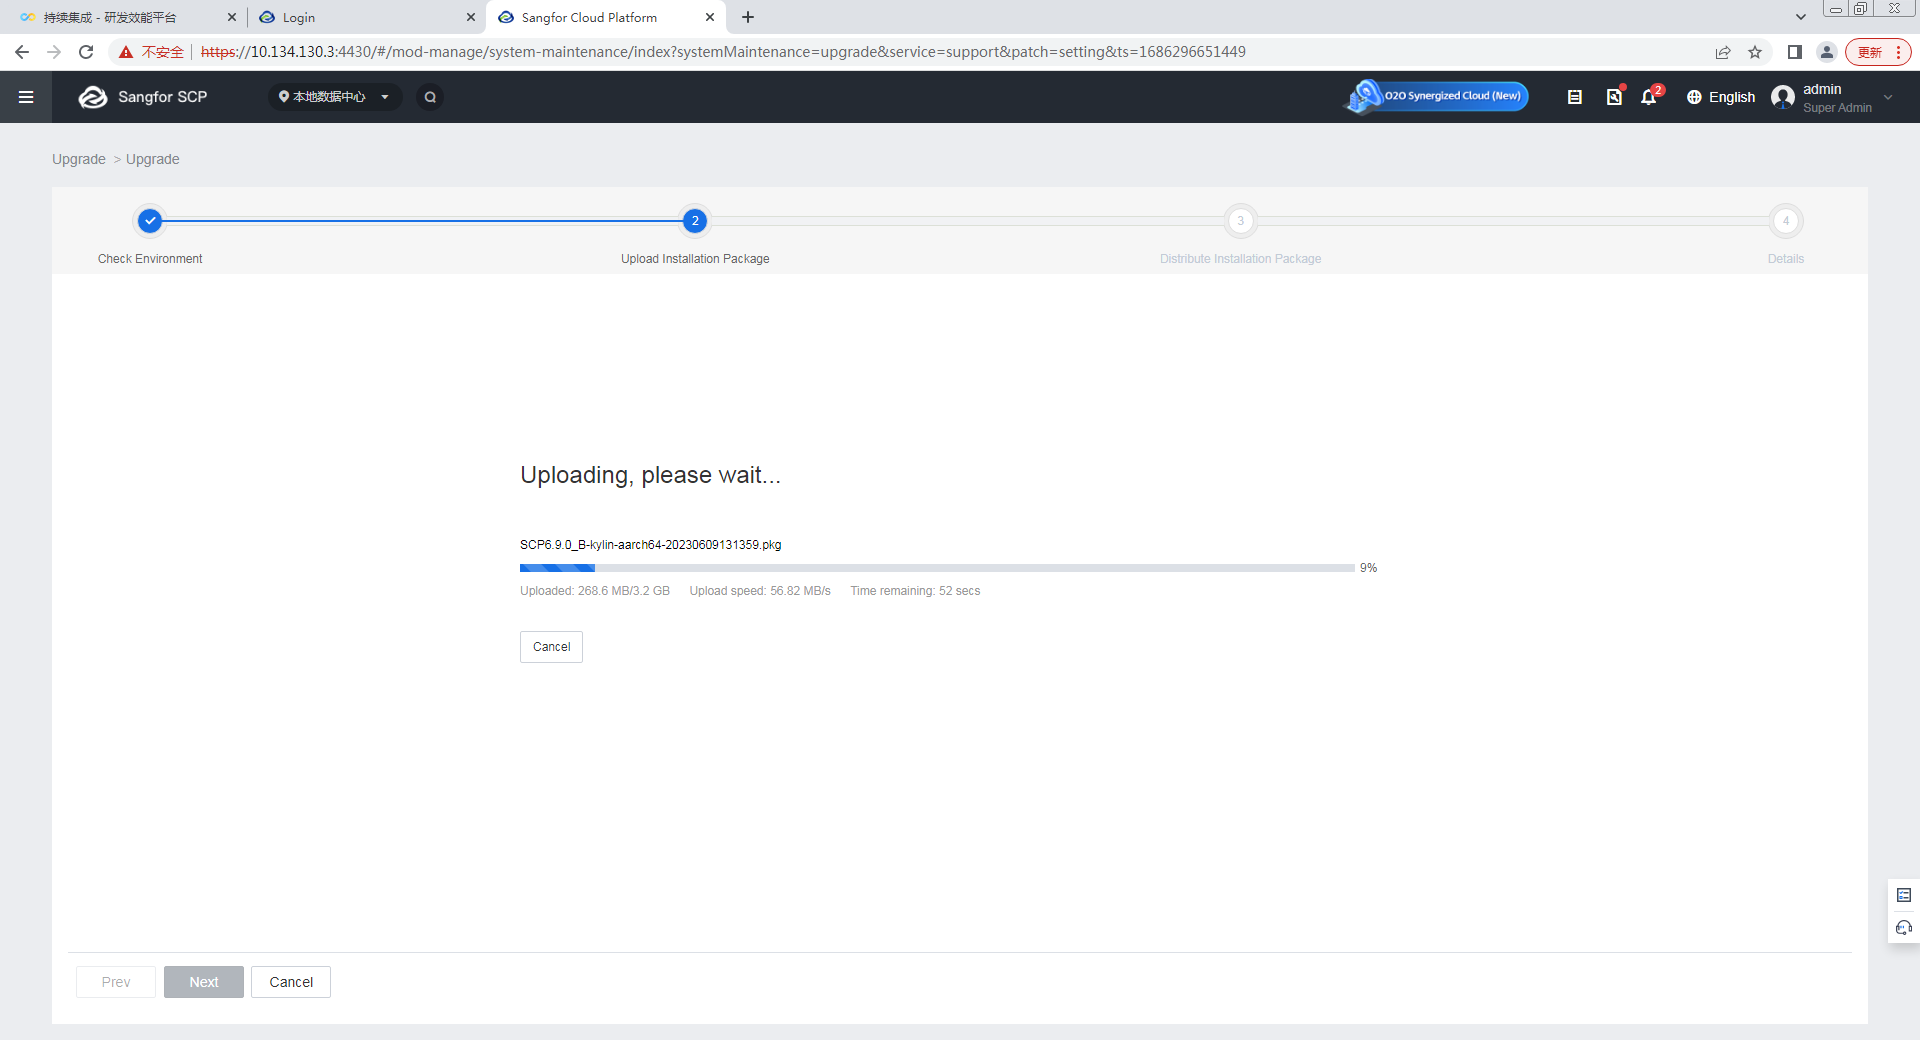
- After the environment passes the check, upload the HCI update package.
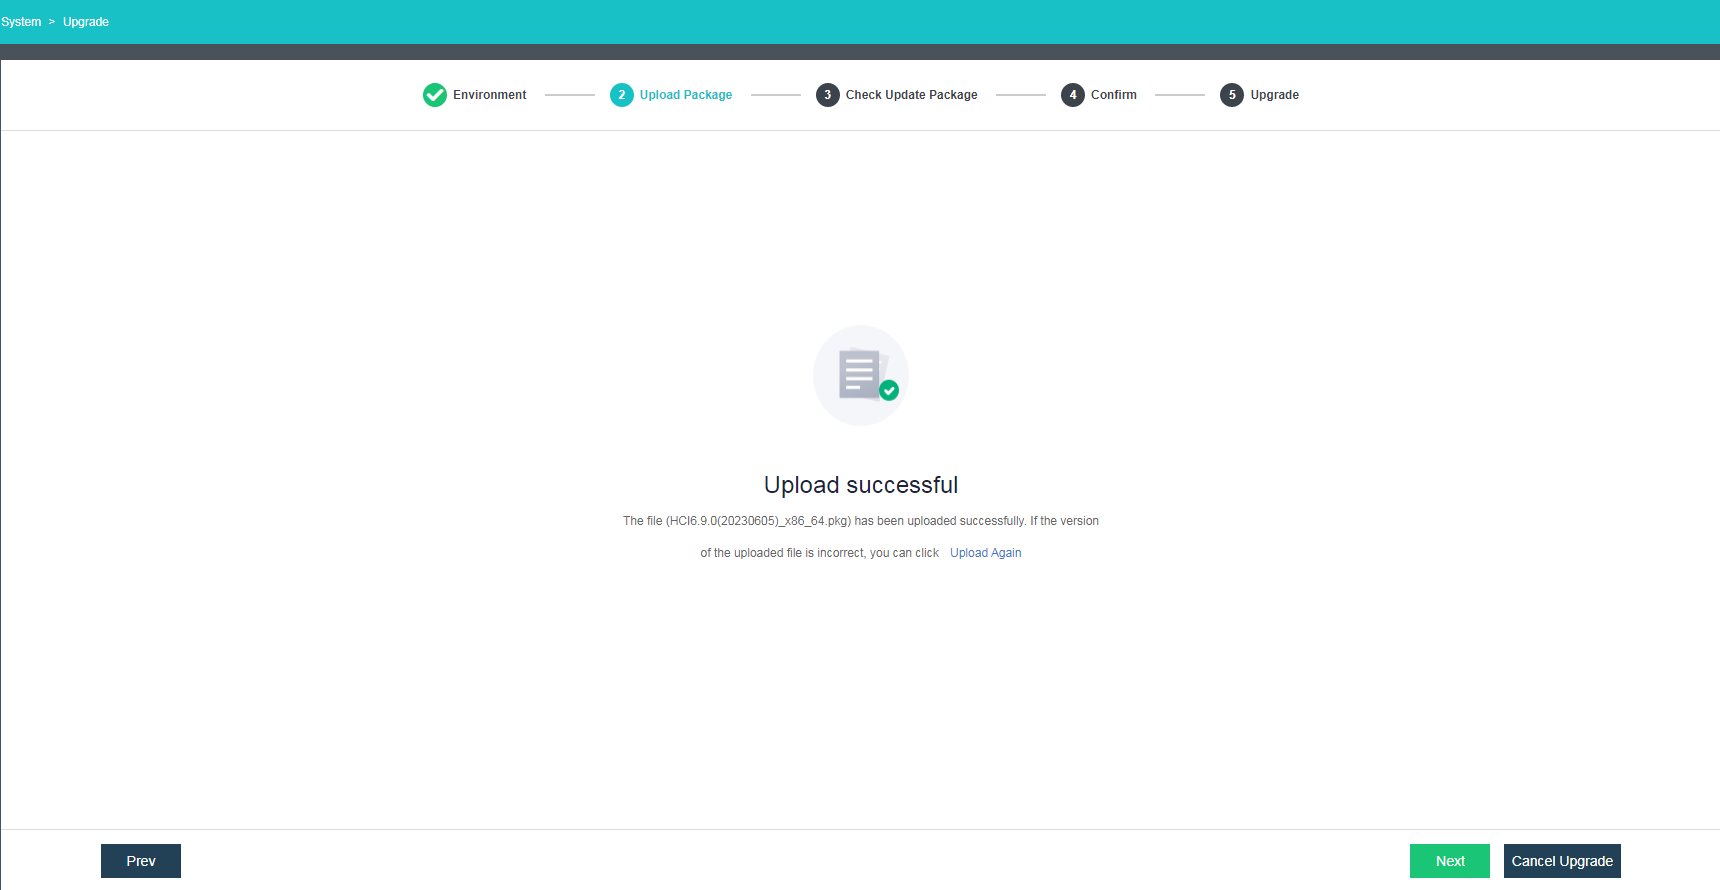
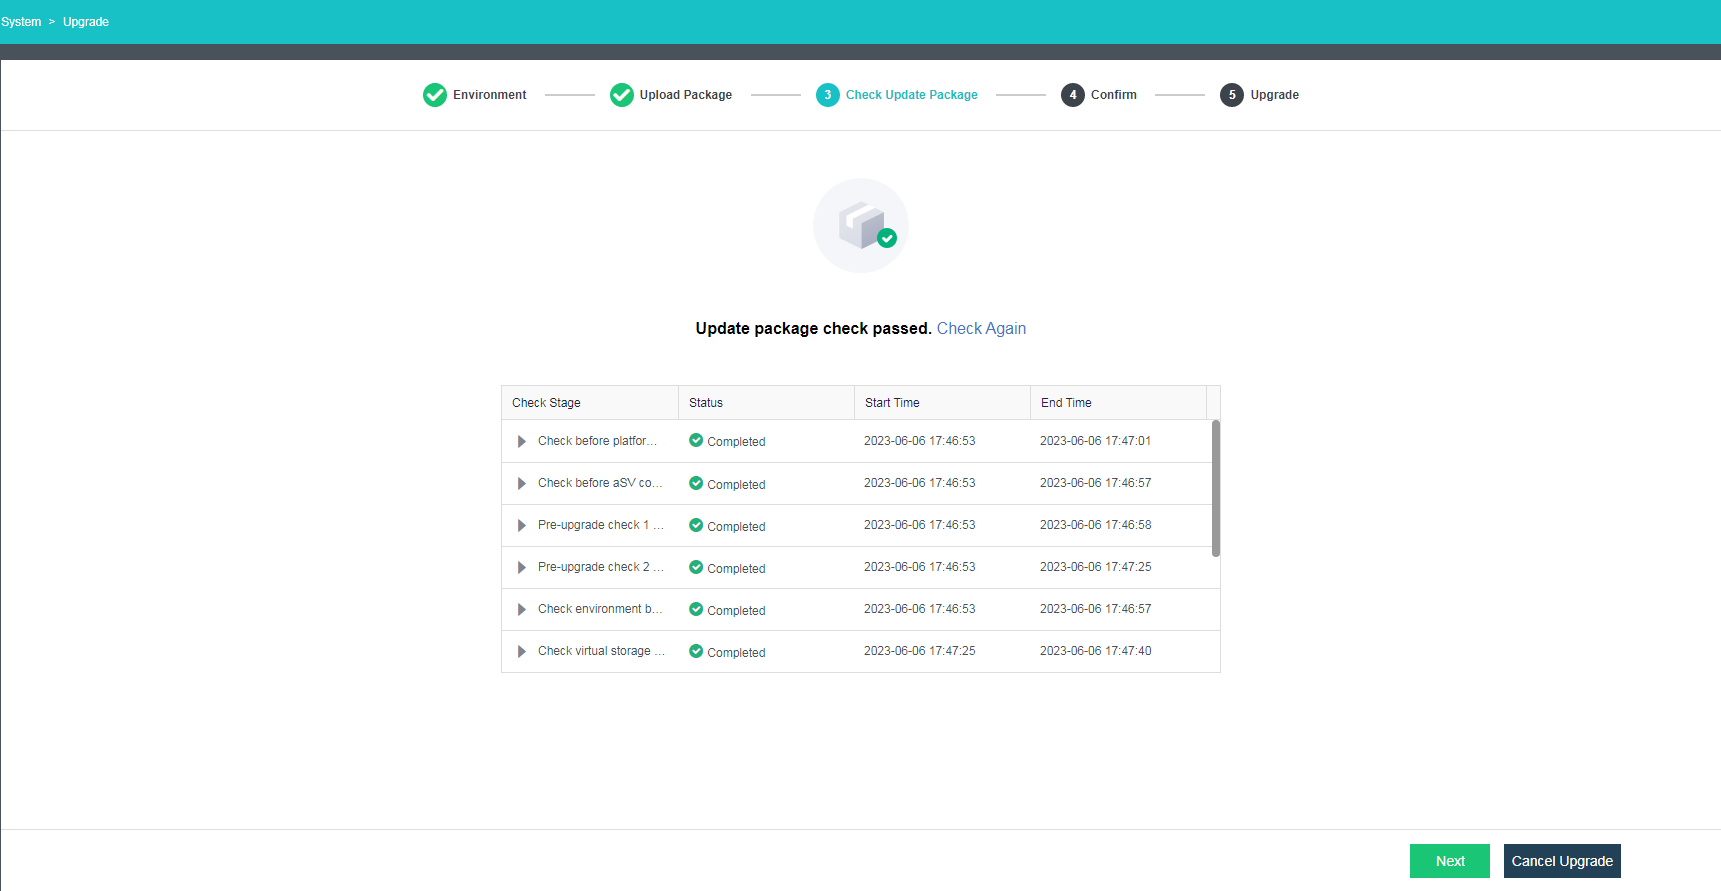
- The update package passes the check.
Quick Upgrade
- Select Quick Upgrade for Upgrade Method and click Next.

-
The quick upgrade starts.
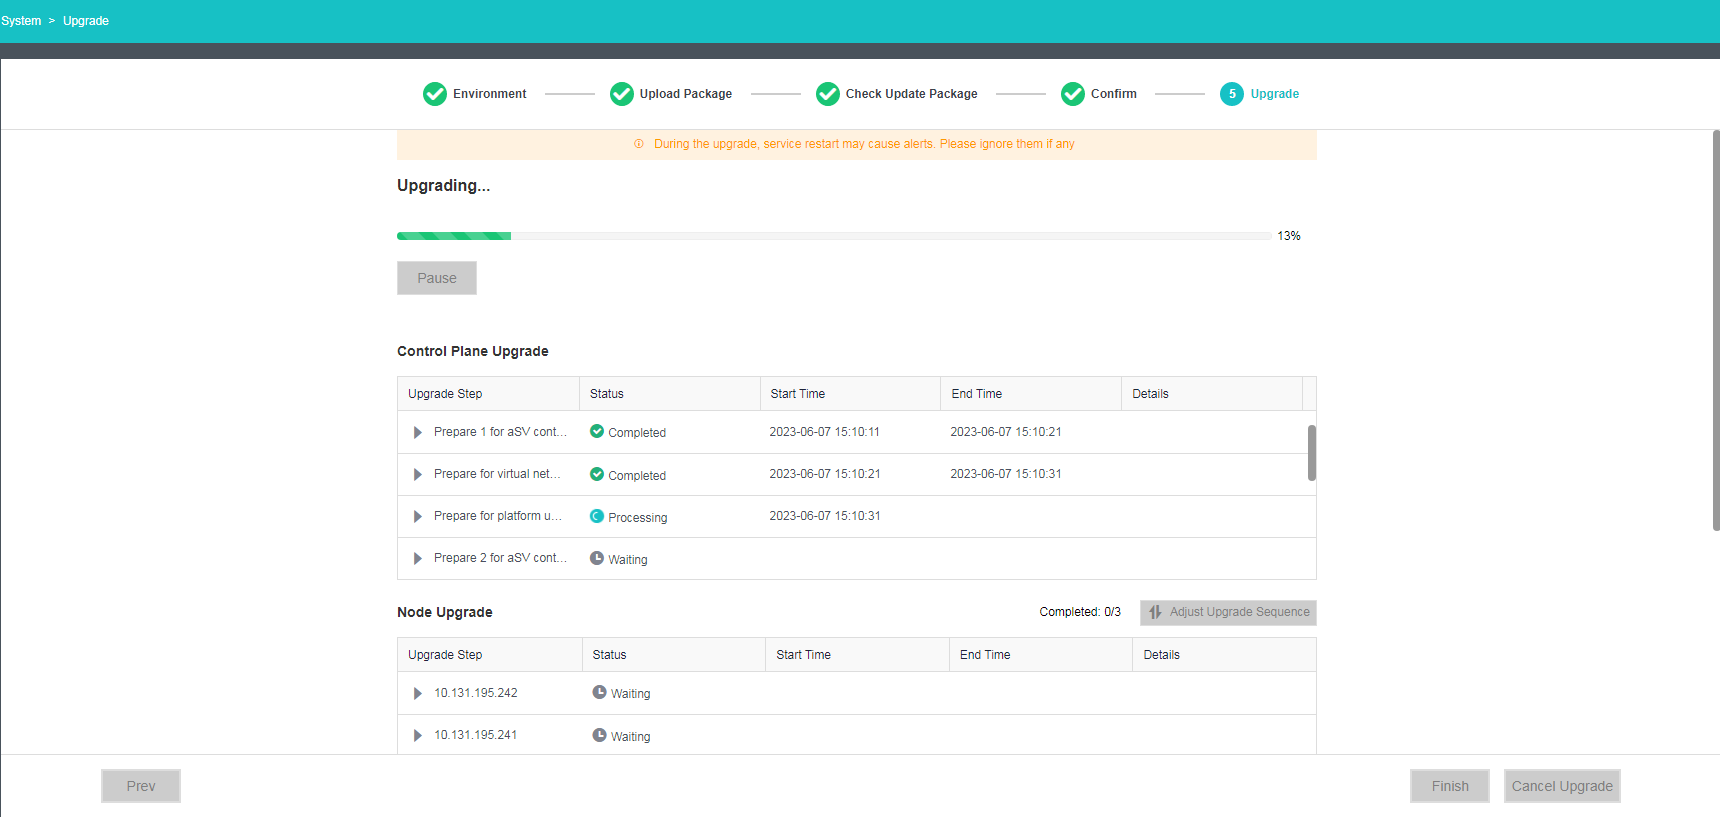
-
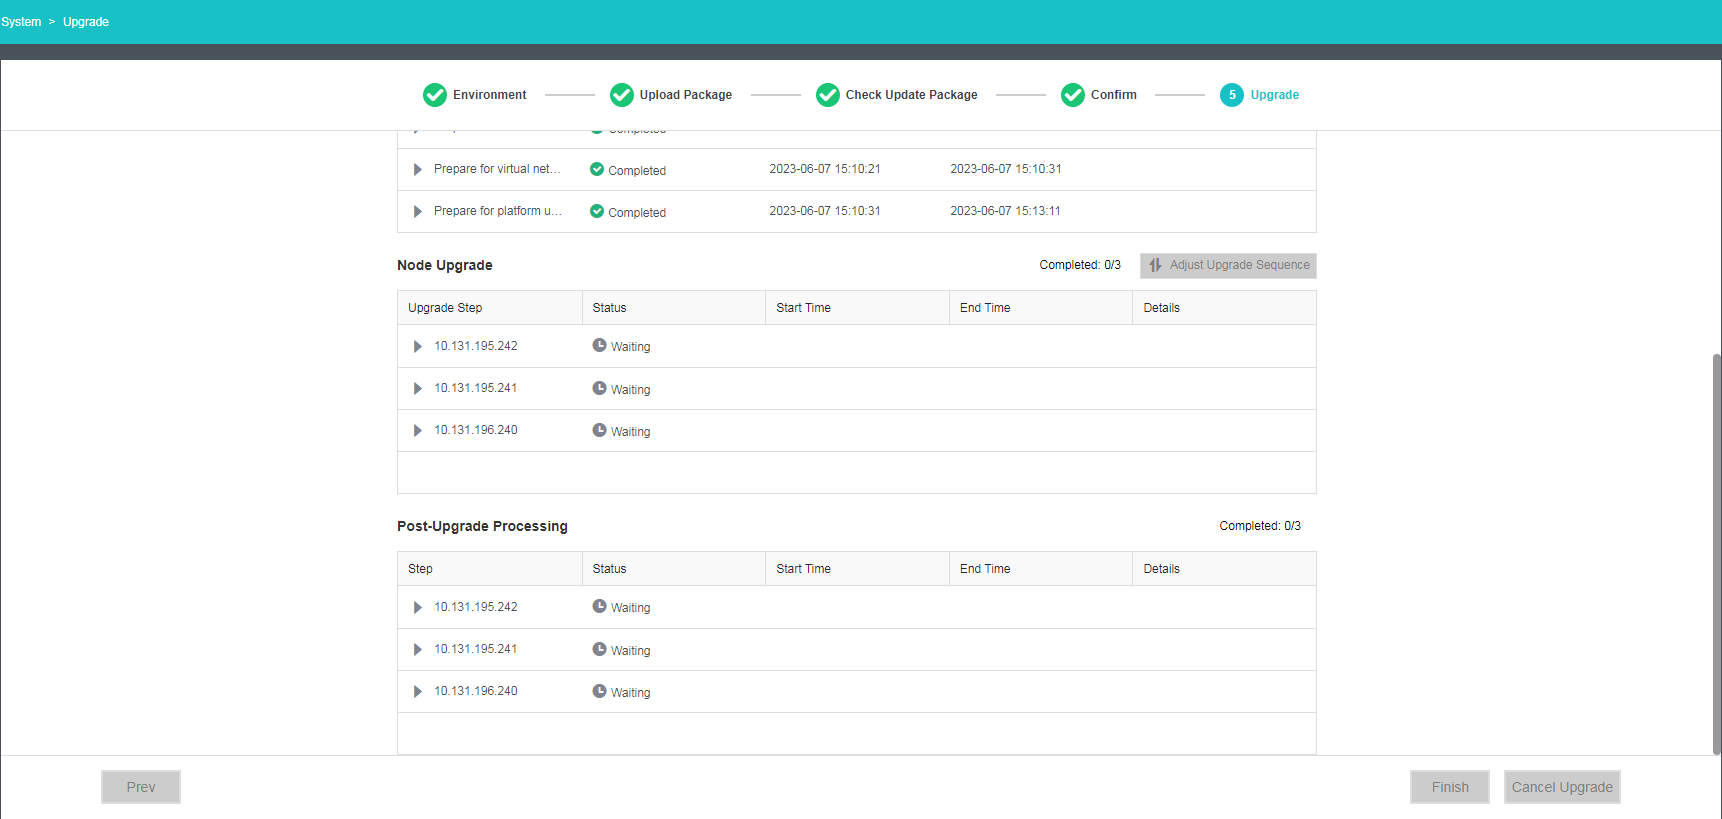
The upgrade tasks at each stage are shown during the upgrade process.
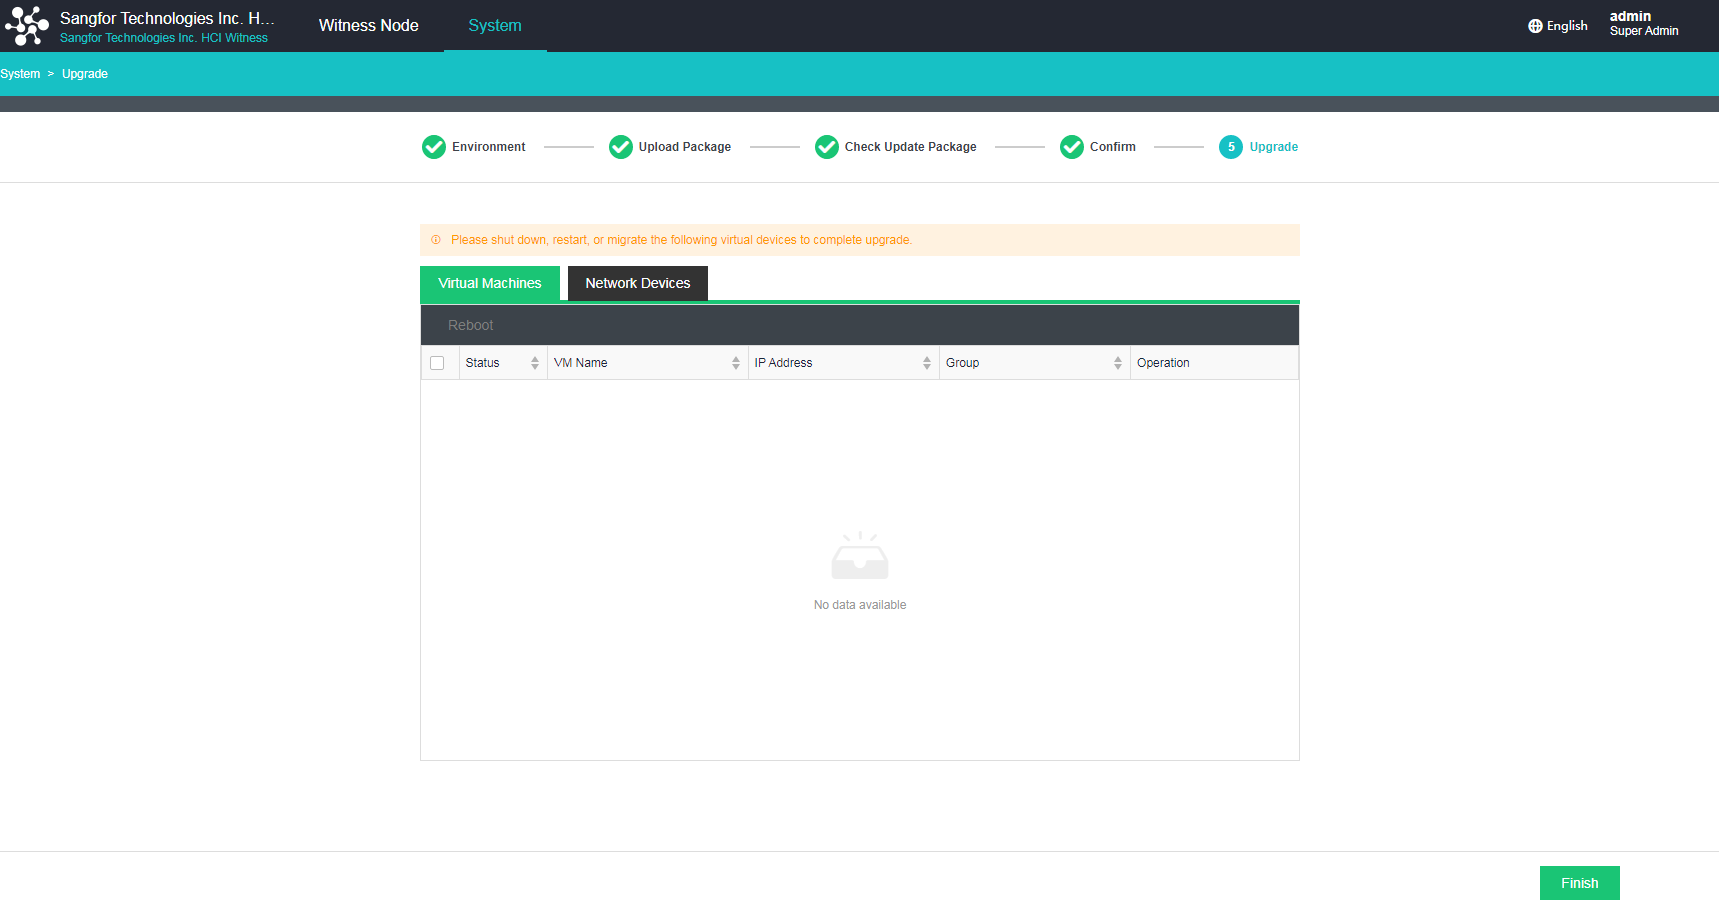
-
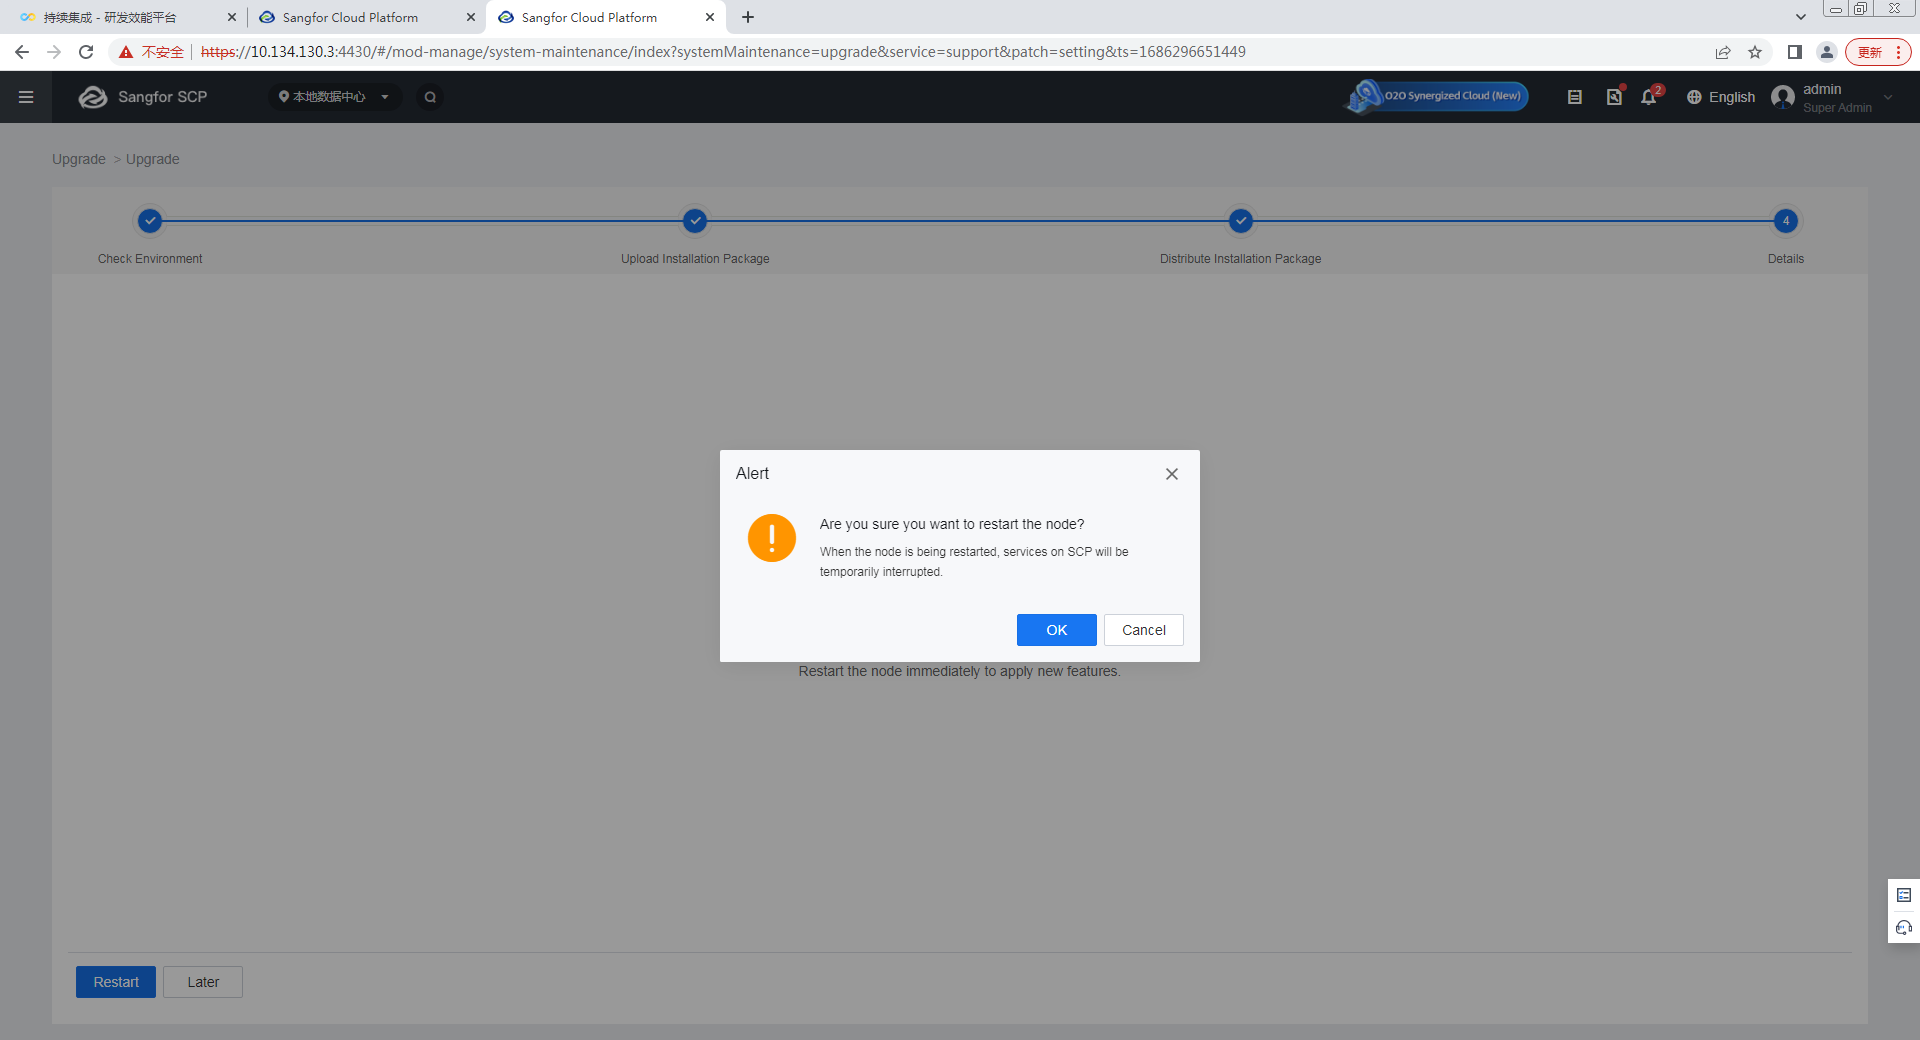
After the upgrade, the system will ask whether to perform live migration for VMs and NFV devices. VMs not installed with vmTools need to be migrated to complete the upgrade.
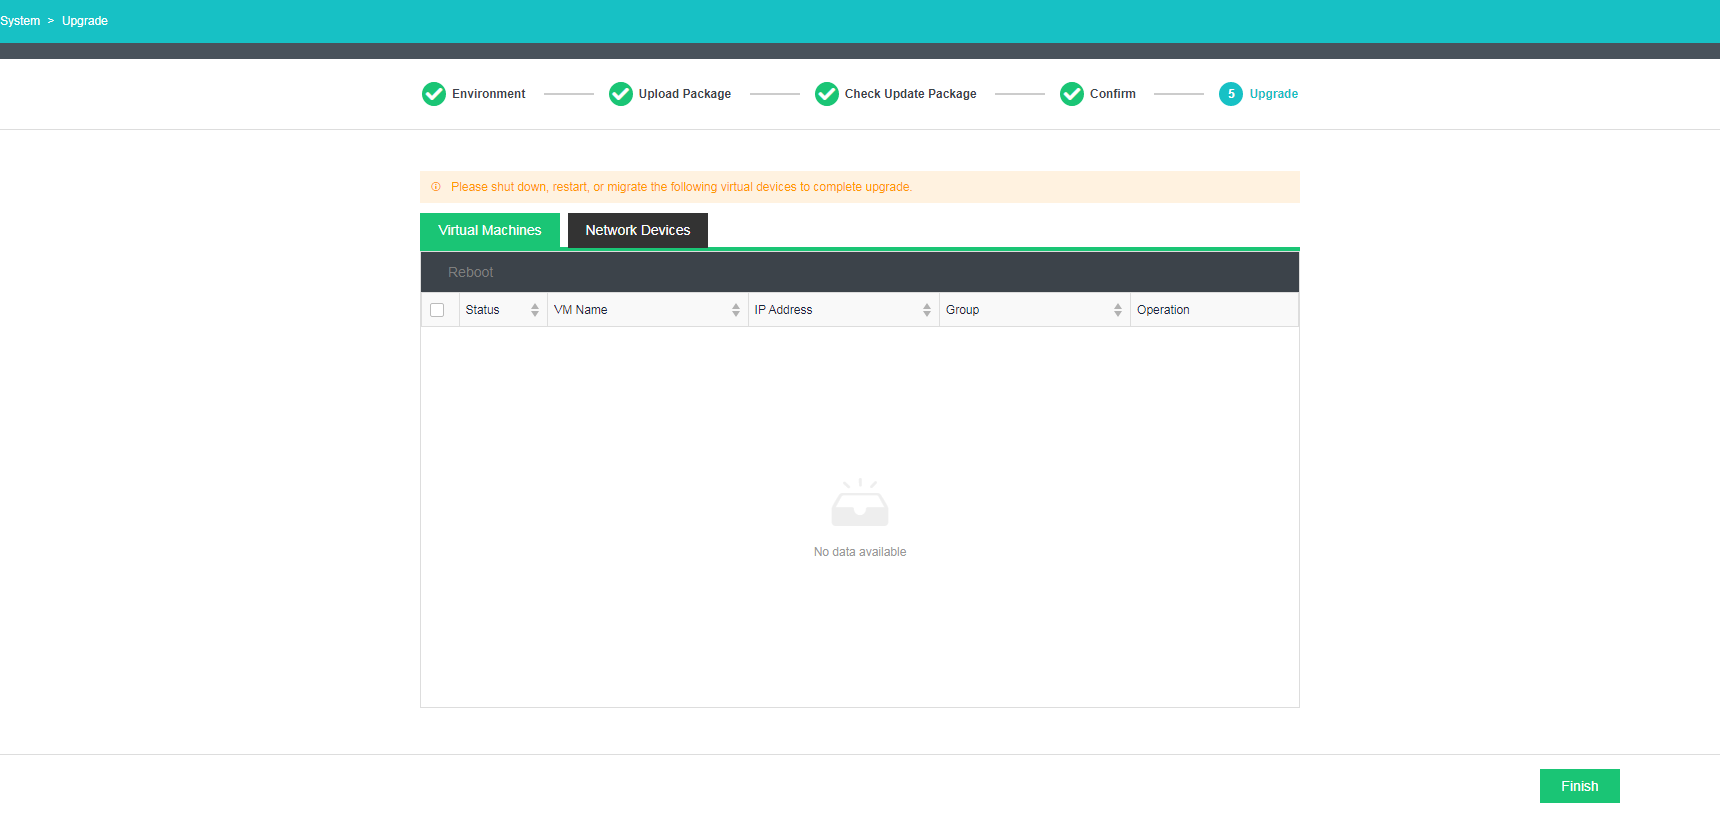
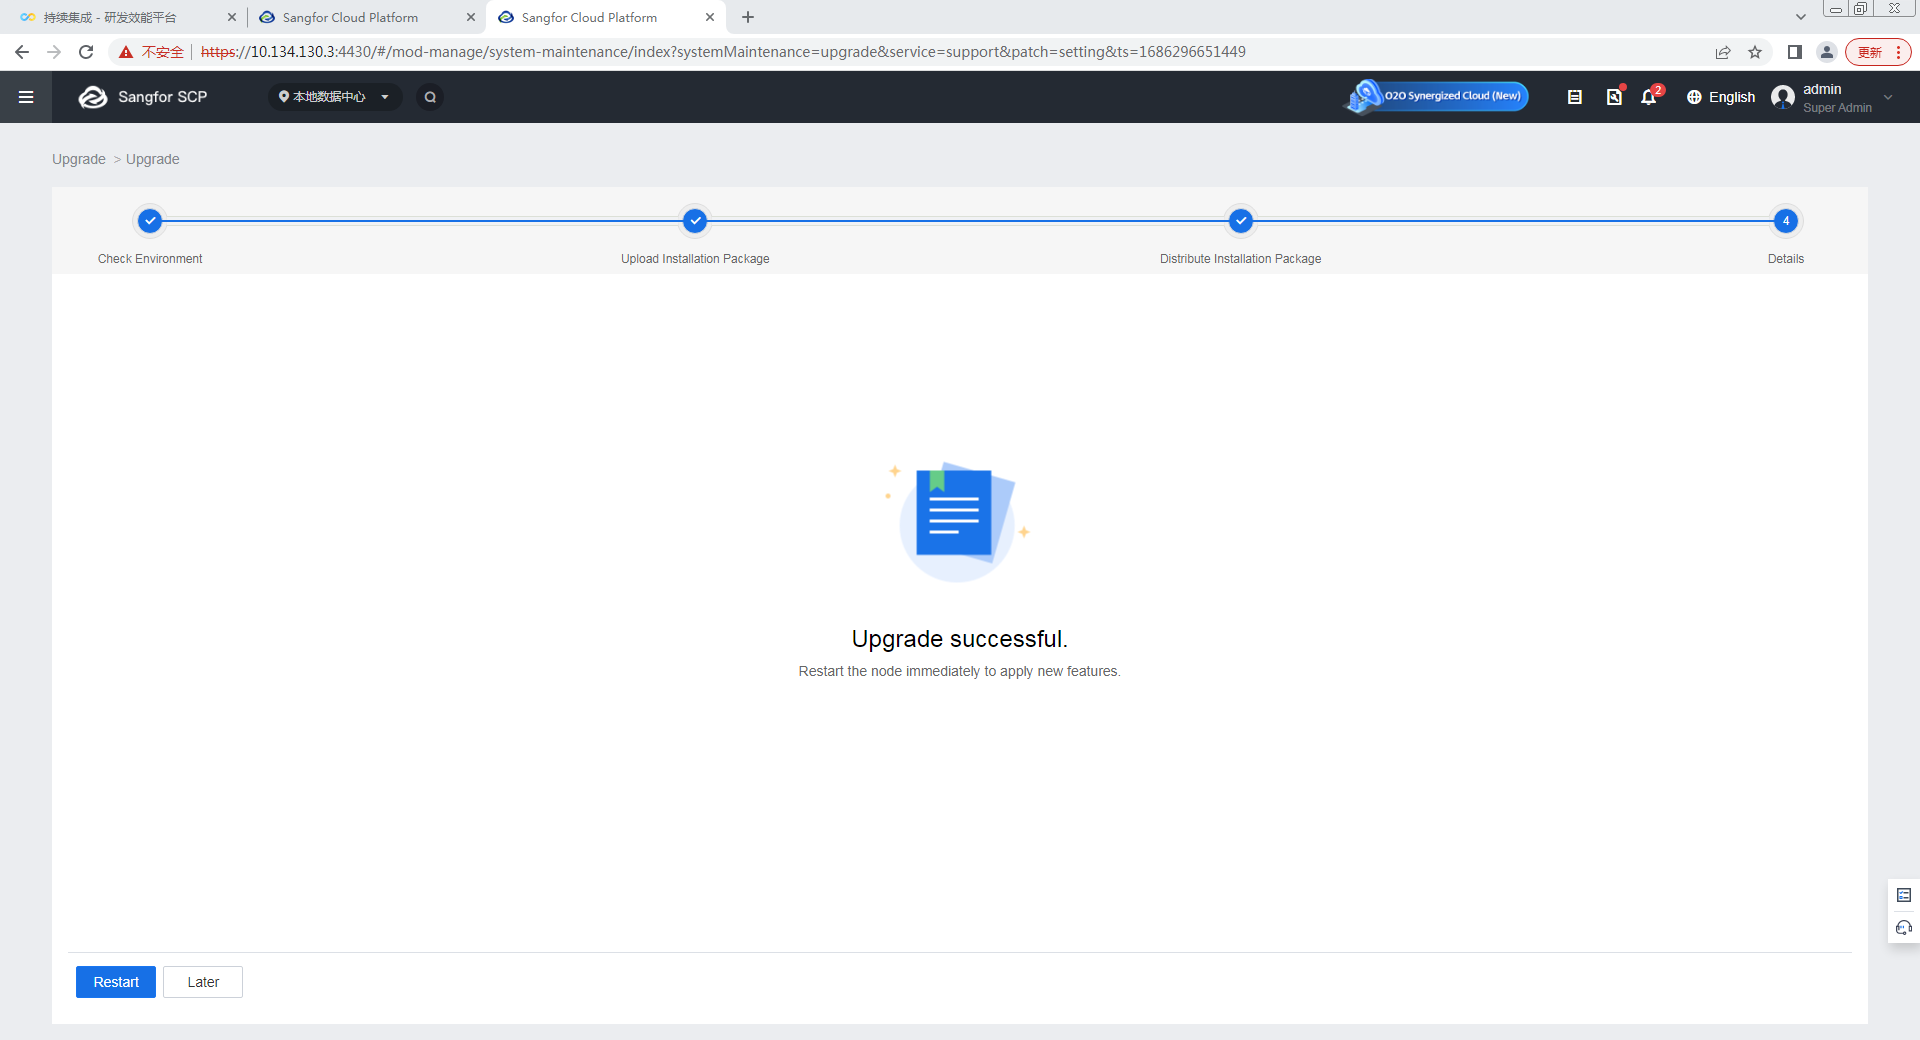
-
The upgrade is complete.
Rolling Upgrade
- Select Rolling Upgrade for Upgrade Method and click Next.
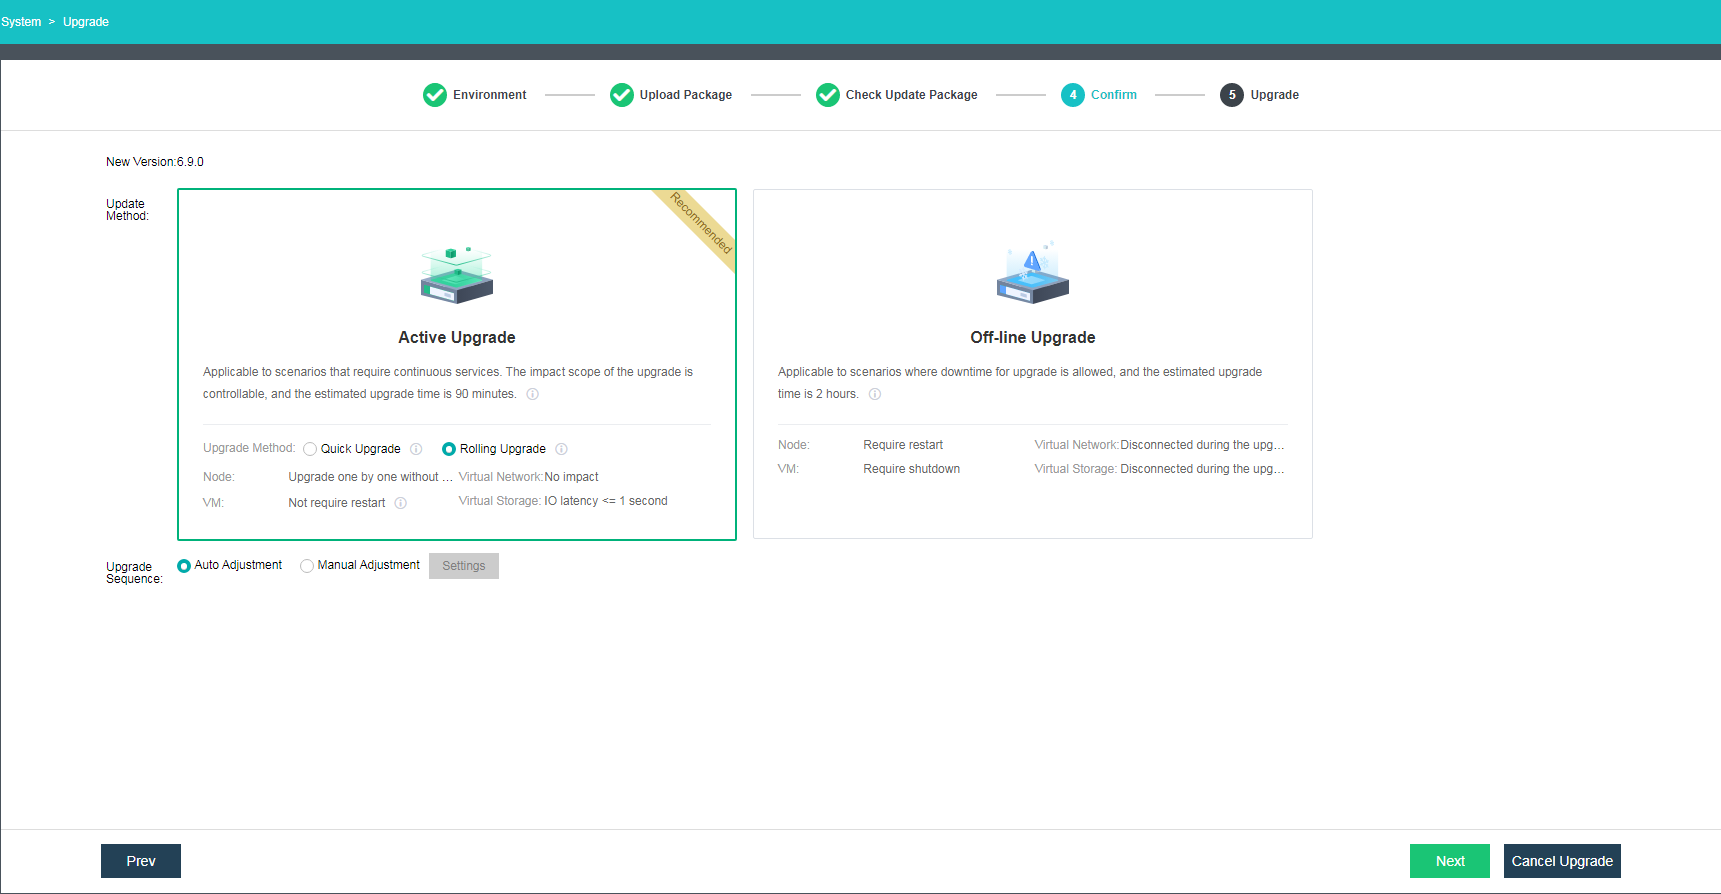
- Select Manual Adjustment for Upgrade Sequence to adjust the sequence of nodes for the upgrade, or select Auto Adjustment. After the upgrade sequence adjustment is complete, click Next.

-
During the Rolling upgrade, all the nodes’ control planes will upgrade first, followed by the data plane upgrade (one node each time). Before the data plane upgrade starts, the running VMs will be migrated to a node that is not in the upgrading state. During the control plane upgrade, you will be logged out. Please wait about 1 minute and then reload the page to log in again.
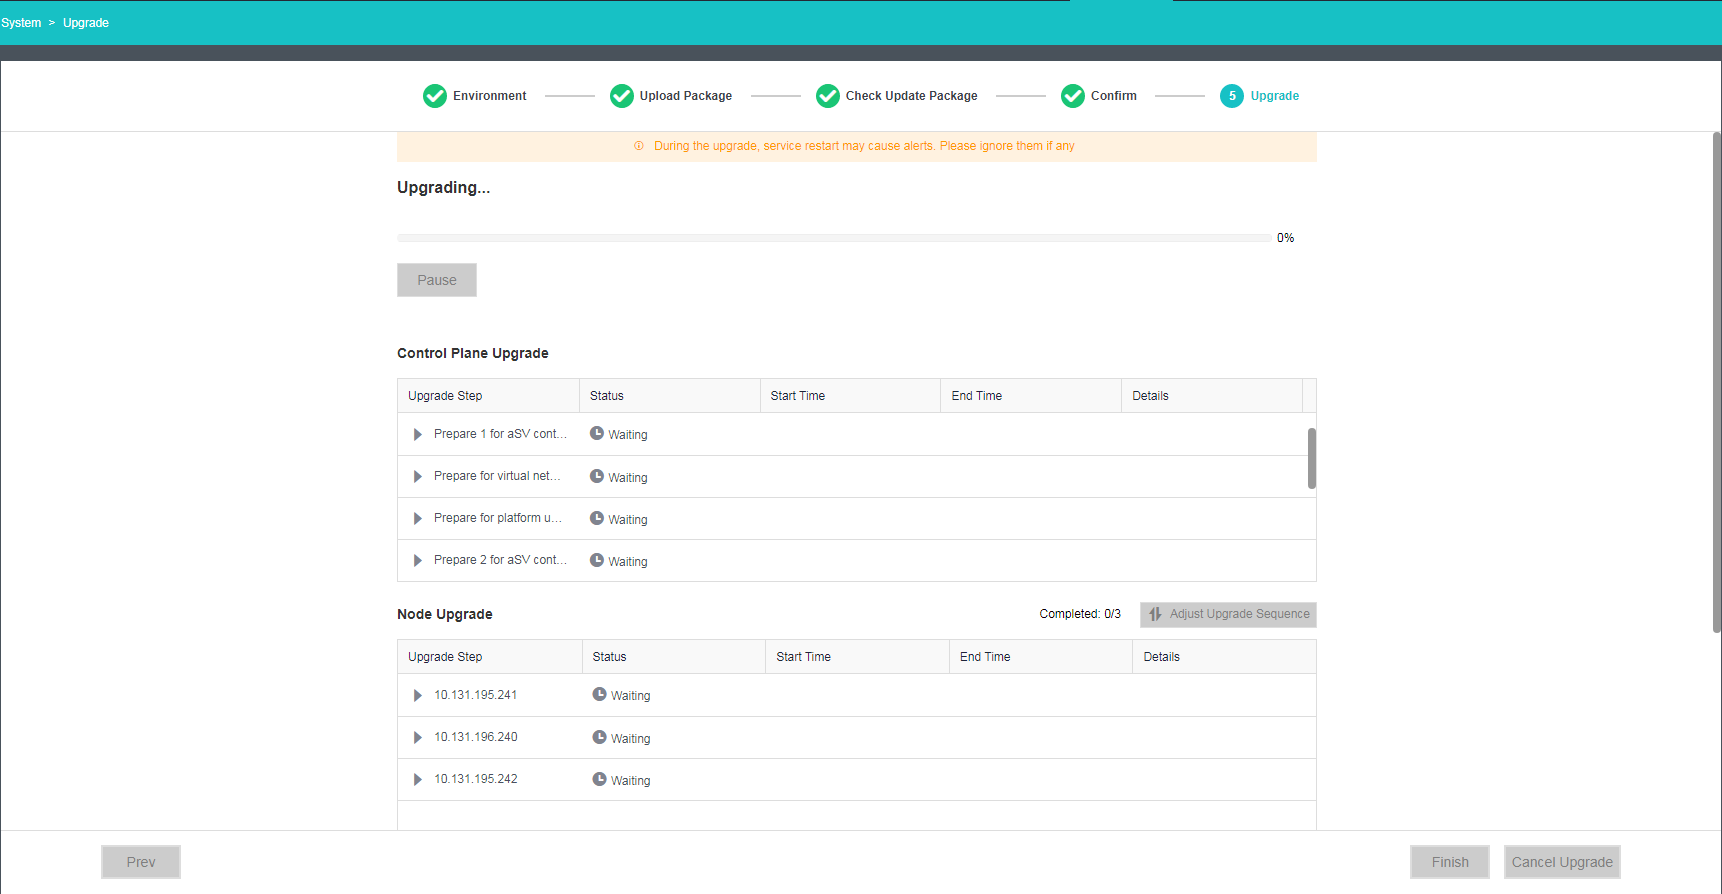
-
The upgrade is complete.
Offline Upgrade
-
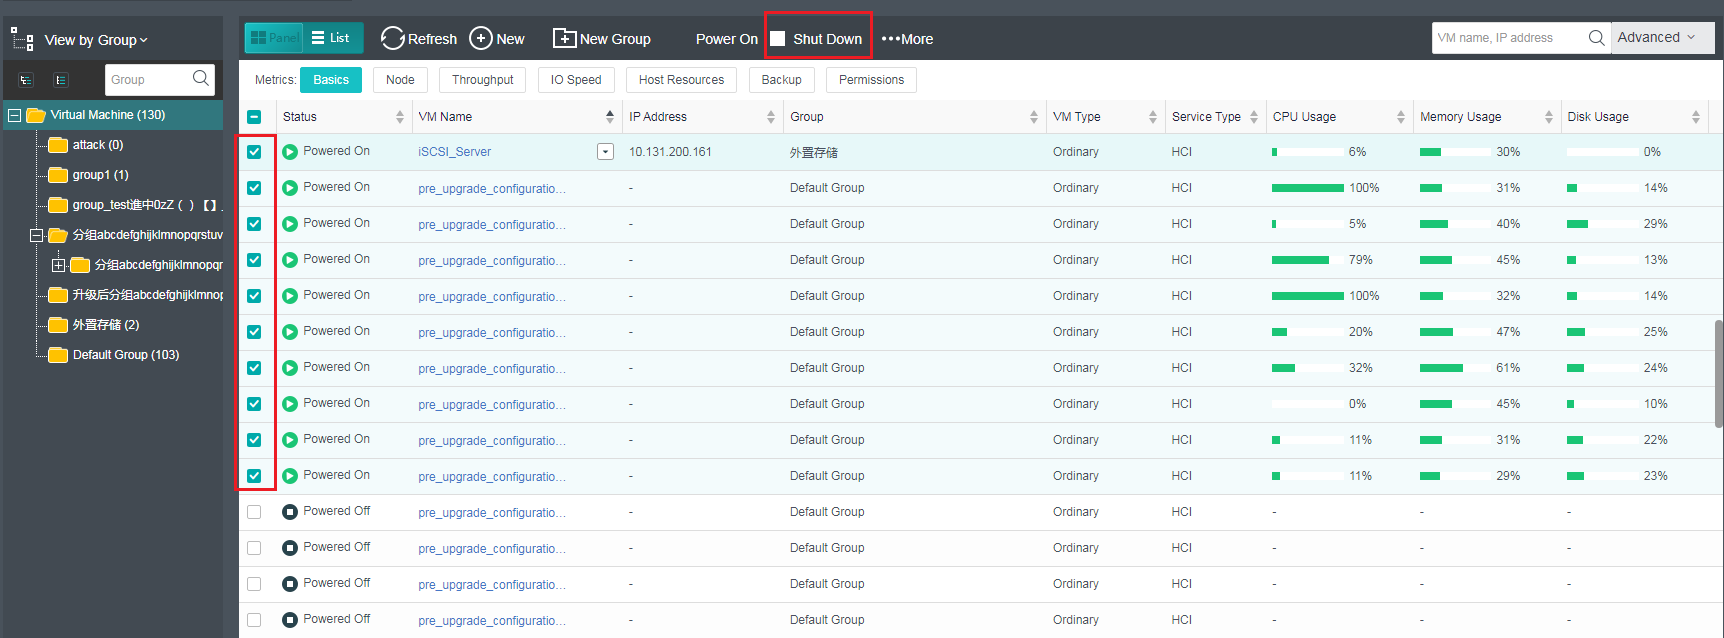
Shut down all VMs.
Select all VMs and shut them down. If the operation fails, go to their consoles to shut them (including suspended VMs) down separately.
-
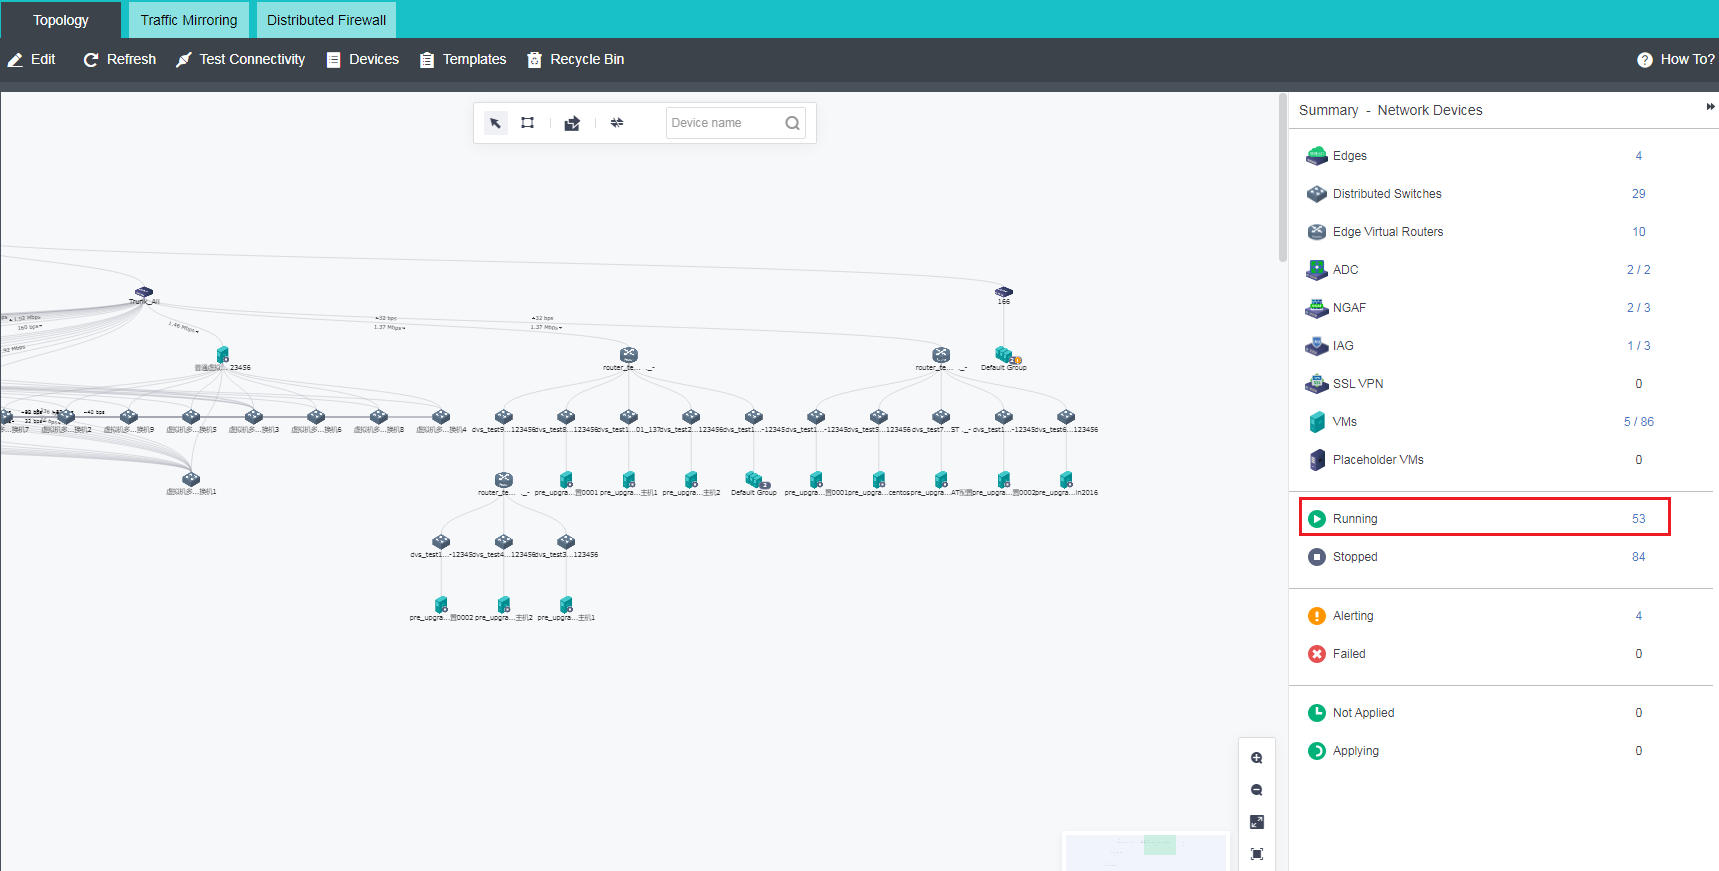
Shut down all NFV devices.
Go to Networking > Topology, click Running to view all NFV devices (excluding routers and switches), and shut them down.
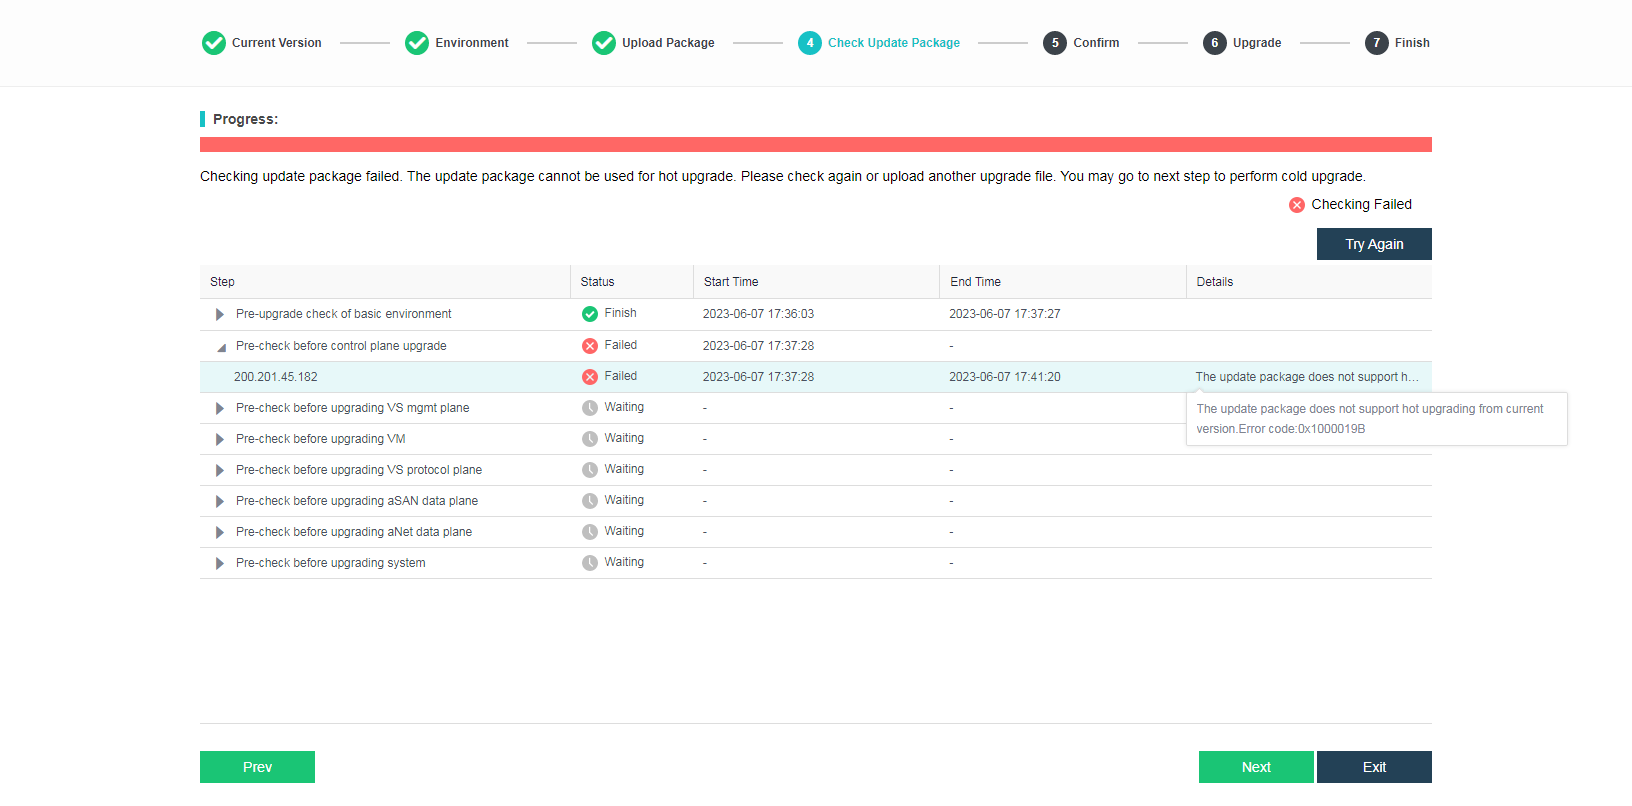
- Run the pre-check, and the system advises to perform an offline upgrade. Click Next to proceed.
-
You can start the offline upgrade after all NFV devices are shut down. All nodes must be restarted, which will cause business service interruption.
-
Click Next to start the upgrade.

-
The progress of the upgrade is shown in the figure below.
-
The upgrade is complete.

-
Restart the nodes.
Graphics Card Driver Upgrade
The GRID driver update requires restarting nodes. Importing the vGPU driver file after the upgrade and restarting the corresponding nodes is recommended.
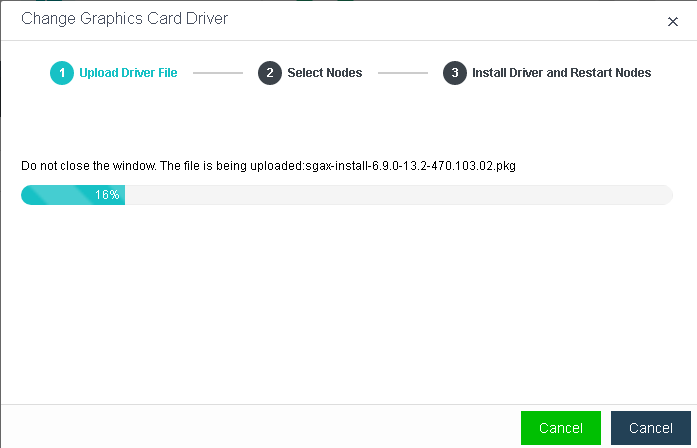
- Go to Nodes > Graphics Cards and click Change Graphics Card Driver to import the GRID driver.
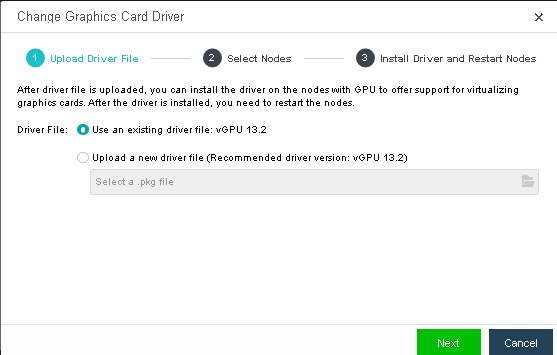
-
Wait until the driver file is uploaded.
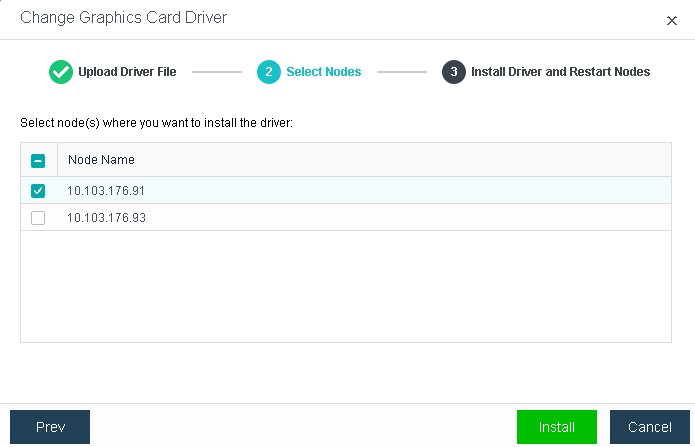
-
Select nodes where you want to install the driver and wait for the driver file to be distributed.

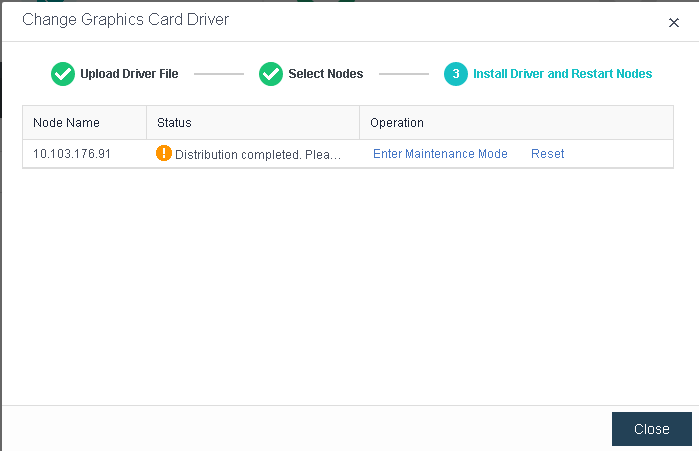
- Click Enter Maintenance Mode and then click Reset to make the driver take effect.
Abnormalities Troubleshooting
Pre-Upgrade Failures
| Scenario | Versions | Solutions | Notes |
|---|---|---|---|
| Timeout while distributing installation package because the management interface of the cluster controller only supports 100 Mbps. | Upgrade from Earlier versions to HCI6.0.1 and above. | Ensure the management interface supports at least 1000 Mbps before the upgrade. | Management interfaces less than 1000Mbps are not supported. |
| Timeout while checking update.suc.exec.precheck.flag and update.rep.finished.flag during the upgrade. | Upgrade from versions earlier than 5.8.6 to versions earlier than 6.0.1. | Check the configuration of nodes in the cluster. Contact a Sangfor technical support representative to mark nodes with low configuration to skip the check. | This problem has been fixed and will not occur while upgrading versions earlier than HCI5.8.6 to HCI6.0.1 and above. |
| Failed to verify the pre-upgrade check package because the memory usage occupied by the running services is too high. | Upgrade from HCI5.8.6 to HCI6.0.0 and above. | Restart the vtp-datareport-server reporting service. | This problem has been fixed and will not occur when upgrading HCI5.8.7_R1 to later versions. |
| Pre-upgrade check failed because the memory usage occupied by the running services is too high, exceeding expectations. | Upgrade from HCI5.8.6 and above versions to HCI6.0.0. | Contact a Sangfor technical support representative to skip this check step. | This problem has been fixed and will not occur while upgrading earlier versions to HCI6.0.1 and above. |
| The VXLAN interface is configured with an IP address but without an IP address pool. | Active upgrade. | Configure the VXLAN IP pool before the upgrade. | This problem will be detected by the pre-upgrade check. The IP address pool must be configured to start the upgrade. |
| aCloud cannot be upgraded after powering off the aCMP VM because aCloud is licensed by aCMP. | Offline upgrade from HCI5.8.5. | Power on the aCMP VM to activate the license, and do not power off it before restarting aCloud. | This problem does not exist in other versions. |
| In the upgrade retry scenario, since other nodes already have the success marks of the pre-upgrade check, the cluster control will be deleted after the pre-upgrade check, thus blocking the upgrade process. | Upgrade from earlier versions to HCI5.8.6 and later. | Contact a Sangfor technical support representative to clean up the success marks of the pre-upgrade check of other nodes. | – |
| 0x0006/0x0005 is reported during the pre-upgrade check of the offline upgrade. | Upgrade from Earlier versions to HCI5.8.6 and later. | Contact a Sangfor technical support representative. | This problem has been fixed and will not occur while upgrading earlier versions to 6.0.1 and later. |
| The ZK service encountered an error during the active upgrade. | Upgrade from earlier versions to HCI5.8.6 and later. | Upgrade again. If the problem persists, please contact a Sangfor technical support representative. | – |
| The virtual storage service encountered an error during the pre-upgrade check. | Earlier versions to HCI6.0.1. | Contact a Sangfor technical support representative. | This problem exists only in HCI6.0.1. |
Upgrade Failures
| Method | Stage | Failure | Solutions | Whether Rollback Is Supported |
|---|---|---|---|---|
| Offline Upgrade/Active Upgrade | Check Environment for Upgrade | The environment check failed. | Troubleshoot and try again. If the problem persists, please contact a Sangfor technical support representative. | Yes, exit the upgrade to roll back to the original version. |
| Offline Upgrade/Active Upgrade | Upload Update Package | The update package upload failed. | Troubleshoot and try again. If the problem persists, please contact a Sangfor technical support representative. | Yes, exit the upgrade to roll back to the original version. |
| Offline Upgrade/Active Upgrade | Pre-Upgrade Check | Pre-upgrade check failed. | Troubleshoot and try again. If the problem persists, please contact a Sangfor technical support representative. | Yes, exit the upgrade to roll back to the original version. |
| Offline Upgrade/Active Upgrade | Upgrade | Host power encountered an error. | Troubleshoot and try again (upgrades from earlier versions to 5.8.6 and above do not support retry). If the problem persists, please contact a Sangfor technical support representative. | No. To roll back to the original version, please contact a Sangfor technical support representative. |
| Offline Upgrade/Active Upgrade | Upgrade | The host management interface encountered an error. | Troubleshoot and try again (upgrades from earlier versions to 5.8.6 and above do not support retry). If the problem persists, please contact a Sangfor technical support representative. | No. To roll back to the original version, please contact a Sangfor technical support representative. |
| Offline Upgrade/Active Upgrade | Upgrade | Other errors occurred. | Troubleshoot and try again (upgrades from earlier versions to 5.8.6 and above do not support retry). If the problem persists, please contact a Sangfor technical support representative. | No. To roll back to the original version, please contact a Sangfor technical support representative. |
| Offline Upgrade | Restart | Any error occurred. | Contact a Sangfor technical support representative. | Contact a Sangfor technical support representative to confirm whether rollback is supported. |
Sangfor Cloud Platform(SCP)
Overview
SCP New Features
-
Micro-segmentation based on aNI: The ability of micro-segmentation intelligent policy recommendation is implemented on aNI flow visualization, relying on distributed firewalls to take effect, rather than aSEC’s distributed IPS engine. However, it belongs to the aSEC component capability and relies on aSEC authorization, not aNET authorization. The aSEC authorization price has not changed in this version.
-
Since version 6.10.0, the SCP interface has been improved to make its capabilities consistent with HCI:
a) VM details: Boot Order, running time, export report, and other details
b) VM editing: Added advanced options such as CPU reservation, huge page memory, BIOS settings, and more.
c) VM operation: Complete migration function, information export, VM import, snapshot, and more.
d) Virtual network and tenant is IPV6 supported, including virtual routers, tenants, EIP, and more.
-
OpenAPI improvement: The interface supports platform hardware monitoring, and lighting up the hard disk light supports third-party servers, which is convenient for hard disk troubleshooting.
-
Container service: support the deployment of container service platform (SKE).
Others
- If HCI has been managed by SCP (earlier than SCP6.7.30) before upgrading to HCI6.9.0, please upgrade SCP to SCP6.7.30 and above (including SCP6.9.0) before upgrading HCI.
- After upgrading SCP6.7.0 to SCP6.7.30 and above (including SCP6.9.0), please contact Sangfor Support for further inspection.
- Since SCP6.8.0 has been containerized, to upgrade an earlier version to SCP6.8.0 and above, please add a disk (400 GB) to the platform for container image storage so that databases will not be affected by disk IO from container images.
Warning:
The offline licensing(virtual key) method is supported only when SCP6.8.0 is deployed on HCI6.8.0 or later.
When using a virtual key to upgrade to SCP6.8.0 and above, the original license key file will become invalid, and the license key will be required to be renewed with the new device info. This licensing method is supported only when SCP6.8.0 is deployed on HCI6.8.0 or later. Therefore, resource pools of earlier versions may cause SCP licensing to fail.
It is required to use the licensing method with a USB key if aSecurity needs to be licensed.
Upgrade Path
Sangfor Cloud Platform(SCP)
The Versions Can Be Upgraded to SCP6.10.0:
| aCMP 5.8.6 Series | 5.8.6_EN | 5.8.6R1_EN | – | – | – | Offline Upgrade |
|---|---|---|---|---|---|---|
| aCMP 5.8.8 Series | 5.8.8_EN | – | – | – | – | Offline Upgrade |
| aCMP6.0.10 Series | 6.0.10_R1_EN | 6.0.10_R2_EN | – | – | – | Offline Upgrade |
| SCP6.1.0 Series | 6.1.0_EN | – | – | – | – | Offline Upgrade |
| SCP6.2.0 Series | 6.2.0_EN | SCP6.2.70_EN | – | – | – | Offline Upgrade |
| SCP6.3.0 Series | 6.3.0_EN | 6.3.70_EN | 6.3.80_EN | – | – | Offline Upgrade |
| SCP6.7.0 Series | 6.7.0_EN | 6.7.30_EN | – | – | – | Offline Upgrade |
| SCP6.8.0 Series | 6.8.0_EN | – | – | – | ||
| SCP6.9.0 Series | 6.9.0_EN | 6.9.1_EN | ||||
| SCP6.10.0 Series | 6.10.0_EN |
NFV Components Upgrade
Please upgrade the NFV components first if their version is lower than the version listed in the following table before upgrading the HCI.
| Device | Version | HCI6.9.0 | Classic Network | VPC | Notes |
|---|---|---|---|---|---|
| vAD | vAD6.6 | √ | √ | – | |
| vAD | vAD7.0.9_R1 | √ | √ | √ | |
| vNGAF | vNGAF7.1_R3 | √ | √ | – | |
| vNGAF | vNGAF8.0.8 | √ | √ | – | Upgraded from vNGAF7.1_R3 is supported. |
| vNGAF | vNGAF8.0.17 | √ | √ | √ | Support from vNGAF8.0.8 is supported. To use a customized version of vNGAF8.0.17, please install the upgrade package first and then the custom package. |
| vNGAF | vNGAF8.0.26 (20200929) |
√ | √ | √ | Version patched supports are both installed using SSL service packs and deployed. |
| vIAG | vIAG11.9 | √ | √ | – | Must re-deploy. |
| vIAG | vIAG12.0.14 | √ | √ | – | Upgrade from vIAG11.9 is supported. |
| vIAG | vIAG13.0.73 | √ | √ | – | Recommend deploying this version of vIAG. Upgrade from the previous version is not supported due to insufficient partition size. |
| vSSL | vSSL7.6.0 | √ | √ | – | |
| vSSL | vSSL7.6.8_R2 (20200928) |
√ | √ | √ | Support to deploy or upgrade by using the product upgrade package. |
Upgrade Impacts
- All the SCP upgrades are offline upgrades. An offline upgrade requires restarting all SCP VMs, but will not affect the running production system.
Upgrade Instructions for Customers
- Customers’ O&M personnel should not log in to the platform for operation and maintenance during the upgrade.
Implementation Procedure
Refer to Chapter 2.2.5.3 SCP Upgrade.
Upgrade Tools
- When the license key for a version before SCP6.2.0 is free of charge and the feature of managing nodes is in use, an Enterprise Edition or Enterprise Plus Edition license is required to upgrade to a new version. Otherwise, this feature cannot be used.
- To upgrade a version before SCP6.2.0 to SCP6.2.0 and above, you must replace the aOC license with the SCP license key. There are three license types: Advanced Edition, Enterprise Edition, and Enterprise Plus Edition.
- aHCM license for SCP6.3.0 and above will specify the maximum number of nodes. If an aHCM license is activated before the upgrade, a license for a maximum of 500 nodes will be given by default after the upgrade.
- In versions earlier than SCP6.3.0, Application Center and Hybrid Cloud features are available only when the Enterprise Plus Edition license is activated. For SCP6.3.0 and above, independent licensing through the Application Center and aHCM can be done when the Advanced Edition or Enterprise Edition license is activated.
- Nodes can be managed in versions earlier than SCP6.3.0 when the Enterprise Edition or Enterprise Plus Edition license is activated. In SCP6.3.0, the Advanced Edition license can also be used with the node license in aHCM.
- In versions earlier than SCP6.3.0, the license for managing Hybrid Cloud VMs has an expiration date. In SCP6.3.0, the license has no expiration date but specifies the maximum number of nodes that can be managed. For Enterprise Plus Edition, the maximum number of Hybrid Cloud VMs that SCP can manage depends on the number of licensed host CPUs.
Note:
The number of independently licensed Hybrid Cloud VMs or the VM quantity in a free license, whichever is greater, shall prevail. The specific rules are as follows:
Enterprise Plus Edition: For the SCP license of 20 CPU cores and below, a free license for managing 50 Hybrid Cloud VMs will be granted.
Enterprise Plus Edition: For the SCP license of 20 CPU cores (excluded) to 40 CPU cores (included), a free license for managing 100 Hybrid Cloud VMs will be granted.
Enterprise Plus Edition: For the SCP license of more than 40 CPU cores, a free license for managing 999,999 Hybrid Cloud VMs will be granted.
For customers who have purchased Enterprise Edition with 10 CPU cores and a license for managing fewer than 50 Hybrid Cloud VMs, a free license for managing 50 Hybrid Cloud VMs will be granted after SCP is upgraded to Enterprise Plus Edition.
For customers who have purchased Enterprise Edition with 10 CPU cores and a license for managing more than 50 Hybrid Cloud VMs, the number of Hybrid Cloud VMs that can be managed will remain unchanged after SCP is upgraded to Enterprise Plus Edition.
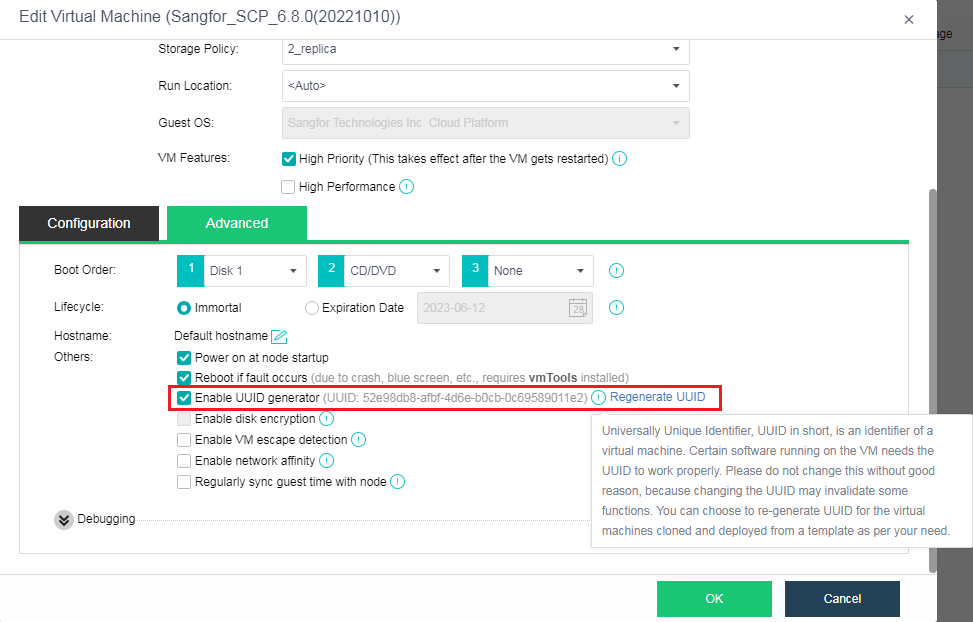
- Before upgrading versions earlier than SCP6.3.0_EN, please enable the UUID generator for SCP VMs on the HCI cluster where SCP resides to ensure that the security optimization feature takes effect.

-
When SCP6.7.0_EN manages an earlier version of HCI, after the HCI platform is upgraded to 6.7.0_EN, data sync may fail for Distributed Firewall while upgrading SCP6.7.0 to SCP6.7.30. Please contact a Sangfor technical support representative.
-
Before upgrading an earlier version of SCP to SCP6.8.0 and above, please ensure there are four SCP VM disks and the capacity of disk 4 is 400 GB or more.
Post Upgrade Check
After the upgrade is completed, start and verify the SCP services.
Rollback
SCP supports snapshot-based rollback. Before upgrading SCP, take a snapshot of the platform. Then, if the upgrade fails, rollback can be performed based on the snapshot.
Note:
Snapshot-based rollback can be performed in the event of an upgrade failure rather than a configuration change failure.
Upgrade Guide
Upgrade Instructions
Upgrade Steps
Please follow the following steps to upgrade:

Upgrade Sequence

Upgrade Notes
SCP Upgrade
- Upgrade the standby node for a cluster with active and standby nodes before upgrading the active node. You can upgrade the cluster mode directly.
- In the active-standby disaster recovery scenario, before upgrading the platform, disable disaster recovery policies and enable them after the upgrade is complete.
- Before upgrading SCP6.7.0_EN or an earlier version to SCP6.10.0, please check and ensure there are four SCP VM disks and the capacity of disk 4 is at least 400 GB.
- Before upgrading versions earlier than SCP6.3.0_EN, please enable the UUID generator for SCP VMs on the HCI cluster where SCP resides to ensure that the security optimization feature takes effect.
Upgrade Preparations
Packages, Documents, and Tools
Packages:
| Name | Description | Obtain Through |
|---|---|---|
| SCP6.10.0_EN update package | Used for upgrading from an earlier version to SCP6.10.0_EN. | Sangfor Community https://community.sangfor.com/plugin.php?id=service:download&action=view&fid=47#/12/all |
| Active and standby pre-upgrade package (optional) | After the active and standby pre-upgrade package is upgraded, the active and standby nodes can be upgraded simultaneously. | https://download.sangfor.com/Download/Product/HCI/HCI6.2.0_EN/SCP6.2.0_EN/SP-SCP_JG_PRE_UPGRADE_EN_01.pkg |
Documents:
| Name | Description | Obtain Through |
|---|---|---|
| SCP6.10.0 user manual | Describes basic O&M and configuration in SCP. | Sangfor Knowledge Base https://knowledgebase.sangfor.com/indexPage?module=645 |
| aDeploy User Guide | Provides instructions for using aDeploy. | Sangfor Knowledge Base https://knowledgebase.sangfor.com/indexPage?module=645 |
Tools:
| Name | Description | Obtain Through |
|---|---|---|
| Chrome/Edge | The browser to access HCI and SCP web console. | Obtain from the internet. |
| PuTTY/MobaXterm | An SSH client for troubleshooting if needed. | Obtain from the internet. |
| MD5 | Used for verifying the integrity of the upgrade package. | Check it when downloading the package file. |
| aDeploy | Used for pre-upgrade checks and other checks with aDeploy. | Sangfor Community https://community.sangfor.com/plugin.php?id=service:download&action=tool |
| License Key | 1. For a version earlier than HCI5.8.2, please apply for a new HCI license key. 2. If the NFV devices need to be upgraded according to Chapter 2.1.2.2 NFV Components. Please apply for a new NFV license key. 3. Before upgrading, please confirm that the customer’s license has not expired. Otherwise, the environment needs to be renewed. 4. Before upgrading, please check that the original NFV license key has not expired. Otherwise, the license needs to be renewed. |
Contact corresponding personnel to obtain or confirm. |
Environment Information
Fill in the corresponding IP information in the table below.
| Type | Classification | IP Address | Netmask | Remarks |
|---|---|---|---|---|
| Active SCP | The IP address for the management interface | |||
| Standby SCP | The IP address for the management interface |
Customer Resources Coordination
During the upgrade, O&M personnel should not log in to the platform for operation and maintenance.
Please coordinate resources in advance according to the following requirements to ensure a smooth upgrade:
-
Determine when to upgrade and fully prepare for service interruption during the upgrade to reduce impact.
-
Obtain contact information of the responsible persons.
-
Ensure a computer (with Internet access and a stable connection to the device) is ready. Ensure the computer can install and run the upgrade client software.
| Type | Name | Contact | Responsible For |
|---|---|---|---|
| Sangfor Technologies Inc. | Upgrading HCI and SCP | ||
| Customers | Coordinating resources and upgrade time. (Upgrade time: ) | ||
| Customers | Ensure O&M personnel will not log in to the platform for operation and maintenance. | ||
| Customers | Arrange persons responsible for application systems to handle service opening and verification issues. |
Pre-upgrade Check
Check with aDeploy
Apart from health check features, aDeploy supports checking customers’ common problems. It optimizes the platform-based check mechanism and can check the environment before upgrading. If faults or alerts are reported, please handle the faults and alerts for the cluster before upgrading.
Refer to Chapter 2.2.3.1 Packages, Documents, and Tools, for the download link.
SCP Pre-Upgrade Check
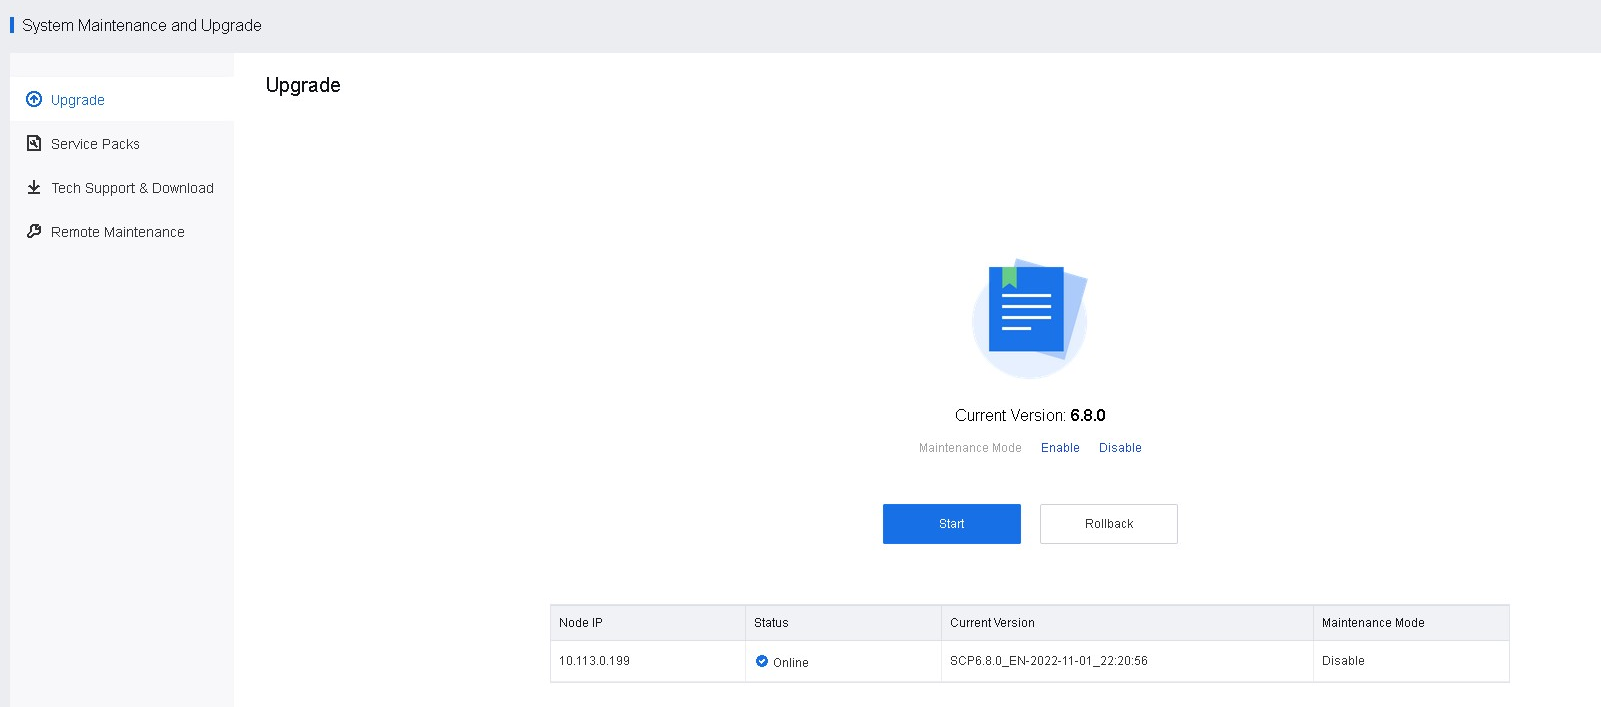
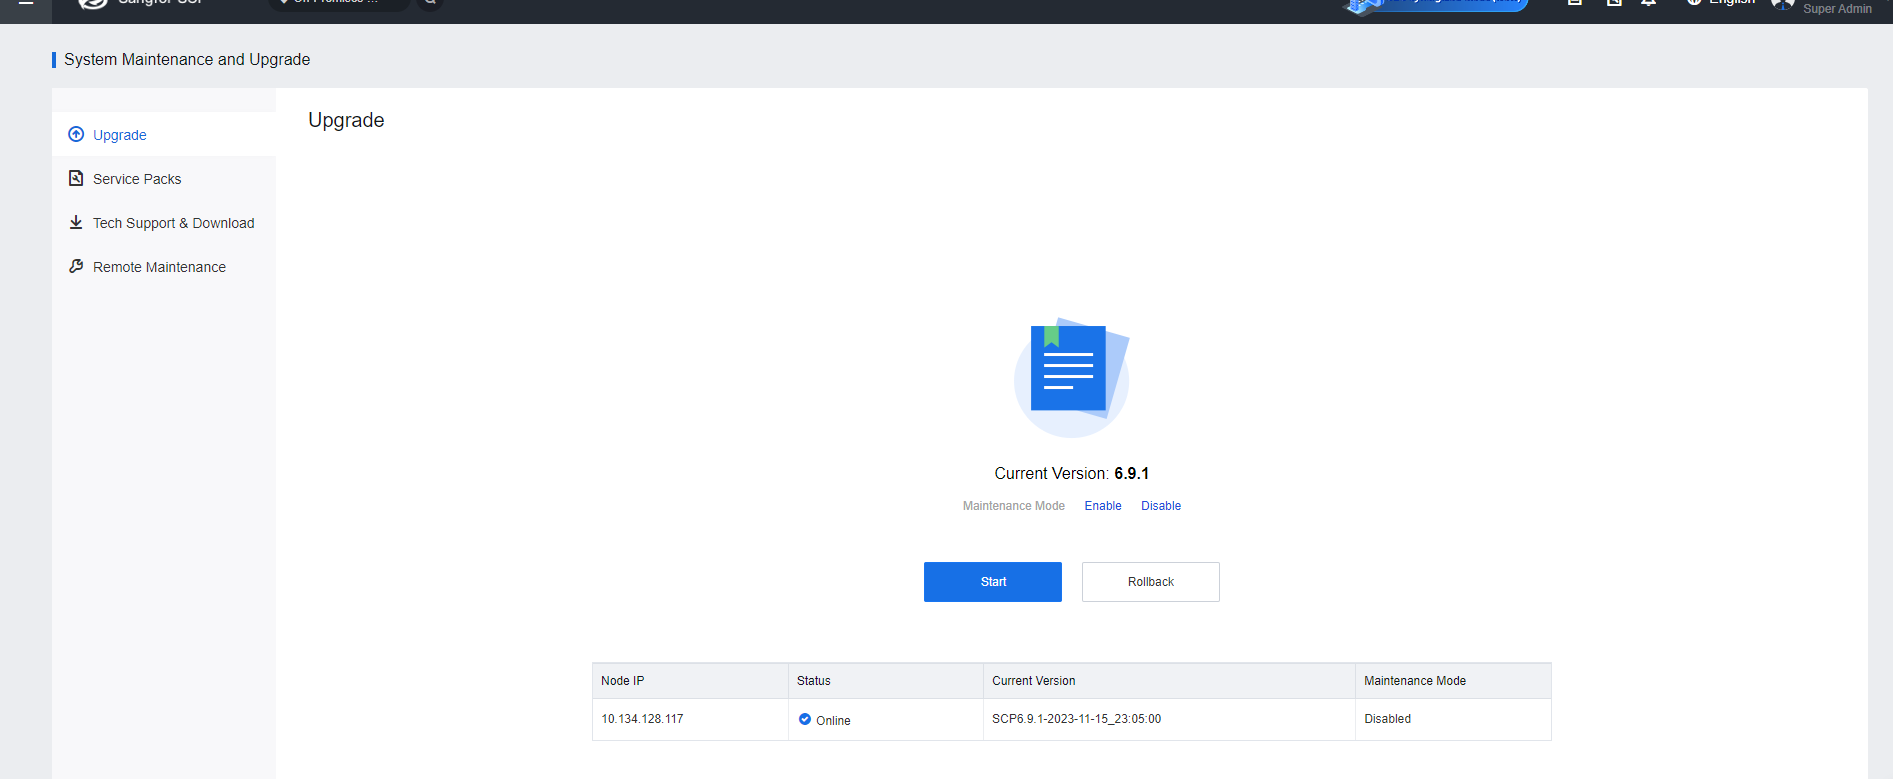
- Check the current version.
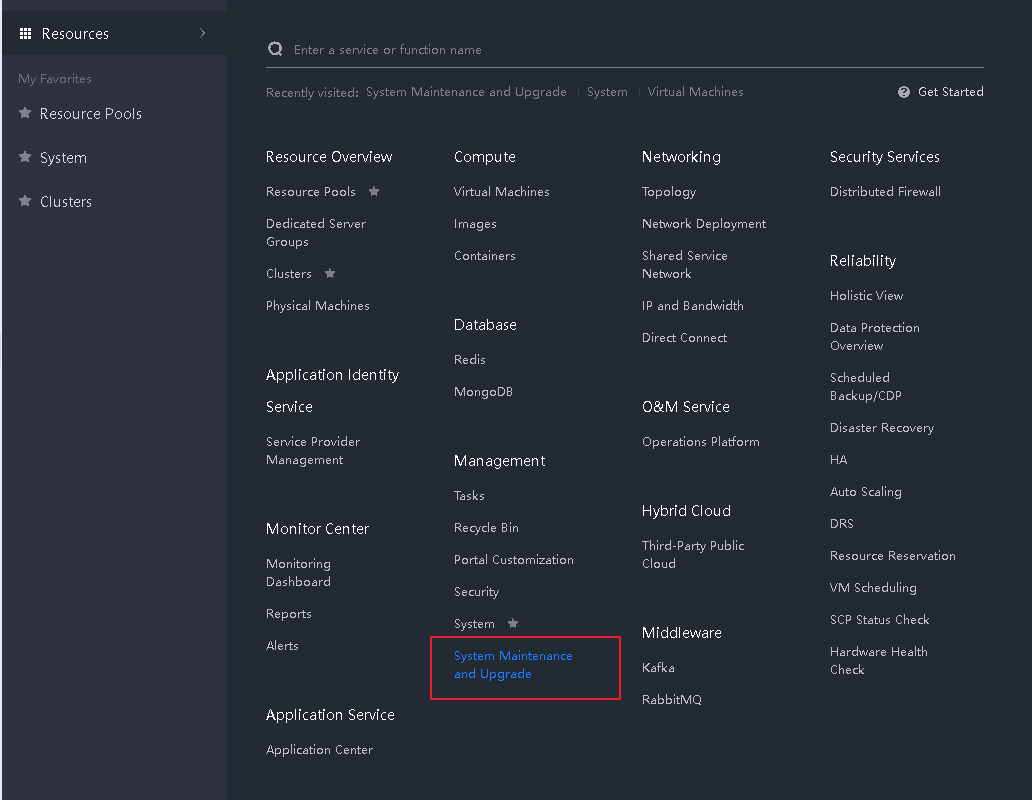
Go to Resources > Management > System Maintenance and Upgrade > Upgrade to view the current SCP version.

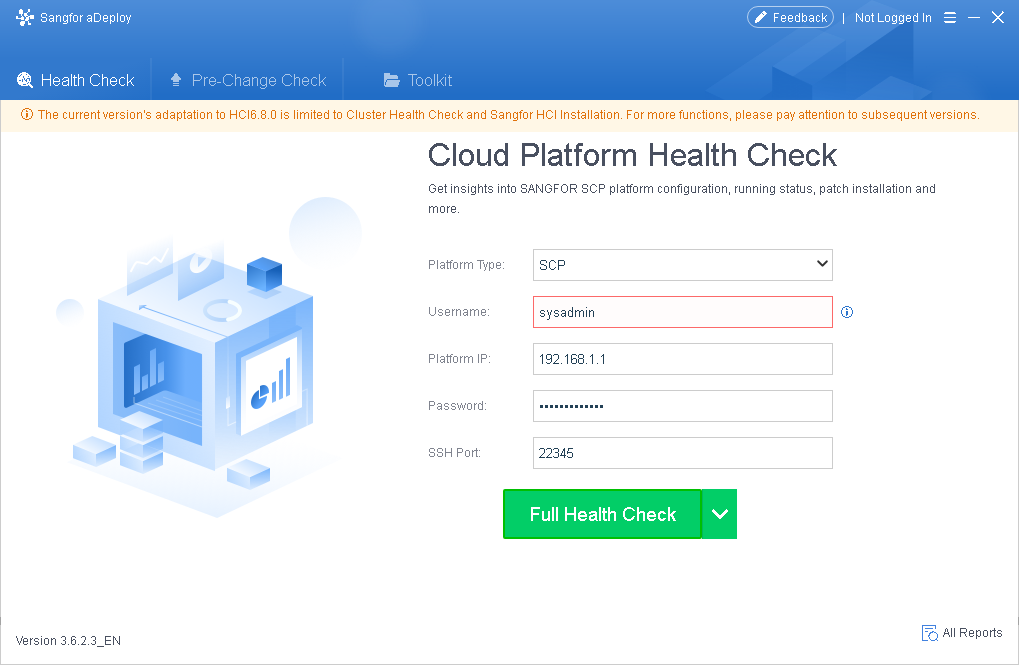
- Check with aDeploy.
- Platform Type: Select SCP.
- Username: Enter sysadm for SCP6.3.0 and above or root for other versions.
- SSH Port: Enter 22345. For versions earlier than SCP6.1.0, enter 22.
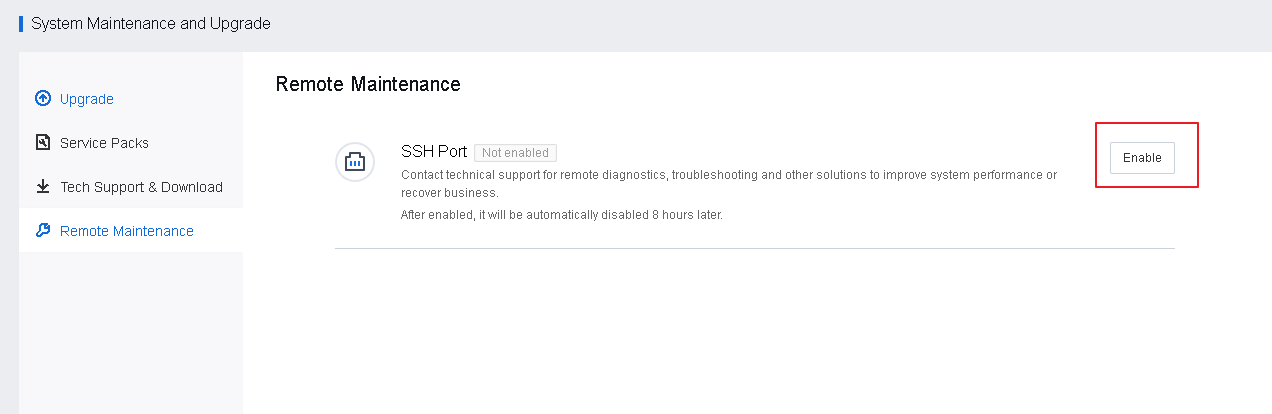
If an error message indicates that the SSH service port needs to be enabled, go to Resources > Management > System Maintenance and Upgrade > Remote Maintenance and click Enable.
- Check active/standby SCP.
Before upgrading, check whether SCP is in active/standby mode. Then, log in to the management portal of SCP and go to Reliability > SCP Status Check > SCP Failover to check whether there is a standby node. If yes, upgrade the active and standby pre-upgrade package first to upgrade the active and standby nodes simultaneously. For details, refer to Chapter 2.2.3.1 Packages, Documents, and Tools.
- Check before upgrading for disaster recovery scenarios.
In disaster recovery scenarios, there is no particular upgrade sequence for primary and secondary sites (they can be upgraded simultaneously). Before upgrading, check the current tasks of primary and secondary sites to ensure that no disaster recovery-related task is in progress. It is recommended to manually stop ongoing disaster recovery tasks (if any) before upgrading. After the upgrade, ensure the platform runs properly and start disaster recovery tasks.
- Check if there is any ongoing task.
If there is an ongoing task in Tasks, please wait for the task to finish before upgrading, or manually cancel the task and start the task after the upgrade.
- Check the SCP VMs disk number and capacity.
Check whether SCP has four disks and whether the capacity of disk 4 is 400 GB or more. If disk four does not exist or its capacity is less than 400 GB, add a disk or expand the capacity for an existing disk before upgrading.
Upgrade Procedure
aSecurity Upgrade
- Upgrade aSecurity
Step 1. Go to Security Services > aSecurity > Settings > aSecurity Upgrade and click Upgrade.
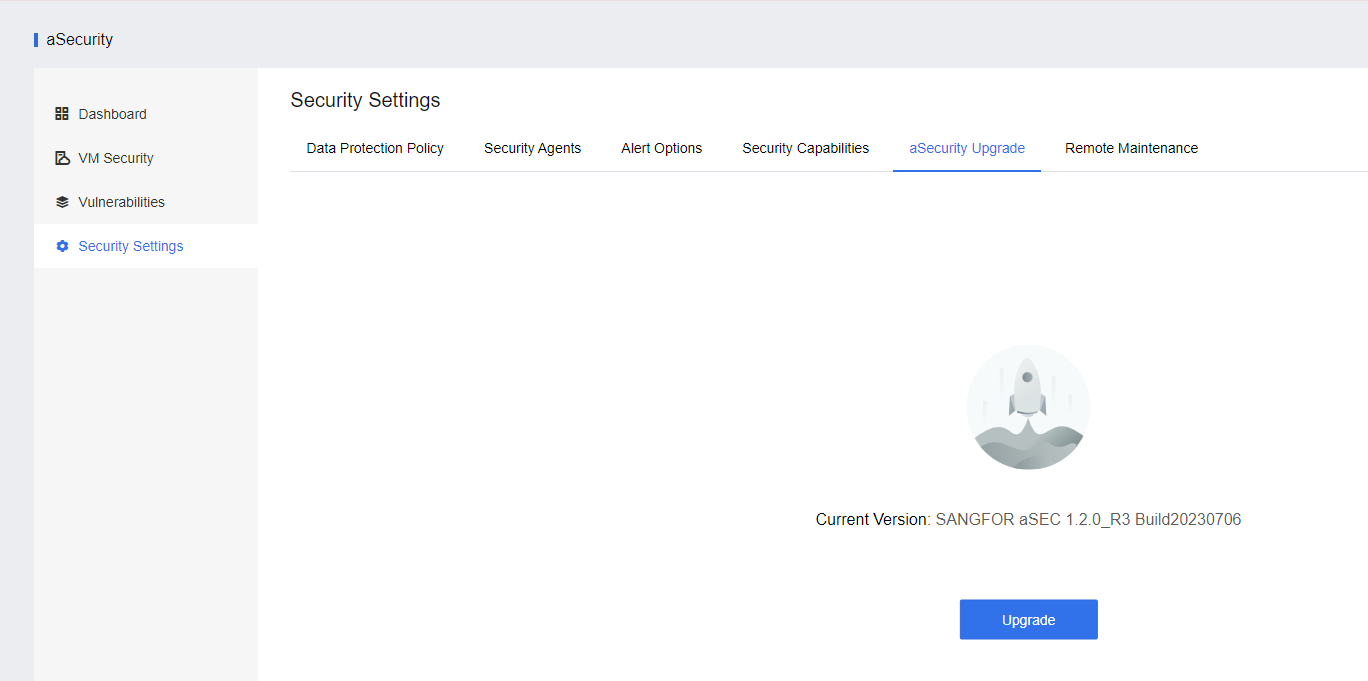
Step 2. Click Next to import the update package. Click Next after a successful import. If the update package passes the verification, click Upgrade and wait for the upgrade to complete. aSecurity will automatically restart after the upgrade is complete. The upgrade process will take about 30 minutes.
Step 3. After the upgrade, platform authentication, and licenses must be obtained again to use aSecurity capabilities.
- Upgrade Security Protection Manager(Endpoint Secure)
To upgrade Security Protection Manager(Endpoint Secure), kindly contact Sangfor Technical Engineer for assistance.
aNI Upgrade
- Go to Networking > Network Insight, click , select aNI Upgrade and click Upgrade.


-
Wait for the environment check to complete.
-
Upload the update package.
-
Wait for the update package check to complete.
-
Start the upgrade.
-
Restart aNI.
-
The upgrade is complete.
SCP Upgrade
- Go to System Maintenance and Upgrade > Upgrade and click Enable to enable Maintenance Mode.
- Click Upgrade and confirm that the new version of SCP is consistent with HCI, then upload the update package and click Start.
- Wait for the upgrade to complete, and then restart the platform.
- After the restart, check whether the current version is SCP6.9.0 in System Maintenance and Upgrade > Upgrade.
Note:
For upgrades from SCP6.7.0_EN(managed HCI6.7.0_EN and above) to versions later than SCP6.8.0_EN, you need to contact Sangfor Technical Support for further assistance.
NFV Component Upgrade
Refer to the upgrade guide for corresponding products for the upgrade procedure for NFV components.
Abnormalities Troubleshooting
Pre-Upgrade Failures
| Scenario | Versions | Solutions | Notes |
|---|---|---|---|
| While upgrading SCP (earlier than 6.8.0) to SCP6.9.1 in case that the disk 4 (/dev/vdd) is in use, the following messages will be displayed: a. The disk (/dev/vdd) has been partitioned, but its datastore does not meet the requirements. Please contact a Sangfor technical support representative. b. The file system of disk 4 (/dev/vdd) does not meet the requirements. Please contact a Sangfor technical support representative. |
Upgrade from earlier versions to SCP6.8.0 and above. | 1. Contact the customer to confirm whether the added disks can be removed or migrate the disk data. 2. Exit the upgrade process. 3. Delete disks added by the customer on the HCI platform. 4. Add a disk with a capacity of 400 GB to the SCP VM on the HCI platform. 5. Upgrade again. |
|
| While upgrading SCP (earlier than 6.8.0) to SCP6.8.0 and above, the following message will be displayed: a. The disk (/dev/vdd) does not exist. Please add a new disk with a capacity of 400 GB or more. |
Upgrade from earlier versions to SCP6.8.0 and above. | 1. Exit the upgrade process. 2. Add a disk with a capacity of 400 GB to the SCP VM on the HCI platform. 3. Upgrade again. |
|
| While upgrading SCP (earlier than 6.8.0) to SCP6.8.0 and above, the following message will be displayed: a. Error occurred while partitioning the disk (/dev/vdd). Please delete the disk, add the disk again, and upgrade again. |
Upgrade from earlier versions to SCP6.8.0 and above. | 1. Exit the upgrade process and go to the HCI platform to power off the SCP VM. 2. Delete disks newly added for the SCP VM on the HCI platform. 3. Add a disk with a capacity of 400 GB to the SCP VM on the HCI platform. 4. Power on the SCP VM and upgrade again. |
|
| While upgrading SCP (earlier than 6.8.0) to SCP6.8.0 and above, the following message will be displayed: a. GRUB upgrade failed. Please do not restart the SCP VM. If the problem persists, please contact a Sangfor technical support representative. |
Upgrade from earlier versions to SCP6.8.0 and above. | 1. Upgrade again 2. No impact if the upgrade is successful. 3. If the upgrade fails again, do not power off or restart the SCP VM. Contact a Sangfor technical support representative. |