【NGAF】WatchGuard IPSec VPN Configuration Guide_V8.0.47
Introduction
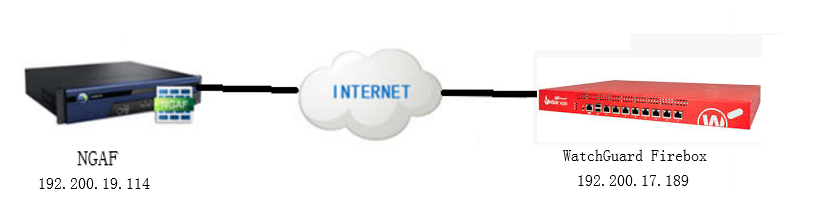
The full name of the VPN is Virtual Private Network. VPN is defined as establishing a temporary and secure connection over a public network (through the Internet), a secure and stable tunnel through a chaotic public network. Using this tunnel, you can encrypt data several times to safely achieve the purpose of using the Internet. A virtual private network is an extension of an intranet. Virtual private networks help remote users, corporate branches, business partners, and suppliers establish trusted and secure connections to the company’s intranet for secure extranet virtual private networks that connect to business partners and users. VPN mainly uses tunnel, encryption, decryption, key management, and user and device identity authentication technology.
Applicable Scenario
Configuration
Configure WatchGuard
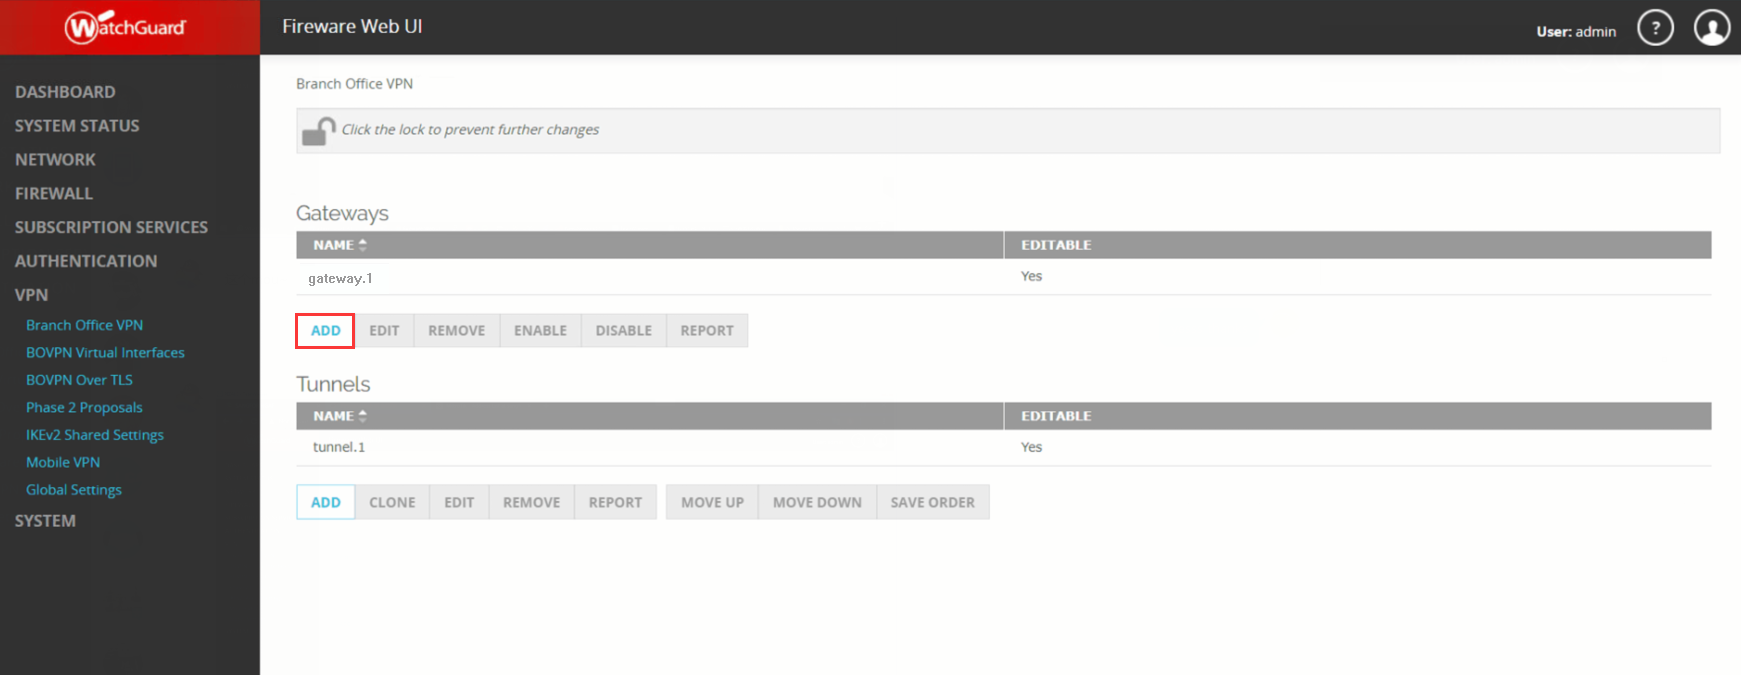
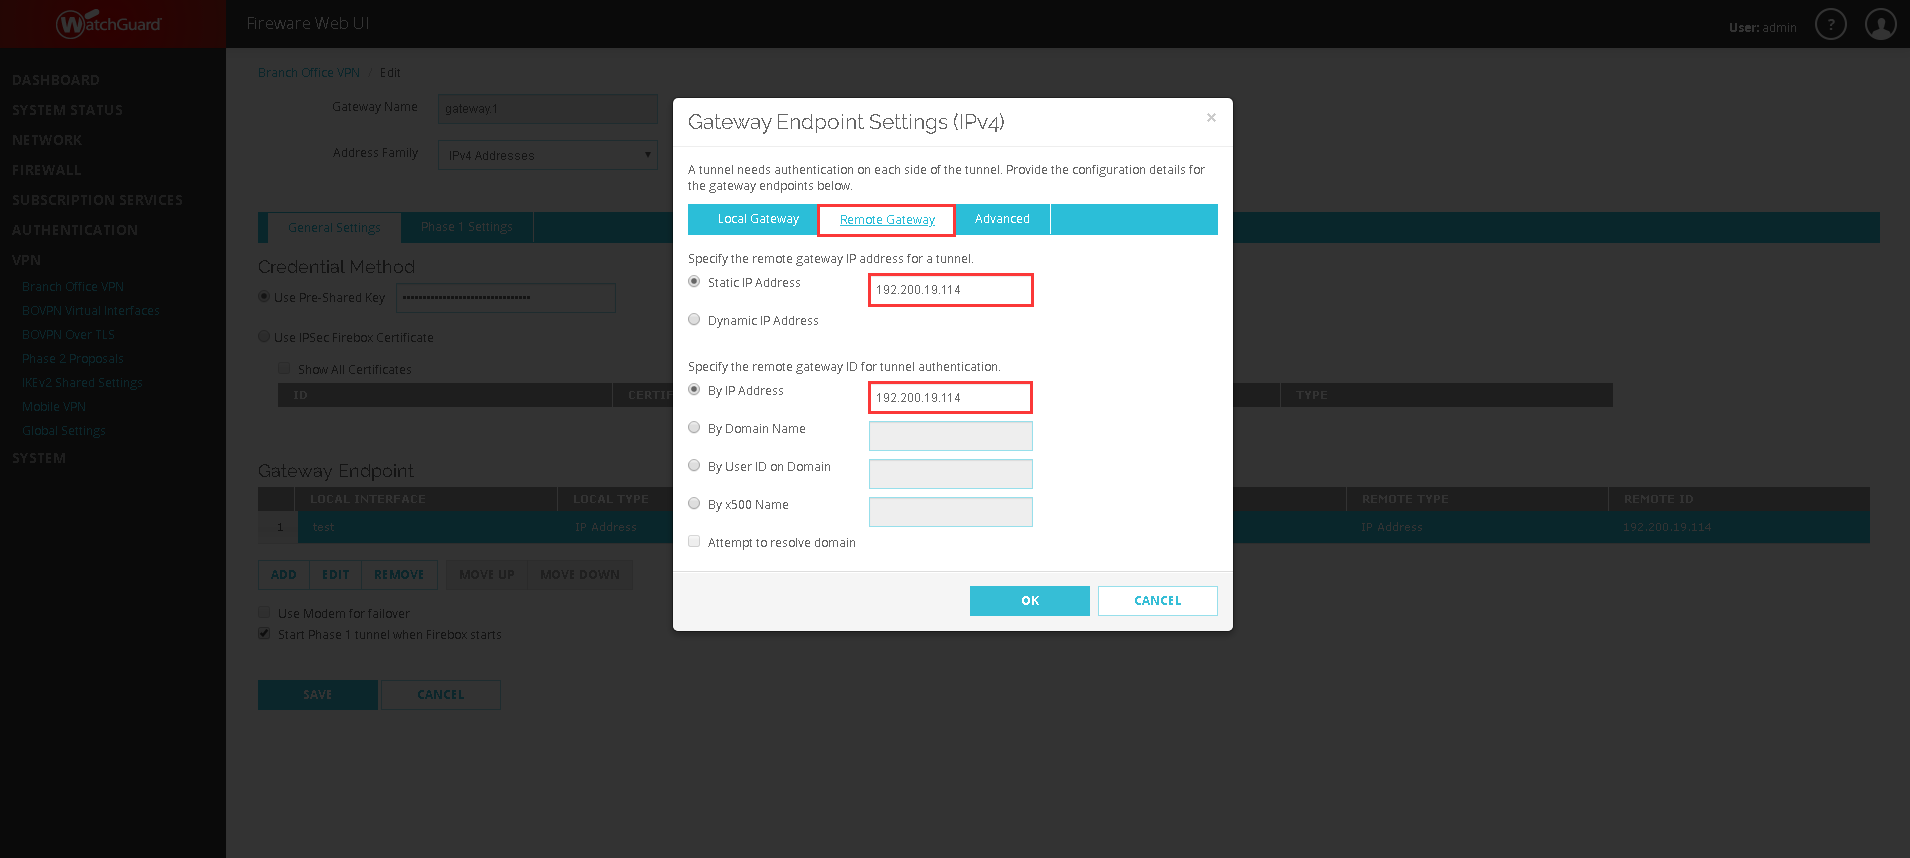
- Configure phase 1. Go to VPN > Branch Office VPN, click the Add button under Gateways, then fill in the Gateway Name and Use Pre-Share Key. After that, click the Add button under the Gateway Endpoint to add the phase 1 configuration.
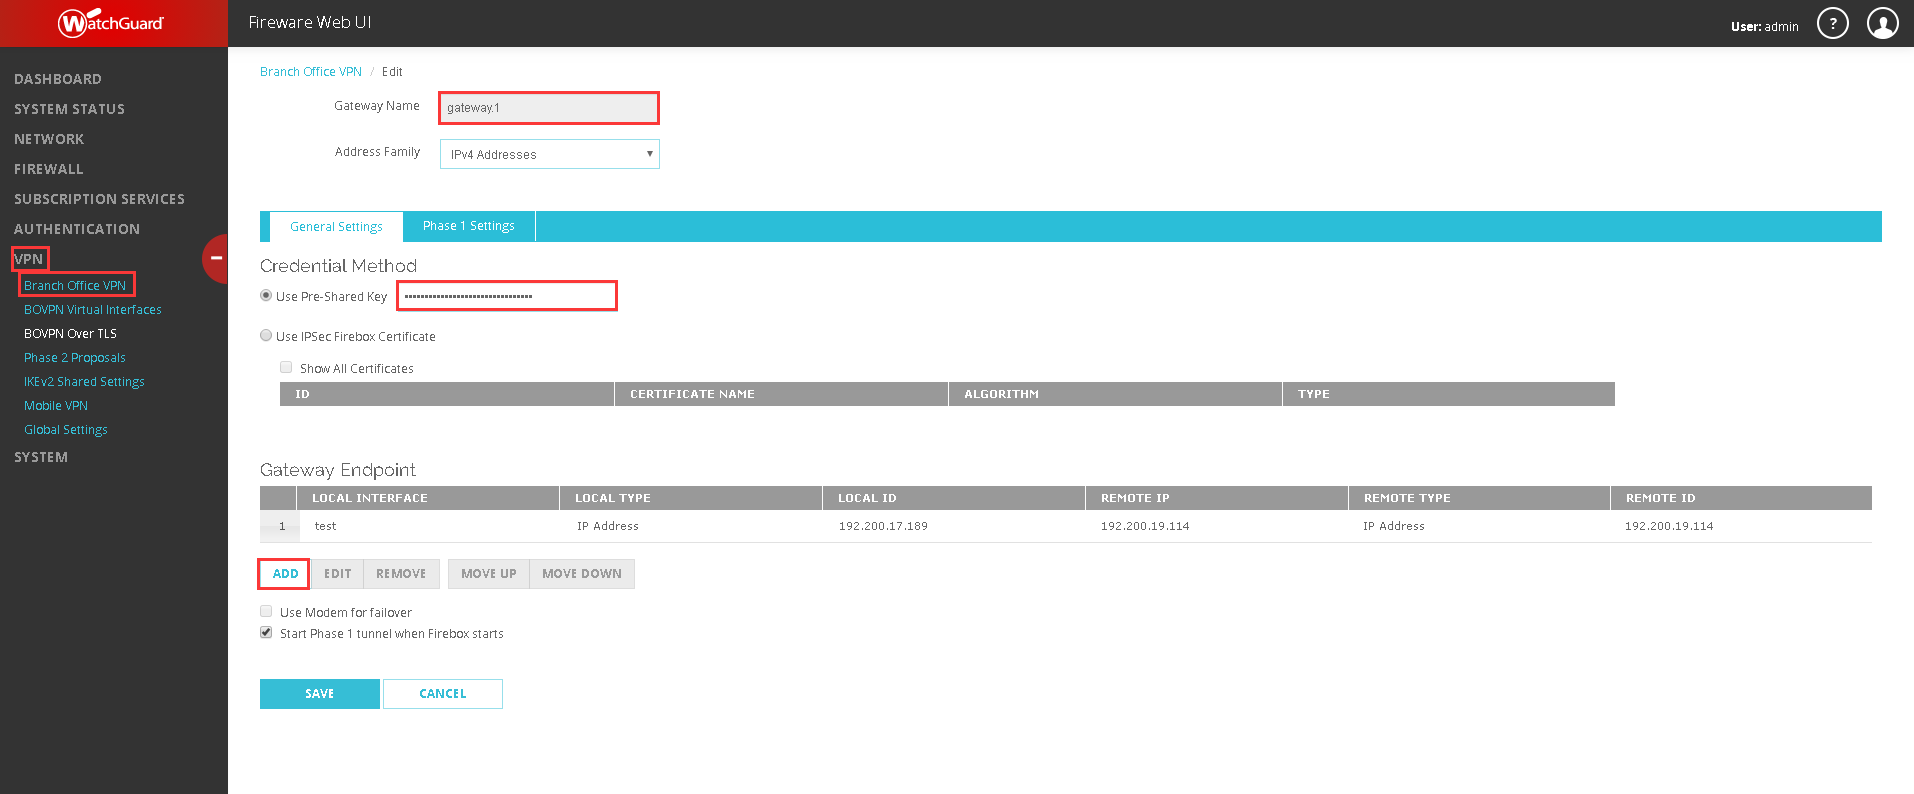
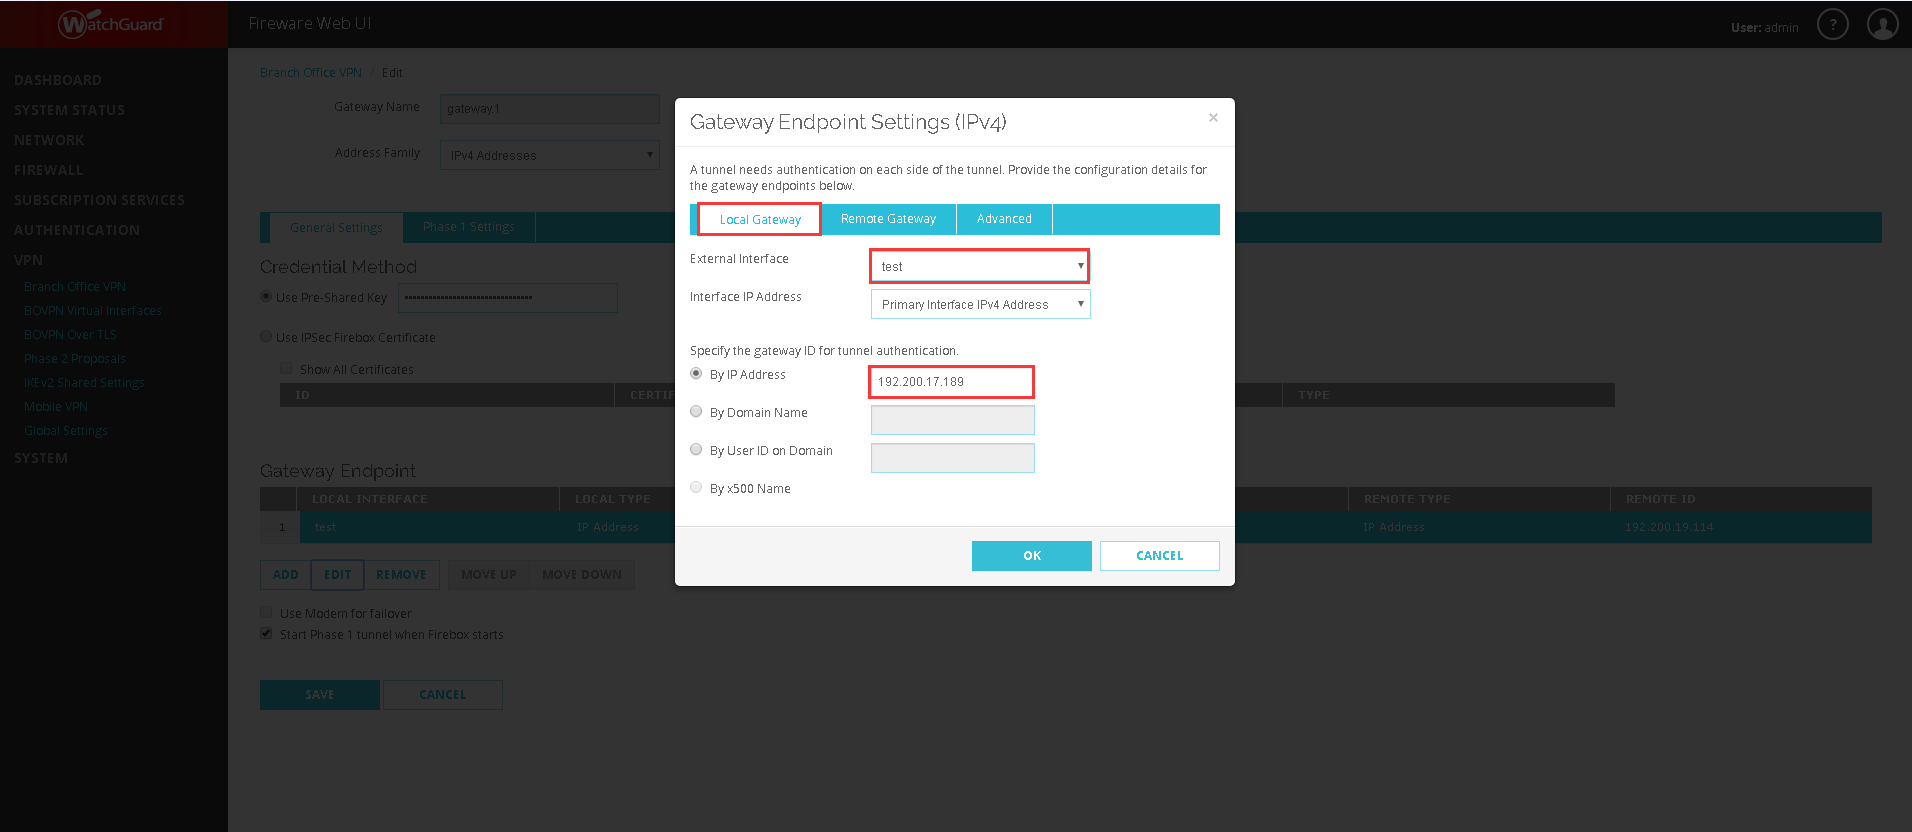
- After clicking on the Add button, it will prompt out a tab, and you need to fill in phase 1 as below:
Note:
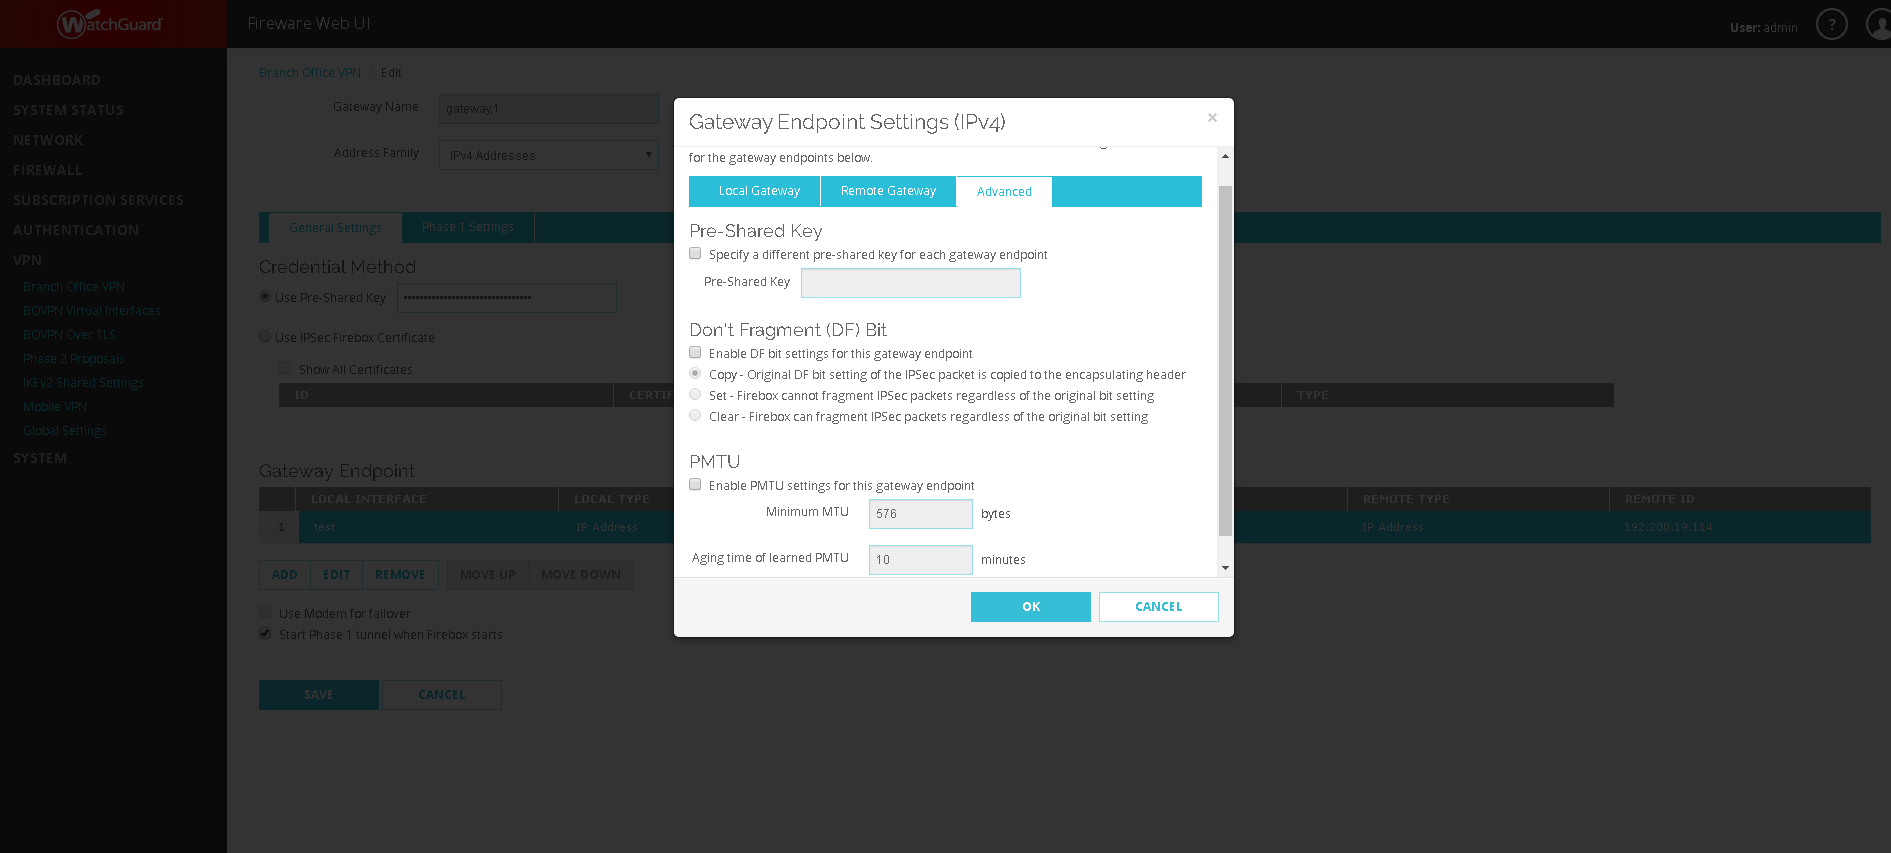
Suggest keeping default settings for the Advanced settings.
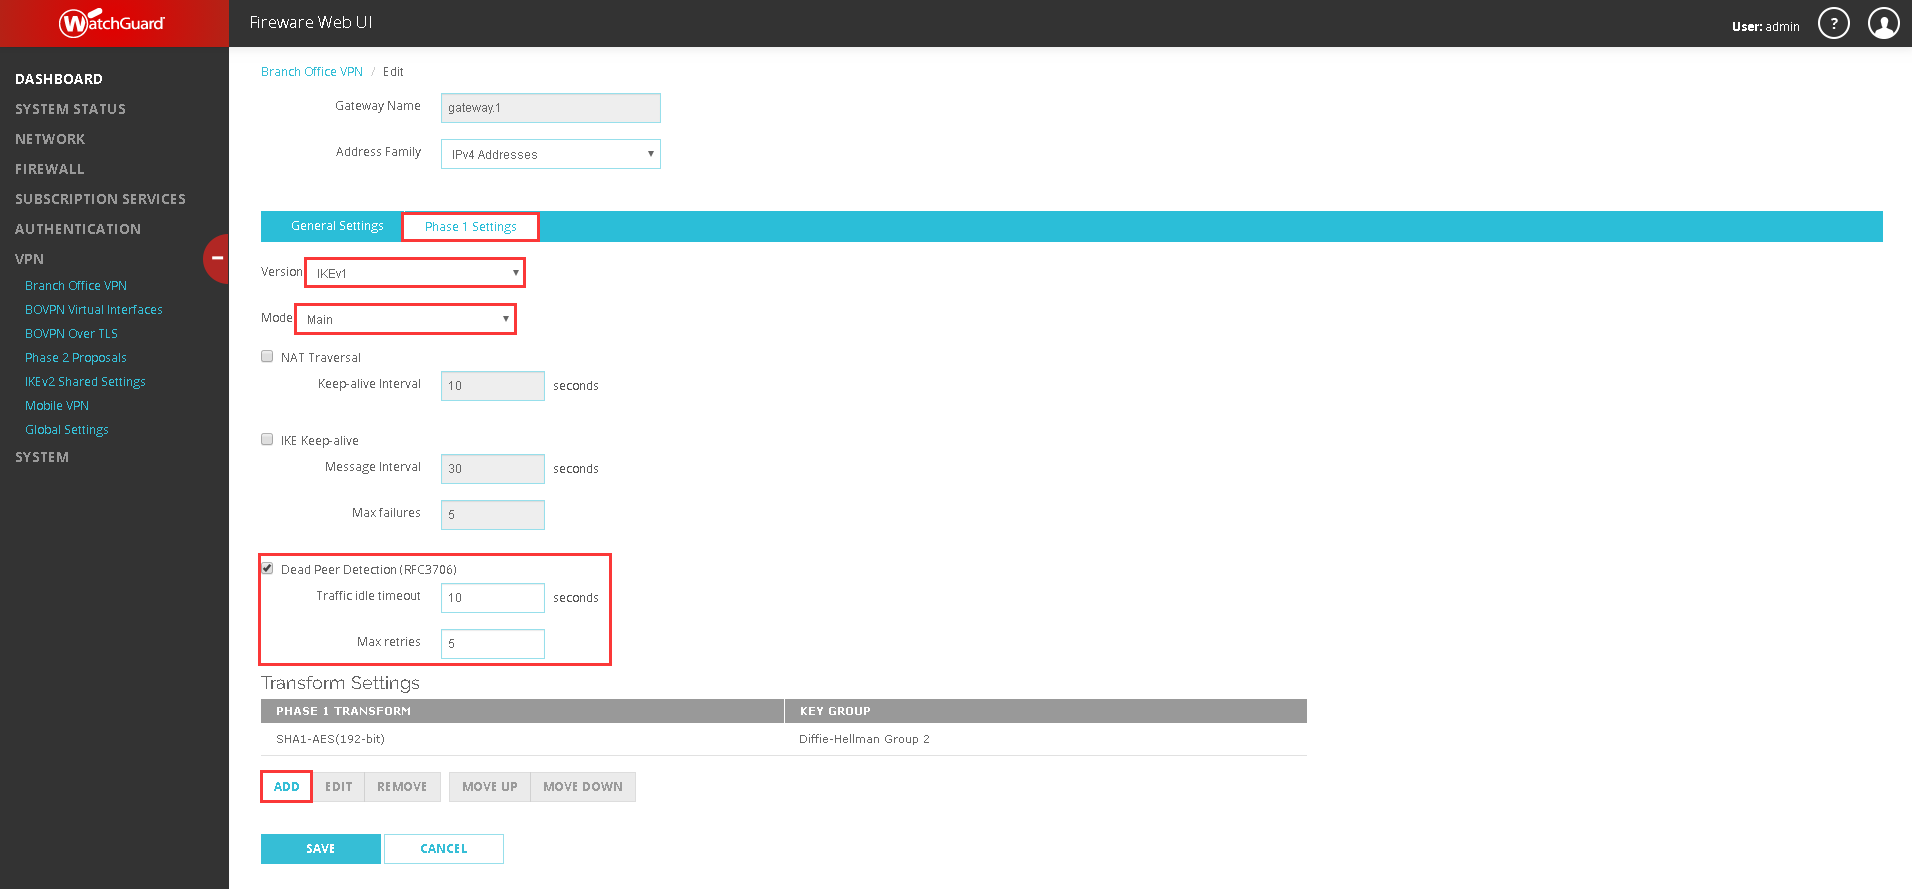
- After configuring the Gateway Endpoint information, you need to fill in the Phase 1 information on Phase 1 Settings as below:
Note:
NGAF versions before 8.0.23 only support IKEv1, version 8.0.23 and above support IKEv2.

Note:
The SA Life used in this scenario is the default of the WatchGuard device. It can be changed accordingly.
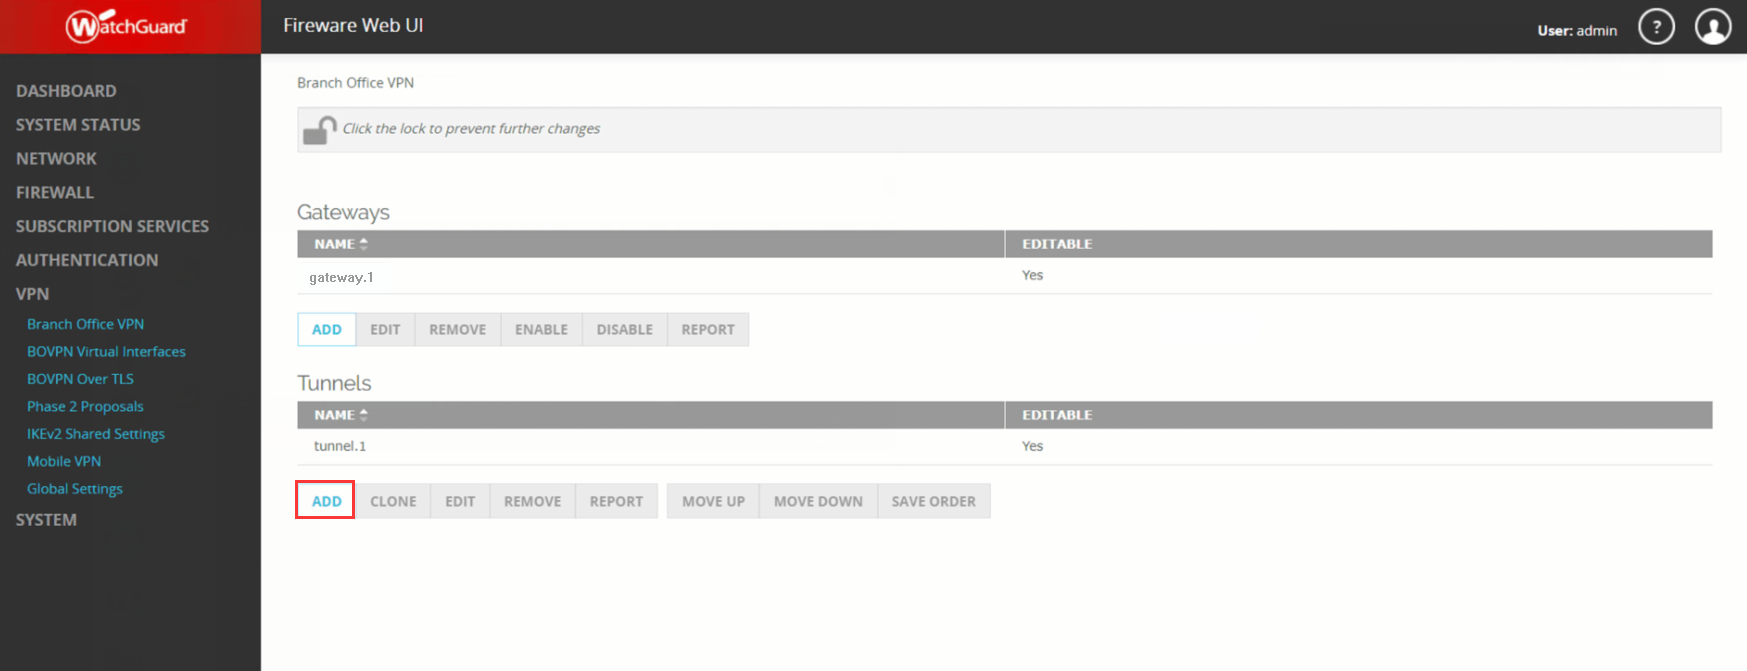
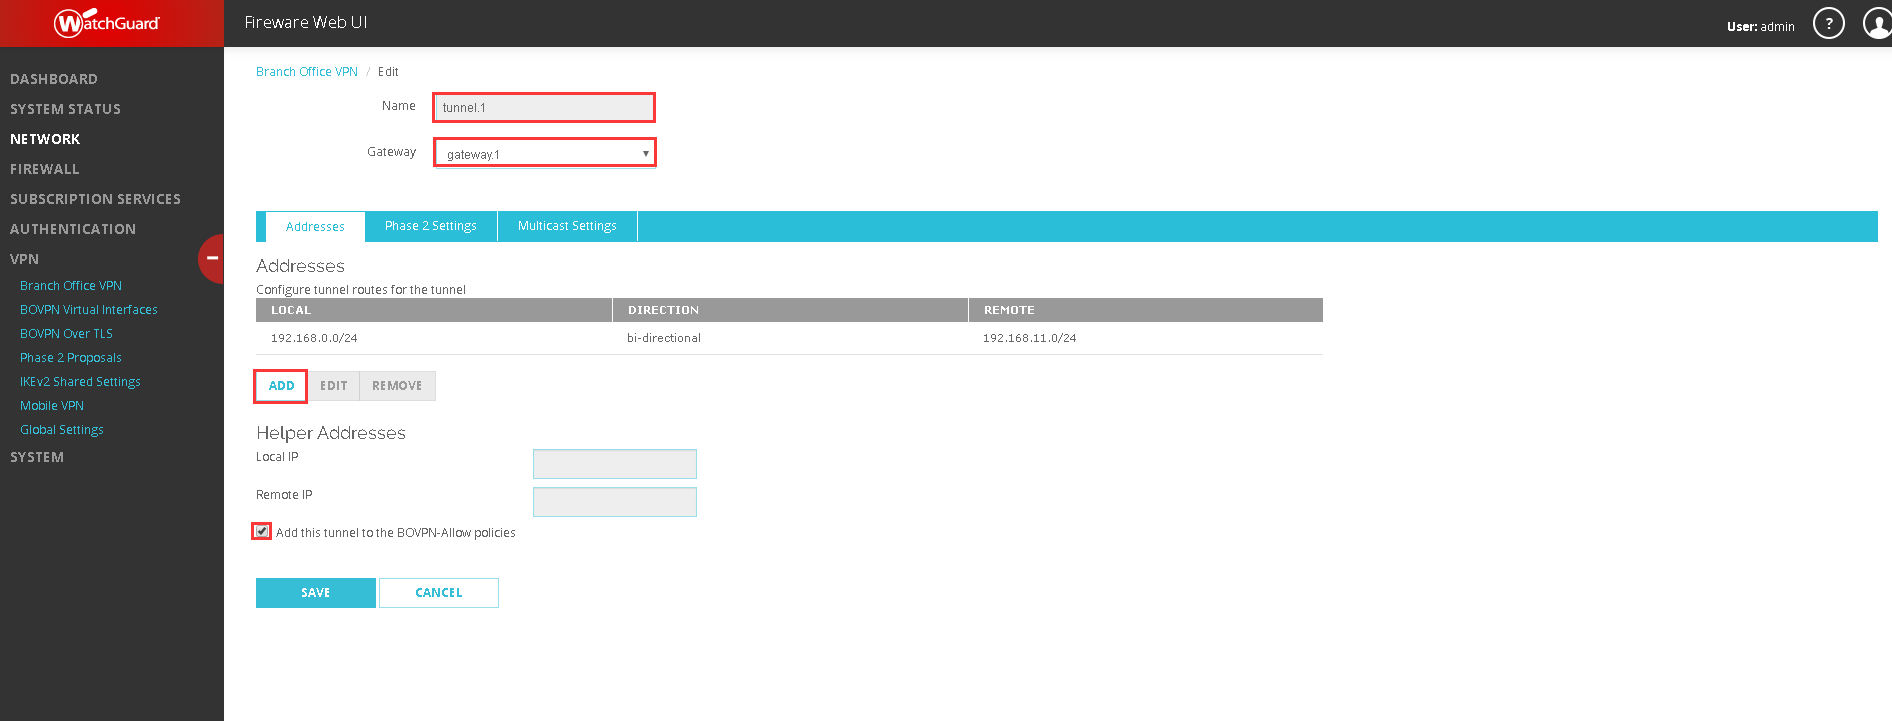
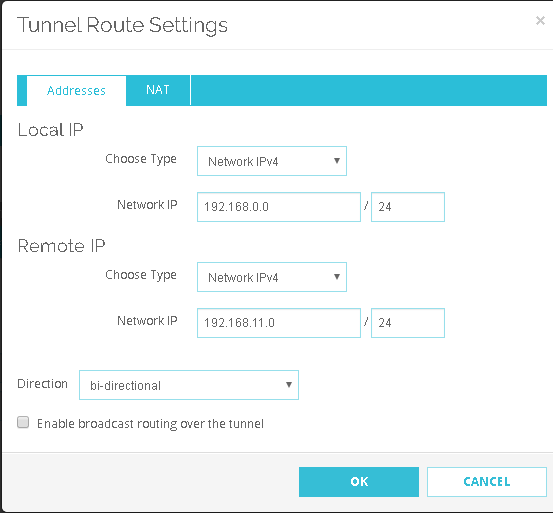
- After configuring phase 1, go to Tunnels and click the Add button, then fill in the phase 2 information such as tunnel name, choose the gateway that was created, and click the Add button to add the addresses as below:
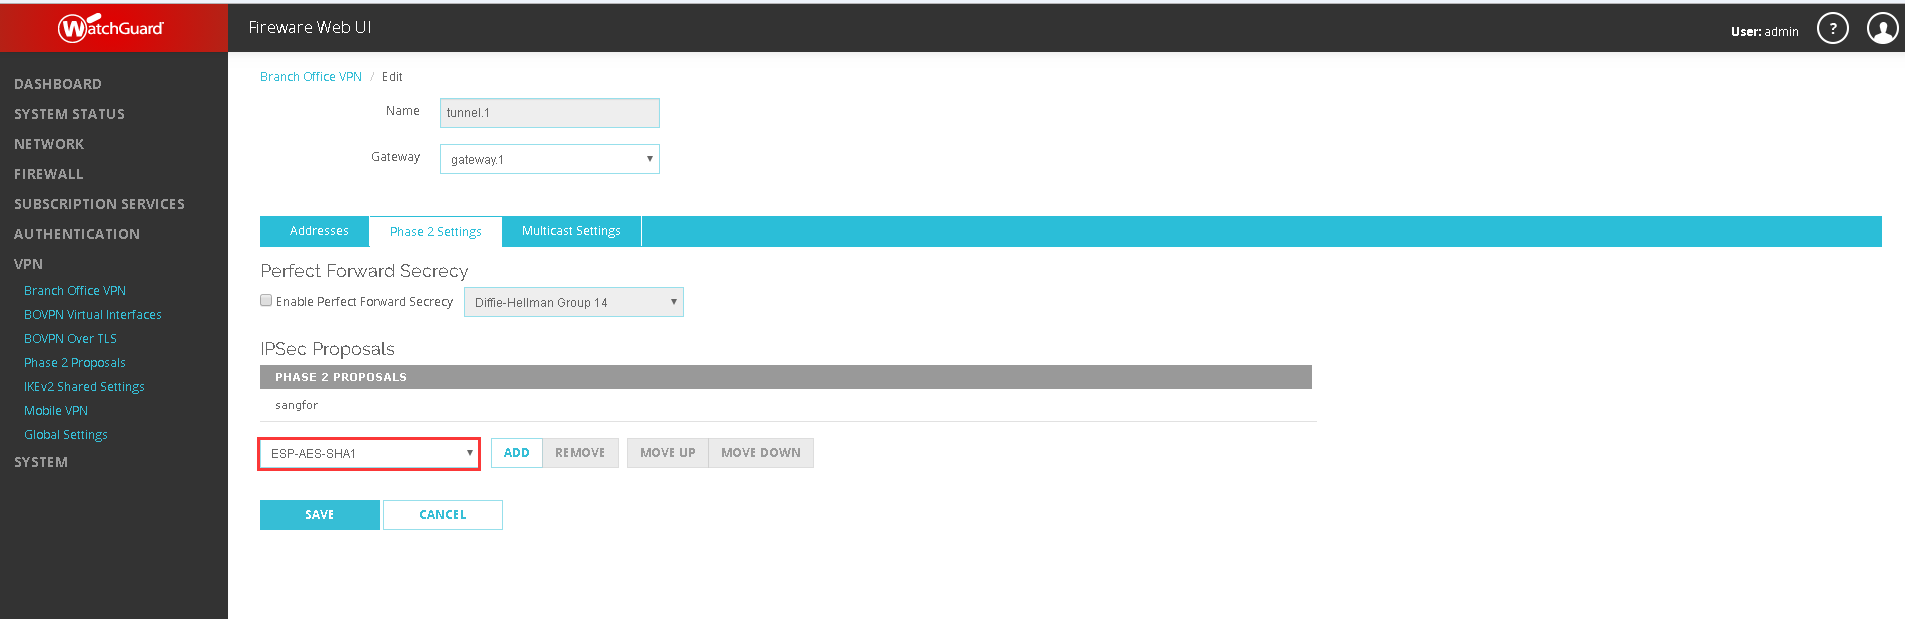
- Lastly, go to Phase 2 Setting and choose the proposal as shown below:
Configure NGAF
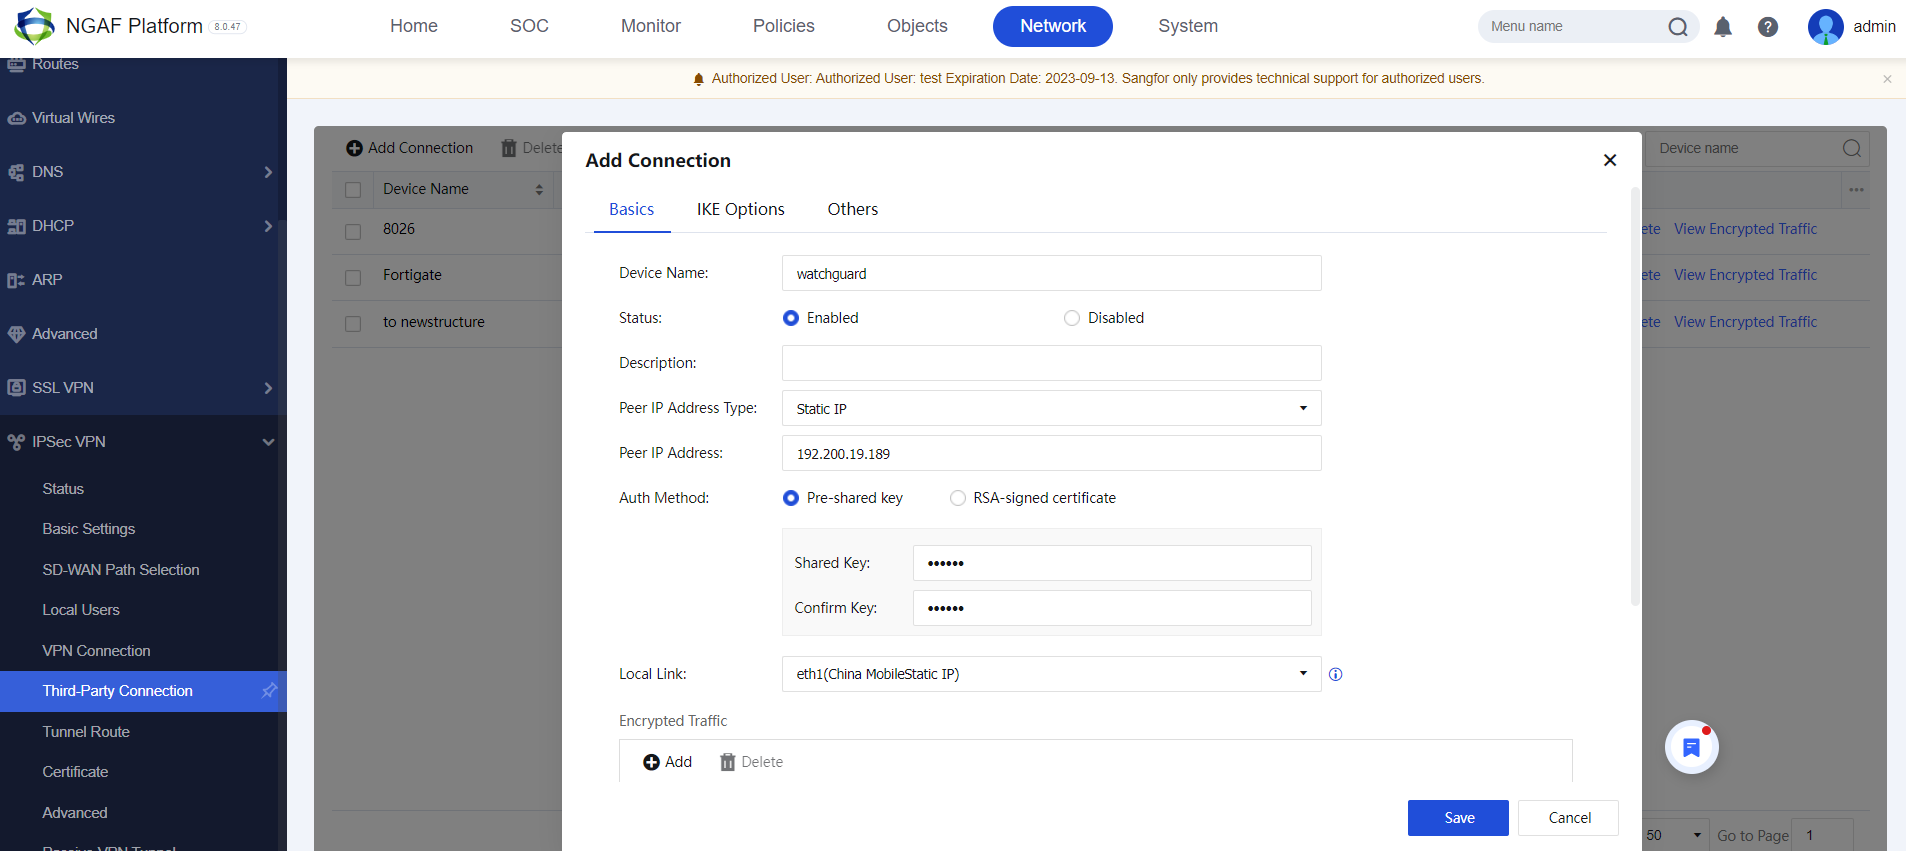
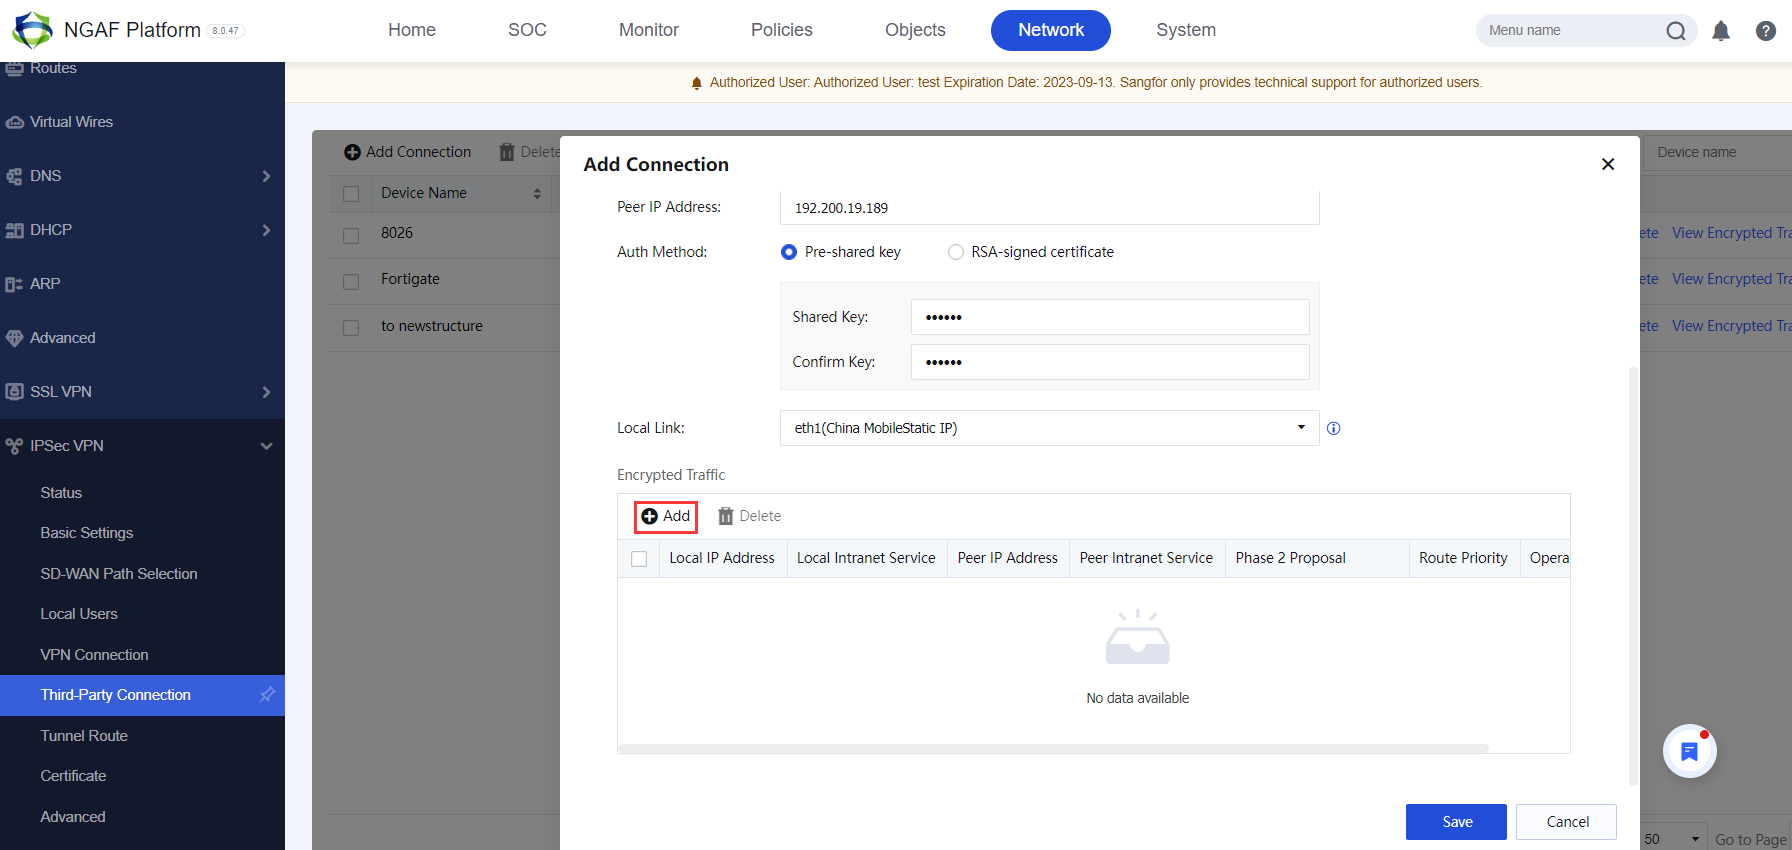
- Go to Network > IPSec VPN > Third-Party Connection, then click Add Connection button and fill in the basic configurations as shown below:
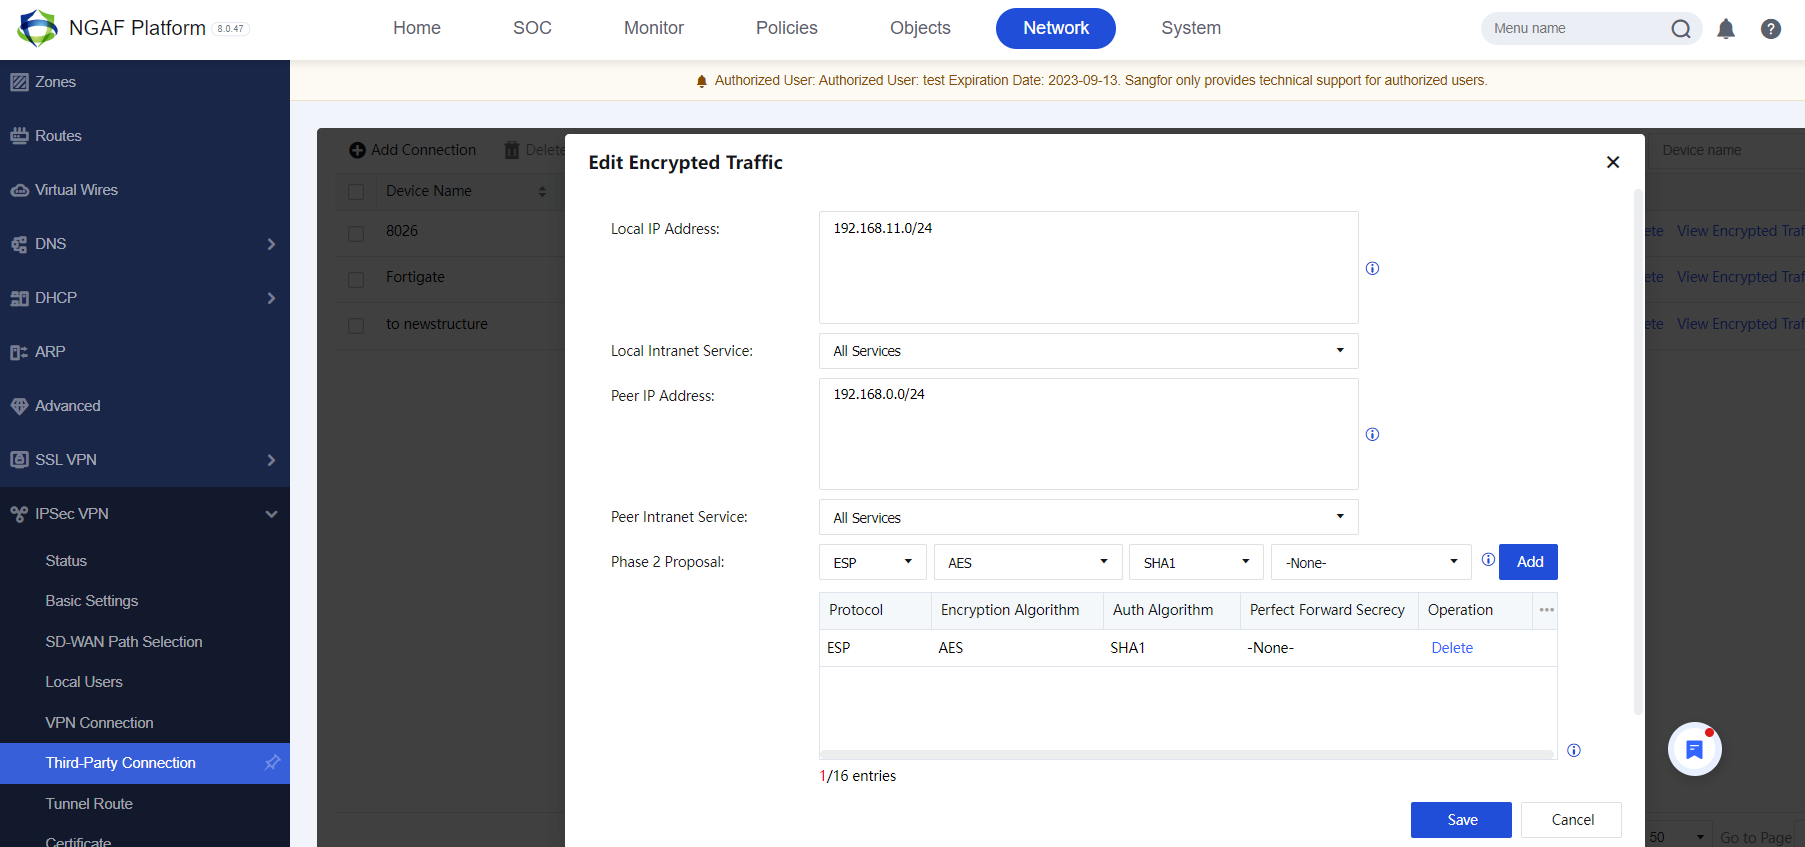
- After configuring basic configuration, go to Encrypted traffic and click the Add button on Inbound Policy and Outbound Policy as below:
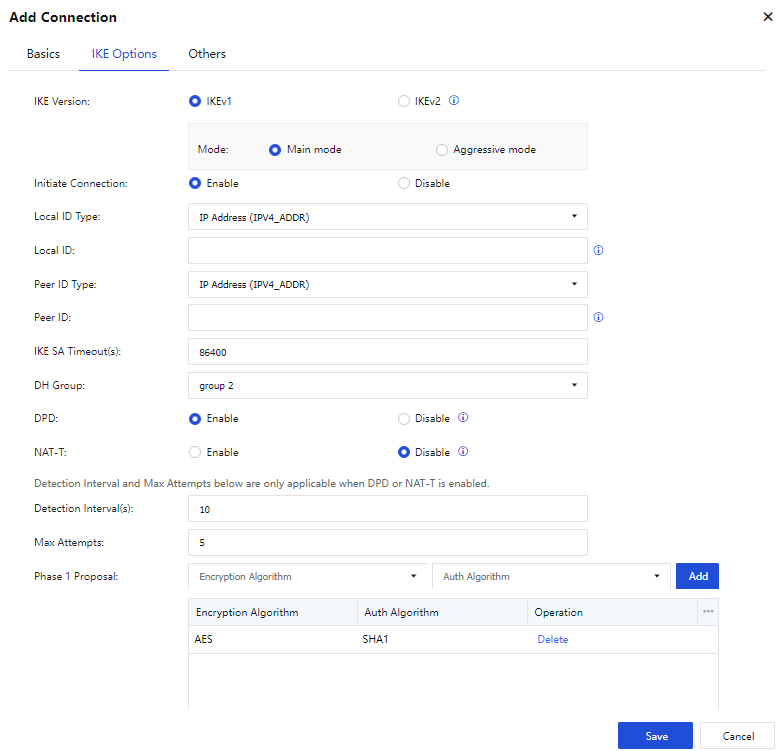
- Click IKE Options to configure the IKE configuration as below:
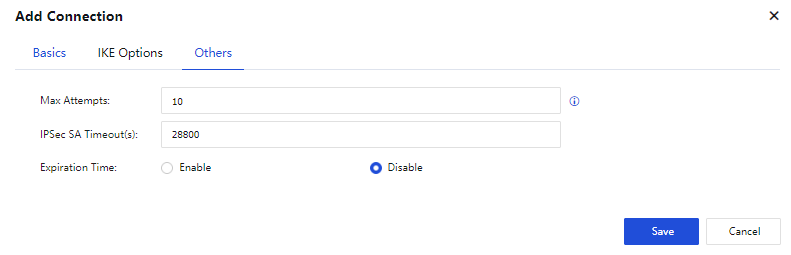
- Lastly, go to Others to configure IPSec SA Timeout as below:
- After configuration, click the Save button.