【NSF】Release Notes_V8.0.95
Overview
Enhancements
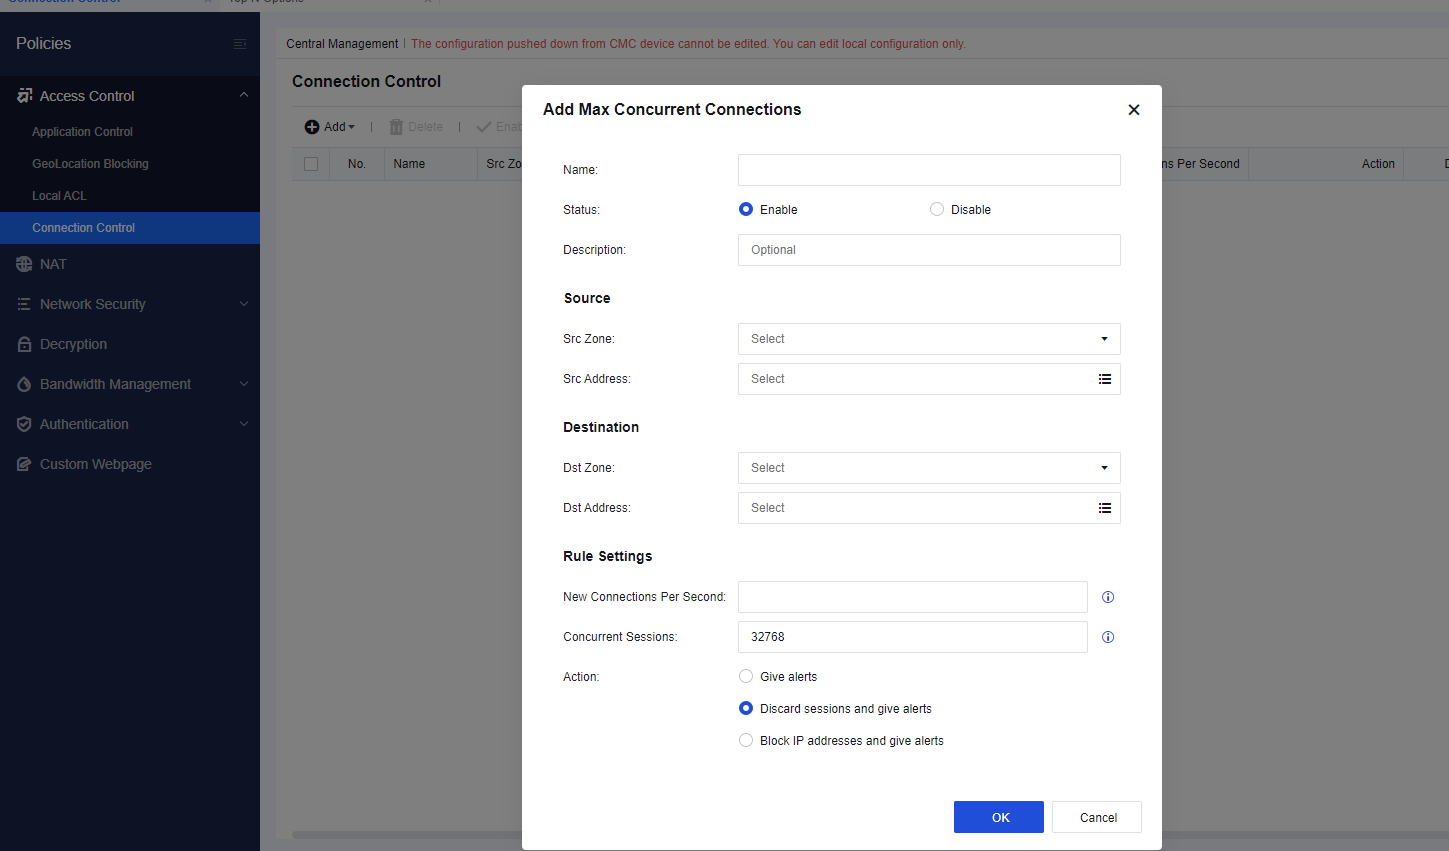
Connection Control
-
A threshold can be specified to limit new connections per second.
-
Actions are provided for administrators to limit the number of new connections from a single IP address. It ensures the stable operation of Network Secure. If the number of new connections exceeds the specified threshold, actions such as giving alerts, discarding sessions, and blocking IP addresses can be executed.
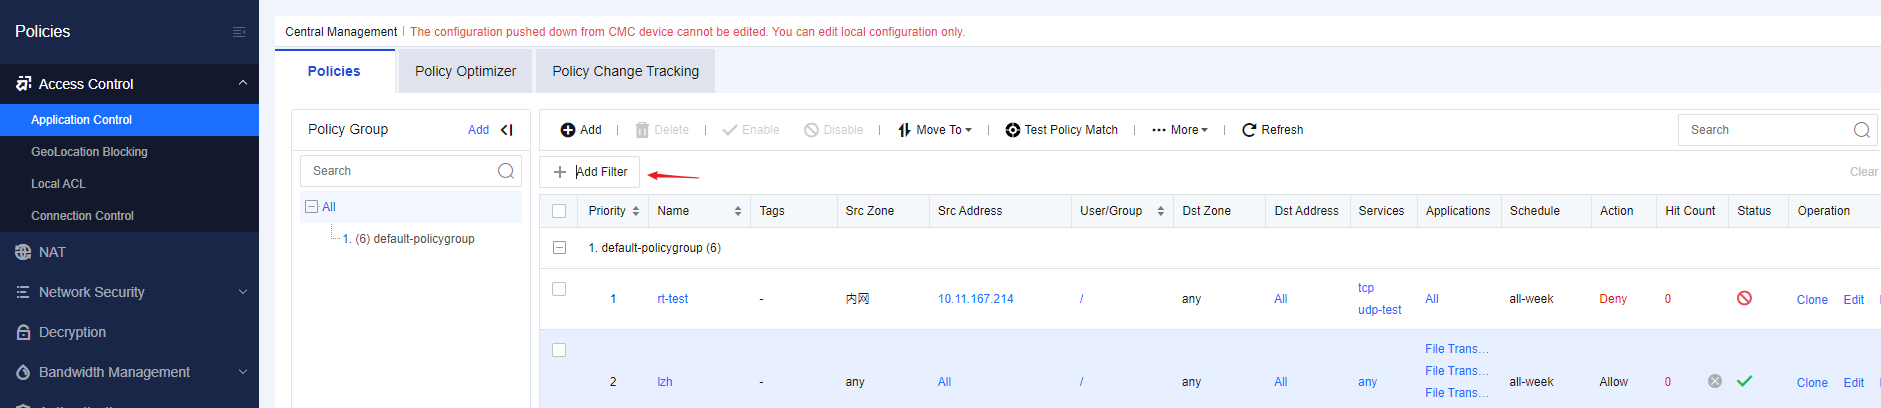
Application Control/NAT Policy Filters
Application control and NAT policies can be filtered flexibly based on fields such as source address, source zone, service, port, and last match count.
Application control policy filter:
NAT policy filter:

Console Pages Response Time Optimized
The time consumed to load critical pages on the console, such as the Home page and SOC-related pages, is significantly reduced.
New Features
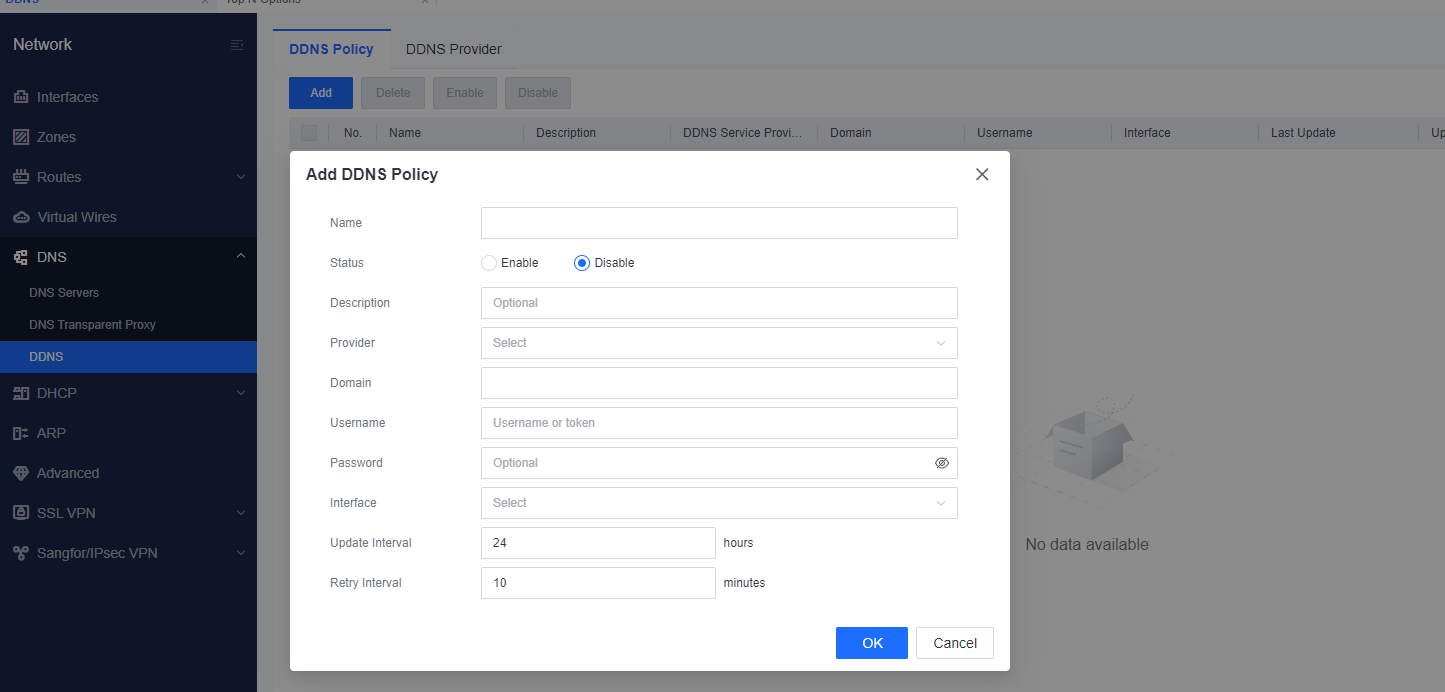
DDNS Policies
DDNS policies can be configured to automatically map a user’s dynamic IP address to a permanent domain name. Users do not need to update the mapping between IP addresses and domain names manually.
Example of adding a DDNS policy:
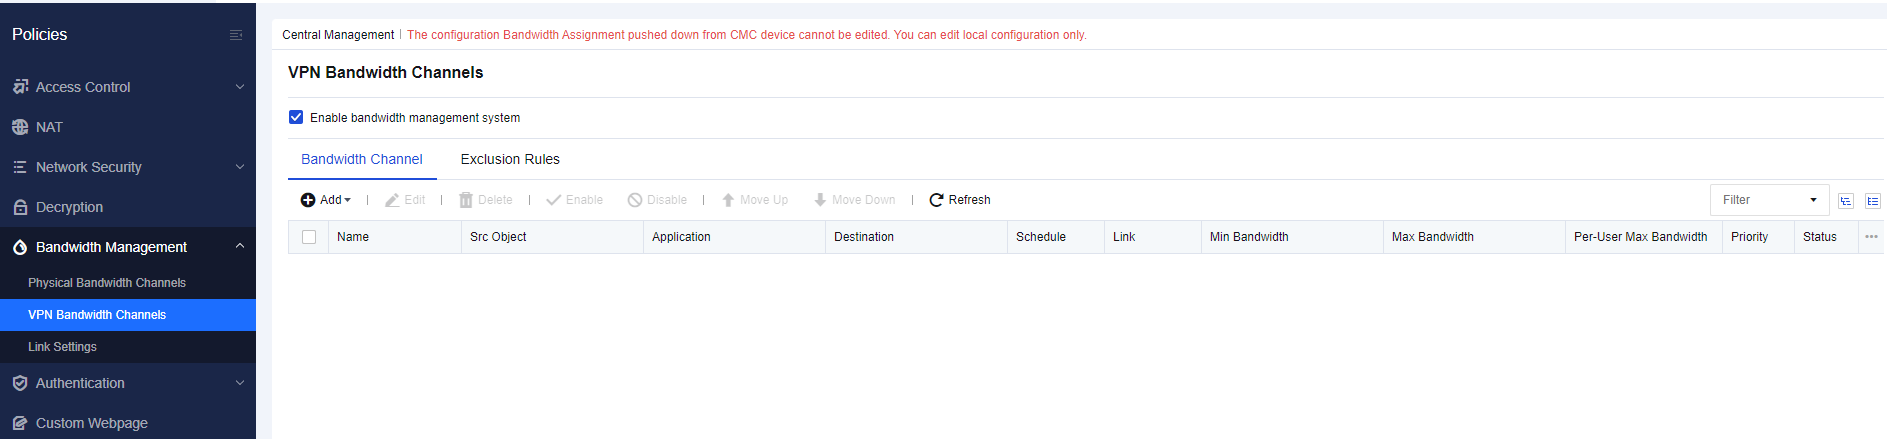
Bandwidth Management for VPN Tunnels
-
Fine-grained bandwidth management is supported all VPN tunnels. Users can determine the priorities of different tunnels to meet specific requirements.
-
The bandwidth of VPN tunnels can be managed more precisely based on the types of applications, websites, and files, thus improving network security and efficiency.
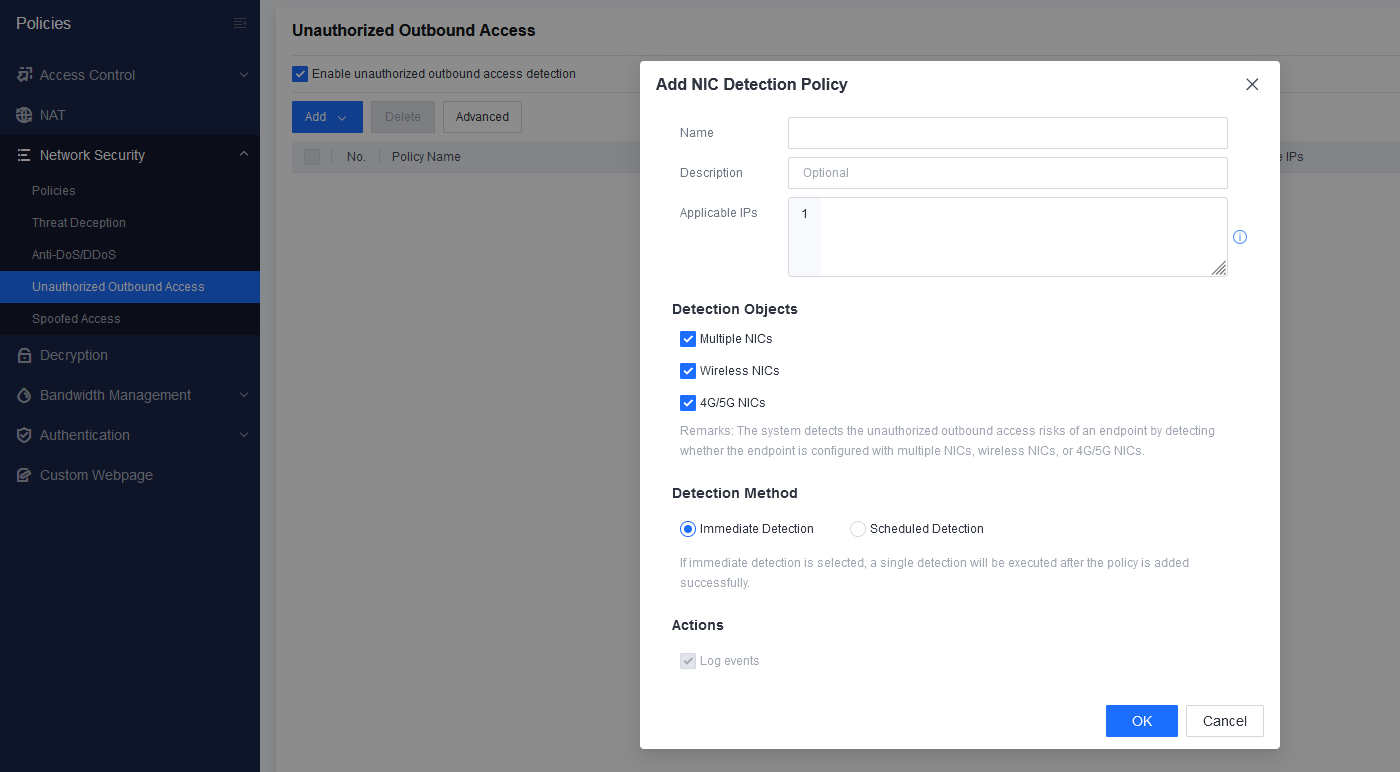
Unauthorized Outbound Access Detection
Unauthorized outbound access can be detected by scanning the NIC information and checking WLAN and WWAN services.
-
Detection objects: multiple NICs, wireless NICs, and 4G/5G NICs.
-
Detection methods: immediate detection and scheduled detection.
-
Whitelist configuration and quick scans for assets with no traffic are supported.
Spoofed Access Detection
-
Detection objects: MAC address change, IP address change, and device type change.
-
IP addresses of endpoints with spoofed access can be automatically blocked.
-
Excluded IP and MAC addresses can be configured.

Private Network Access Control
Private network access control can be implemented based on IP or MAC addresses.


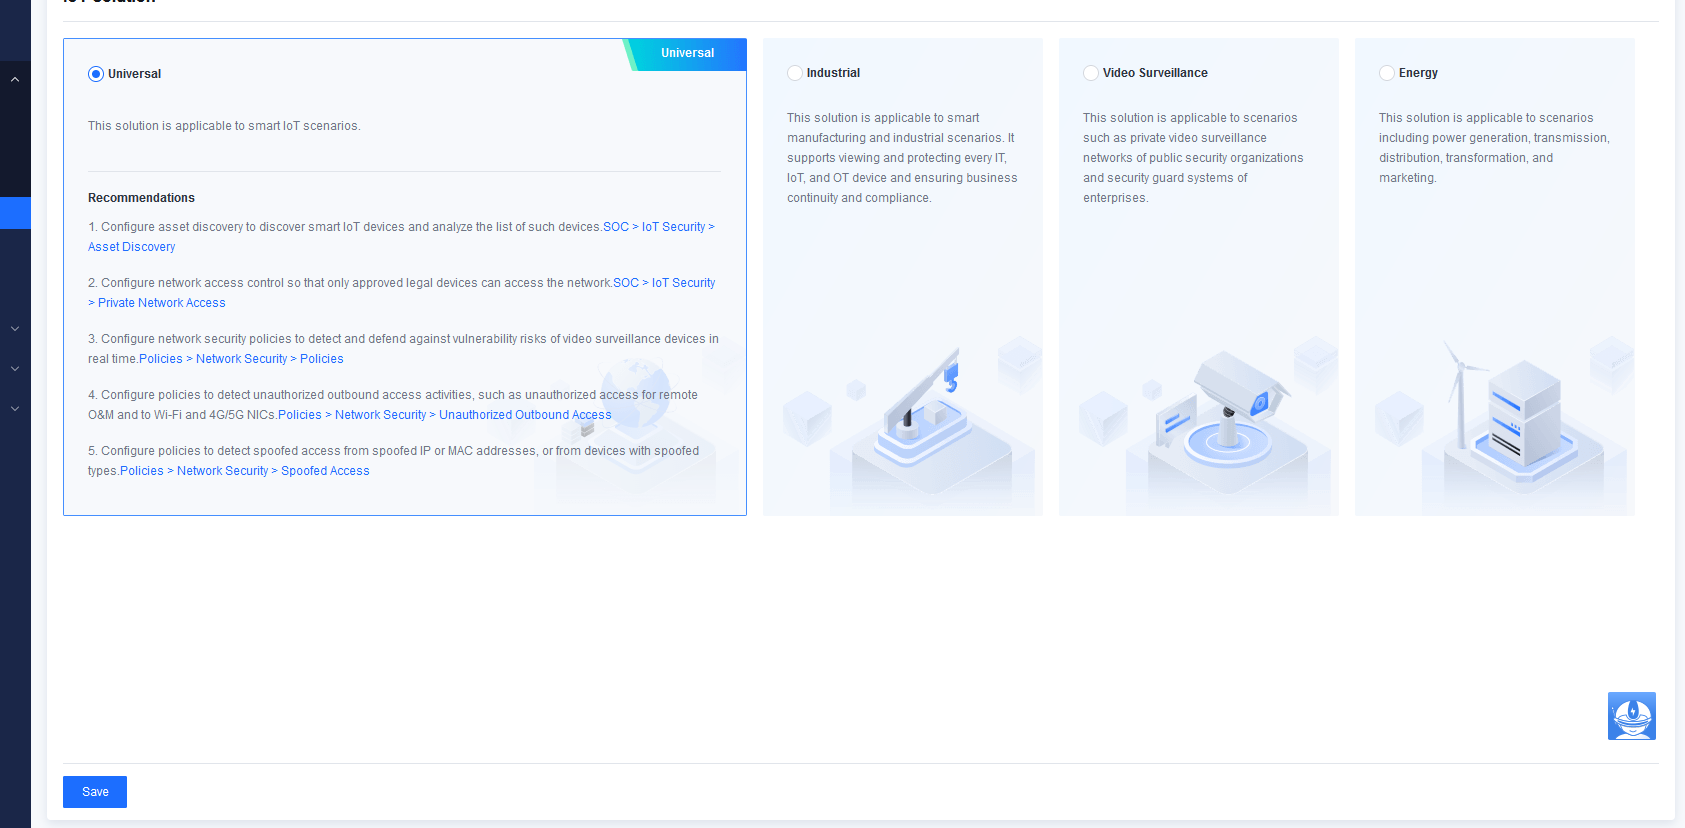
Configuration Recommendations
Configuration recommendations are provided to meet the requirements of users from different industries.
New Models
The following new models are available: NSF-1030A-I, NSF-1200A-I, NSF-3200A-I, NSF-3400A-I, NSF-7200A-I, NSF-7300A-I, and NSF-7500A-I. Please get in touch with the local sales personnel to learn about the specifications of these new models.
Upgrade Impacts
-
The device will restart automatically after the upgrade is complete.
-
The upgrade process may take about 20 minutes under normal conditions (at least 40% of the total CPU and memory are available, and the network is connected).
-
After the upgrade, the data on the Home page will be cached automatically. You are advised to log in 10 minutes after the upgrade is complete.
Impacts on Services
Restart will cause network connections through Network Secure to be disconnected for about 20 minutes.

Impacts on O&M
The Network Secure device cannot be accessed for about 5 minutes during restart.
Upgrade Guide
Preparations for Upgrade
Upgrade Methods
| Upgrade Object | Description |
|---|---|
| Firmware Updater | Sangfor Updater cannot be used to upgrade to the new version. The new version can be upgraded by importing an upgrade package on the Network Secure console’s System > Maintenance > Upgrade page. |
| Databases | For online updates, go to System > Security Capability Update to update the databases. For offline updates, obtain update packages in Self Services > Download at https://community.sangfor.com/ |
| Licensing | Go to System > General Settings > Licensing to check if the license for software upgrade has expired. If the license has expired, renew it. |
Table 1: Upgrade methods.
Environment Information
| Device Name | IP Address | Username/Password | HA |
|---|---|---|---|
| Network Secure 1 | Enable/Disable | ||
| Network Secure 2 | Enable/Disable |
Table 2: Device information.
Customer Resource Coordination
Please coordinate with the customer for the following:
Upgrade schedule:
Personnel for the upgrade:
Personnel for pre-upgrade check:
Personnel for post-upgrade check:
Pre-Upgrade Check
Upgrade Limitations
-
You can upgrade Network Secure ONLY from version 8.0.83, 8.0.85, or 8.0.90 to 8.0.95.
-
Upgrade from a version installed with custom packages is not supported.
Environment Check Using Pre-Upgrade Check Package
Purpose: The pre-upgrade check package checks whether the current device can be upgraded to Network Secure 8.0.95 before the upgrade starts. It improves the success rate of the upgrade and helps detect potential risks in advance.
Procedure
- Obtain the pre-upgrade check package and the corresponding MD5 file. Make sure that the MD5 value is correct.
| Package Name | Supported Model | MD5 Value |
|---|---|---|
| AF8.0.95_precheck(20240911).bin | All models |  |
Table 3: Upgrade package details.
-
Log in to the Network Secure console, choose System > Maintenance > Service Packs, and upload the pre-upgrade check package. After the package is uploaded, click Install.

-
After the installation is complete, check the result. If the installation is successful, you can upgrade to Network Secure 8.0.95. If it fails, troubleshoot issues based on the error message and reinstall the package until the installation is successful. You can contact a technical support representative for help if needed.
You can upgrade to Network Secure 8.0.95 if Installed is displayed in the Status column, as shown in the following figure:

-
Smooth Upgrade of Configurations, Logs, and Data: Supported
-
Central Manager: Supported
-
Passthrough: Supported
-
High Availability Environment: Supported
Upgrade Procedures
Upgrade Paths
| No. | Version Before Upgrade | Version After Upgrade | Remarks |
|---|---|---|---|
| 1 | Network Secure 8.0.83.76 | Network Secure 8.0.95.2062 | Network Secure 8.0.83.76: AF8.0.83.76 Build20230328 |
| 2 | Network Secure 8.0.85.312 | Network Secure 8.0.95.2062 | Network Secure 8.0.85.312: AF8.0.85.312 Build20230823 |
| 3 | Network Secure 8.0.90.556 | Network Secure 8.0.95.2062 | Network Secure 8.0.90.556: AF8.0.90.556 Build20240102 |
Table 4: Upgrade paths.
Upgrade Procedure
Normal Upgrade
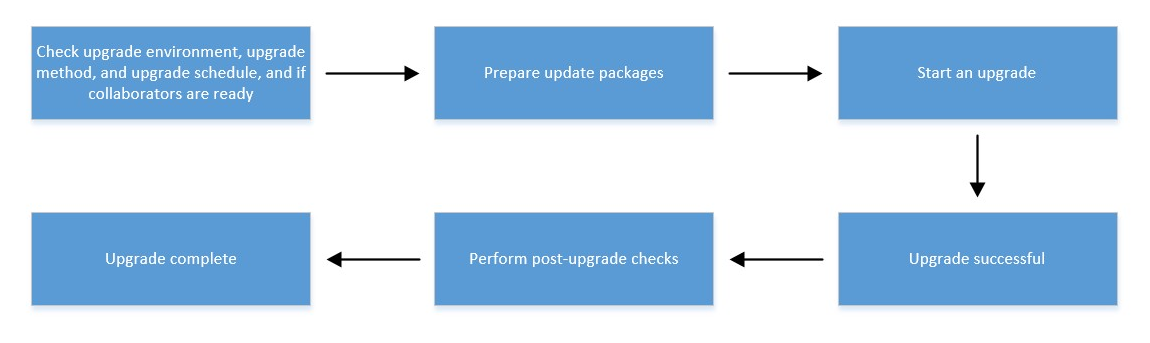
-
Check the upgrade environment, method, schedule, and person in charge’s readiness.
-
Prepare the update packages.
-
Start the firmware upgrade.
-
Upgrade successful.
-
Perform post-upgrade checks.
-
Upgrade complete.
Note:
After the upgrade is successful, the device does not automatically restart. You must manually restart the device by clicking Restart Device on the Upgrade page.

- To upgrade a standalone device, do the following:
-
Check whether the current version can be upgraded: Upgrade from a custom version is not supported. If the device has a KB package installed, check with developers to see if the device can be directly upgraded and if the issues for which the package was developed have been fixed.
-
Prepare the update package and corresponding MD5 file, and ensure the MD5 value is correct.
| Package Name | Supported Model | MD5 Value |
|---|---|---|
| AF8.0.95_x86(20240712).bin | All models |  |
Table 5: Upgrade package details.
-
Back up the configurations.
-
After the upgrade, check if the network connection is available and whether you can log in to the Network Secure device.
-
After the upgrade, check whether the customer network is properly connected and the console can be accessed.
HA Device Upgrade
You do not need to ungroup HA devices during the upgrade. You can manually perform an active/standby switchover to ensure that the upgrade only occurs on the standby device. It minimizes the risk of business disruption due to network failures.
Procedure:
-
Before the upgrade starts, manually synchronize the configuration on the active device, perform an active/standby switchover, and check the service status.
-
Check the synchronization report on the active device. If the synchronization is successful, continue the upgrade. If it fails, locate the failure cause and resolve the configuration differences between the two devices.
-
Back up the active and standby device configuration to avoid configuration loss.
-
If preemption is enabled, disable it on both devices to prevent active/standby switchover issues during the upgrade.
-
Upgrade the standby device. If both devices are active, manually switch one to standby. If the upgrade fails, contact a technical support representative to troubleshoot issues or roll back as soon as possible. Business services are carried out by other devices and will not be affected.
-
After the standby device is upgraded and restarted, wait a few minutes. Then, check the session difference between the active and standby devices or whether critical business sessions have been synchronized between the devices. If synchronized, perform an active/standby switchover and check the service status on the new active device.
Note:
Sessions may fail to be synchronized due to version differences between the active and standby devices. Therefore, after the active/standby switchover, some services may be interrupted and need to be restored.
-
Ensure the services are normal on the new active device and then upgrade the new standby device. If the upgrade fails, contact a technical support representative to troubleshoot issues or roll back the device. If you need to roll back, roll back the current standby device first. Then, perform an active/standby switchover and roll back the new standby device. Make sure that the rollback takes place only on the standby device.
-
After the standby device is upgraded, view the report to check whether synchronization is successful on the active device. If it fails, perform manual synchronization. If it still fails, troubleshoot issues.
-
If the synchronization is successful, you can check the service status.
-
If preemption is disabled before the upgrade, enable it now.
Post-Upgrade Check
Network Connectivity Check
| Check Item | Requirement | Result |
|---|---|---|
| Internet access from internal PCs | Ensure internal PCs can access the internet after the Network Secure upgrade. | |
| Access from internal servers to specific public addresses | Ensure internal servers can access specific public addresses as customers require after the Network Secure upgrade. | |
| Public access to services delivered by internal servers | Ensure the public can access services delivered by customers’ internal servers after the Network Secure upgrade. | |
| HA switchover | Ensure the HA switchover works properly per the POC user manual. | |
| Administrative access to Network Secure via the management IP address | Ensure the Network Secure console can be accessed remotely, and the UI interfaces are working. | |
| Internet access from Network Secure | Ensure the Network Secure device can access the internet for database and service pack updates. |
Table 6: Network connectivity checklist.
System Health Check
| Check Items | Requirement | Result |
|---|---|---|
| CPU usage | Under normal circumstances, CPU usage should be lower than 70%. | |
| Memory usage | Under normal circumstances, memory usage should be lower than 70%. | |
| System logs | Under normal circumstances, system logs should have no errors or warnings. If there are such logs, contact the supplier for solutions. | |
| Remote maintenance | After the upgrade, remote maintenance should be disabled to avoid security risks. | |
| Configuration backups | After the upgrade, device configurations should be backed up and archived locally. | |
| Database update | After the upgrade is complete, the database should be up-to-date to ensure the accuracy and completeness of the application signature database. |
Table 7: System health checklist.
Service Status Check
| Business Asset | Result | Description |
|---|---|---|
Table 8: Service status checklist.
Upgrade Methods
This section introduces three methods and detailed steps for the Network Secure system upgrade.
Upgrading Network Secure from the GUI
You can upgrade from the Network Secure GUI when the Network Secure device can access a public network or update packages stored on the cloud-based server. With this method, the upgrade process is simplified without using other tools, and the progress of the upgrade and the status of the Network Secure device is displayed on the screen.
Upgrade Processes
Both online update and offline updates are available:
Online Update: Go to System > Maintenance > Upgrade, and the system will automatically check for updates. You can directly perform the online update if there is an update package. Otherwise, you will get a message stating, "This is the latest version.".
Offline Update: Go to System > Maintenance > Upgrade, and click Offline Update. In the Get Files Ready step, click Upload to upload the update package. Then, complete the upgrade by following the instructions.
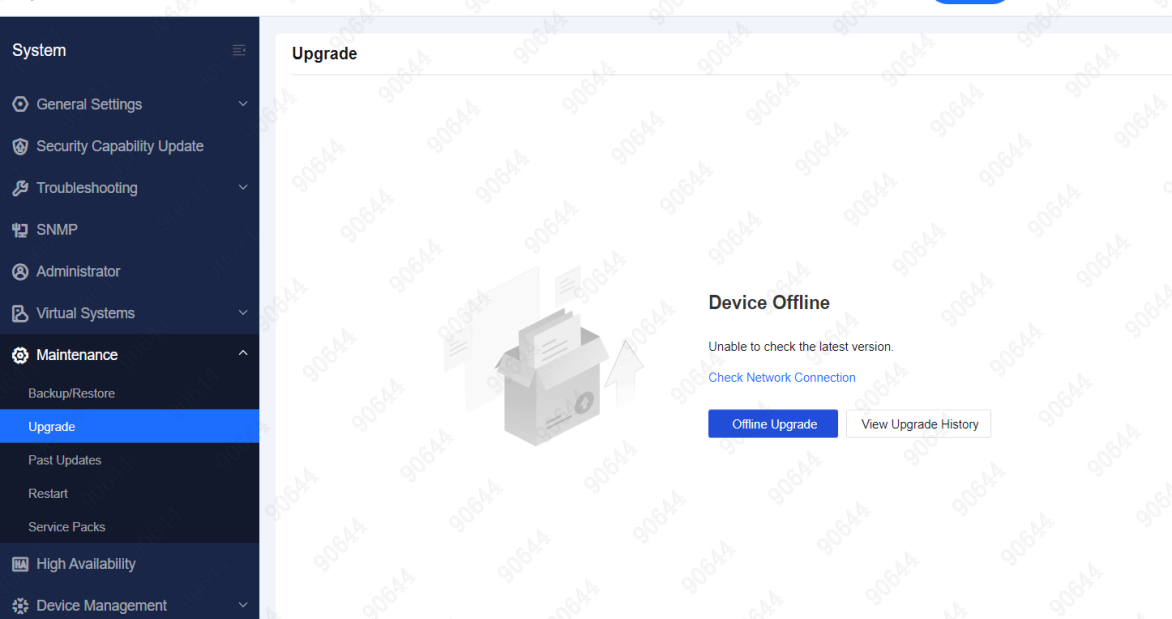
Upgrade Procedures
-
Log in to the Network Secure console and go to System > Maintenance > Upgrade.

-
Click Offline Upgrade and then Upgrade to Another Version to go to the Preparation step, as shown in the following figure:

-
Click Upload Package to upload the upgrade package, as shown in the following figure:

-
After the package is uploaded, click Next to back up the configurations.

-
Click Yes to start the upgrade.

-
After the upgrade, click Restart Device to restart the device. After the device is restarted, log in to Network Secure and check the device status.

Notice:
Do not close the uploading page while uploading the update package. Otherwise, you have to enter the page again and repeat the preceding steps.
Upgrading Network Secure via Central Manager
Upgrading Network Secure via Central Manager is recommended when Network Secure devices are centrally managed by Central Manager and multiple branch devices need upgrade.
Upgrade Processes
-
Log in to Central Manager and go to System > Upgrade > Branch Device Upgrade.
-
Add a scheduled upgrade task and complete the settings.
-
At the scheduled time, the Central Manager will automatically push down an upgrade task to the Network Secure device, and the Network Secure device will immediately perform the upgrade task.
Upgrade Procedures
-
Log in to Central Manager, go to System > Upgrade > Branch Device Upgrade, and click Add Task to configure the settings.

Notice:
If there are no available update packages on Central Manager, click Upload to upload an update package.
There are two options for branch devices to get update packages. You can select an update package in the Update Package field or select Prefer packages from update server.
-
Click Next to select the branch devices you want to upgrade.

-
Click Next to specify a schedule for the upgrade task.
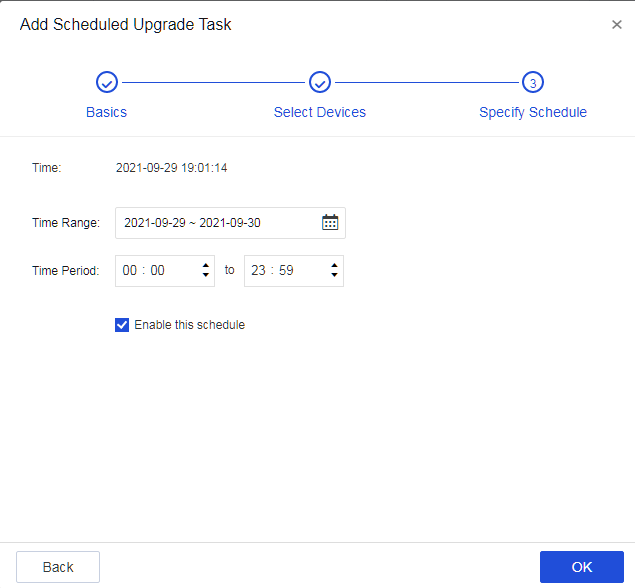
-
At the scheduled time, the Central Manager will automatically push down an upgrade task to the Network Secure device, and the Network Secure device will immediately perform the upgrade task.
Troubleshooting Upgrade Failures
Scenario 1: Memory space is below the threshold of 200mb. Please contact a Sangfor technical support representative.
Recommendation: If memory is insufficient but a customer insists on upgrading, contact Customer Service at +60 12 711 7129 (7511) to ask developers for help.
Scenario 2: CPU usage exceeds the threshold (98). Please try again later.
Recommendation: Upgrade the device again when the CPU usage is low.
Scenario 3: The update package does not meet the architecture requirements of the current environment. Please use a package that meets the architecture requirement or contact a technical support representative.
Recommendation: Obtain the upgrade package and the corresponding MD5 file based on the model of your device, and make sure that the MD5 value is correct.
Scenario 4: Upgrade failed because the current device name is invalid. Please Contact a Sangfor technical support representative.
Recommendation: Run the theme_change.sh –pattern AF script in the backend and upgrade the device again.
Scenario 5: "Disk space is insufficient." "Please clean up disk space first."
Recommendation: Delete temporary files in the /sfdata/log/ directory and make sure that the available storage space is greater than 6 GB.
Scenario 6: Other issues
Recommendation: Call Customer Service at +60 12 711 7129 (7511) to ask developers for help.
Rollback Instructions
You can roll back to the original version. If any issues occur after the upgrade, call Customer Service at +60 12 711 7129 (7511) or contact local technical support for help.
