【SCP】Deployment Guide for Third-Party Proxy Server_V6.10.0
Principle and Overview
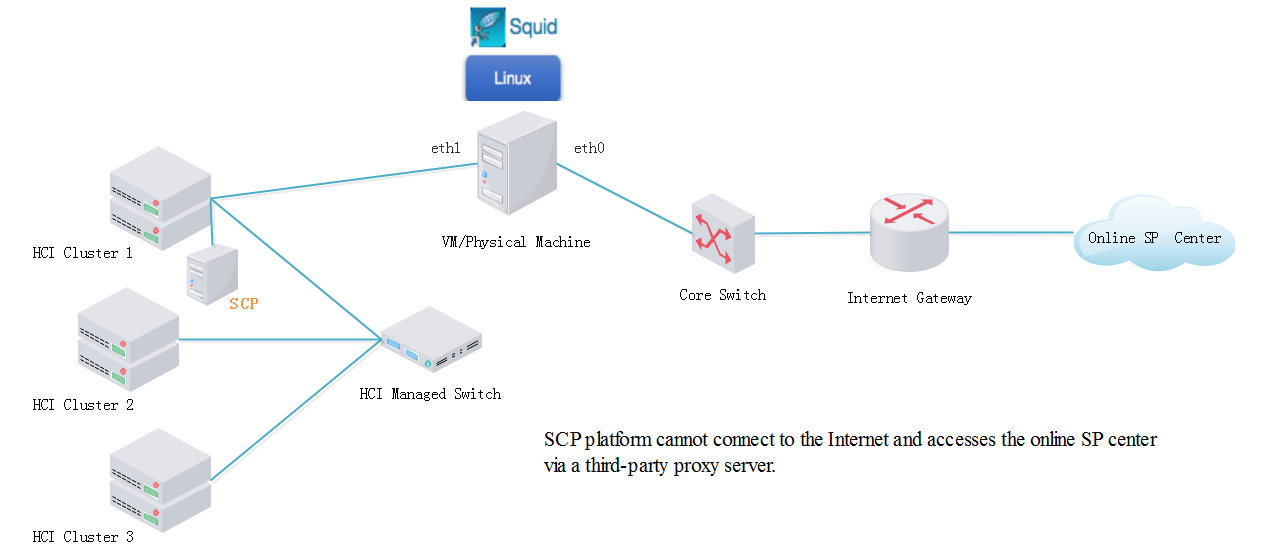
Suppose the HCI or SCP platform is in the LAN and cannot automatically obtain the service pack via direct connection with the service pack (SP) server on the Internet. In this case, a third-party proxy server(which supports Windows and Linux) can be built to forward the request and access the SP server.
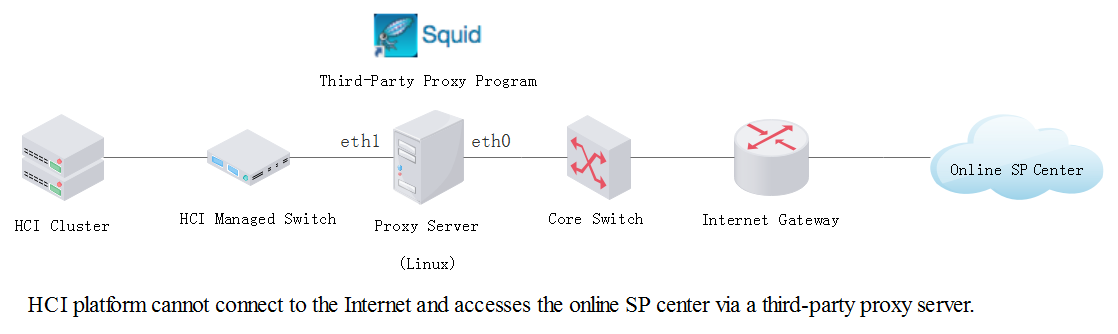
Suppose the IP address of the HCI management interface is 192.168.11.14, and that of the online SP center is 113.105.88.152. HCI can connect the SP center via the proxy server by the following steps:
Step 1. HCI or SCP connects to the proxy server.
To connect the HCI or SCP to the proxy server, you can configure the IP address of a proxy server NIC such as eth1 to be in the same network segment as that of the HCI or SCP management interface, 192.168.11.252 for example, to forward the request to the proxy server.
If the HCI or SCP platform needs to download an SP package from the online SP package center, the destination URL address may be in the following format:
wget http://113.105.88.152/download/sp-patch-xxx.bin
Next, you need to configure proxy routing to send a request to the IP address of the eth1 interface:
http_proxy=192.168.11.252, port=8021
Then, the request is transmitted to the eth1 interface of the proxy server.
Step 2. Forward the request via the Proxy Server.
On the proxy server, the proxy service listening on the proxy port (port 8021 in this example) is deployed to process the incoming request. Specifically, the proxy server will replace the source IP address and its proxy request header and forward the request with the local IP address to the SP server. The SP server receives the request through the connection (such as a TCP connection) established based on the proxy server’s public IP address (eth0 interface).
Step 3. Respond to the Request.
The SP server responds to the request and only records the proxy server’s IP address rather than the LAN IP address.
After receiving the response from the SP server, the proxy server forwards it to the LAN IP address through the port.
Step 4. Establish the connection to download Service Packs.
After receiving the response, the internal IP address establishes a connection to download SP files. That is the whole process for downloading SP files via the proxy server.
Concepts and Descriptions
| Concept | Description |
|---|---|
| Proxy server LAN interface | The NIC provides connections to LANs, such as the home LAN or enterprise LAN. |
| Proxy server WAN interface | The NIC provides connections to WANs, such as the Internet. |
Configure the Squid Proxy Server on Linux
System Compatibility Check
| Type | Specifications |
|---|---|
| OS | CentOS or other Linux release versions |
| Processor | 1 core |
| Memory | 1 GB |
| Disk | 5 GB |
| NIC | 2 |
Note:
In this document, we take CentOS 7.8 as an example for demonstration.
Configure the Network for Linux
Configure one NIC to an IP that can access the WAN(see the following table), and configure the IP address of another NIC that can access the HCI or SCP management network.
| Address | Requirements |
|---|---|
| http://cloudbgcop.sangfor.com | Allow access to at least one IP address. |
| https://113.105.88.152 | Allow access to at least one IP address. |
| http://update1.sangfor.net | Allow access to at least one IP address. Access to multiple is recommended. |
| http://update2.sangfor.net | Allow access to at least one IP address. Access to multiple is recommended. |
| http://update3.sangfor.net | Allow access to at least one IP address. Access to multiple is recommended. |
| http://121.46.26.221 | Allow access to at least one IP address. Access to multiple is recommended. |
| https://auth.sangfor.com | Allow access to at least one IP address. |
| https://auth.sangfor.com.cn | Allow access to at least one IP address. |
| https://sp.sangfor.com | Allow access to at least one IP address. Access to multiple is recommended. |
| https://sp1.sangfor.com | Allow access to at least one IP address. Access to multiple is recommended. |
| https://sp2.sangfor.com | Allow access to at least one IP address. Access to multiple is recommended. |
| https://sp3.sangfor.com | Allow access to at least one IP address. Access to multiple is recommended. |
| https://sp.sangfor.com.cn | Allow access to at least one IP address. Access to multiple is recommended. |
| https://sp1.sangfor.com.cn | Allow access to at least one IP address. Access to multiple is recommended. |
| https://sp2.sangfor.com.cn | Allow access to at least one IP address. Access to multiple is recommended. |
| https://sp3.sangfor.com.cn | Allow access to at least one IP address. Access to multiple is recommended. |
| https://dld.sangfor.com | Allow access to at least one IP address. |
-
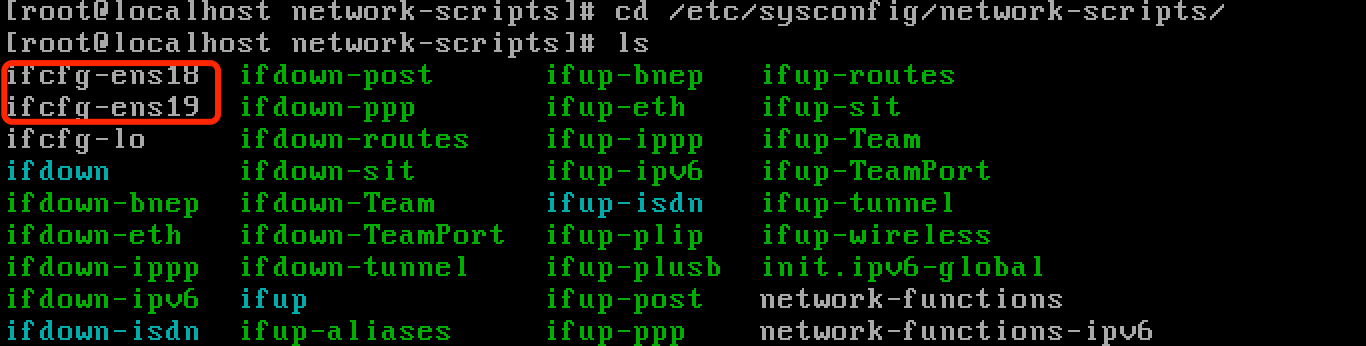
Enter the NIC configuration path: cd /etc/sysconfig/network-scripts/
-
Check the NICs and ensure there are two NICs: ifcfg-ens18 and ifcfg-ens19, as shown below.
- Configure the IP address of one NIC that can only connect to the LAN, and configure the IP address of another NIC that can only connect to the WAN. The process for configuring a NIC is given as follows:
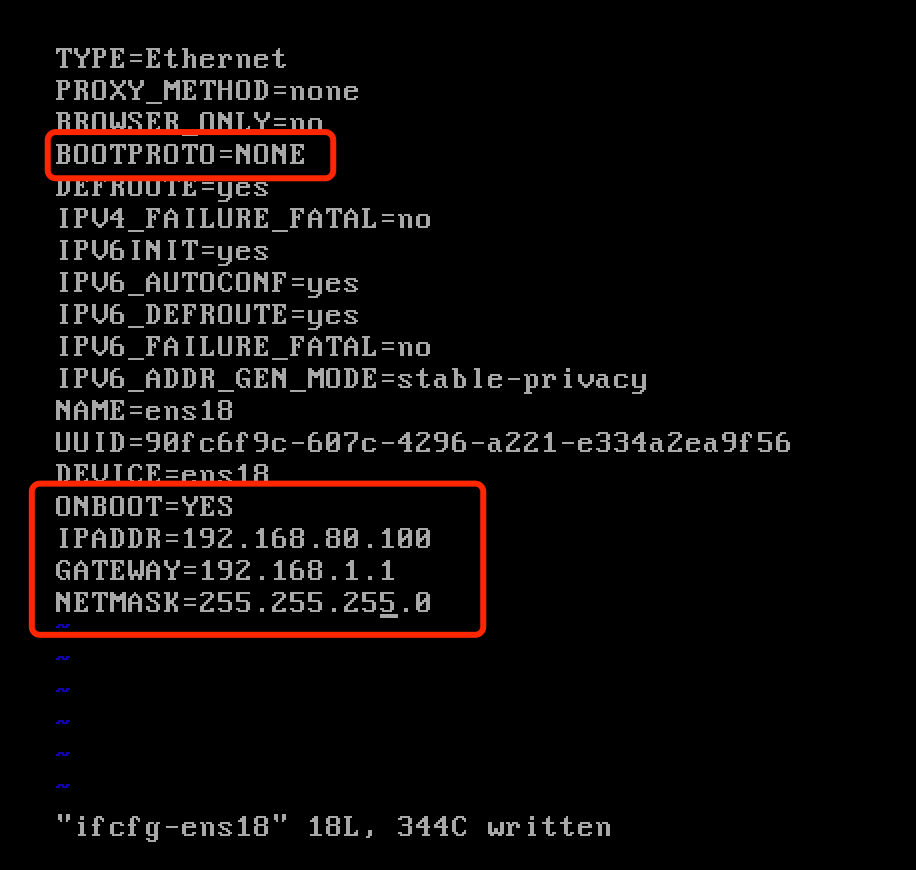
a) Edit the following information for NIC ifcfg-ens18: vi ifcfg-ens18

b) Modify the values of BOOTPROTO and ONBOOT:
BOOTPROTO=NONE
ONBOOT=YES
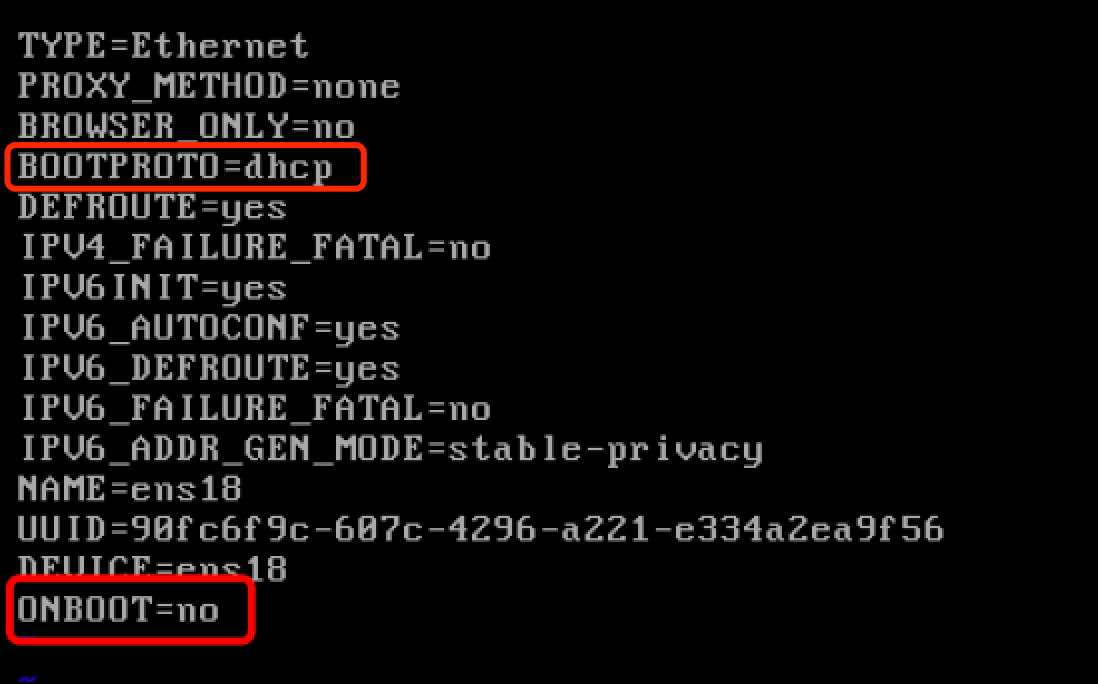
Note:
Set BOOTPROTO to NONE to indicate that DHCP service is not used.
Set ONBOOT to YES to ensure that NIC is enabled.
c) Add the configured IP address information:
IPADDR=192.168.80.100
NETMASK=255.255.255.0
GATEWAY=192.168.1.1
The modified configuration information is shown as follows:
d) Save the configuration file changes, and restart the network service to apply the configuration. Command: systemctl restart network
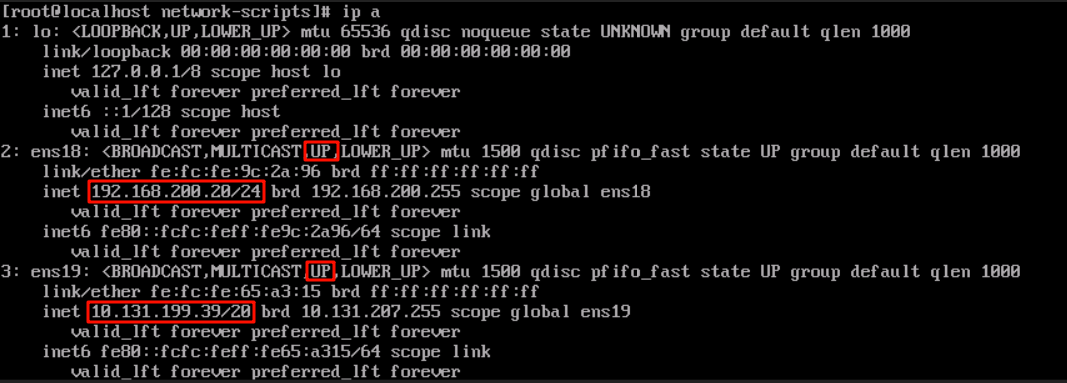
e) Verify whether the configuration has taken effect. Command: ip a
f) Check whether the network interfaces are in the UP state (activated).
g) Check whether the IP addresses assigned to the interfaces are correct, including netmasks.
Fix Firewall-Related Issues
During the LAN connectivity test, an internal IP address is usually used to ping the connectivity of the management network IP address to ensure communication between networks. If the ping request fails, you can check the firewall settings of the proxy server because the firewall may have blocked ICMP requests. In this case, you can try to temporarily disable the firewall on the proxy server and test the connectivity again. If the ping request is successful, you may need to adjust the firewall rules. It is not recommended to disable the firewall for a long time. Therefore, you’d better adjust the rules and restart the firewall.
Under certain situations, the firewall may block specific services’ ports to enhance security. When you fix firewall-related issues stated in Chapter 3.4 and Chapter 3.11, you should operate cautiously to avoid unnecessary security risks. The firewall must be enabled immediately after fixing the issues. Service port blocking should not affect normal O&M.
Test Network Connectivity
Test LAN connectivity: Use the proxy server’s internal IP address to ping the HCI management interface’s IP address to test connectivity. Suppose it cannot be pinged; refer to the firewall issues handling in Chapter 3.3 and then retry.
Test WAN connectivity: Ping the proxy server’s external IP address (as mentioned in Chapter 3.2) to test connectivity.
Install the Squid Proxy Server
Log in to Linux through the root account and execute the following command to install the Squid proxy server: yum install -y squid

Note:
If the default source is unavailable and the download fails, you can download through the 163 mirror source. Configure a software source for the CentOS system as follows:
- Log in to the CentOS system and execute the following command:
Back up the original YUM configuration files: cp -r /etc/yum.repos.d /etc/yum.repos.d.backup
Delete the current configuration files: rm -rf /etc/yum.repos.d/*
- Download the repo file of CentOS 7 and put it in /etc/yum.repos.d/ (please make a backup before operation).
https://mirrors.163.com/.help/CentOS7-Base-163.repo
Rename the downloaded configuration file ‘CentOS7-Base-163.repo’ to ‘CentOS-Base.repo’.
- Execute the following commands to generate cache files:
yum clean all
yum makecache
- Execute the following command to install the Squid proxy server: yum install -y squid
Configure the Squid Proxy Server
In this demonstration, we will take the CentOS7.8 system as an example. For other distros, the configuration process is similar.
We have already compiled the Squid configuration file. You can replace /etc/squid/squid.conf directly in the Proxy_Squid_Deployment_Guidance\Linux-squid\squid.conf configuration file we provided. Download here.
Step 1. Connect to the server remotely by using the terminal emulator Xshell and enter the /etc/squid/ path.

Note:
You can download Xshell from the official Xshell website. URL may change over time. If the URL cannot be accessed, visit the official website of NetSarang Computer to download Xshell.
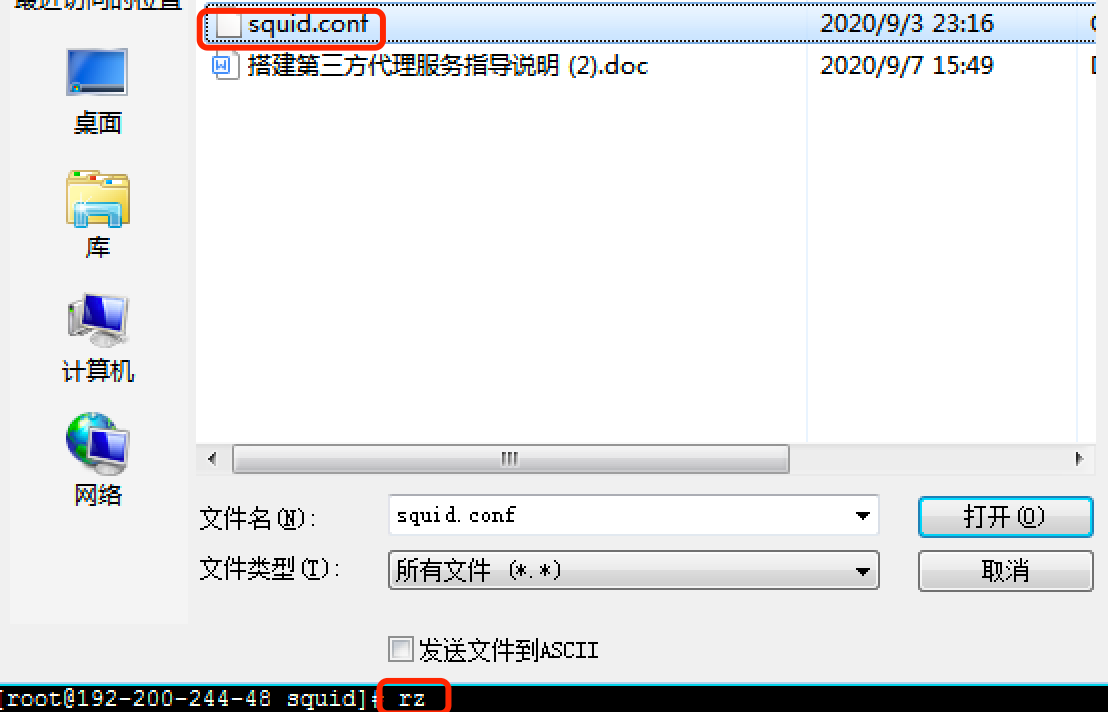
Step 2. Delete the original squid.conf file. Command: rm squid.conf

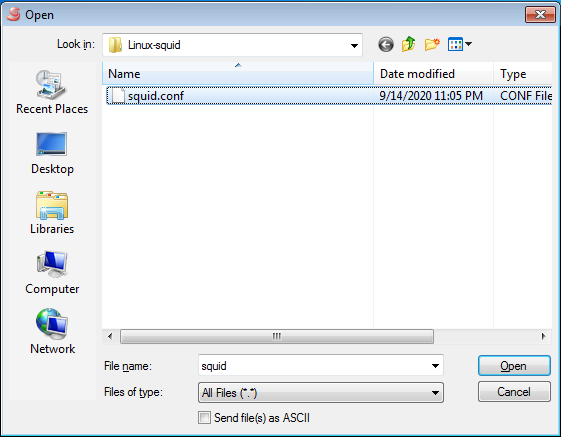
Step 3. Enter rz and select the squid.conf file:
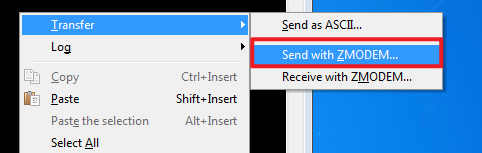
Step 4. If Xshell prompts that file transfer failed, and the page prompts File Transfer: Send with ZMODEM as follows:
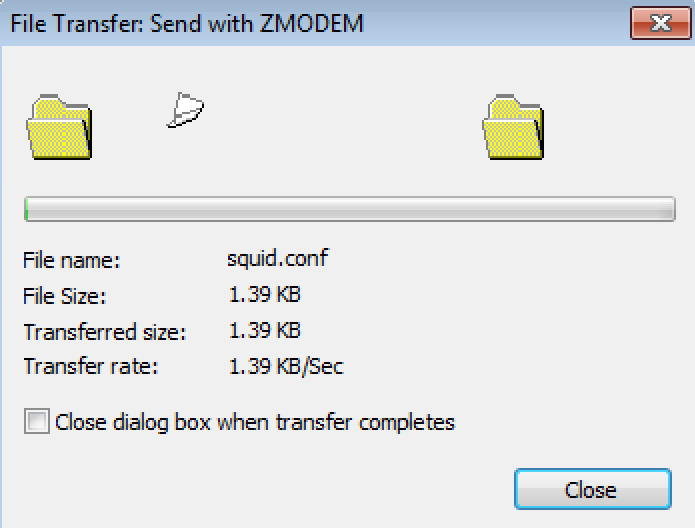
Right-click and select Transfer > Send with ZMODEM.
Step 5. After replacing the configuration file:
-
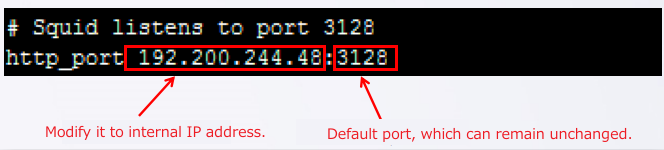
Open the vi /etc/squid/squid.conf configuration file to modify the proxy server IP address and port:

Replace 192.200.244.48 with the internal IP address of the proxy server, which only provides proxy services for the LAN without exposure to the WAN. The default port is port 3128. You can specify a new one according to your needs.
- Configure proxy username and password.
Install the httpd-tools tool. Command: yum install httpd-tools

Execute the htdigest command to generate a password file.
Command: htdigest -c /etc/squid/digest_users vt.com admin

Note:
/etc/squid/users: Default password file location.
vt.com: Consistent with the realm value in the squid.conf configuration file.
admin: Custom username.
After executing this command, you will be prompted to enter a password.
Then execute the following command:
htpasswd -cb /etc/squid/ncsa_users admin

Note:
admin: Same with the username in the above command.
<password>: Same with the password in the above command.
-
Whitelist the destination servers to the proxy server.
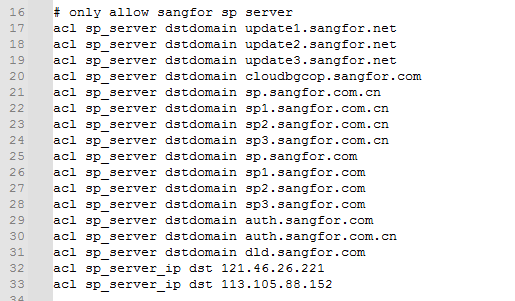
To enhance security, we added a whitelist of some domain names and IP addresses of official upgrade servers to the squid.conf configuration file that will be automatically selected when the user does not have a DNS server. The Squid proxy server only allows requests from the domain names and IP addresses in the specified whitelist, and rejects requests from other domain names and IP addresses.
The user can also modify the whitelist if necessary and add multiple ACL rules in the following format:
Specify a domain name: acl sp_server dstdomain
specify an IP address: acl sp_server_ip dst
Open the Listen Port on the Squid Proxy Server
Execute the following commands to open the listen port on the Squid proxy server.:
firewall-cmd –zone=public –add-port=3128/tcp –permanent
firewall-cmd –reload

Note:
The default port is port 3128, which can be modified according to the actual situation.
The port number needs to be consistent with that configured in Chapter 3.6.
Execute the following command to query whether the port has been open. "yes" is returned if the port is open.
Command: firewall-cmd –query-port=3128/tcp

Start/Stop the Squid Proxy Service
- Start the Squid proxy service. Command: systemctl start squid.service
- Stop the proxy service. Command: systemctl stop squid.service
- Run the Squid proxy service at startup. Command: systemctl enable squid.service

Disable NetworkManager Service
Disable the NetworkManager service to avoid network failure. Command:
systemctl stop NetworkManager
systemctl disable NetworkManager

Configure DNS Server
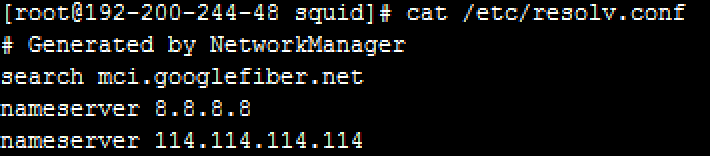
Configure the DNS server address under the resolv.conf file. Command: vi /etc/resolv.conf

Add the following lines to your ‘/etc/resolv.conf’ file:
nameserver 114.114.114.114
nameserver 8.8.8.8

Then, check the configuration. Command: cat /etc/resolv.conf
Disable Unnecessary Ports
Disable the SSH service as per your needs. Blocking the SSH and dhcpv6-client service ports through the firewall is recommended. Command: systemctl disable sshd.service

Notice:
If the connection is established through SSH, blocking the SSH service port will cause the SSH connection to be interrupted. Under this situation, you can only perform operations on Linux by connecting to the monitor or the virtual machine’s console.
Command:
firewall-cmd –remove-service=ssh –permanent
firewall-cmd –remove-service=dhcpv6-client –permanent

firewall-cmd –reload

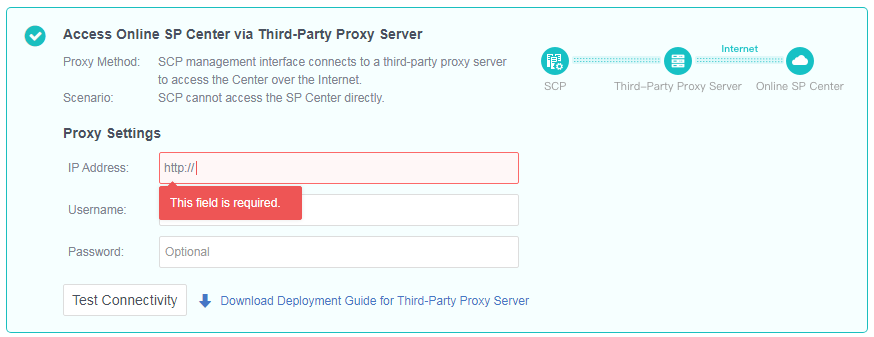
Configure the Proxy Settings on HCI/SCP
After the above steps, you can go to the HCI or SCP platform to configure proxy settings. You need to enter the correct IP address and port in Chapter 3.2 and Chapter 3.6, fill in the username and password, save the settings, and test the connectivity.
Remove the Squid Proxy Server
If you want to remove the proxy service from the server, follow the steps below to delete it.
- Stop Squid. Command: systemctl stop squid
- Disable Squid. Command: systemctl disable squid
- Uninstall Squid. Command: yum remove squid
- (Optional) You can execute the following commands to completely remove Squid and its configuration files:
yum remove squid
rm -rf /etc/squid
rm -rf /var/spool/squid
rm -rf /var/log/squid
Notice:
Ensure you have corresponding permissions (sudo may be required) before executing these commands.
Make sure that no services depend on Squid before you remove it.
Ensure that backups of the Squid configuration are removed unless you need to use them again.
Configure the WProxy Proxy Server on Windows
Configure the Network for Windows
Configure one NIC to an IP that can access the WAN(refer to Table 3), and configure the IP address of another NIC that can access the HCI or SCP management network.
Please go to Windows Settings > Network & Internet to complete the IP configuration.
Copy Files
Copy the Proxy_Squid_Deployment_Guidance\Windows-wproxy\WProxy_EN proxy service program folder extracted from the compressed package to any location (C:\Program Files (x86)\ is recommended).
Run the WProxy Proxy Server
- Double-click the WProxyUI.exe file to run the program. The following message will appear:

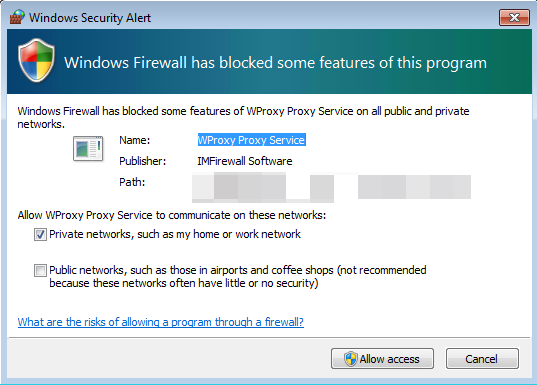
- Click the Allow access button to enter the following page, and click the Settings button to configure the proxy server:
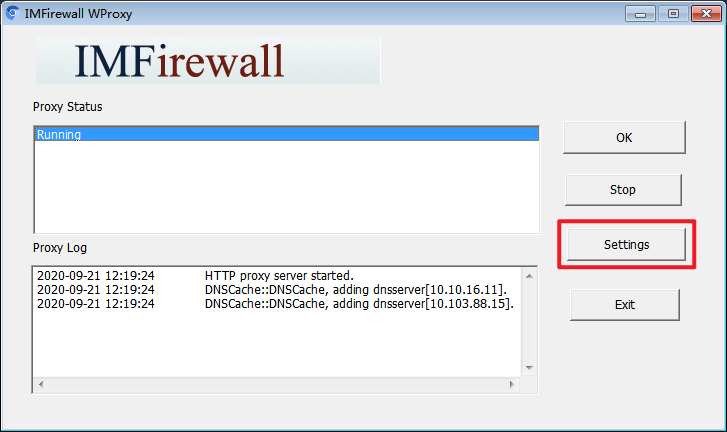
- Select the internal IP address of this server from the Listen IP drop-down list.
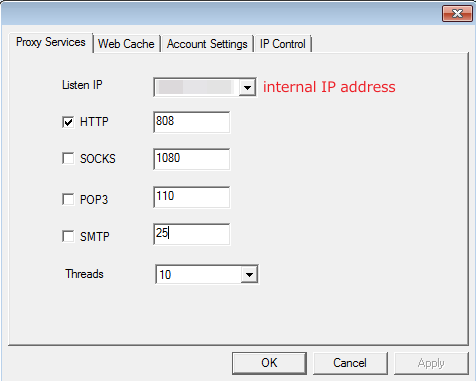
Note:
The internal IP address connects to the HCI/SCP platform, while the external IP address connects to the online SP server over the Internet.
- Set the port number of the HTTP proxy (port 808 by default). You can also specify a new one.

- Click OK on the Proxy Services page, then click OK on the WProxy UI page to minimize the WProxy proxy server to the system tray area.
Start the Proxy Port
Find open_proxy_port.bat in the Proxy_Squid_Deployment_Guidance\Windows-wproxy folder, right-click, and select Run as administrator as follows:

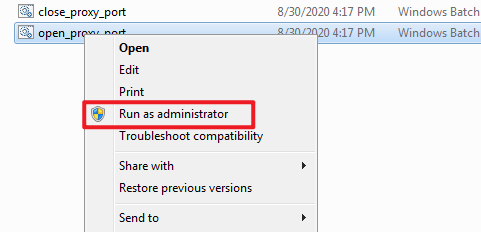
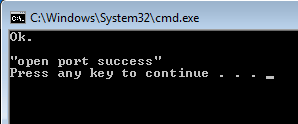
Then click Yes to run it. The port is open successfully when the following figure appears:
Configure IP Access Control
Click the WProxy proxy server icon in the system tray to enter the WProxy UI, and then click Settings > IP Control to configure IP access control:
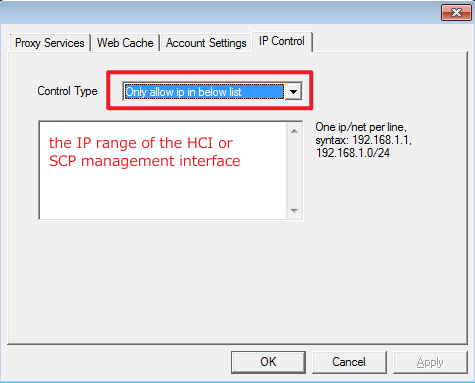
Select Only allow ip in below list and enter the IP range of the HCI or SCP management interface so that only HCI or SCP is allowed to access the proxy server.
For example, if the HCI cluster is deployed on the network segment 192.168.123.2-192.168.123.251, traffic from 192.168.123.0/24 can access the proxy server.
Close the Proxy Port and Exit the WProxy Proxy Server
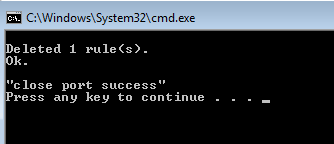
If the proxy service is no longer needed, you can close the proxy port by running the close_proxy_port.bat script  in the Proxy_Squid_Deployment_Guidance\Windows-wproxy folder. The process is the same as the start process.
The following figure appears if it is successfully closed:
Then click the WProxy proxy server icon in the system tray to enter the WProxy UI and click Exit to exit the proxy server.
Remove the WProxy Proxy Server
Delete the Proxy_Squid_Deployment_Guidance\Windows-wproxy folder directly to remove it.