【SCP】Quick Deployment Guide_All Versions
Preparation
SCP version should match the HCI version before installation and you should check the version you need. And the HCI cluster should be completed deployment.
The following attachement is the SCP HCI and NFV matching relationship.
SCP download link :
https://community.sangfor.com/plugin.php?id=service:download&action=view&fid=47#/12/all
SCP Create
Step 1. Log in to the HCI platform console.
Step 2. Click Compute > New > Import VM:

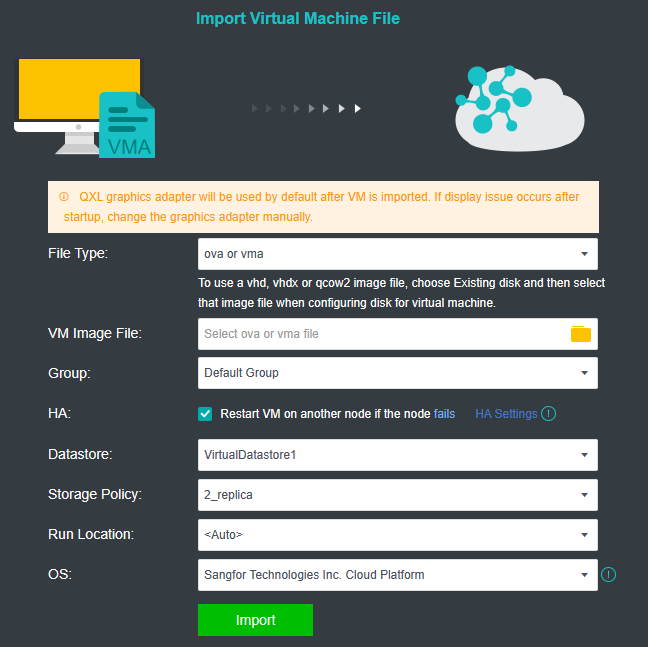
Step 3. File type select ova or vma. Select the downloaded SCP vma Image File, and then select the Group, Datastore, Storage Policy and Run Locaion, The OS should select Sangfor Technologies Inc. Cloud Platform. After that, click Import to display the upload interface.
SCP Network Configuration
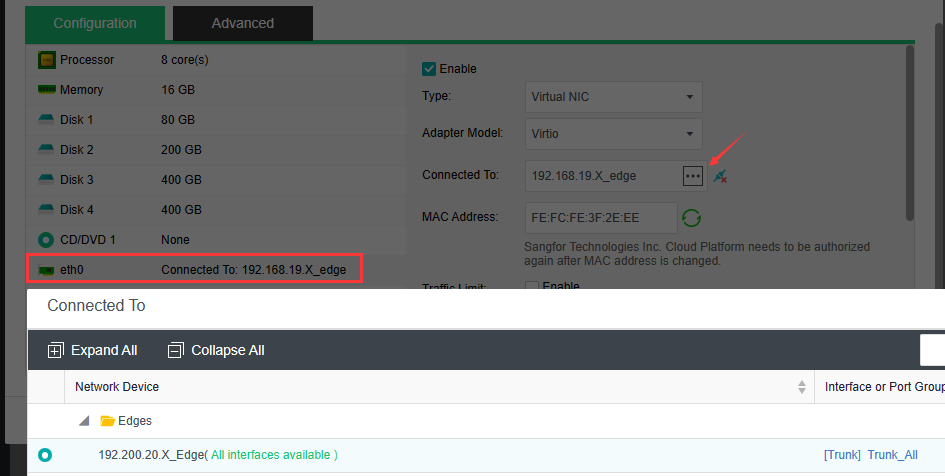
Step 1. Select the newly imported SCP virtual machine. Click More > Edit to edit the NIC, connect to the network, and click OK.
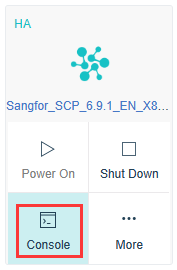
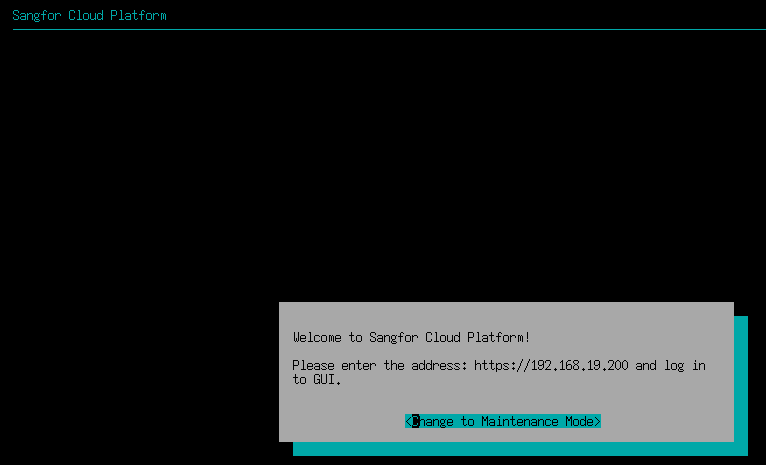
Step 2. Powered on the imported SCP virtual machine, and click console,
Have a random click on the virtual machine’s console, press Enter to enter into the maintenance mode, and then enter the password (the initial password is admin). After the password is entered, click OK and press Enter to enter the configuration interface.
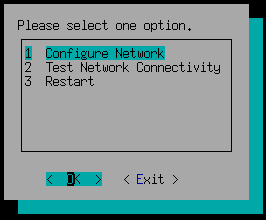
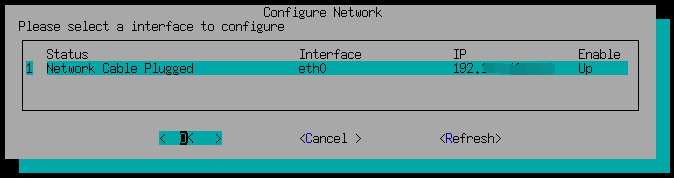
Step 3. Click the key ↑↓ on the keyboard to select Configure Network and press enter. Then select eth0.
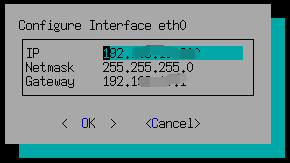
Step 4. Set the IP address, netmask, gateway and click OK.
Step 5. Open a browser, browse https://SCP IP:4430 and click log in.
License
Go to System > Licensing > Platform License > Update License Key .
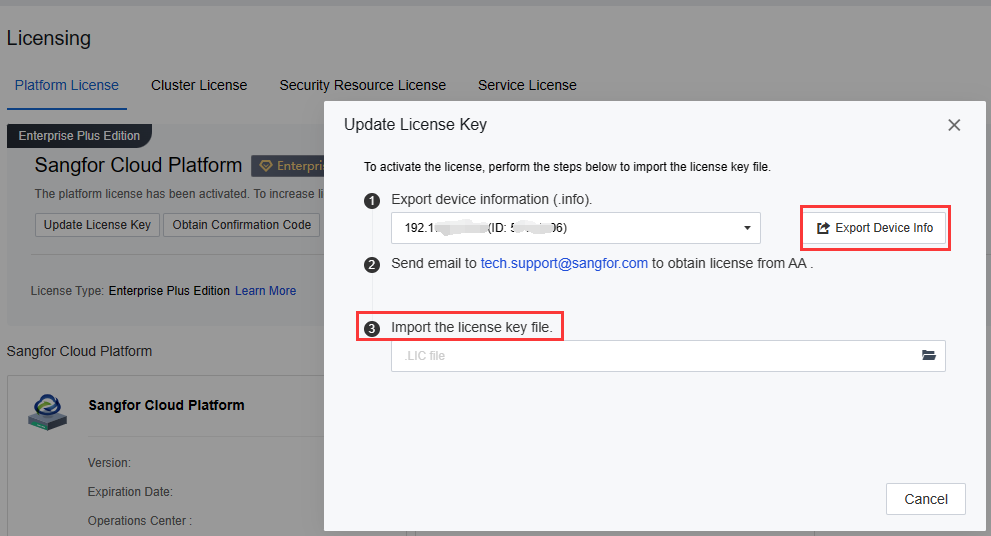
Click Export Device Info the Export the device info file. Use the device info file get the license file (In the testing environment, and you can log in to the test license system to activate it yourself. If it is the sales environment, you need to send the files to the Related personnel) Import the license file after getting the license file in the same page.
Manage HCI
Cluster Initialization
Step 1. Navigate to Resources Overview > Clusters and click the Add Cluster.
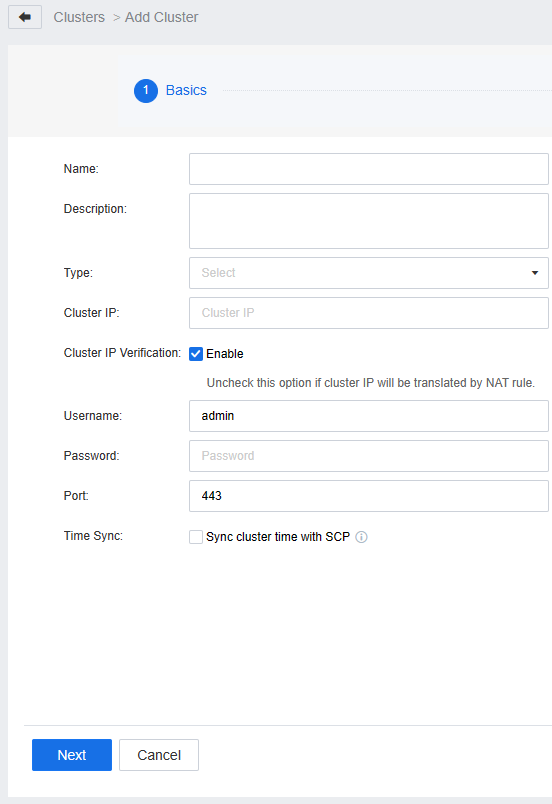
Fill in the cluster Name and Description, and after selecting the cluster Type, enter the Cluster IP and admin Password. If the port has not been changed, keep the default setting (if the cluster IP has been mapped by NAT, please uncheck Cluster IP verification), select the appropriate licensing mode, and click the Next .
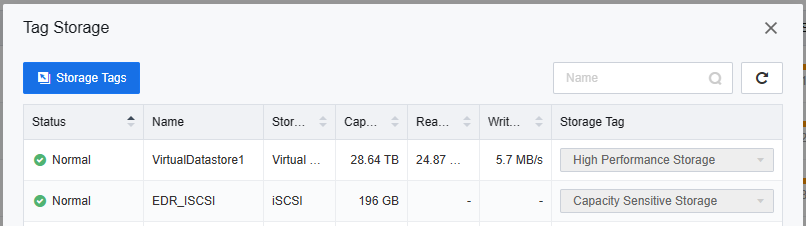
According to the actual situation of the cluster, different tags can be set for different storage volumes. The default includes high performance, performance, and capacity.
High-performance storage: Strong read and write performance, used to create high-performance virtual machines, generally gives this tag to the SSD storage category.
Performance storage: Strong read and write performance, but relatively aging, generally old storage.
Capacity storage: Average read and write performance, but large capacity, high security, and high-cost performance.
After confirm all the configuration click ok .
Cluster Licensing
Select System > Licensing > Cluster and click Licensing. License different modules according to requirements.
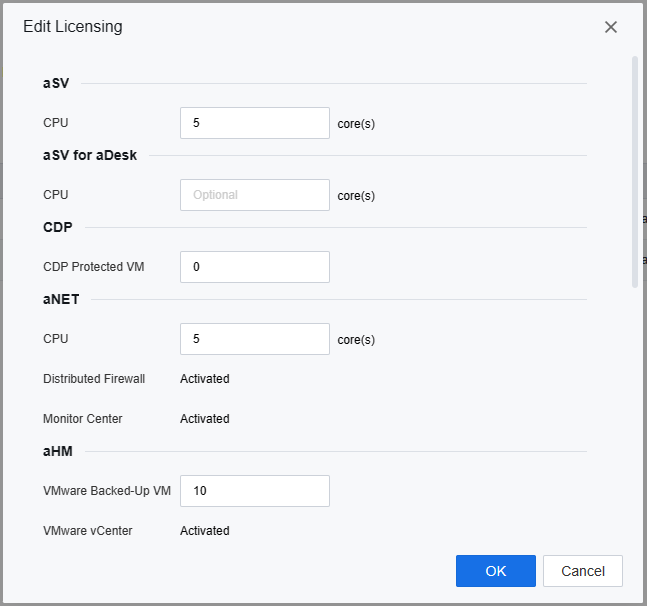
Click OK to finish the license.
Resources Pool Add
Select Resources Overview > Resource Pools > New.
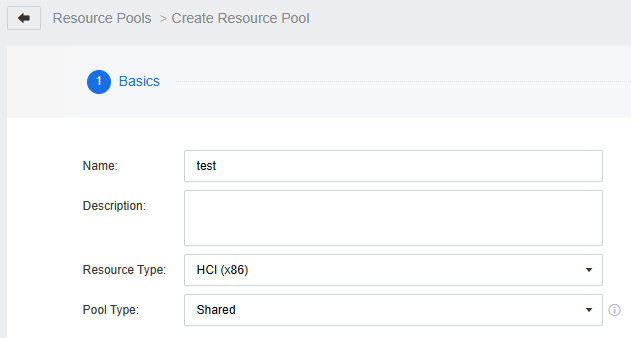
Fill in the name Resource Type and Pool Type.there are two Pool Type Shared mode and Dedicated mode.
Shared mode: Shared resource pool can be assigned to multiple tenants.
Dedicated mode: dedicated resource pool can only be allocated to one tenant.
After selecting the Pool Type select the cluster that needs to be associated. Confirm that the information is correct and click the Confirm button.
VPC Network
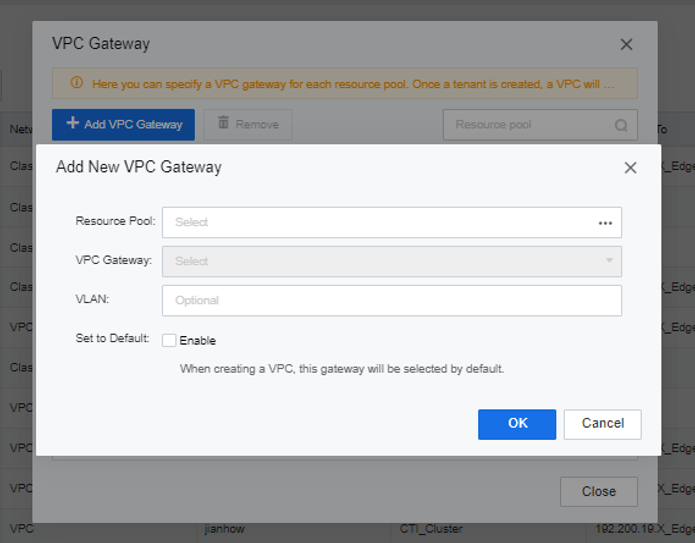
Configure VPC Gateway
Select Networking > Network Deployment and click VPC Gateway. select the VPC outgoing interface corresponding to each resource pool.
Create Tenant
Select User and Access Management > User > Tenants. Then, click the New button to create a tenant . Enter the tenant’s name, login username, email address, mobile phone number, and password, and click Next .

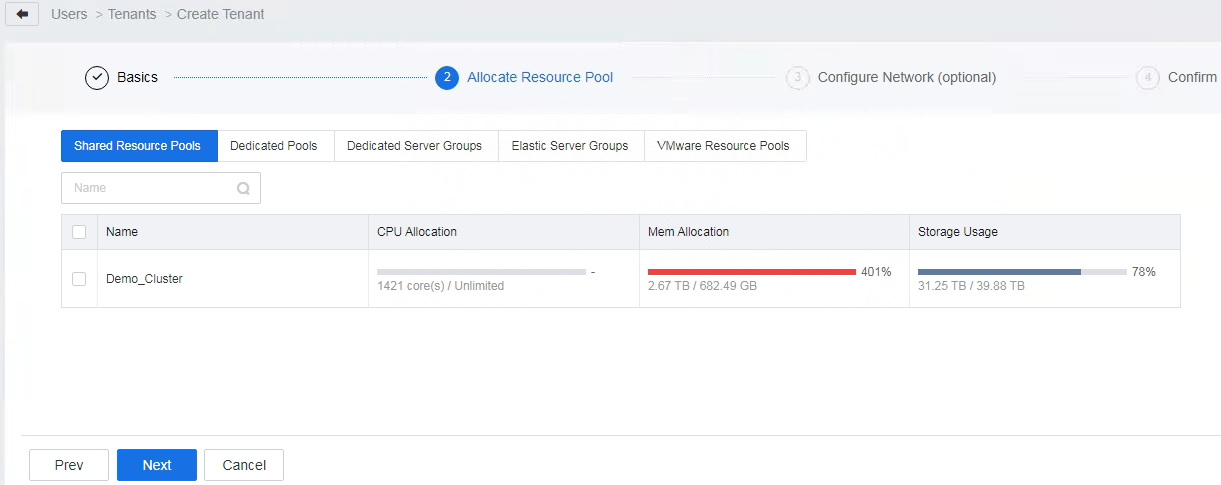
Allocate resource pools and select the resource pool resources that the tenant can use.
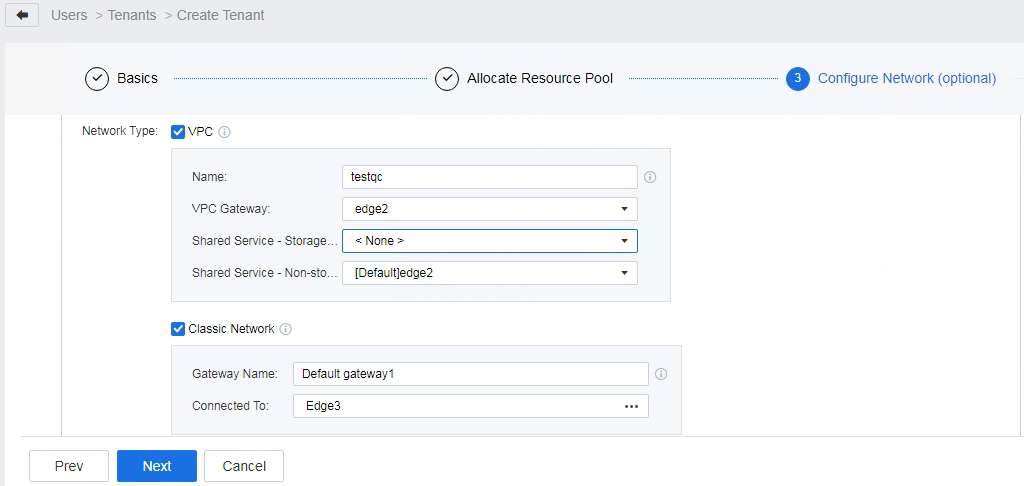
Configure the network type of the tenant. VPC is selected by default. You can select the Classic network if you want to, fill in the Gateway Name, and select the Connected To device.
Click Next then click Confirm & Set Quotas for tenants based on actual needs.
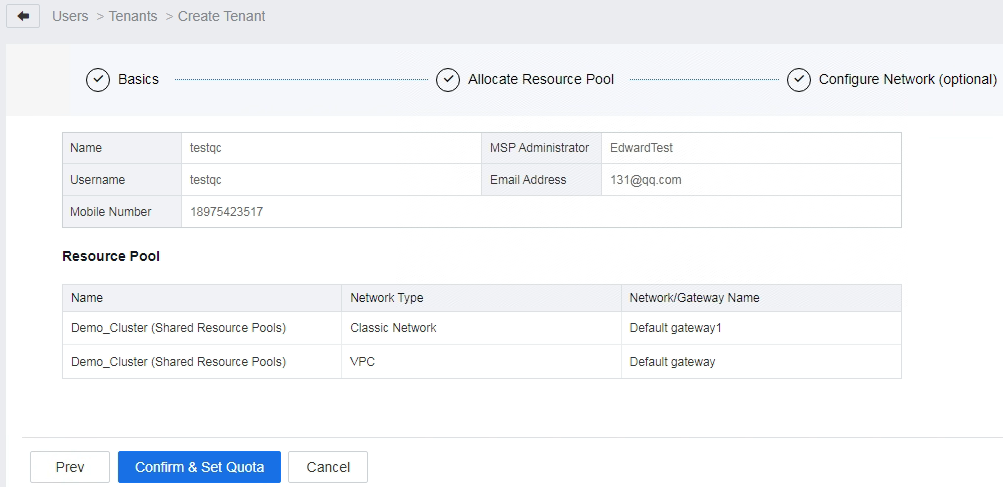
Confirm the information.

Click Save to finish.
Elastic IP Pool
Select Networking > IP and Bandwidth > Shared Services > Elastic IP Pools, and click New. Fill in the name and description of the elastic IP pool, select the tenant to be associated, line type, network egress, set the total bandwidth, add the elastic IP, and click OK to complete the creation.
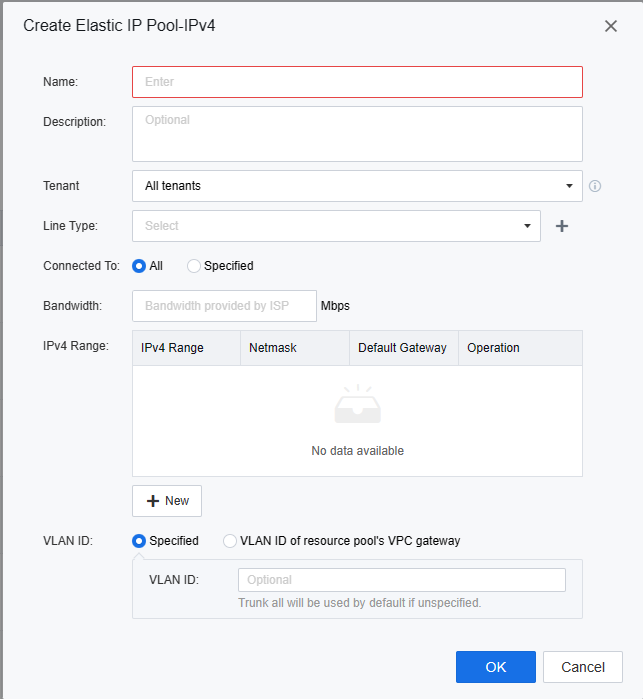
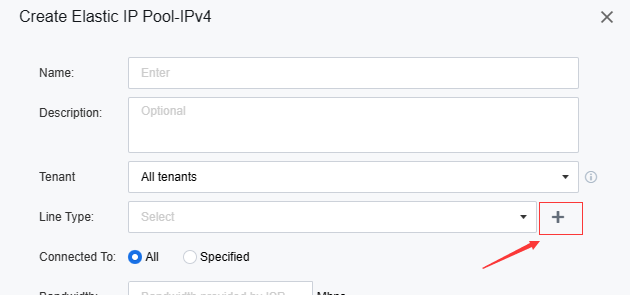
If the default Link Type are not you want , you can click You can click the plus sign .
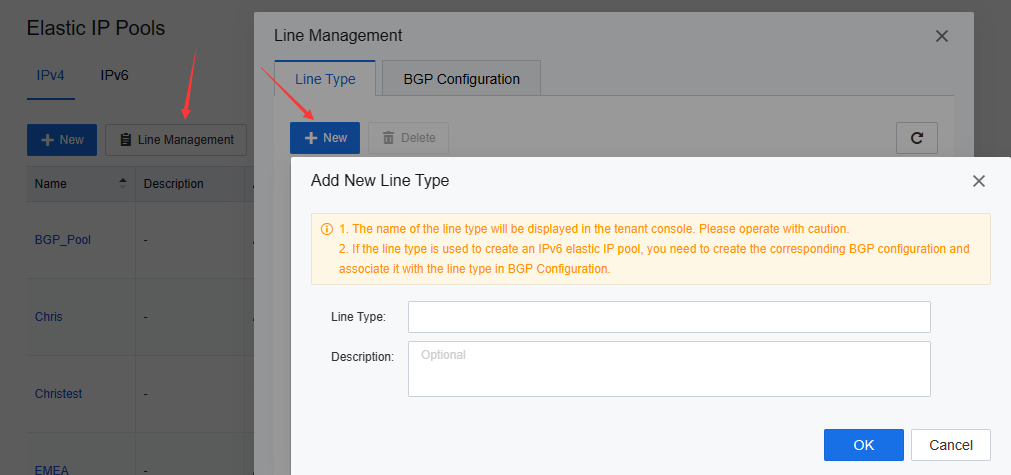
Or before click New you can click Line Management> Line Type > New.
VM Create
Image Upload
Navigation to Compute > image there are four type image.
Public VM image: uploaded by platform administrators and can be used by platform administrators, tenants, and tenant users.
Private VM image: tenant uploads the Private VM image for the tenant and the tenant user. The platform administrator has the right to delete the private image.
Network Device image: uploaded by the admin administrator and can be used by the admin administrator and tenants.
Advanced Service image: uploaded by the admin administrator. Components of SCP, such as asec.
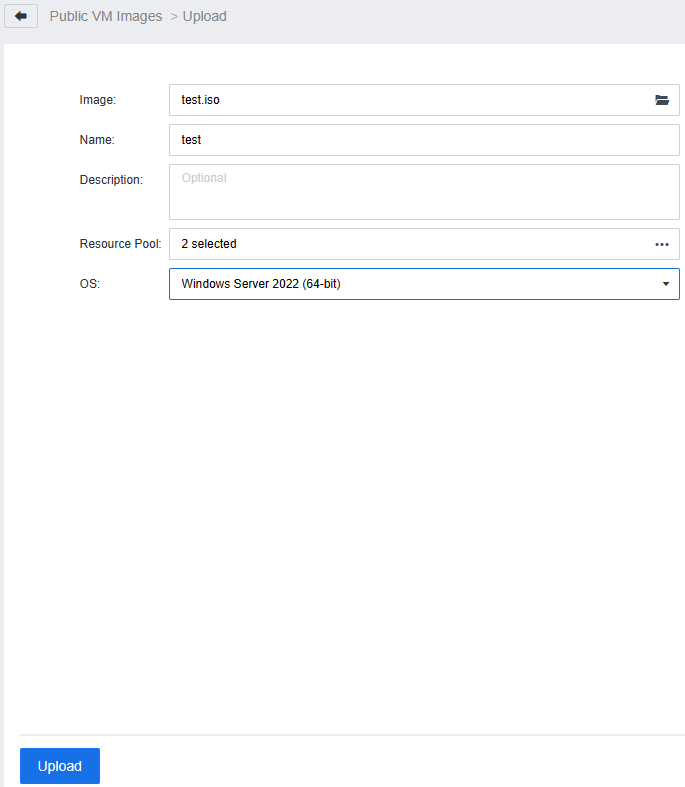
Select public VM image > upload select the iso or vma file resource pool and OS type fill in the name description click upload wait the file complete upload .
Public and Private VM images are divided into ISO mirrors and built-in mirrors (HCI mirrors). ISO mirrors are files in iso format, and built-in mirrors (HCI mirrors) are converted and produced by virtual machines.
Create VM
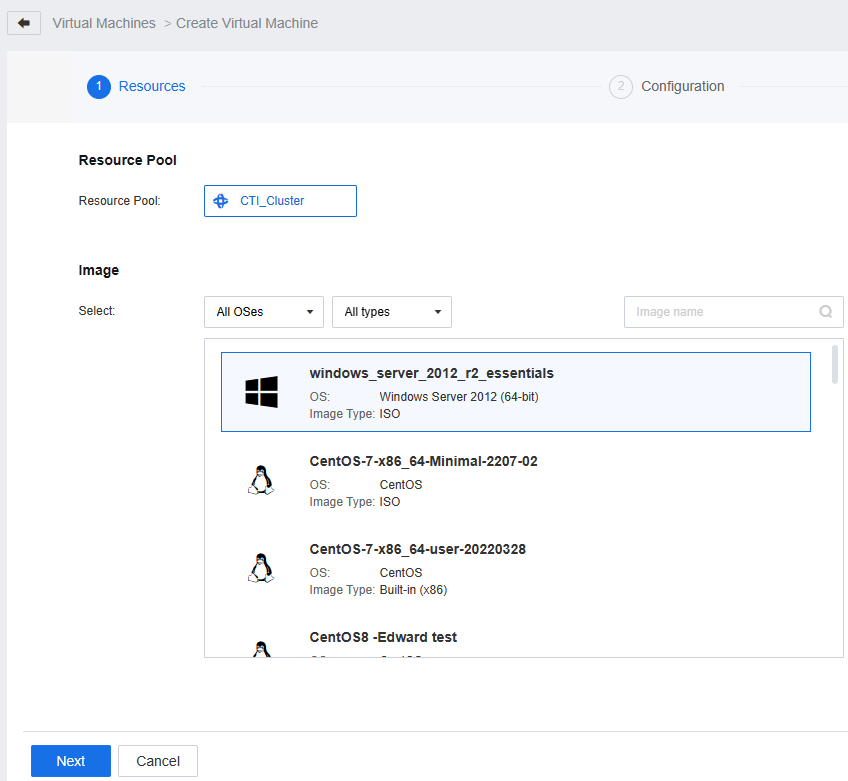
Go to Compute > Virtual Machines > New select resource pool choose Create Virtual Machines.
Create Virtual Machines: use iso or build-in file to create VM.
Import Virtual Machines: use vma or ova file to create VM.
Select image file click Next.
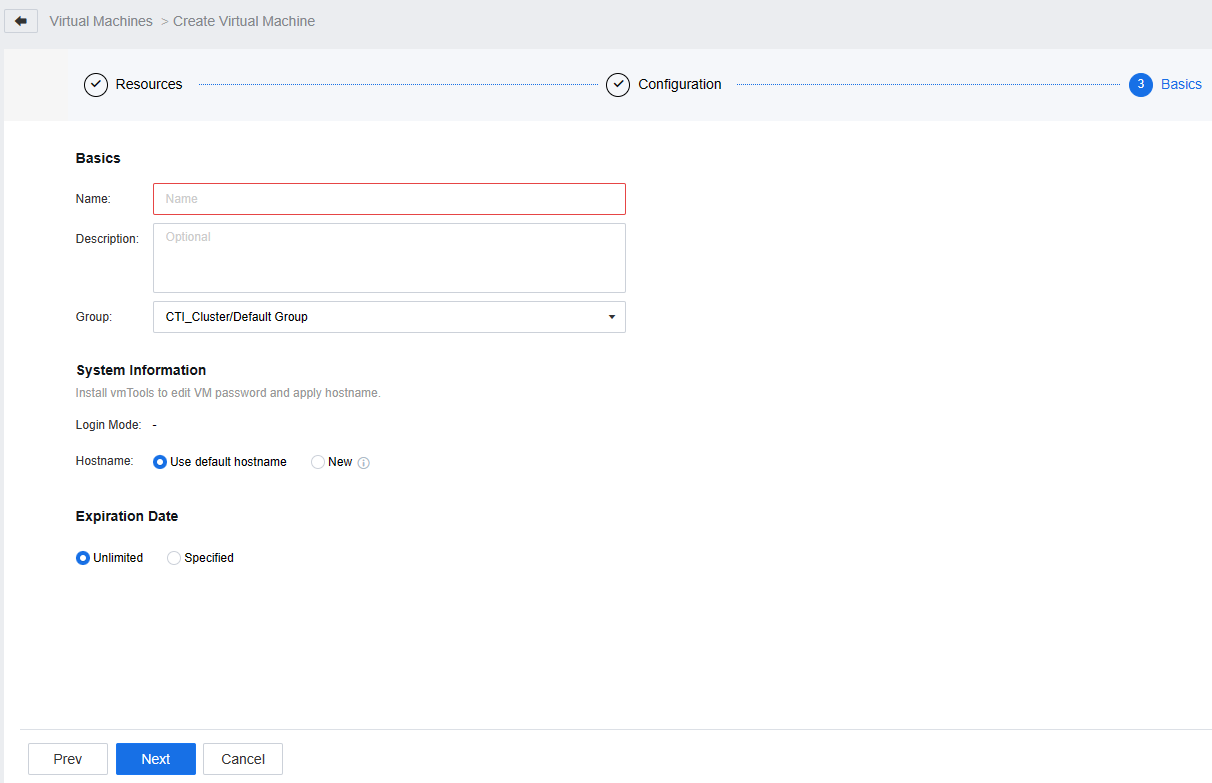
Adjust the configuration as you want then click next, fill in the name description and Group.
Click Next confirm the information about the VM if there are problems click OK wait the VM created success .
VM Allocation
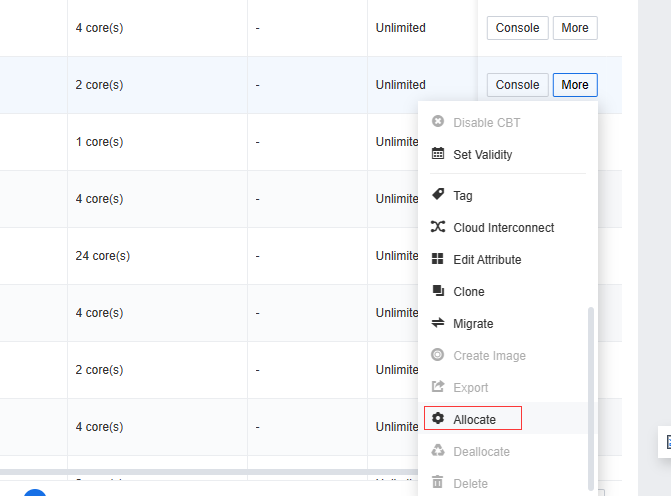
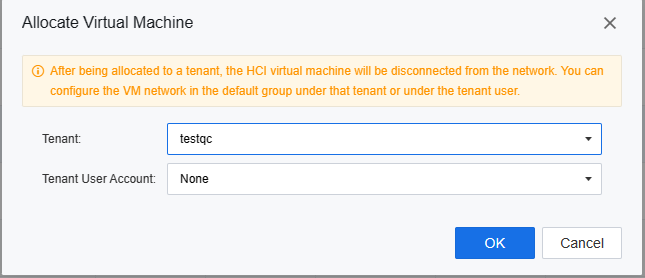
When VM created by administrator account you allocation the VM to the tenant. go to Compute > Virtual Machines location the VM click Allocate .
Select the tenant (or tenant user account).
For tenants, in addition to virtual machines allocate by the admin user, they can also create their own virtual machines. Login SCP with tenant portal https://ip after login success, create VM with the same step in Chapter 7.2 .
Tenant Network
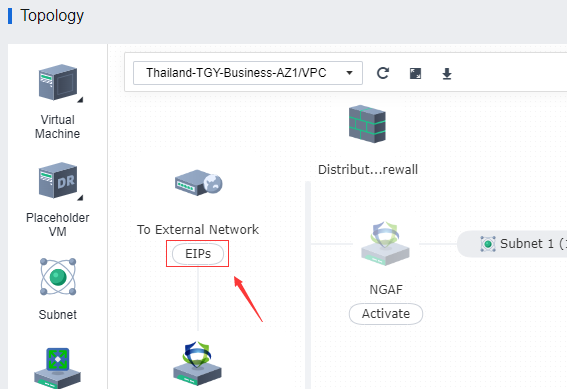
If the VM in the VPC network needs connect to the external network should Bind elastic IP Select Networing > Topology click EIPs.
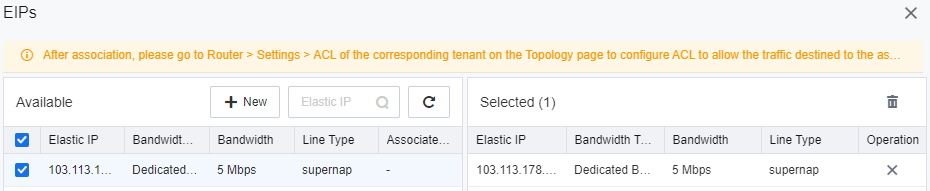
Select the available Elastic ip (if there is not available EIP you can click New Add New Elastic lP ) then click OK to confirm.
The above configuration all VM source ip will convert the EIP. If you want to establish a one-to-one mapping between the virtual machine’s source IP and an Elastic IP for external network connectivity, you can bind an EIP to the VM.
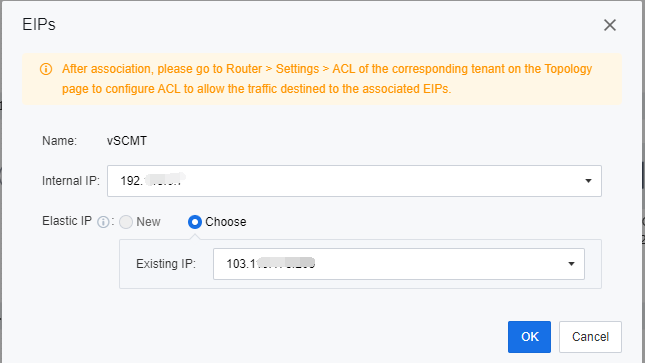
Select the VM click More > EIPs.
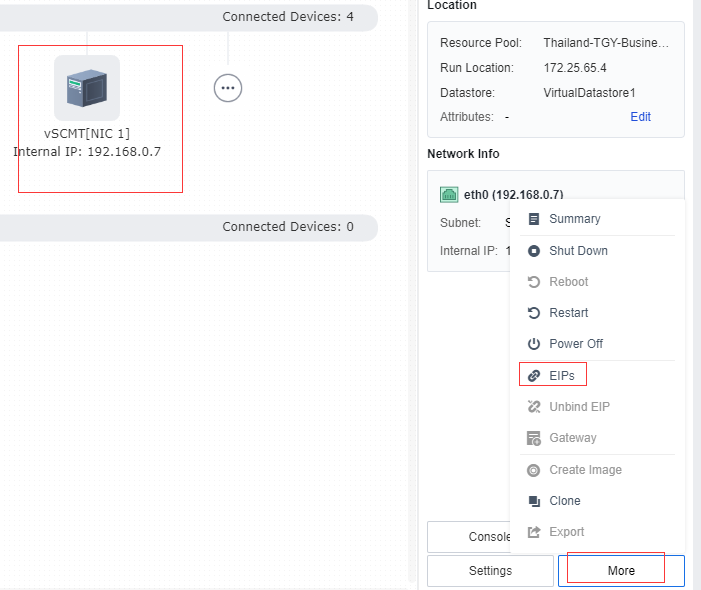
Select VM internal ip and elastic ip click OK.