[DMP2.0.2] How to deploy in a multishared service elastic IP pool environment
Problem Description
After deploying DMP in an environment with multiple shared service outlets, errors are reported when creating Databases and loading
Reason: Failed to bind an elastic IP address to the load balancer. Please contact the administrator.

Warning Information
Reason: Failed to bind an elastic IP address to the load balancer. Please contact the administrator.
Effective troubleshooting steps
Deploying DMP requires opening shared service and supporting Shared Service elastic IP pools. (The Security Center also has corresponding matching requirements) The actual network conditions on the client side may have multiple Shared Service elastic IP pools in different network segment.

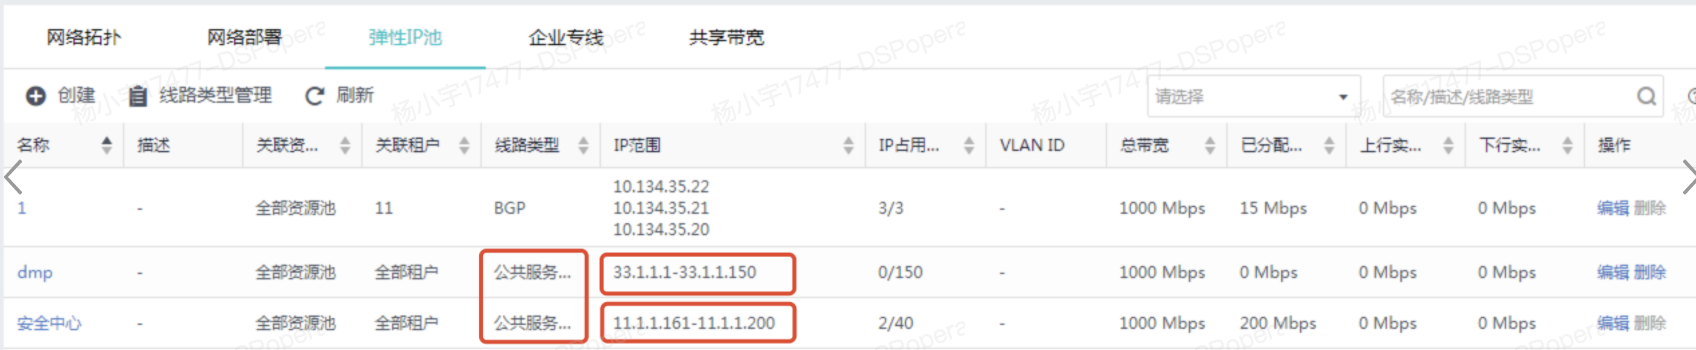
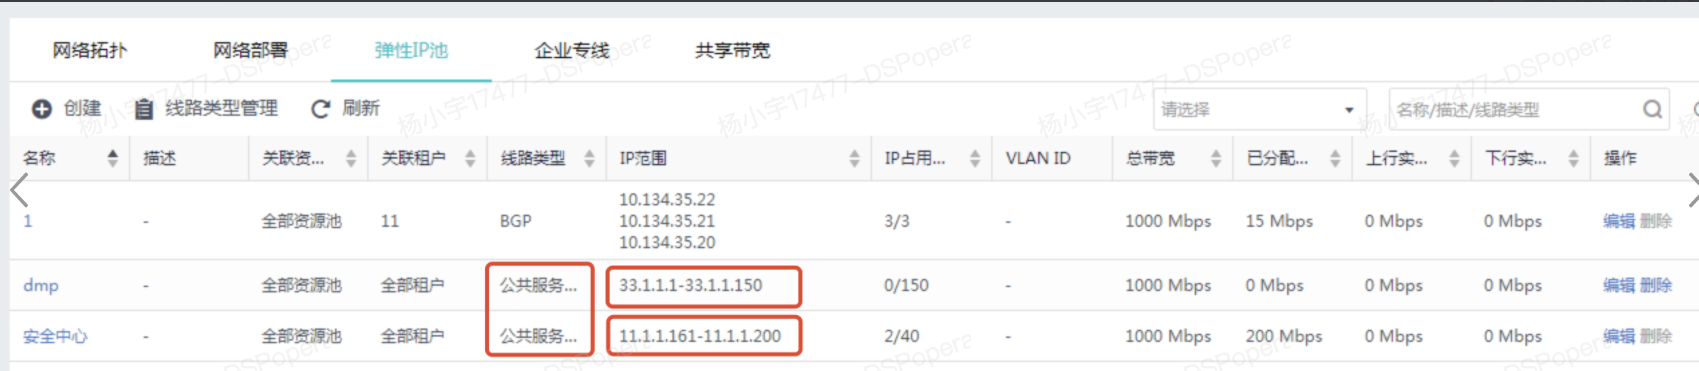
In a similar situation, when DMP creates a DB cluster, it cannot specify elastic IP pool, so it will apply for a Shared Service elastic IP in an originally unreachable network segment, which ultimately causes the creation to fail.
solution
Overview: Manually create Route (layer 3) and open the public elastic IP network segment elastic IP
Detailed steps: (refer to topology)
Scenario 1: Tenant elastic IP configured on the tenant Route (layer 3) is not in the same elastic IP pool as the IP address of the DMP internal communication port
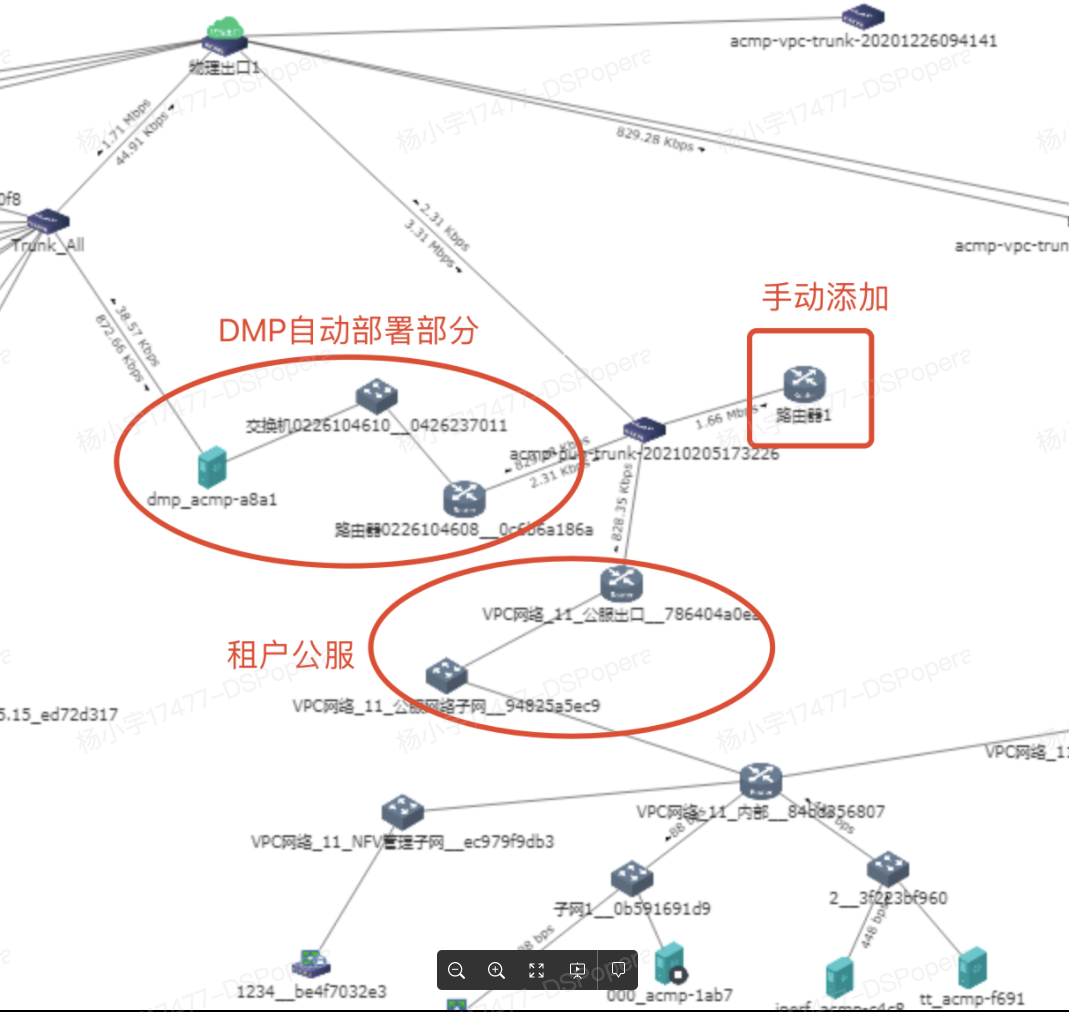
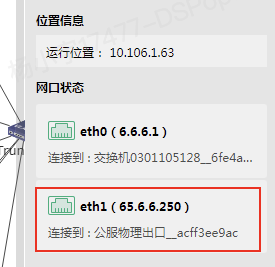
- First, manually add a Route (layer 3) A and connect it to Tenant Shared Service exit. Referring to the figure above, you need to add 2 network ports (each network port needs to be connected, corresponding to the Shared Service elastic IP pool of 2 different network segment. If there are 3 different network segment, you need to add 3 network ports, and so on)
The specific configuration IP of the network port is the gateway IP of each Shared Service elastic IP IP pool, as follows
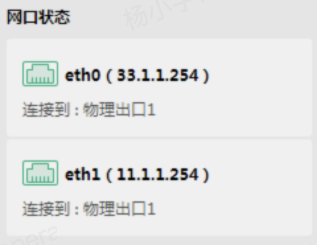
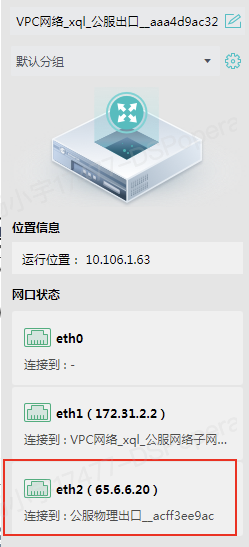
- Add a Route (layer 3) DMP, add the newly added elastic IP pool network segment, and point the gateway to DMP. Refer to the figure below (need to fill in config to prevent loss after restart)
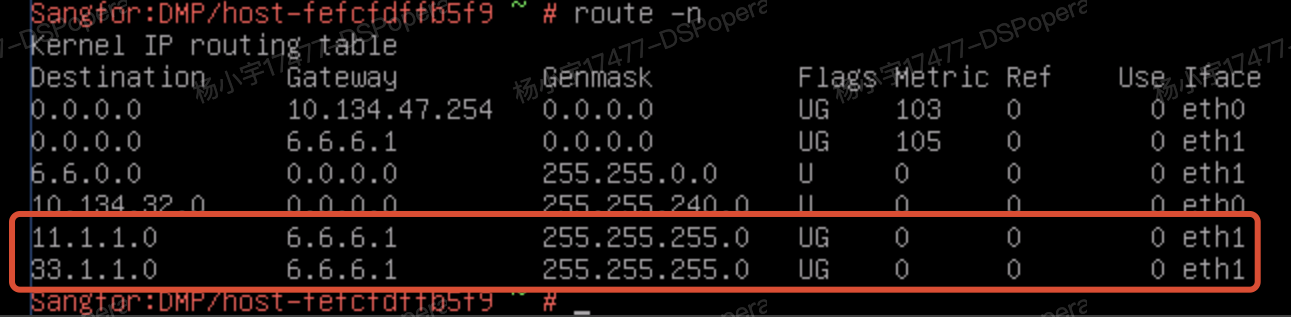
Very Important: Please be sure to configure the newly added route in /etc/sysconfig/network-scripts/route-eth1. Otherwise, after the DMP upgrade is restarted, the network may be disconnected due to route loss, triggering DB self-healing.
Very Important: Please make sure to configure the newly added route in /etc/sysconfig/network-scripts/route-eth1. Otherwise, after the DMP upgrade is restarted, the network may be disconnected due to route loss, triggering DB self-healing.
Very Important: Please make sure to configure the newly added route in /etc/sysconfig/network-scripts/route-eth1. Otherwise, after the DMP upgrade is restarted, the network may be disconnected due to route loss, triggering DB self-healing. ****
Scenario 2:
If the Shared Service network network segment used for DMP deployment is consistent with the network of Tenant Shared Service egress Route (layer 3), but the Shared Service elastic IP bound to the Databases belongs to another network segment, then you only need to add a Route (layer 3) to DMP and the DMP egress Route (layer 3). There is no need to create a new Route (layer 3) for Route (layer 3) forwarding.
DMP internal communication port IP:
Tenant Shared Service server egress router IP:
- Configure a static Route (layer 3) on the router where the DMP internal communication port is located, and point the next address to Tenant Shared Service Route (layer 3) IP.

- Add a route to the elastic IP pool where the DBVM elastic IP as Route (layer 3)
Suggestions and Conclusion
The DMP for elastic exports of multiple public servers cannot specify a specific IP pool, causing the DBVM to connect to the wrong export.
Original Link
https://support.sangfor.com.cn/cases/list?product_id=36&type=1&category_id=19579&isOpen=true