【VDI】Cross-Cluster Migration Guide_V5.9.1
Background
This document guides frontline staff to perform cross-cluster migration operations for VDI 5.6.0 and above versions to meet daily operations and maintenance requirements.
Restrictions
-
Cross-cluster cold migration of VMs to VS datastore in two-host HCI clusters is not supported (external datastores are supported) and can be solved by cross-class cluster hot migration.
-
Cross-cluster migration of virtual machines using floating pool mode private disks is not supported. After cross-cluster migration, it is not possible to reimport the original resources to use the originally assigned floating pool mode private disk data.
-
The VM advanced option does not support VM migration across clusters using restore to the latest snapshot mode. After migration, it will not be possible to reimport to the original resource for use.
-
Only supports cross-cluster migration between HCI clusters of the same version (e.g., HCI6.10.0 to HCI6.10.0) and from a lower version HCI cluster to a higher version HCI cluster (e.g., HCI6.9.0 to HCI6.9.1), and does not support cross-cluster migration from a higher version to a lower version HCI cluster or between VMP and HCI clusters.
-
Templates cannot be migrated directly. Refer to Chapter 3 for details.
Precautions
Important: After the migration, you must validate the functions the customer needs to use on the new cluster before deleting the relevant contents on the source cluster to avoid abnormal situations that make restoring the customer’s environment impossible.
-
You should also refer to the following steps regarding remote application server VM migration. For VDI 5.6.0 and above, exporting and importing user associations are not required.
-
Suppose the virtual machine is associated with an app container before migration; in that case, you need to select the app container associated with the migrated virtual machine in the VDC console on the Service > Software Distribution page when docking the management source and destination HCI clusters after migration. Select More > Copy to copy the app container to the destination HCI cluster, and then use the copied app container to associate with the migrated virtual machine.
-
Differences in features between VDC versions:
a) VDI version 5.6.0 does not support template recovery to the destination cluster for cross-service cluster scenarios. Therefore, you need to contact TAC for assistance.
b) VDI version 5.9.0 supports template recovery to any cluster.
c) VDI version 5.9.1R1 has the history of VMs deleted in resources and user associations, and it prompts for bindable user information based on the VM name when importing VMs into a resource.
-
Templates:
a) Cannot directly migrate VM templates.
b) If such misoperations have been performed, you need to roll back and follow the template migration instructions. Rollback operation: Delete the VM templates migrated to the destination cluster and restore the templates in the source VDC Templates.
c) Refer to Chapter 3.9 and 3.10 for template migration operations.
-
Cross-cluster migration will affect local user auto-login. Users need to enter their password once to log in. After that, it will be auto-login.
-
Using multiple VDC clusters to manage the same VM template is prohibited because it can lead to data loss.
-
If the template version, e.g., V2, is not associated with any VMs in the new cluster, then V2 cannot be recovered, and only V1 can be selected for template recovery.
Scenarios
Scenario 1: Migration Within The Same Cluster (VDC Remains Unchanged)
| Scenarios | Version Required |
|---|---|
| Migration within the same cluster | VDI 5.6.0 or above |
| Item | Procedures |
|---|---|
| 1 | Migrate VM |
| 2 | Filter migrated VMs |
| 3 | Export filtered VM information |
| 4 | Delete filtered VMs |
| 5 | Import VM to the resource |
| 6 | Import associated settings |
Scenario 2: Cross-cluster Migration (VDC Changes)
| Scenarios | Version Required |
|---|---|
| Cross-cluster migration | VDI 5.6.0 or above |
| Item | Procedures |
|---|---|
| 1 | Migrate VM |
| 2 | Migrate VDC |
| 3 | Filtering of migrated VMs |
| 4 | Export filtered VM information |
| 5 | Delete filtered VMs |
| 6 | Integrate with new HCI |
| 7 | Delete VM template |
| 8 | Recover VM template |
| 9 | Import VM to the resource |
| 10 | Import associated settings |
| 11 | Delete resource record |
| 12 | Delete source HCI |
Configuration
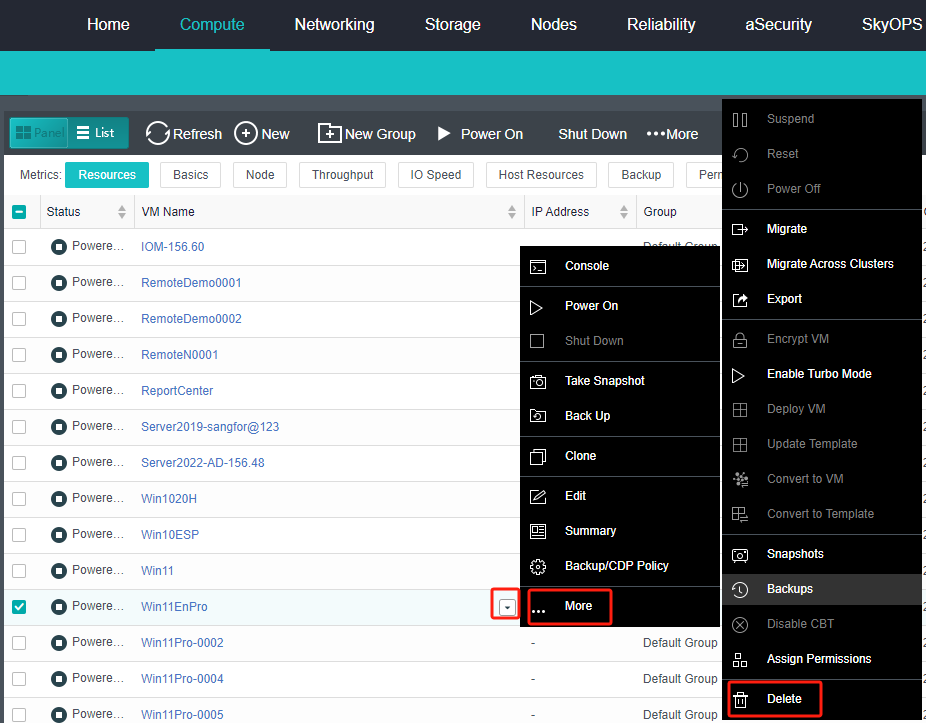
Migrate VM
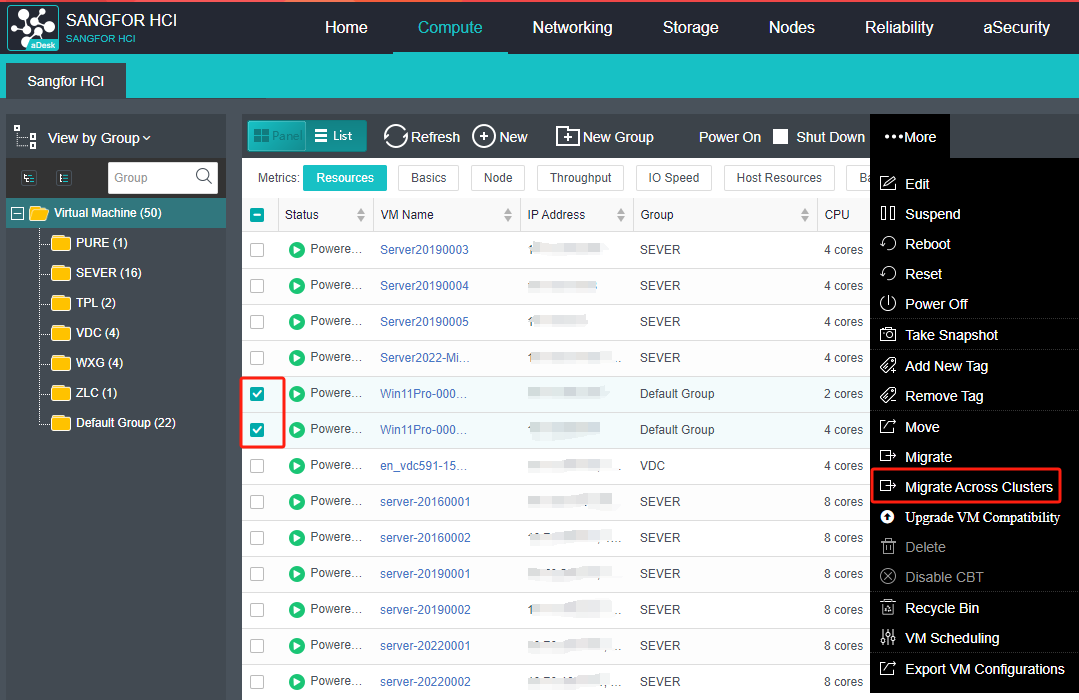
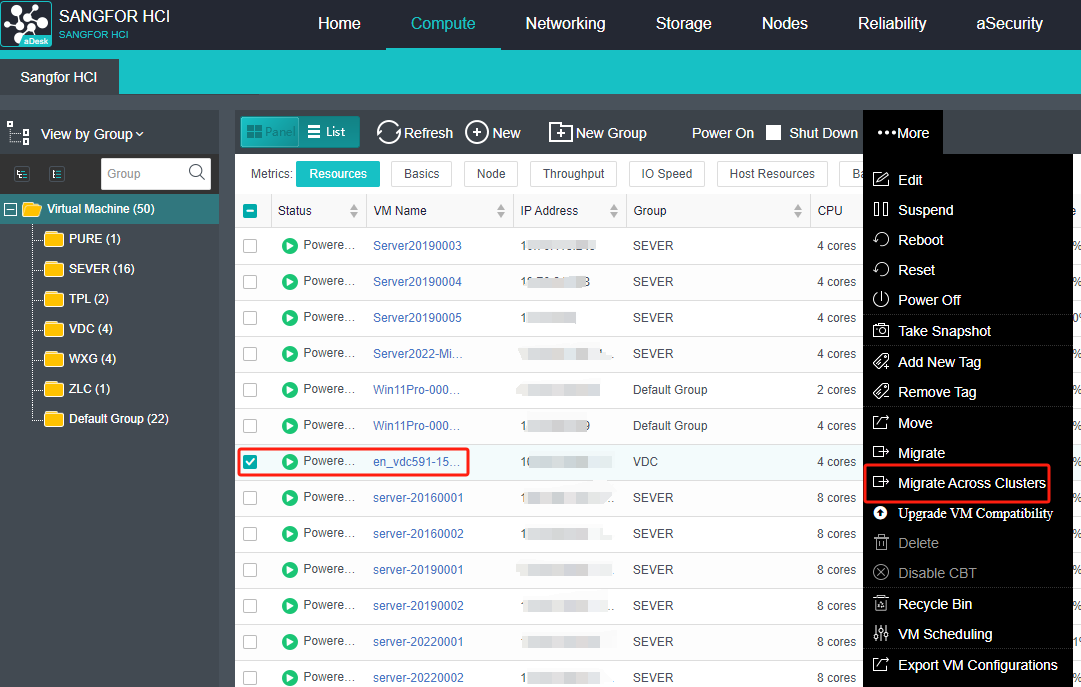
- Log in to the HCI console and navigate to Compute, select the virtual machines to be migrated, and Click More > Migrate Across Clusters.
Note:
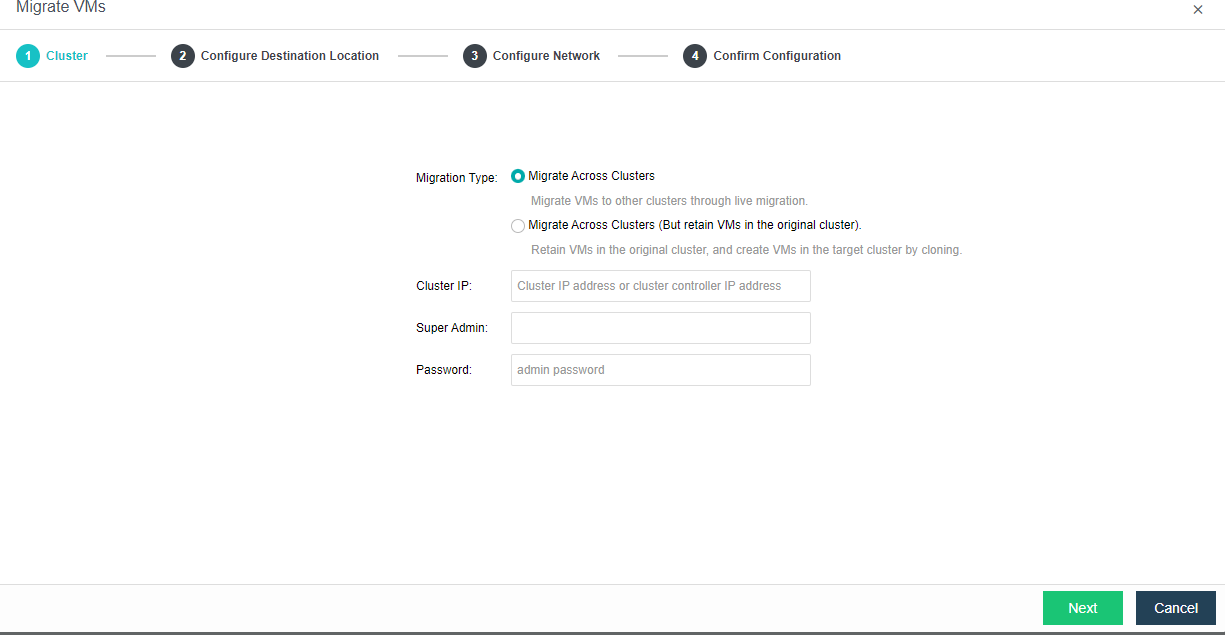
HCI VMs can be migrated across clusters in both ways. If you choose the Migrate Across Clusters type, the source cluster will automatically delete the corresponding VMs after the VM migration is completed, and the administrator can retrieve them from the recycle bin afterward. Migrate Across Clusters (But retain VMs in the original cluster), the source cluster will not automatically delete the corresponding VMs after the VM migration is completed, and you need to manually filter the migrated VMs for statistics compiling and deletion.
- Select Migrate Across Clusters of migration type, enter the IP of the destination cluster, the admin account and password, and click Next.

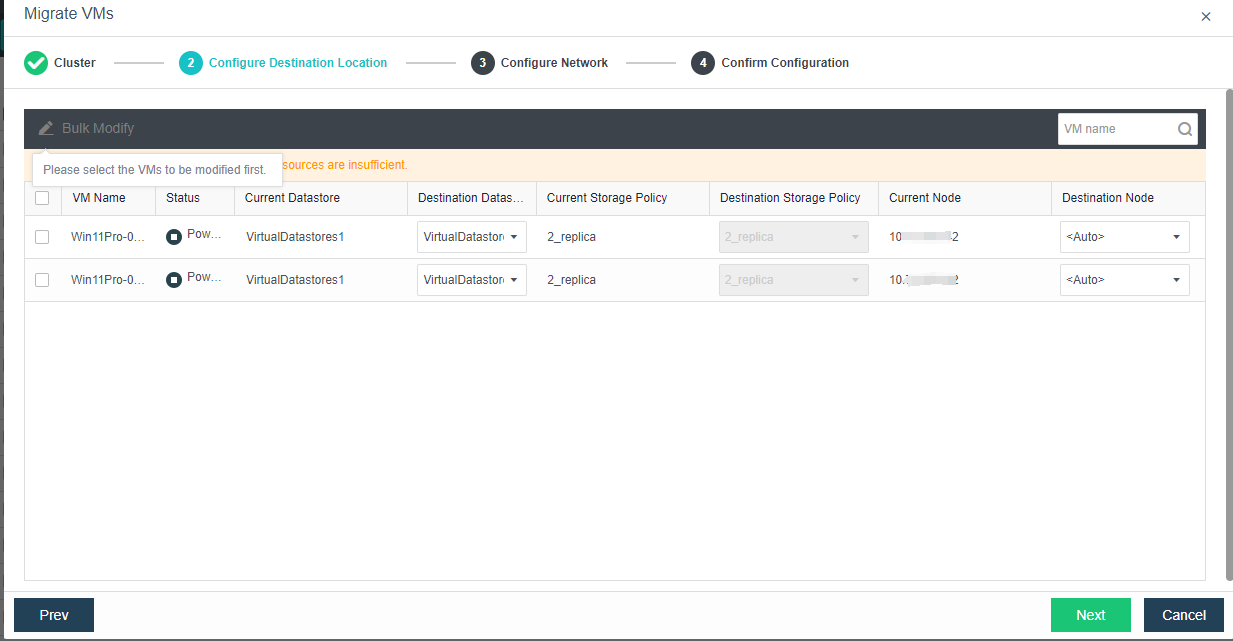
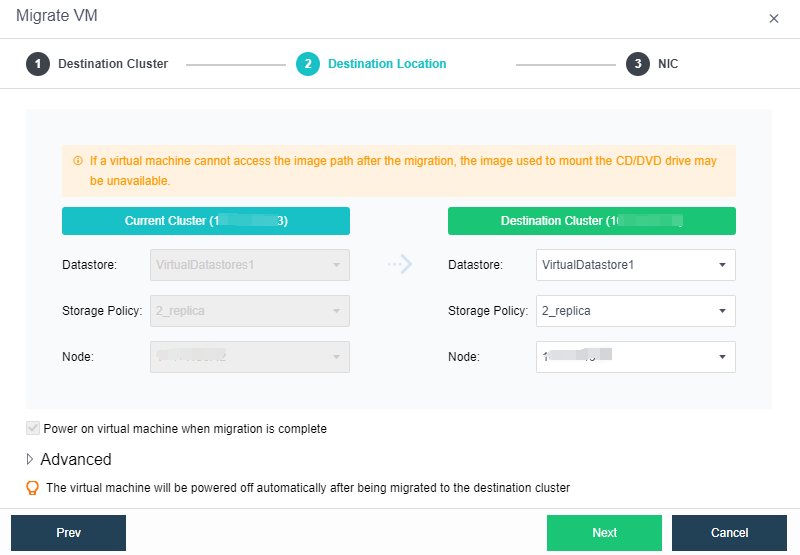
- Confirm the destination datastore and destination node, and click Next.
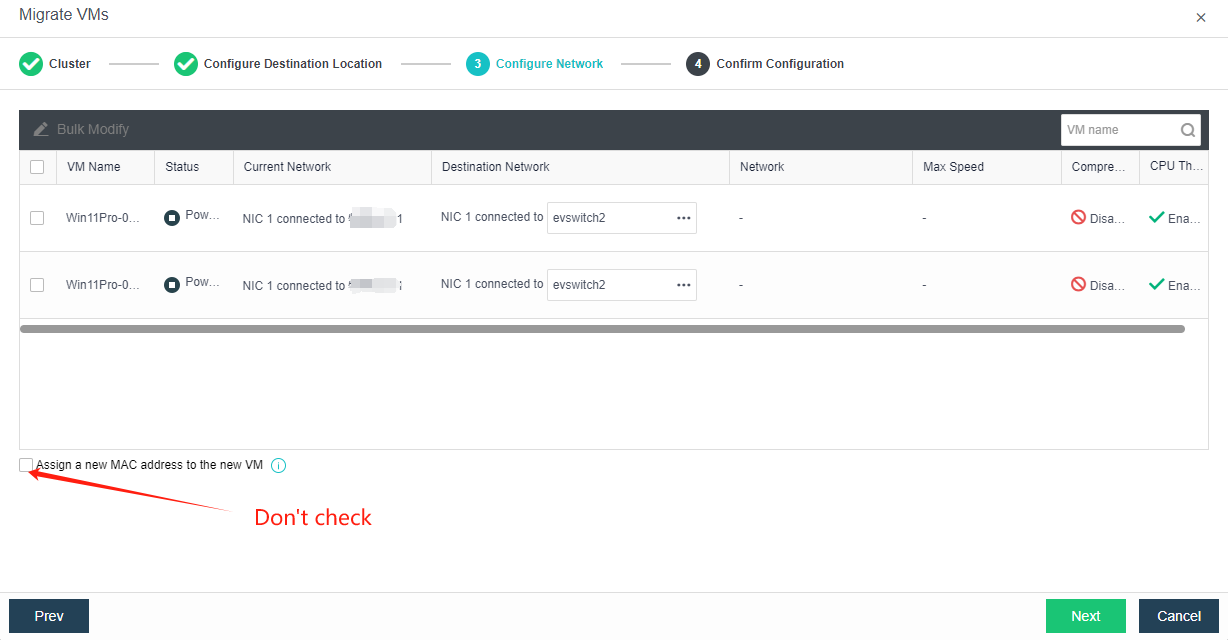
- Confirm the bridging switch of the destination network; do not check the Assign a new MAC address to the new VM checkbox, and click Next.
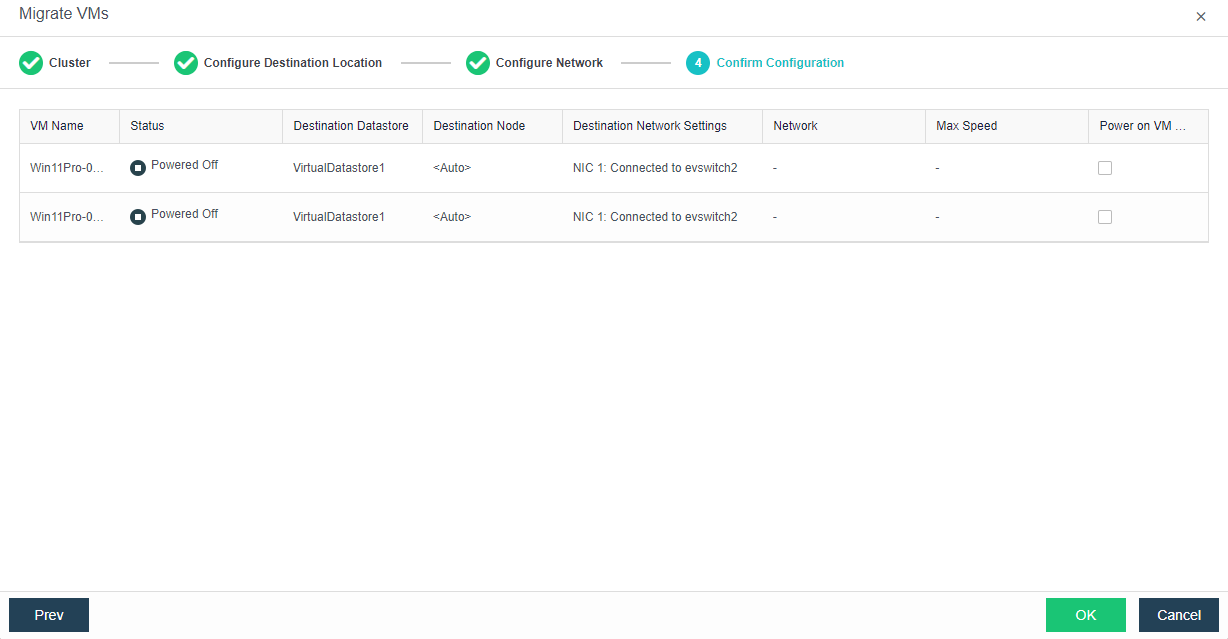
- Confirm the migration configuration details and click OK.
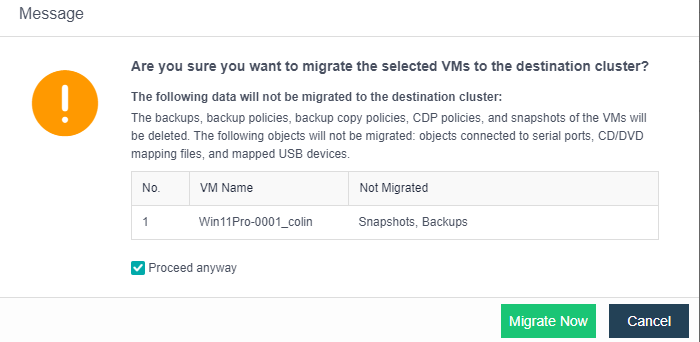
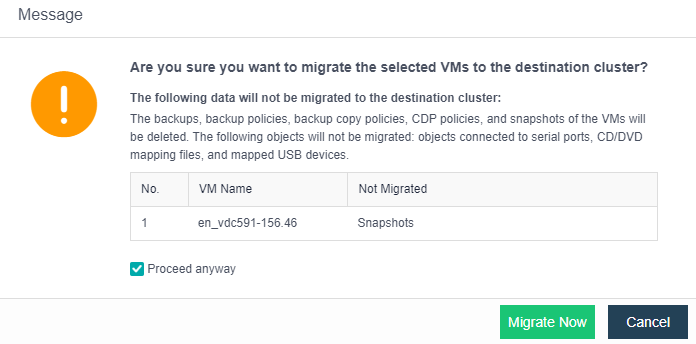
- Confirm the pop-up window by checking the Proceed anyway checkbox and clicking Migrate Now.
Migrate VDC
- Log in to the HCI console and navigate to Compute, select the VDC to be migrated, and Click More > Migrate Across Clusters.
Note:
VDC virtual machine can only be migrated across clusters in one way. If you choose the Migrate Across Clusters (But retain VMs in the original cluster) type, VDC licenses will have expiration issues.
- Select Migrate Across Clusters of migration type, enter the IP of the destination cluster, the super admin account and password, and click Next.
- Confirm the destination cluster’s datastore, storage policy, and node, then click Next.
- Select a network connection and click OK.

- Confirm in the pop-up window by checking the Proceed anyway checkbox and clicking Migrate Now.
Filter Migrated VMs
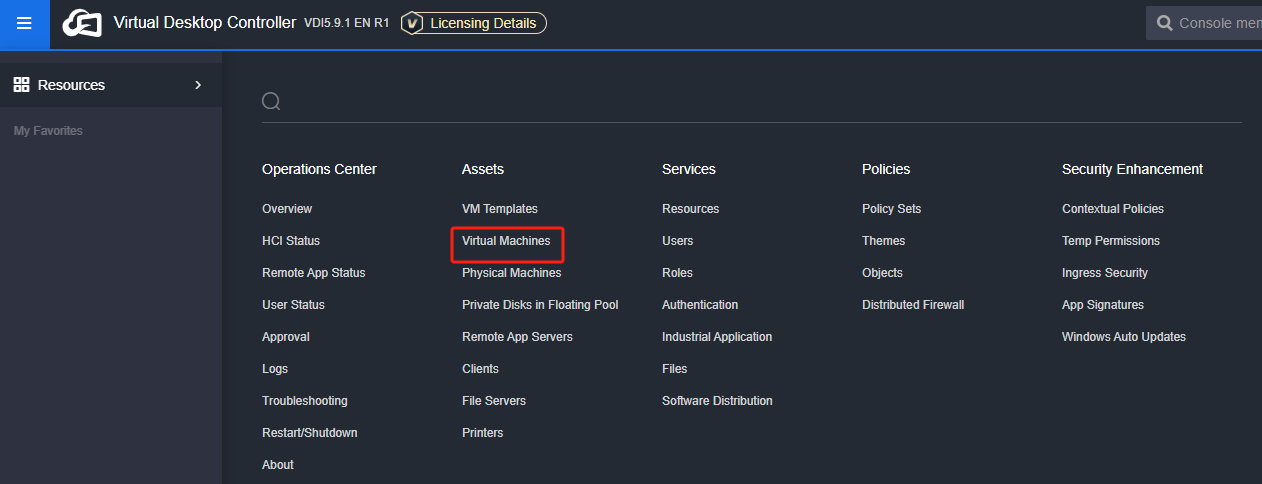
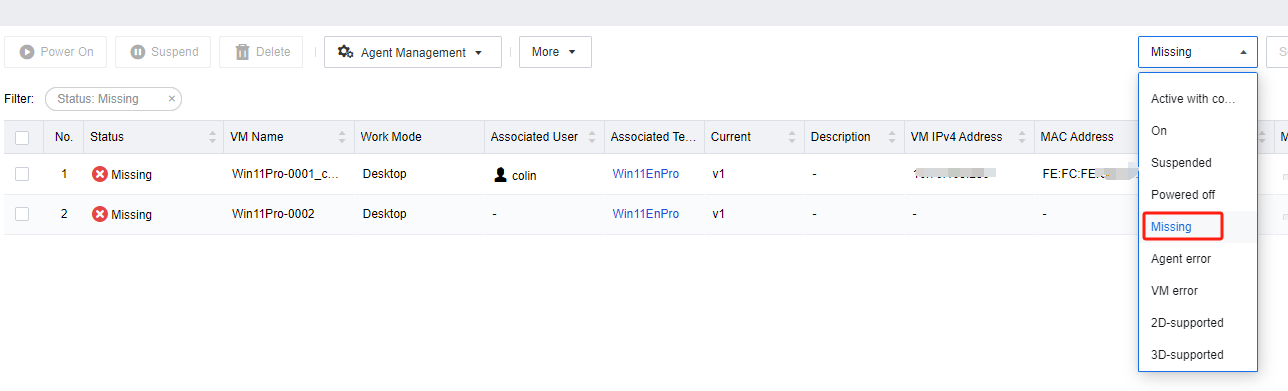
Log in to the VDC console, enter the Assets > Virtual Machines interface, filter the virtual machines in the state of Missing, and filter out the virtual machines that have completed cross-cluster migration.
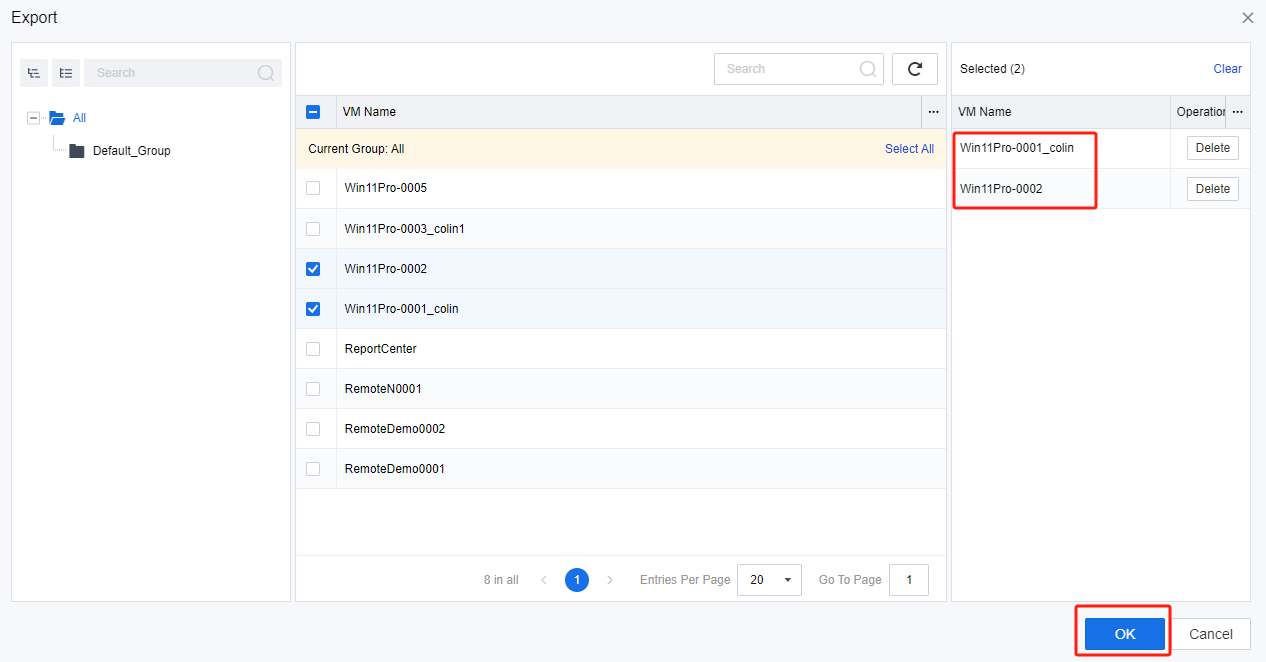
Export Filtered VM
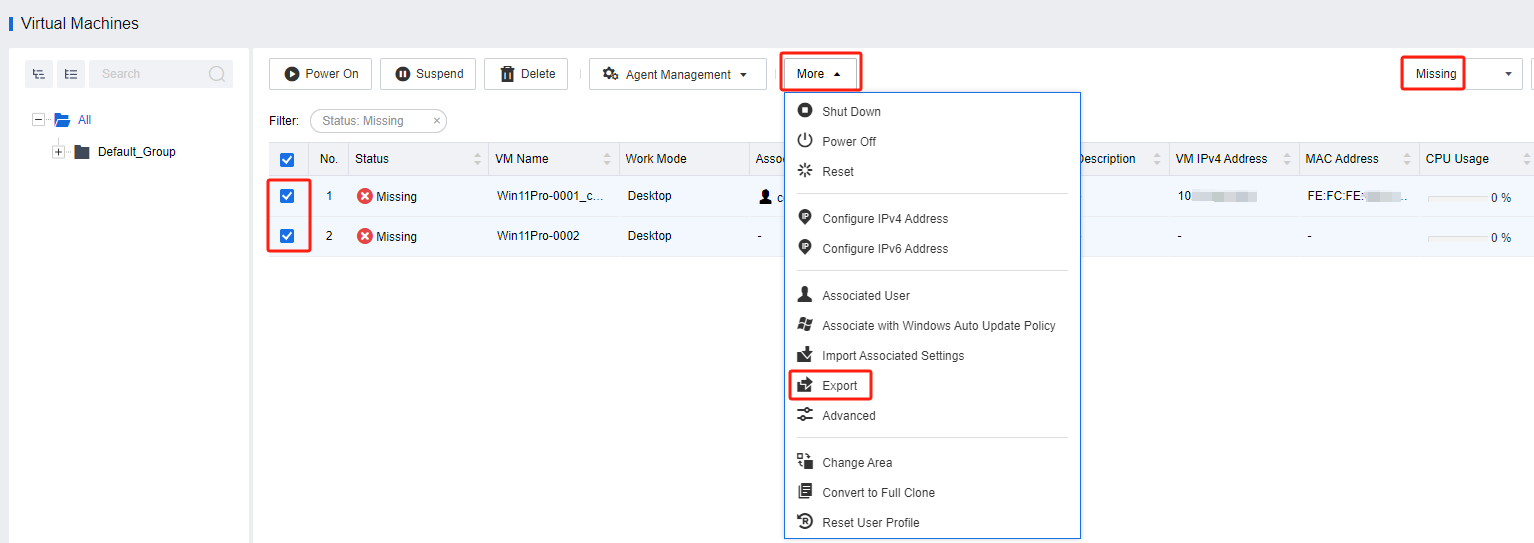
After selecting them in bulk, click More > Export to export the information of VMs that have completed cross-cluster migration.
Note:
This step is not required for VDI 5.9.1R1 and later versions.
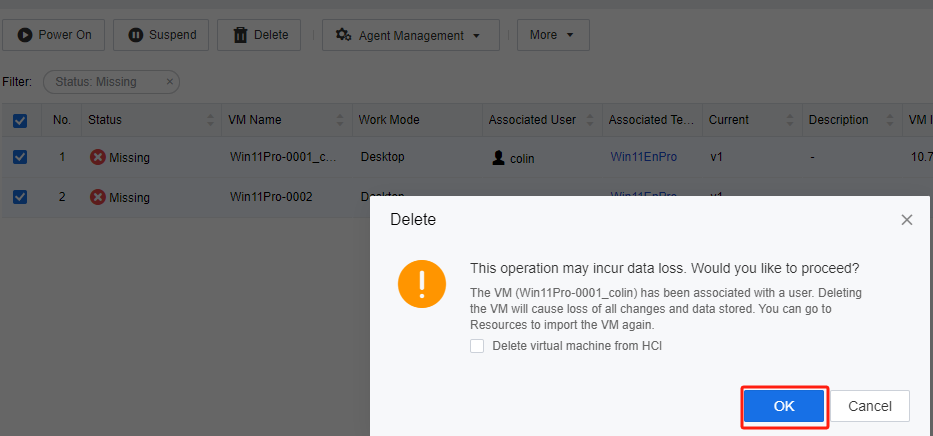
Delete Filtered VMs
- Delete the VMs that have completed the cross-cluster migration in the VDC console without checking the Delete virtual machine from HCI checkbox.
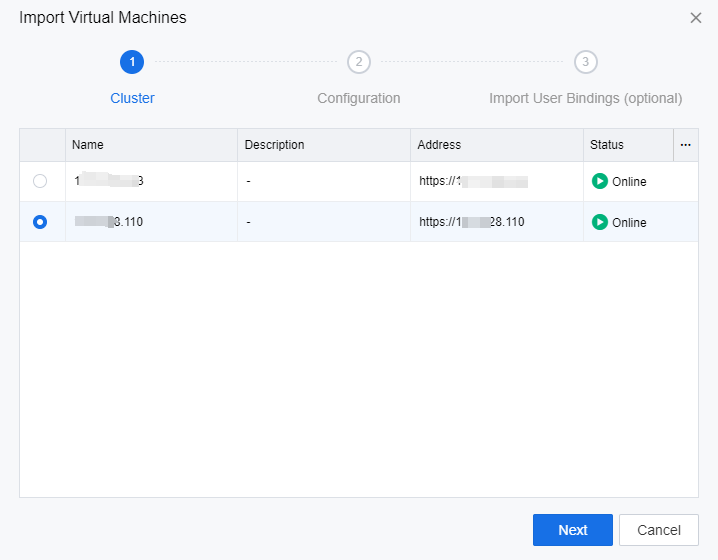
Import VM to the Resources
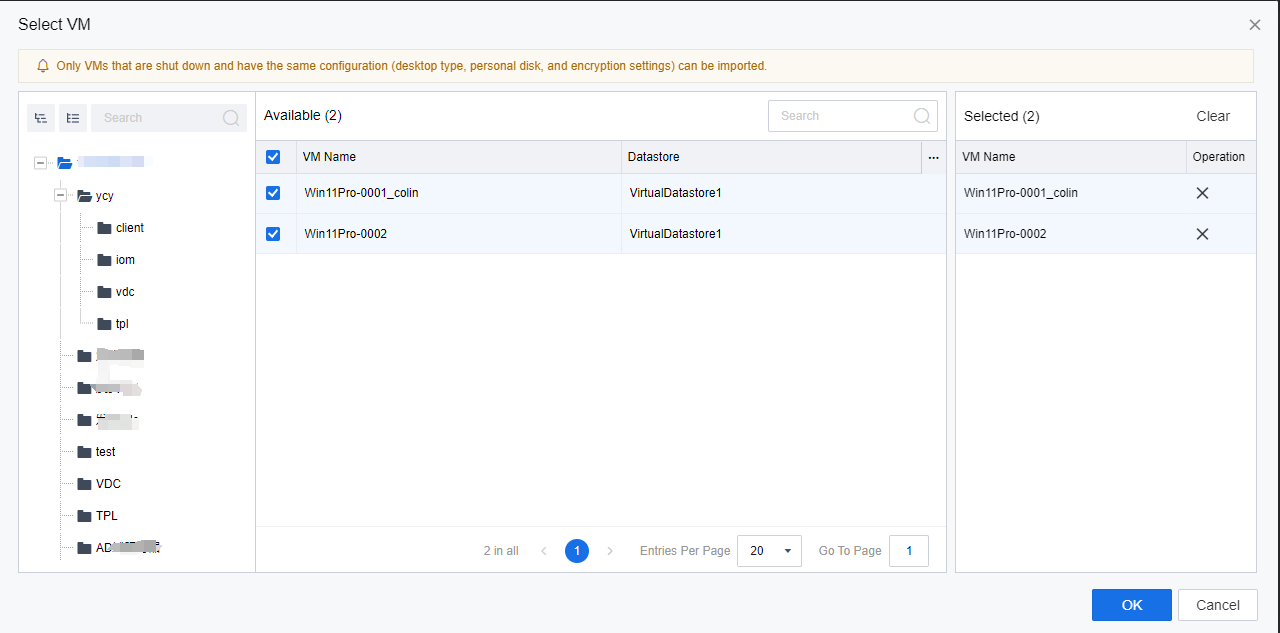
- In the VDC console, go to the Services > Resources interface, edit the desktop resources to which the migrated VMs belong, and in the Import Virtual Machines section, reimport the VMs that have been migrated(Only shutdown VMs can be loaded during the import).
Note:
VMs in VDI5.6.0 to VDI5.9.1 will be shut down and locked after successfully imported.

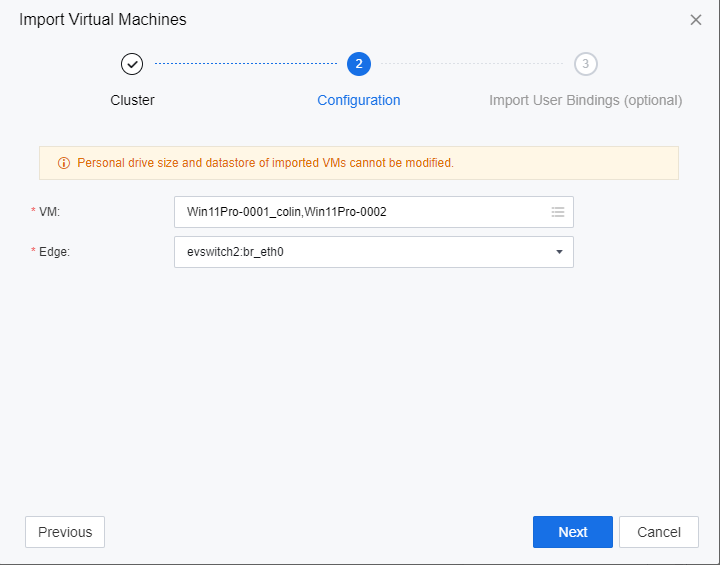
- Select the destination cluster for the migration and click Next.
- Select the migrated VMs and the edges that need to be bridged, and click Next.
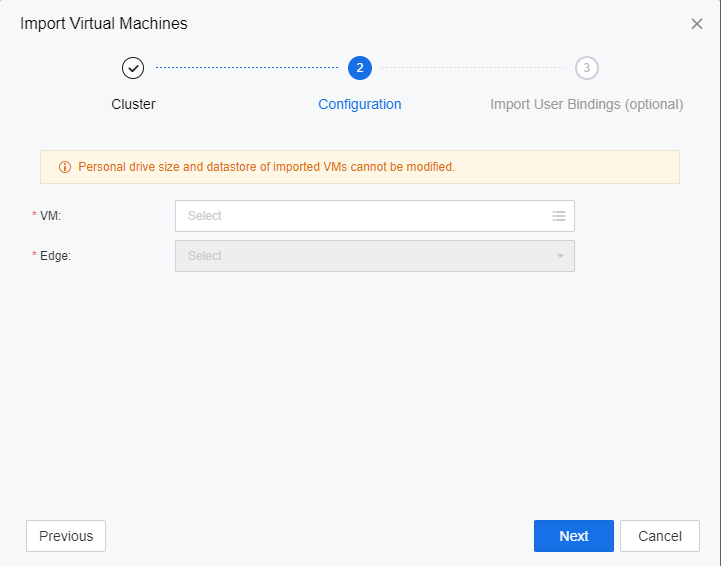
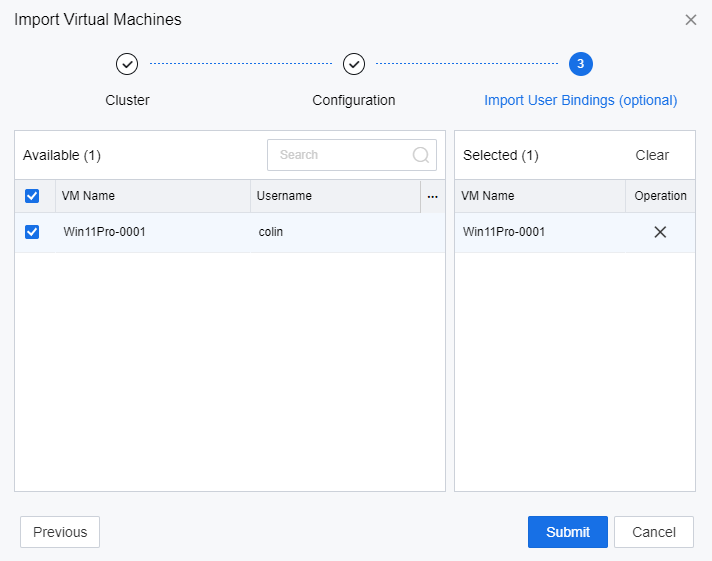
- Select import user bindings and click Submit (5.9.1R1 and above versions support this operation).
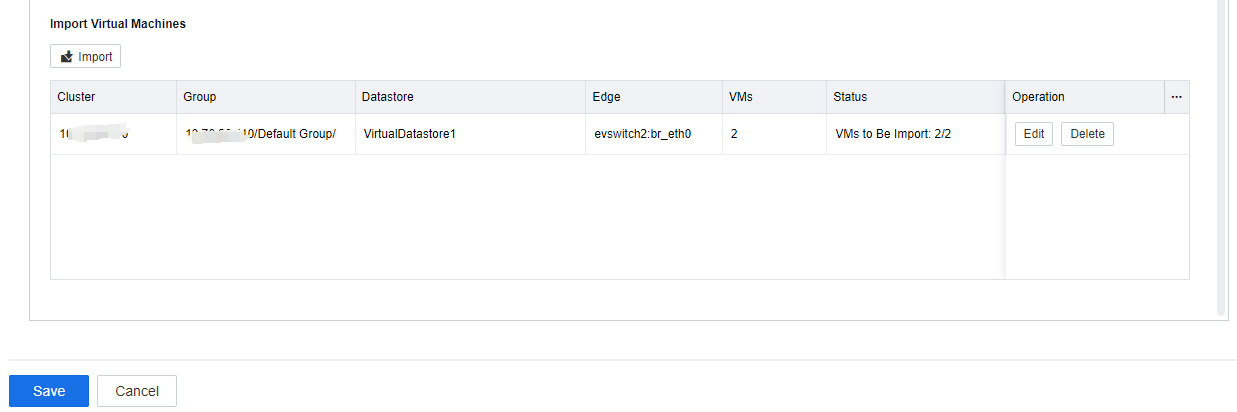
- After confirming that the information is correct, click Save.
Import Associated Settings
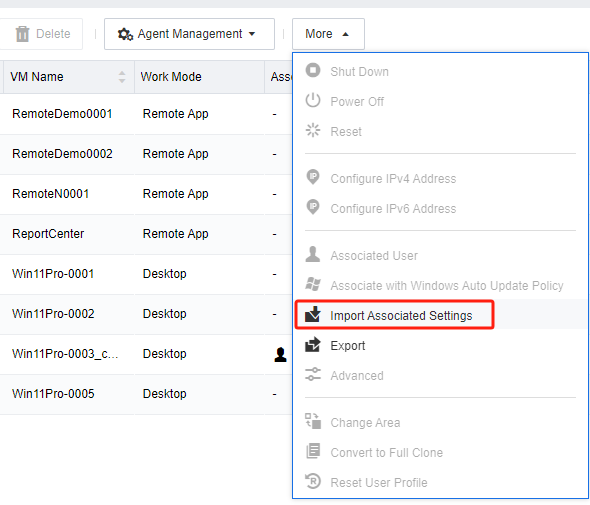
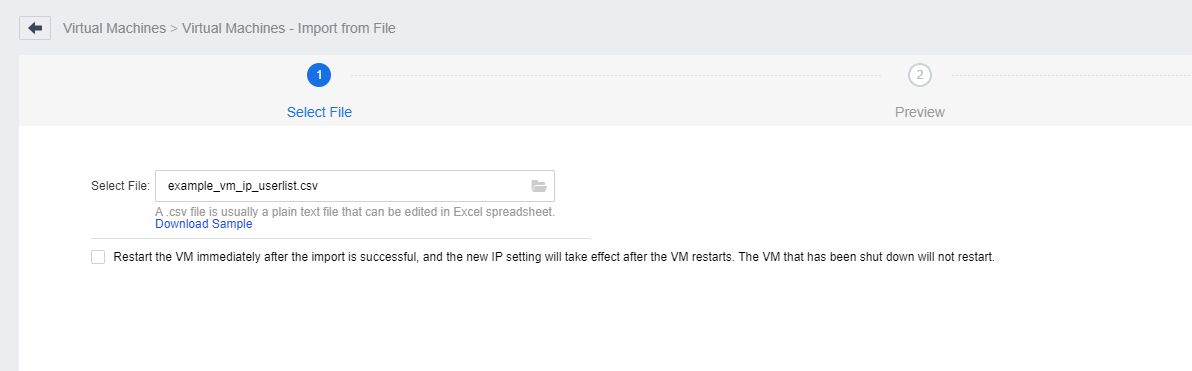
- In the VDC console, enter the Assets > Virtual Machines interface, and click More > Import Associated Settings.
Note:
This step is not required for VDI 5.9.1R1 and above versions.
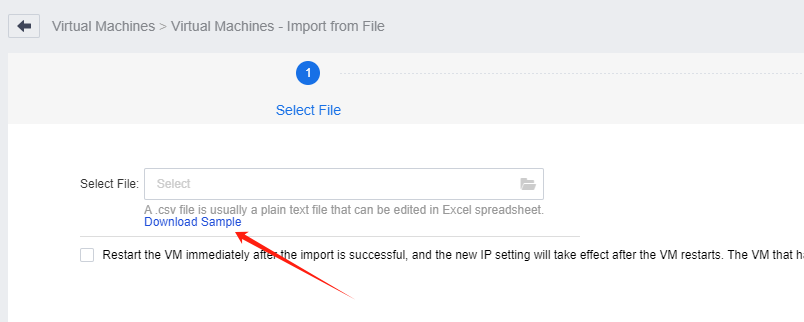
- Click Download Sample, and download the import form template.
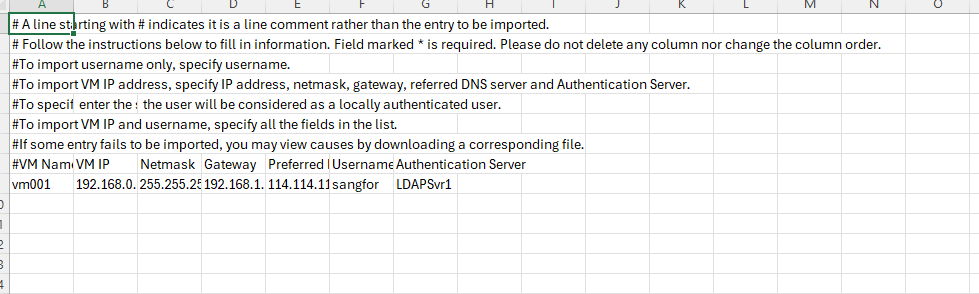
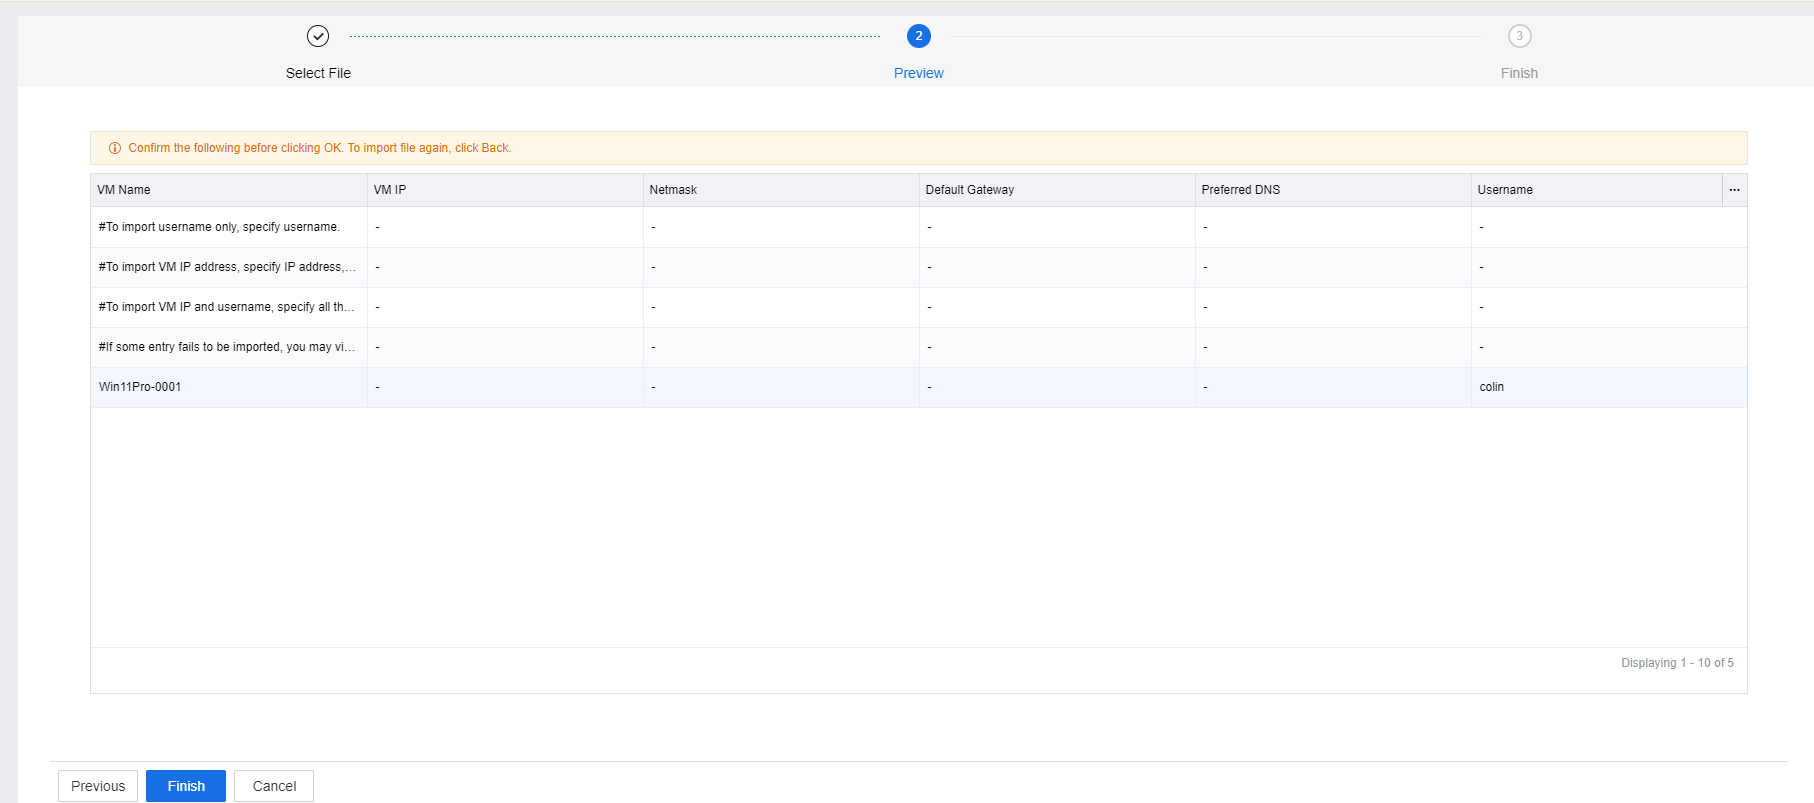
- Fill in the import template with the information about the migrated VMs exported in Chapter 3.4 according to the template format (keep the form file format in CSV and do not change it).

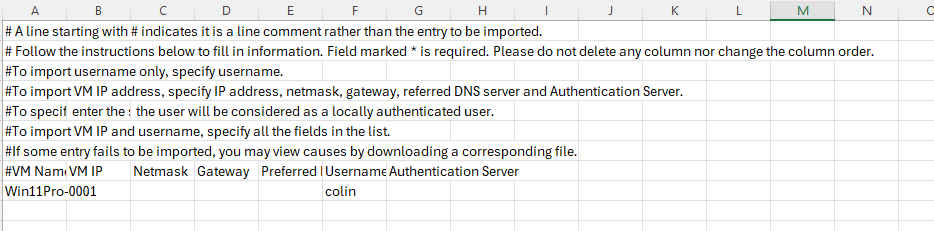
- Upload and complete the re-association of the user associations of the migrated VMs.
- After confirming the relevant information, click Finish.
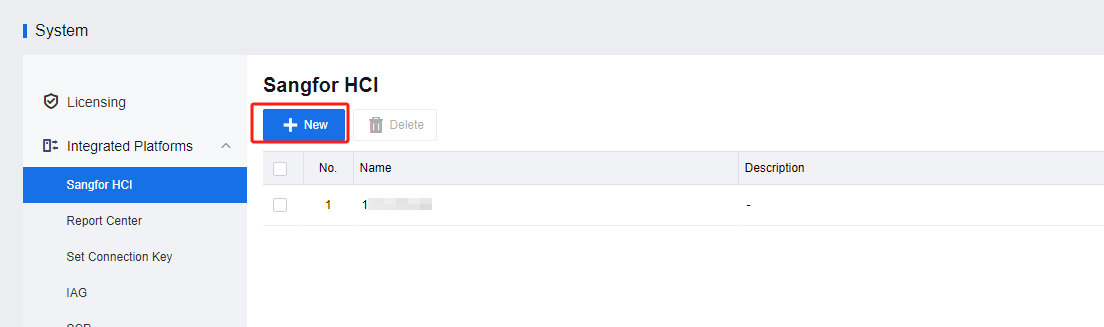
Integrate with New HCI
- Log in to the VDC console and navigate to System > Integrated Platforms > Sangfor HCI. Click New to create the new HCI cluster.
Delete VM template
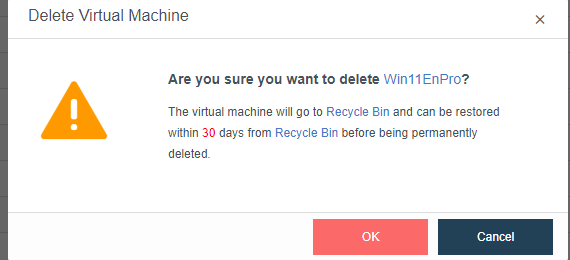
- Log in to the HCI console and navigate to Computer. Select the template virtual machine to be migrated, click More > Delete, and click OK to send the VM template to the recycle bin.
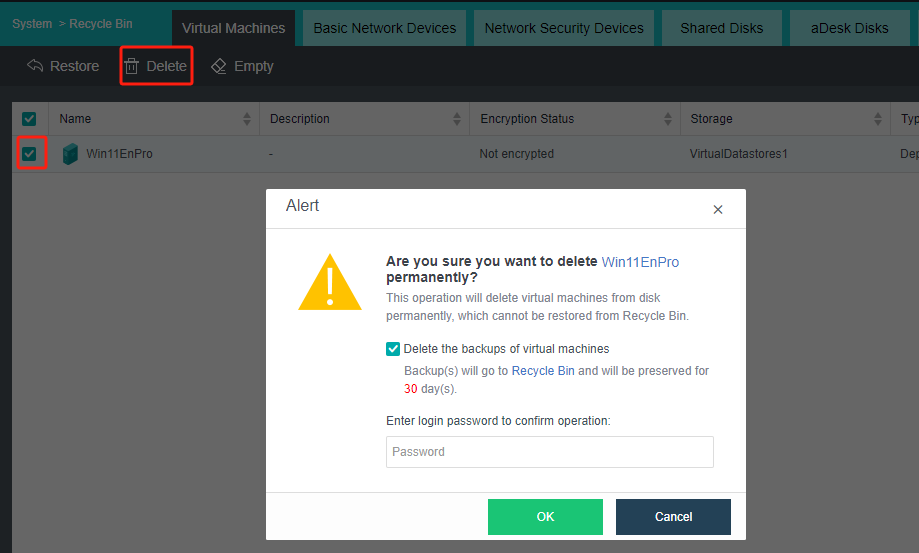
- Navigate to Compute > More > Recycle Bin. On theRecycle Bin page, Check the box for deleted VM template, click Delete, enter the admin password, and click OK.
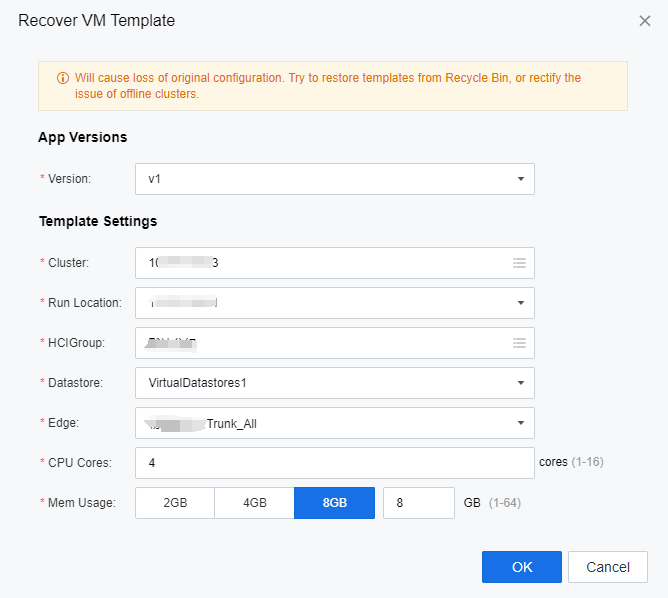
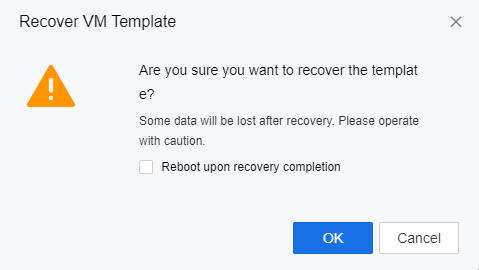
Recover VM Template
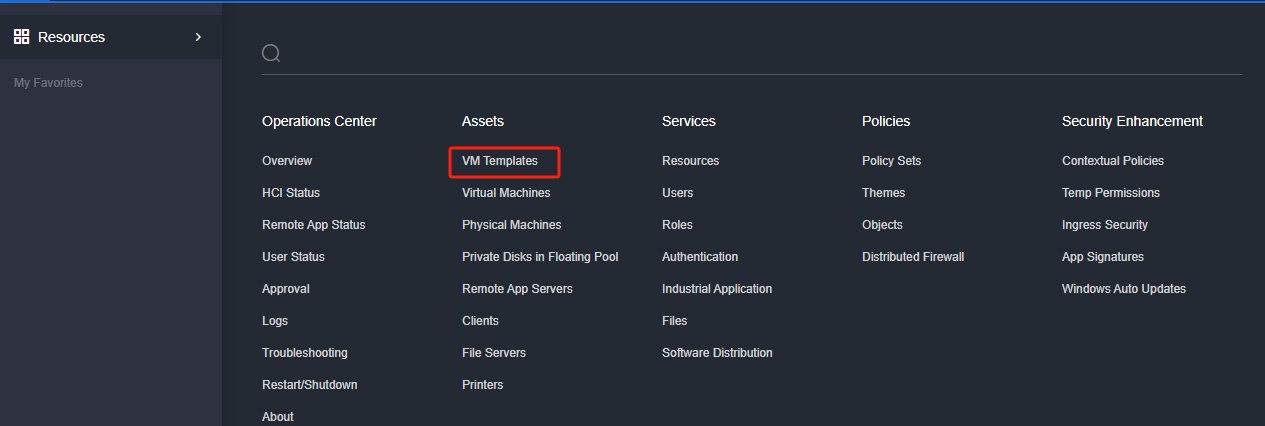
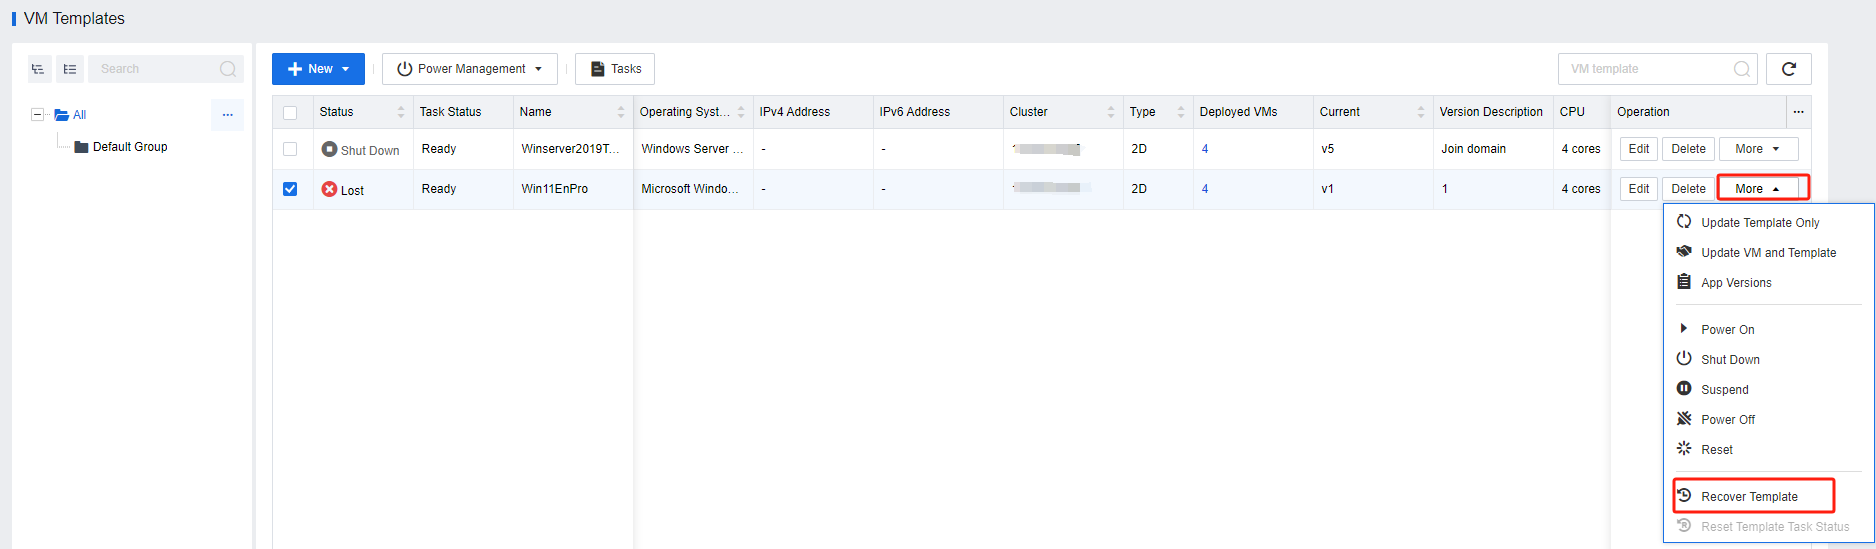
Log in to the VDC console and navigate to Resources > Assets > VM Templates. On the VM Templates page, locate the Lost VM template and click More > Recover Template.
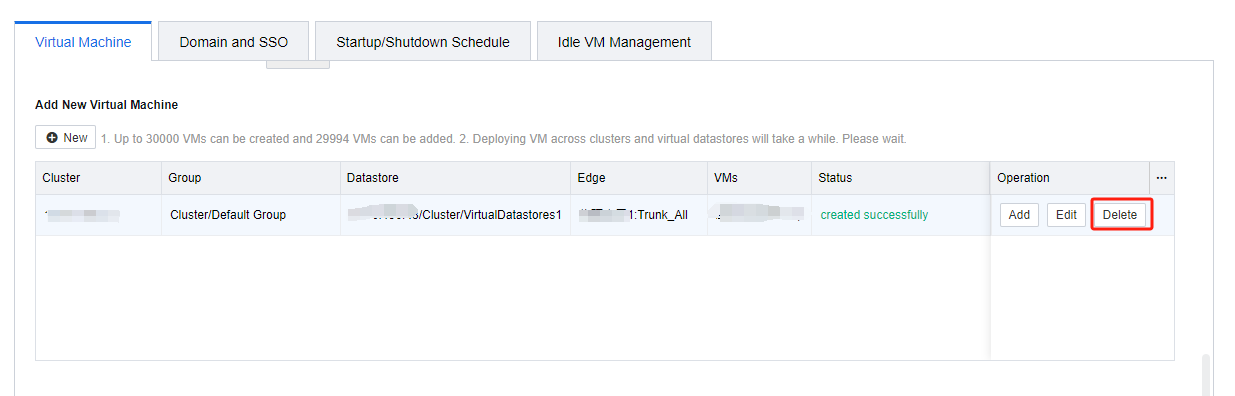
Delete Resource Record
In the VDC console, go to the Services > Resources interface and edit the desktop resources belonging to the migrated VMs. Find the records belonging to the VMs before migration in the Add New Virtual Machines, and click Delete.
Delete Source HCI
Log in to the VDC console and navigate to System > Integrated Platforms > Sangfor HCI. Click Delete to remove the origin of the HCI cluster.
