【VDI】Disaster Recovery Configuration Guide_V5.9.1
Background
You may refer to this document for guidance when configuring disaster recovery for VDI.
Supported VDI Versions
Version 5.9.0 and above.
Prerequisites
According to the following scenario, customers are required to complete the below preparations:
- Windows images, such as Windows 10/11 images.
- At least 4 Hyper-Converged Infrastructure (HCI) nodes and 1 HCI witness node.
- Witness hardware requirements are as follows:
| Cluster Size | Minimum Hardware Requirements | Illustration |
|---|---|---|
| Small Deployment (4 to 6 HCI nodes, 2 to 3 for each machine room) |
CPU: 6 cores Memory: 32GB System disk: capacity ≥ 128GB Quorum disk: enterprise SSD with capacity of > 100GB. Virtualization deployment requires no less than 1000 IOPs. |
Support VMware, HCI virtualization deployment, and physical machine deployment. |
| Midsize Deployment (8 to 16 HCI nodes, 4 to 8 for each machine room) |
CPU: 8 cores Memory: 32GB System disk: capacity ≥ 128GB Quorum disk: two 128GB or 248GB enterprise SSDs are used and configured as RAID1. |
Physical machine deployment is recommended. |
| Large Deployment (18 to 24 HCI nodes, 9 to 12 for each machine room) |
CPU: 16 cores Memory: 32GB System disk: capacity ≥ 128GB Quorum disk: two 128GB or 248GB enterprise SSDs are used and configured as RAID1. |
Make sure to deploy using physical machines. |
- At least two core switches.
Note:
Make sure the customers make the above preparations in advance.
Scenarios
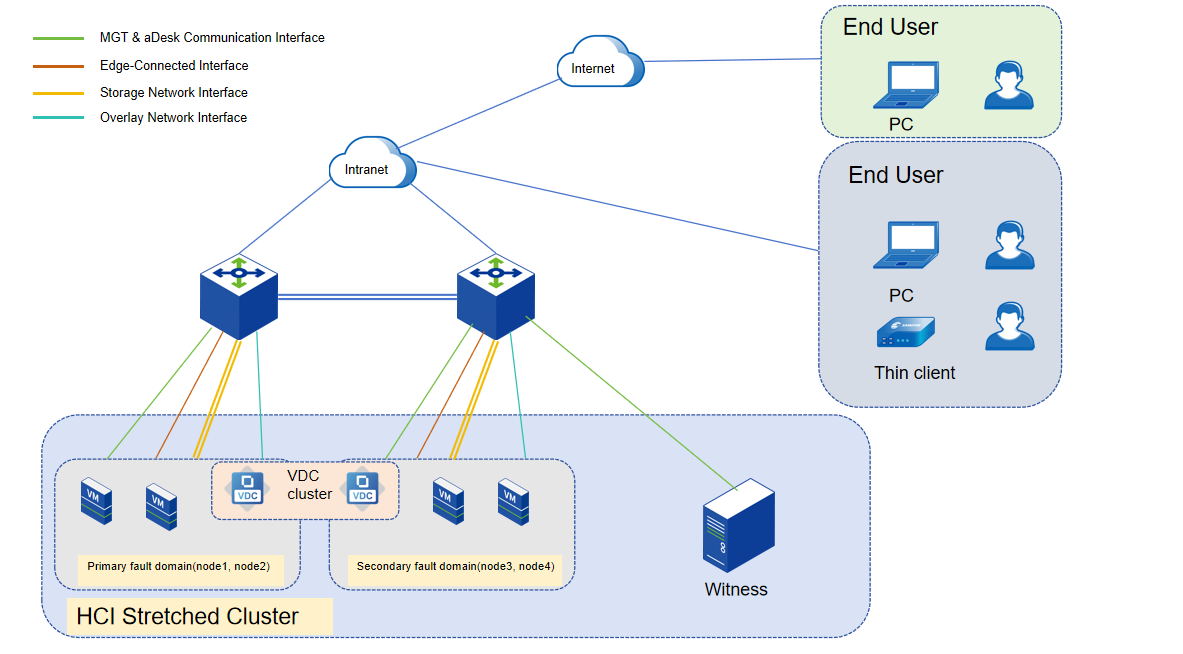
Scenario: HCI Stretched Cluster and VDI
The topology diagram below is for the POC environment use. It can be adjusted according to the actual situation.
| Scenario | Version Required |
|---|---|
| HCI Stretched Cluster & VDI | HCI 6.9.0 or above & VDI 5.9.0 or above |
| Item | Function Enabled | Configuration |
|---|---|---|
| 1 | HCI Stretched Cluster | 1. Deploy a witness node. 2. Deploy a stretched datastore. |
| 2 | VDC | Deploy a software VDC cluster. |
| 3 | aDesk Communication Interface | Configure aDesk communication interfaces. |
| 4 | HCI Integration | 1. VDC integrates with HCI. 2. Init platform configuration. |
| 5 | VDI Template | Create a VDI Template. |
| 6 | Resource | Create a VM resource. |
| 7 | Fault Domain | Set the VM to the corresponding fault domain. |
Configuration
Deploy HCI Stretched Cluster
Deploy Witness Node on Virtualization Platforms
HCI Environment
- On the HCI console, navigate to Compute and click New. On the Create Virtual Machine page, click Import VM to import a VM.

- On the Import Virtual Machine File page, click the Folder icon to select the local VMA file of the witness node.

-
Click Import, waiting for task completion.
-
After the VM is imported, click Summary. On the Summary tab of the witness VM, click Power On to start the VM.

VMware Environment
- In vSphere Client, navigate to Inventory. Click Datacenter > ACTIONS > Deploy OVF Template.

- On the Select an OVF template page, select Local file and click UPLOAD FILES to choose the OVF file of the witness node.

- Keep the default name, location, and resource options, and then go to the Configuration page.

- Select an option based on the cluster scale. Here, the Tiny Witness Node indicates a configuration of 6 vCPUs + 16 GB RAM, the Medium Witness Node indicates 8 vCPUs + 24 GB RAM, and the Large Witness Node indicates 12 vCPUs + 32 GB RAM.

- On the Ready to complete page, confirm your selection and click Finish.

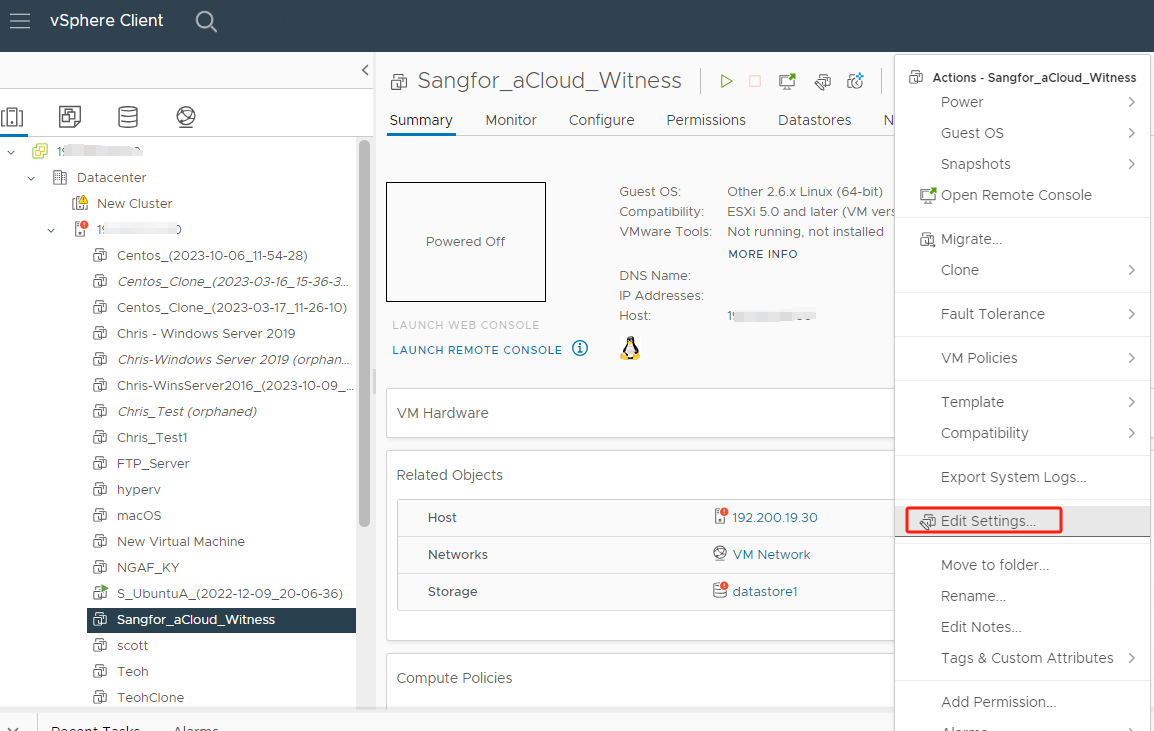
- Select the imported VM and click ACTIONS > Edit Settings to modify the settings.
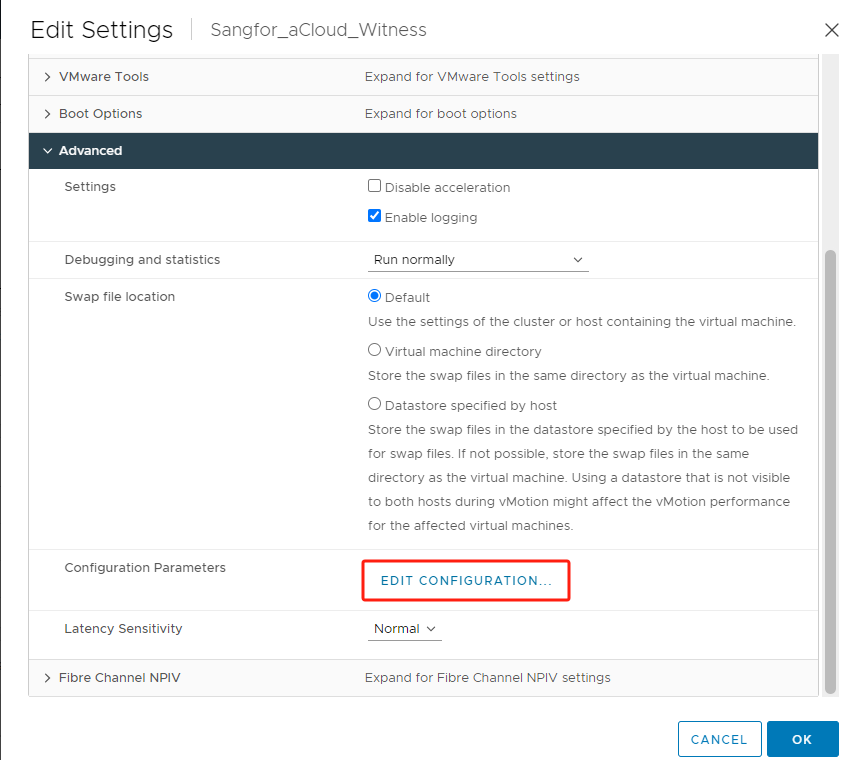
- Click VM Options and expand Advanced. Go to Configuration Parameters, and click EDIT CONFIGURATION.
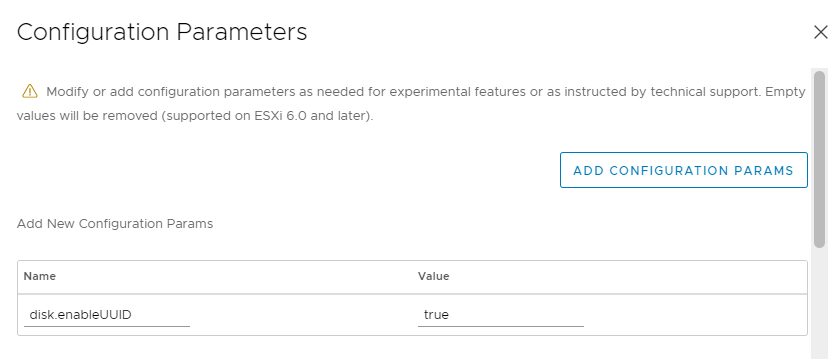
- Enter "disk.enableUUID" for Name and "true" for Value, then click OK to complete the settings.
Deploy Witness Node on Physical Server
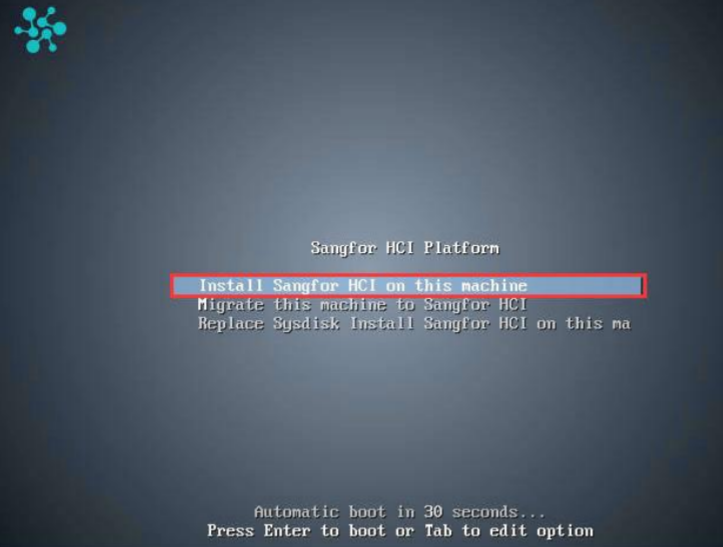
- For installation from an ISO image, load the installer and choose to boot from the Intelligent Platform Management Interface (IPMI). For installation from a USB flash drive, boot from the prepared flash drive. Then, the following page is displayed. Select Install Sangfor HCI on this machine and press Enter.
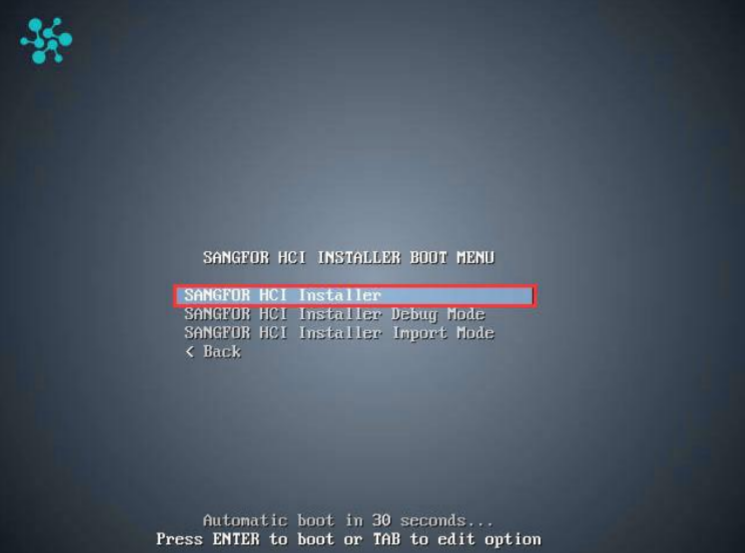
- Select SANGFOR HCI Installer and press Enter.
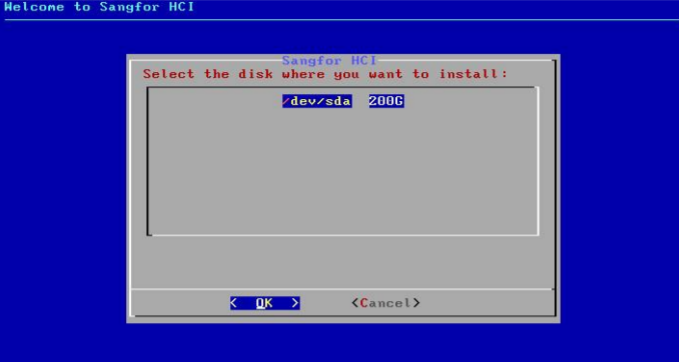
- Select the disk where you want to install the Sangfor HCI software and select OK.
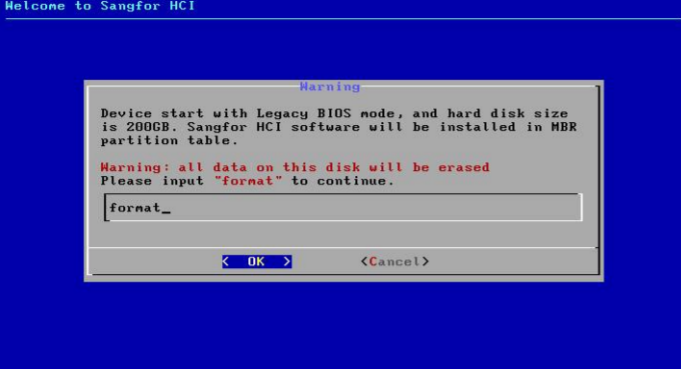
- Then, you will be prompted that this operation will format the disk. Enter "format" in the input box and select OK. If you do not need the disk speed test, select No in the pop-up dialog box.
- After installing the system, select the NIC as prompted and select OK. Then, press Enter to go to the settings page.
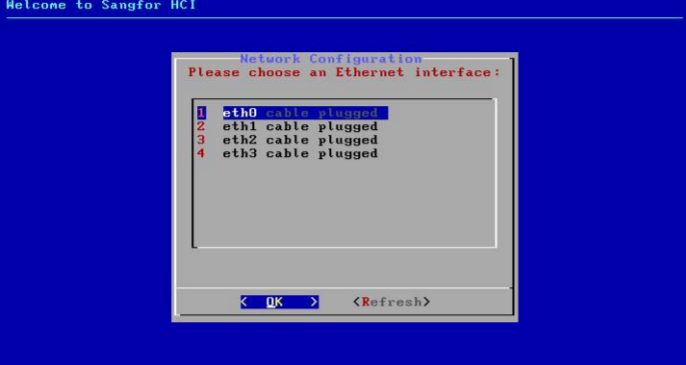
- Configure the IP Address, Netmask, and Gateway, then select OK. Make sure that the address can communicate properly with the target HCI cluster.

-
Select Yes to return to the NIC selection screen and set other NICs, or select No to complete the installation.
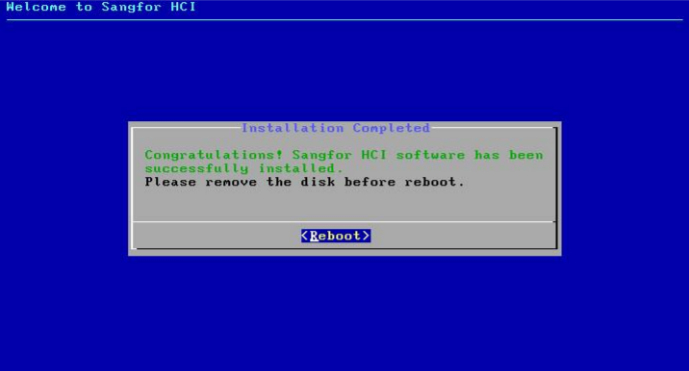
-
Remove the USB flash drive or ISO image file and select Reboot to complete the installation.
- After restarting the server, you can log in to the witness node console by entering https://configured IP address in your browser.
Deploy Stretched Datastore
- Configure the storage datastore type.
On the HCI console, navigate to Storage > Virtual Storage, select the Virtual Datastores tab, and click New. Then, select Stretched datastore as the datastore type.

- Select the node.
Select the nodes to be added to the stretched datastore. The stretched cluster requires at least 4 nodes.

- Specify the fault domains.
Add the required nodes to the corresponding fault domains. There are four nodes in this example, so two nodes are added to the Primary Fault Domain, while another two are added to the Secondary Fault Domain.

- Add Witness Node.
After naming the Primary Fault Domain and the Secondary Fault Domain, configure the witness Node IP according to the pre-installed witness node. Follow the wizard to enter the password to confirm the configuration of the witness node.


Note:
After logging in to the witness node, you need to Enable the SSH Port of the witness node under System > Port Management.

- Confirm the configuration.
Confirm the configuration of the fault domain. Modifying the fault domain where the node is located after the datastore creation is not supported.

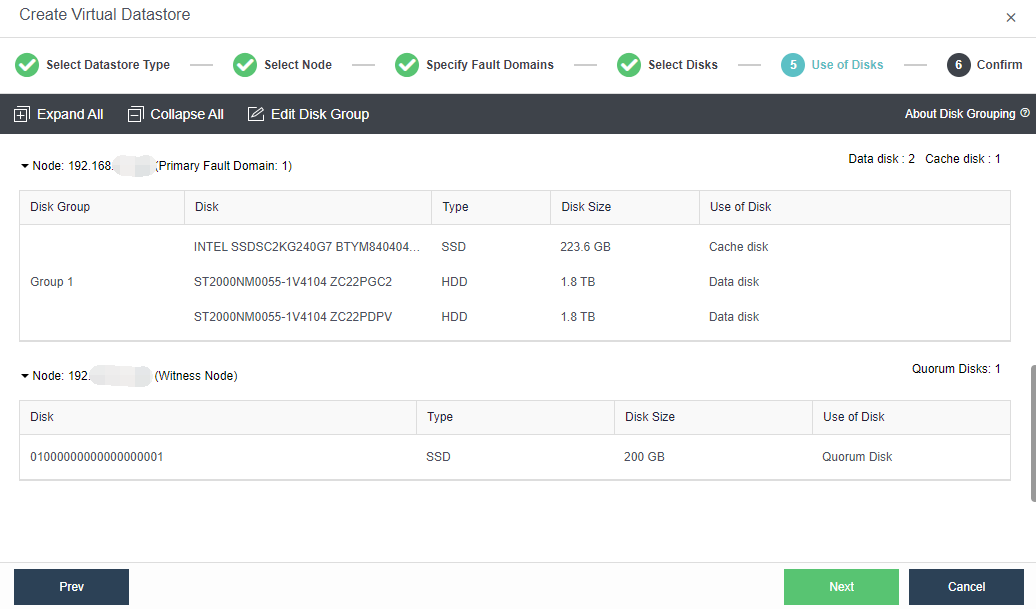
- Configure the Use of Disks.
Next, you need to plan the use of disks, including data disk, cache disk, and spare disk. Generally, SSD is used as a cache disk to improve the IO performance of virtual storage. The system automatically recommends the type of hard disk according to the configuration. You can follow the default recommendations of the system.

- Confirm the configuration.
Finally, the page displays the configuration result information of the virtual datastore, including the final storage capacity, the number of copies, and the number of disks. After confirming that the configuration is correct, you need to enter the administrator password and click OK to start initializing the virtual datastore.


Deploy Software VDC
- On the HCI console, navigate to Compute and click New. On the Create Virtual Machine page, click Import VM to import a VM.

- On the Import Virtual Machine File page, select your local software VDC VMA image and the datastore, and click Import.

- After the VM is imported, click Summary. On the Summary tab, click Power On to start the VM and click Console to enter the VDC VM console.

Configure the Management IP Address of Software VDC
- On the console of the VDC VM, select Network Setup Wizard and OK, then press Enter.

- On the Management Setup Wizard screen, select Static Specify a static ip address and OK, then press Enter.

- On the Static ip configure screen, specify a management IP address and a DNS. Select OK, and press Enter to save the settings.

- On the Static IP screen, select Yes to restart the management network for the static IP address configured in the preceding step to take effect.

Verify the Deployment
- After completing the deployment, visit the VDC’s management URL (https://Management IP address:4430) with a browser. You will see the login page of the management console if the deployment is successful.

- It is recommended to use Chrome or Firefox browsers to visit the VDC console.
Configure aDesk Communication Interfaces
It is necessary to configure the aDesk communication interfaces of the HCI cluster because VDI clients must communicate with HCI nodes through aDesk communication interfaces to access virtual desktops. You can configure aDesk communication interfaces as follows:
Log in to the HCI console and navigate to Nodes > Communication Interfaces > aDesk Communication Interface. On the aDesk Communication Interface page, click Settings. In the Settings dialog box, specify each HCI node’s communication interface and IP address.

Integrate with HCI and Init Platform Configuration
- Log in to the VDC console, go to System > Integrated Platforms > Sangfor HCI, and click New to enter the Add New Platform page.


a. Name: Name of the HCI.
b. Description: Description of the HCI. Provide information such as the purpose, making it easier to remember.
c. Address: IP address of the HCI that can communicate with the VDC.
Note:
The IP address must be in the format of https://IP, where IP represents the HCI cluster IP address. In a standalone deployment mode, enter the management interface’s IP address.
d. Username: Username of the HCI admin account.
e. Password: Password of the HCI admin account.
- After completing the configuration, click Test Connectivity to verify whether the HCI is integrated successfully.

- After completing the test, click Next to enter the Edit Platform Config page. VDC will automatically enable Desktop Cloud Access Service and Huge-Page Memory Is Effective for HCI. If only virtual desktops run in the HCI cluster, set the huge-page memory threshold to 100%. If HCI VMs and virtual desktops run in the HCI cluster, set the huge-page memory threshold to 70%.

- If only aDesk VDI services are running in the HCI cluster, optimize the system settings for the HCI cluster on the Edit Platform Config page to enable optimal performance for virtual desktops running in the cluster. Specific steps are as follows:
- Check the VDI Performance Optimization checkbox and select All HCI cluster nodes from the Optimize Host drop-down list.

- In the Residual Snapshot Cleanup Settings section, set Cleanup Mode to Delayed (Realtime is set by default) and Cleanup Time (daily) to a non-working period.

- Click Save to complete the settings. After the HCI is added, its Status will become Online, as shown in the figure below.

- Click the Server IP Address URL to open the HCI login page.
Create VDI Template
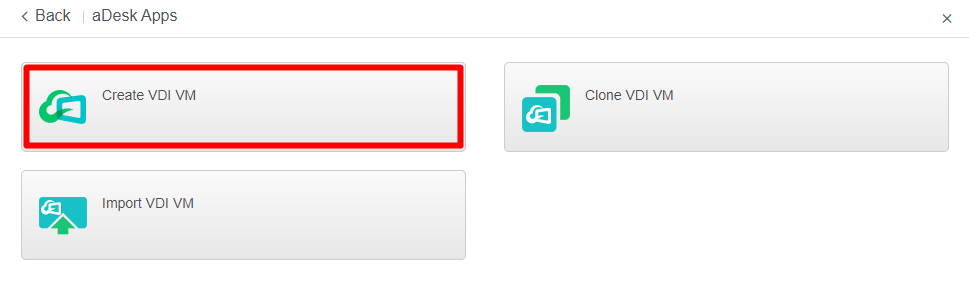
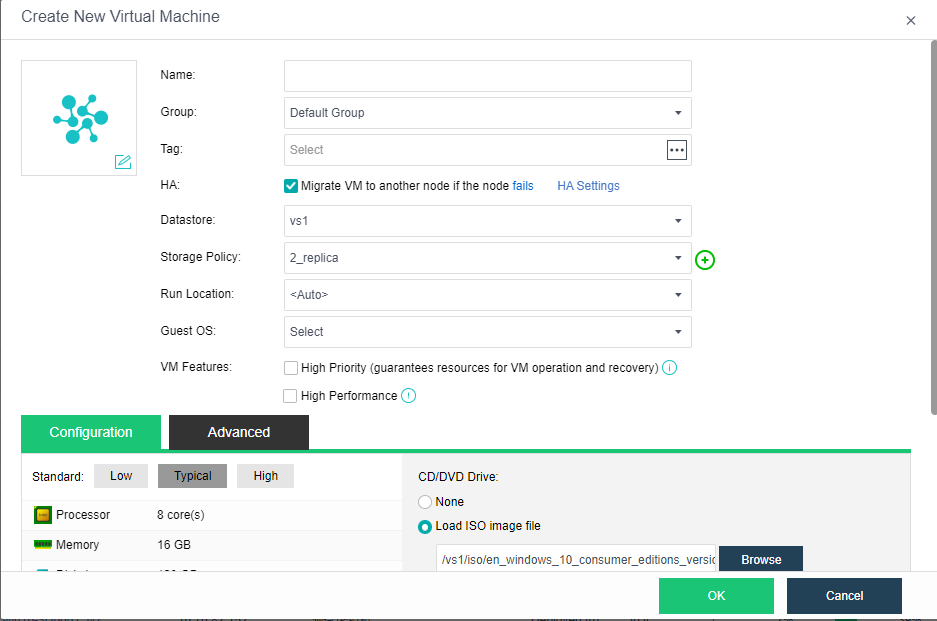
- Log in to the HCI console, navigate to Compute and click New. On the Create Virtual Machine page, select aDesk Apps. On the aDesk Apps page, click Create VDI VM.

- On the Create New Virtual Machine page, set parameters such as the name, guest OS, hardware specifications, and installation image, and click OK. Then, start the VM and install the operating system and vmTools. For more details, please refer to the Sangfor HCI User Manual.
-
After installing the operating system and vmTools, install the agent for virtual desktops or remote app servers according to the VM template type.
-
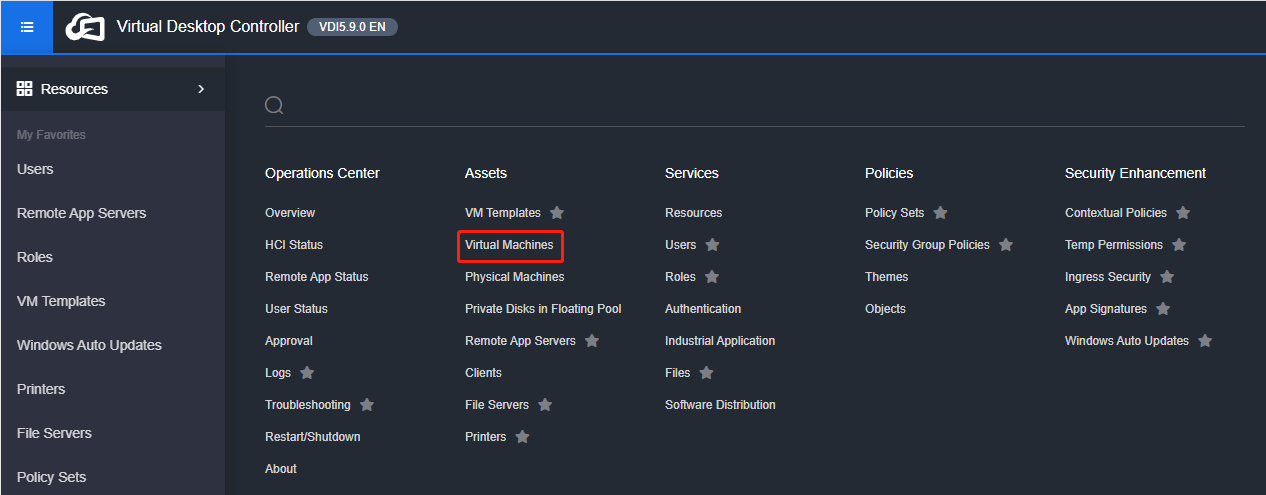
Log in to the VDC console and navigate to Resources > Assets > Virtual Machines. On the Virtual Machines page, click Agent Management and select an option to download the agent installation package that matches the VM operating system.

5.Copy the agent installation package to the VM where you want to install the agent and perform the installation.
-
Windows VM
Import the downloaded agent installation file (VDesktopServerInstall.exe) into the Windows VM, execute the file, and follow the instructions to complete the installation. The VM will restart after the installation is completed.
- After installing the agent, install service software as required and then shut down the VM.
- Log in to the VDC console and go to Resources > Assets > VM Templates. On the VM Templates page, click New and select Convert to VM Template from the drop-down list.


- On the Convert to VM Template page, select the target VM and the HCI cluster where the VM is created. Set other parameters based on the actual scenario, and click Save. In the confirmation dialog box, click OK.


- On the VM Templates page, click Tasks to enter the Tasks page to view the template conversion progress.


Create VM Resource
- Log in to the VDC console and navigate to Resources > Services > Resources. On the Resources page, click New and select Virtual Desktop.


- On the Add Virtual Desktop Resource page, complete the settings in the Basics section as required, where Work Mode must be set to Desktop.

- Under the Virtual Machine tab, complete the settings in the Basics and Private Disk sections as required.

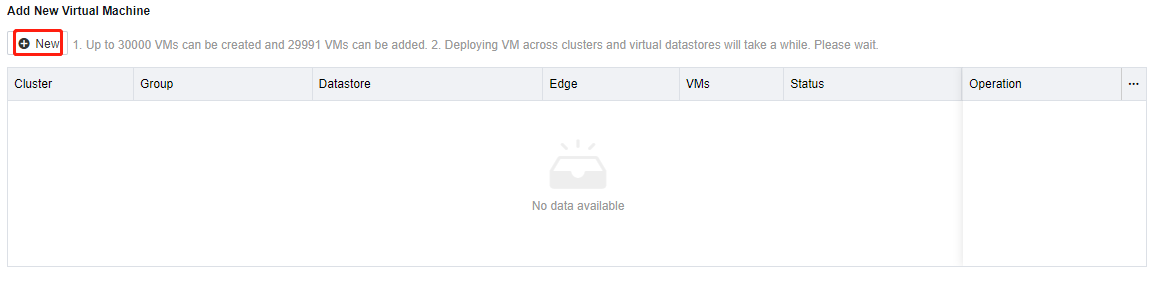
- In the Add New Virtual Machine section, click New. On the Add New Virtual Machine > Cluster tab, select an HCI cluster to deploy the virtual desktops from this resource and click Next.

Note:
Only one HCI cluster can be selected each time. If the virtual desktops from this resource need to be deployed in multiple HCI clusters, you need to repeat the add operation multiple times.
- On the Basics tab, complete the settings as required and click Next.

- On the Configuration tab, complete the settings as required and click Submit.

- Click Save to complete the configuration for creating the virtual desktop resource.
Set VM Fault Domain (Priority Running Location)
- On the HCI console, you can select the fault domain configuration in the Run Location parameter when creating or editing a VM.
