【VDI】NVIDIA vGPU DLS License Server Deployment Guide_v5.9.1
Overview
Introduction
With the release of vGPU13.0 in August 2021, NVIDIA launched a new software license system (NLS, NVIDIA License System) to replace the previous Flexnet-based license service. NLS supports two modes of online licensing (CLS) and offline licensing (DLS).
The CLS is suitable for working environments that can access the public network. VGPU devices can obtain a license through the CLS service on NVIDIA official servers.
The DLS is suitable for enterprise private network environments and performs localized licenses through the local deployment of the DLS server.
The Flexnet-based License service software will reach the end of life (EOL) on July 31, 2023, at which time NVIDIA will stop providing technical support for it.
Characteristic
- DLS will generate an instance token and bind the license with NVIDIA’s official server to replace the legacy method of registering through the license server MAC address.
- The VGPU device obtains the configuration from the token file distributed by DLS to obtain license from DLS, replacing the original network IP + port configuration method.
- The Grid13.x version driver will be compatible with the old license mode before the old license software reaches EOL. However, customers should complete the migration to DLS license as soon as possible.
- The DLS server WEB console port is 443, and the authorized service ports are 80 and 443. The intranet security device needs to allow corresponding access rights and ports.
Platform Environment Requirement
- VDI must be version 5.5.6 or later, and the VDI server VGPU driver version is switched to Grid13.2 or later.
- The virtual machine’s operating system must be a win10 or win11 64-bit system, and the VGPU driver of grid 13.2 and above must be installed.
- The internal firewall needs to allow the 3D virtual machine to access the 80 and 443 ports of the DLS server.
Product Strategy
- Customers who newly deploy 3D desktops must use an NLS license.
- For old customers who have already used 3D desktop, after upgrading the platform version to version 5.5.6 and above, they should complete the migration to the DLS license as soon as possible.
- For the 3D desktop customers who can only use the version before 5.5.0 or Grid11.1 driver due to special reasons (if you need to use the 3D WIN7 desktop). They can only use the original license mode and cannot perform license migration. New licenses cannot be purchased after the original licensed software reaches EOL.
Configuration Guides
DLS Server Deployment
- Login to VMP, go to Compute > New > Import Virtual Machine to import the NVIDIA DLS v3.2.0 license server.
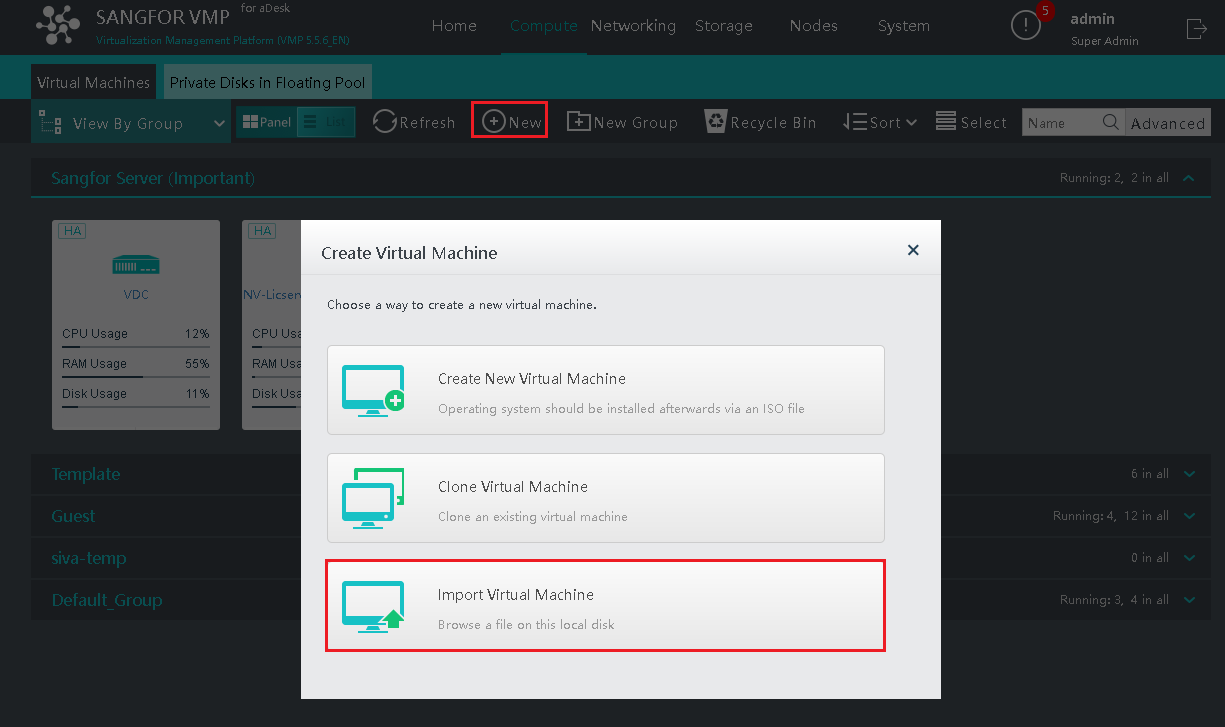
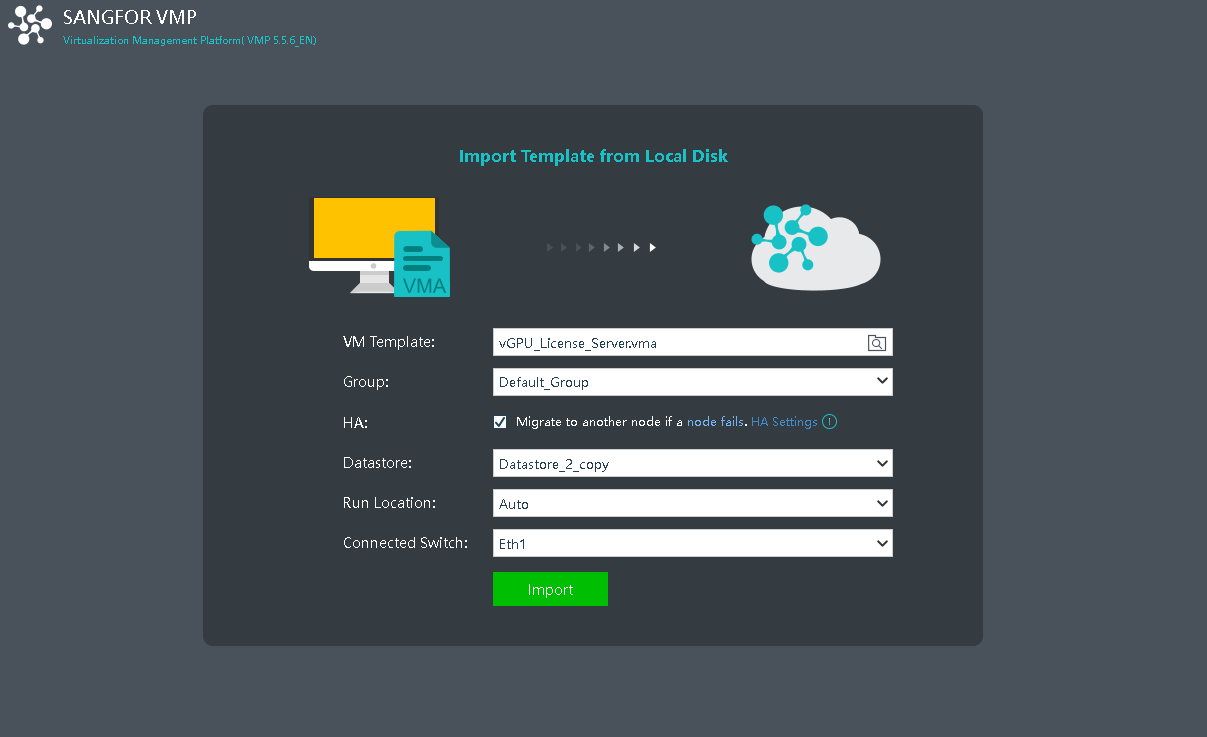
- Upload and import the license server.
- Power on the license server and log in to the VM web console with the dls_**admin account(the default password is welcome**).

-
Execute /etc/adminscripts/set-static-ip-cli.sh**,** and follow the guide to set a static IP for the license server.

-
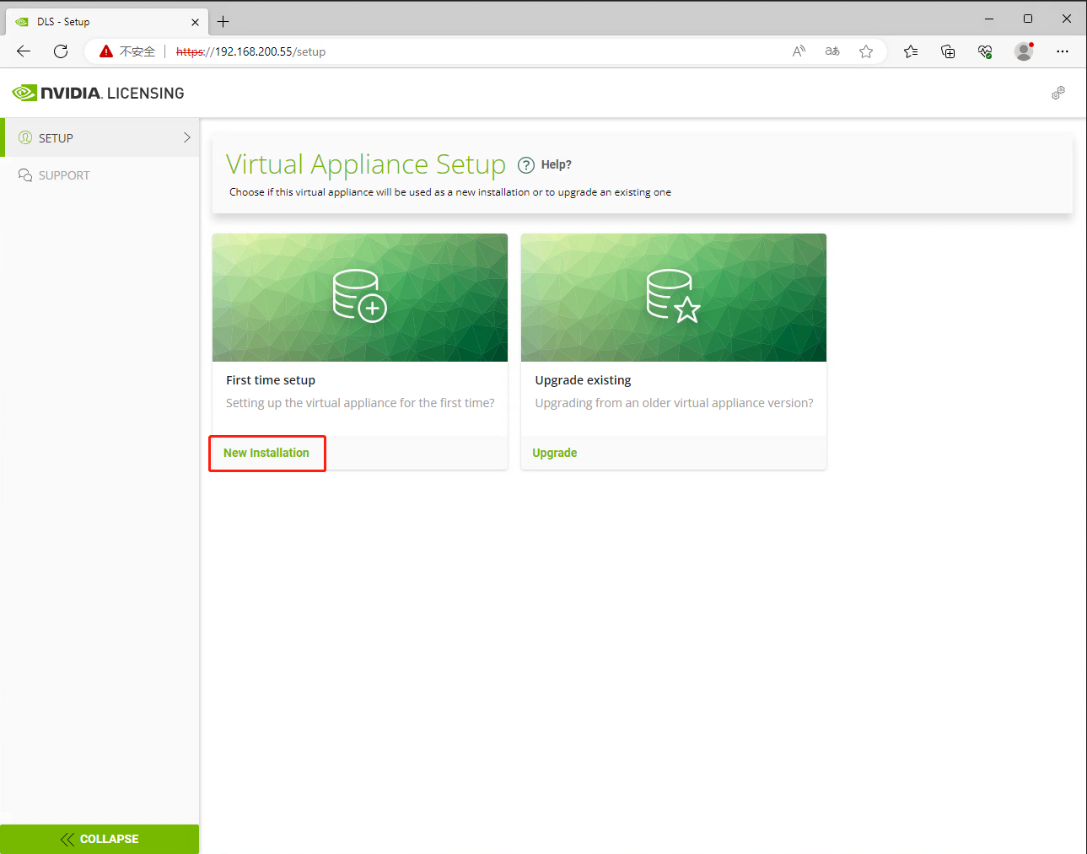
Open the browser and enter https://license_server_IP to access the license server WEB console. Then select New Installation to enter the administrator account registration page.
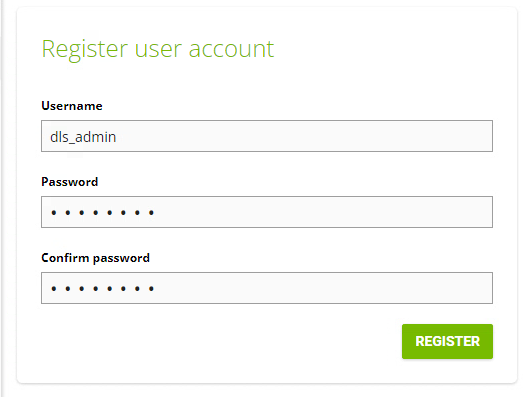
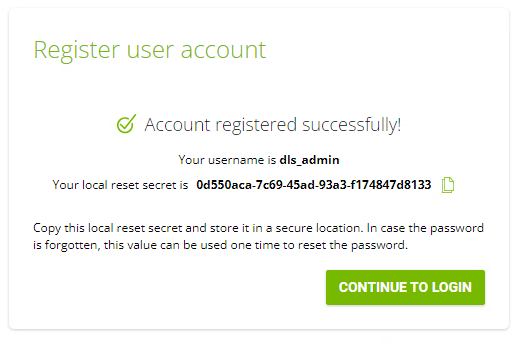
- Enter the administrator account dls_admin password, and click REGISTER to complete the account registration.
- Click CONTINUE TO LOGIN to enter the login interface. Save the reset secret to a local file to use this key to reset the password.
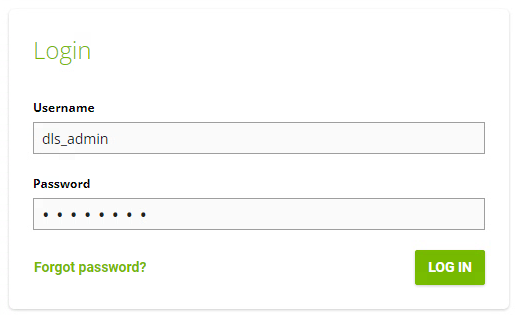
- Use the account dls_admin to log in to the licensing server web console.
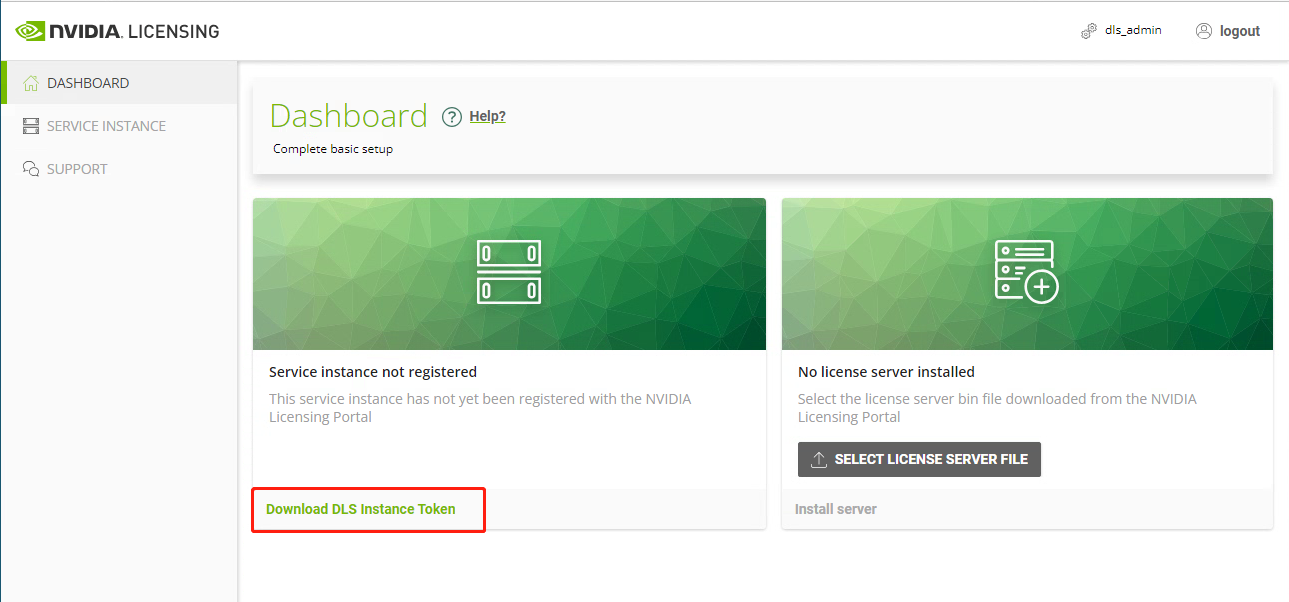
- Select Download DLS Instance Token to download and save this license server’s DLS instance token file. Next, upload it to the NVIDIA official website to register the license server.
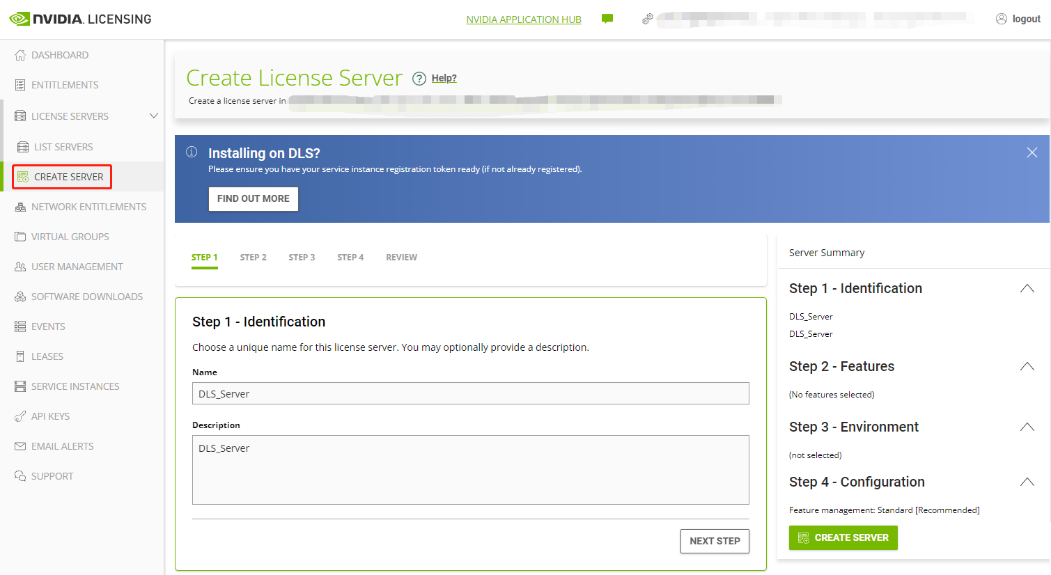
- Log into the NVIDIA enterprise portal at and go to LICENSE SERVER > CREATE SERVER. Fill in the name and description of the authorized server to be created, and then click N**EXT STEP**.
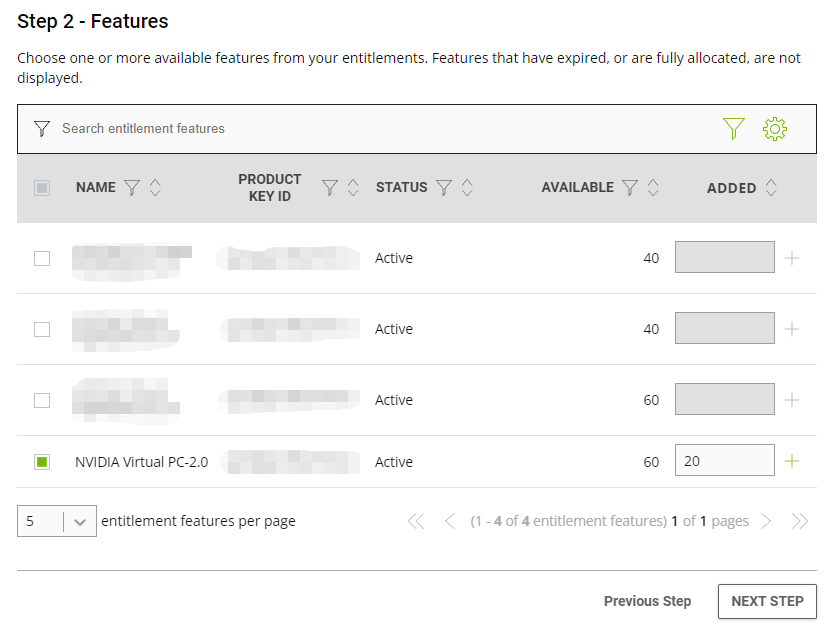
- After selecting the license type and quantity to be assigned to the license server, click N**EXT STEP** to enter the Environment interface.
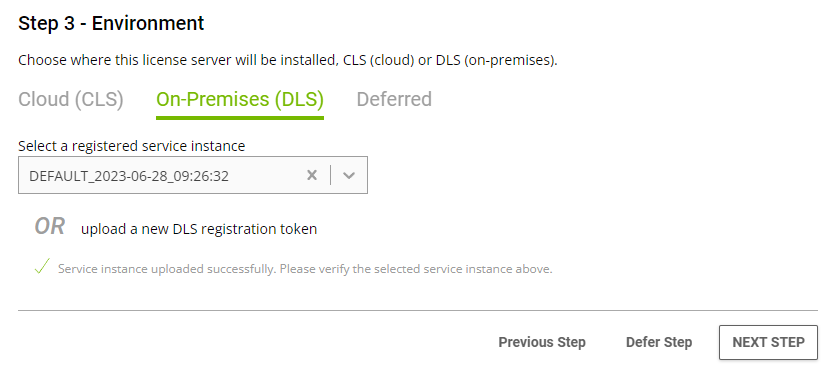
- Click On-Premises (DLS), select the DLS Token file we generated earlier, and click UPLOAD TOKEN.

- Ensure there are no problems with the DLS server instance. Click NEXT STEP.
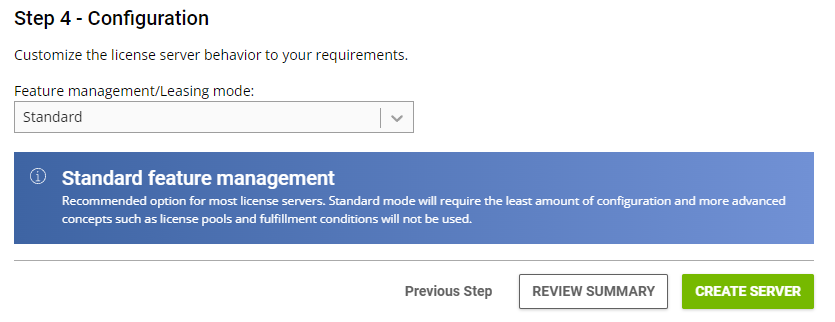
- Keep the default standard mode. If you have other special needs, you can choose other modes here and click CREATE SERVER.
- After the creation is complete, it will automatically jump to the License Server Details page, click the ACTIONS button in the upper right corner, and select Download.

- Download the activation file for the License server.

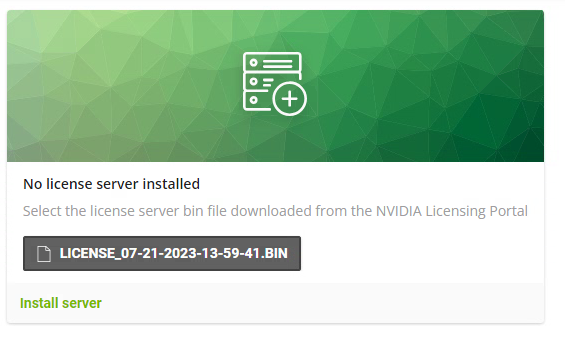
- Log in to the web console of the DLS license server and select DASHBOARD > SELECT LICENSE SERVER FILE.
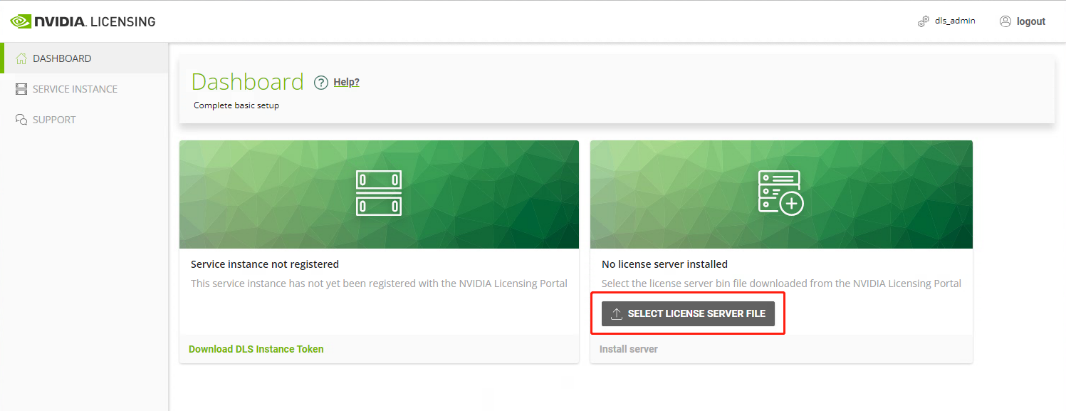
- Select the license BIN file downloaded at the above step, and click Install Server to complete the deployment and activation of the DLS license server.
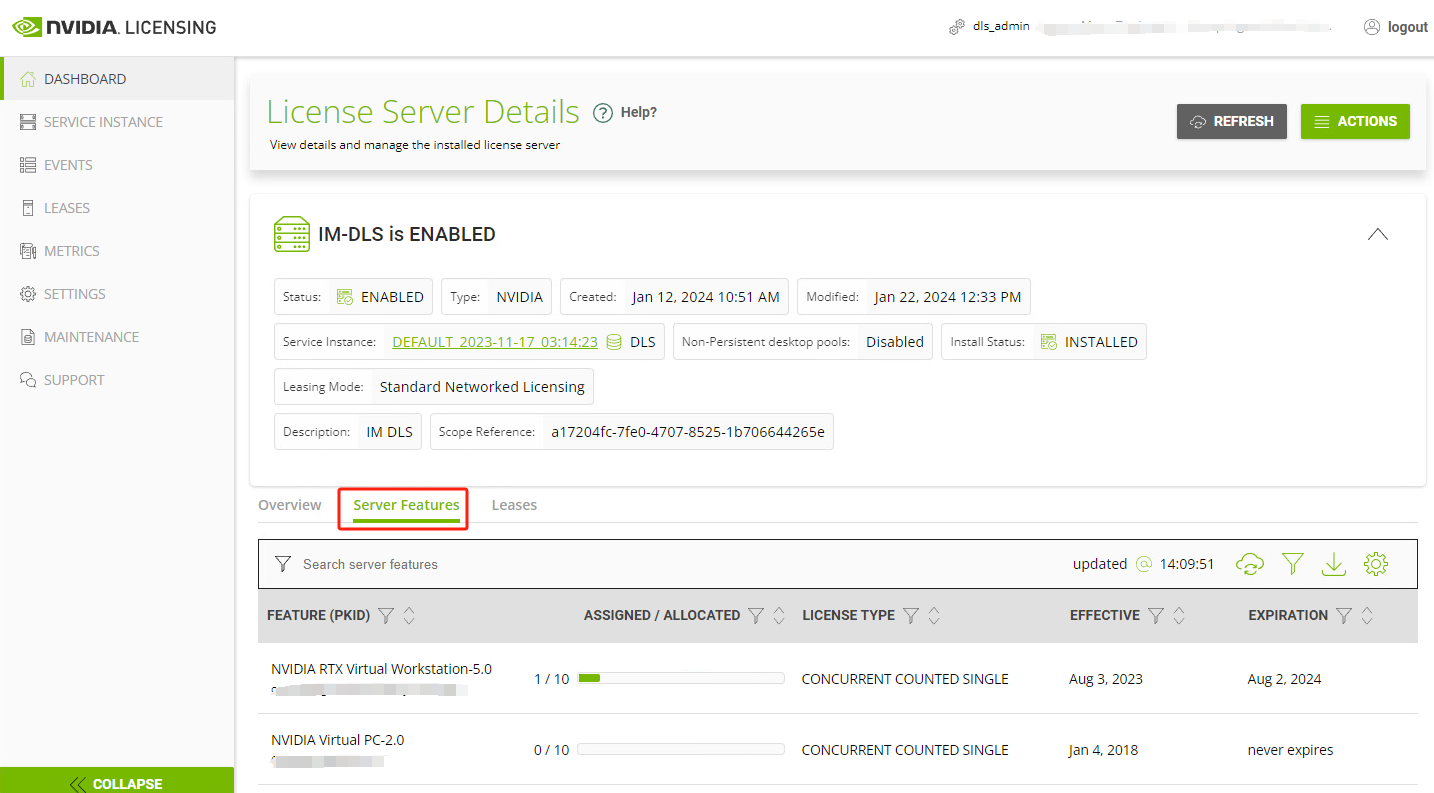
- The DLS server was successfully activated and licensed, as shown in the figure below:
- After confirming that the license server activation is successful, take a snapshot of the license server. If the server becomes abnormal in the future, you can quickly restore it through the snapshot.
Client DLS License Configuration
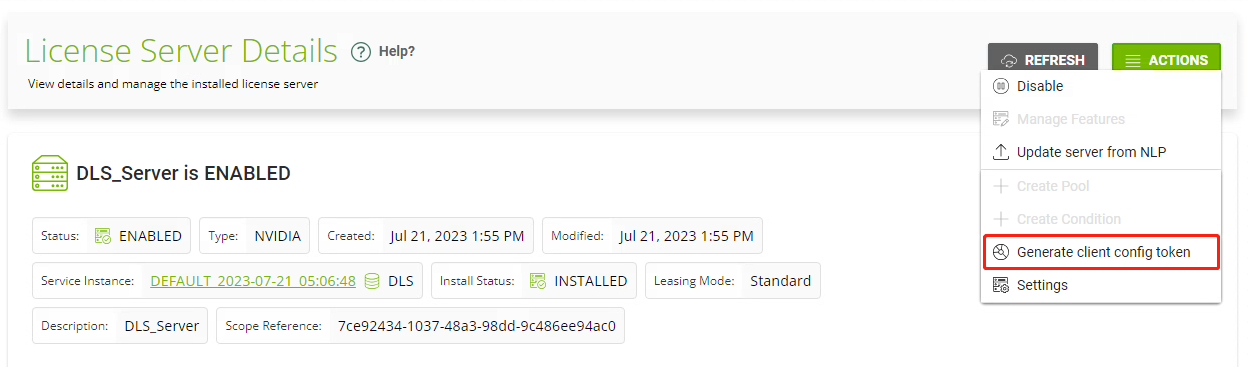
- Log in to the WEB console of the DLS Nvidia server, and go to ACTION**S > Generate client config token**.
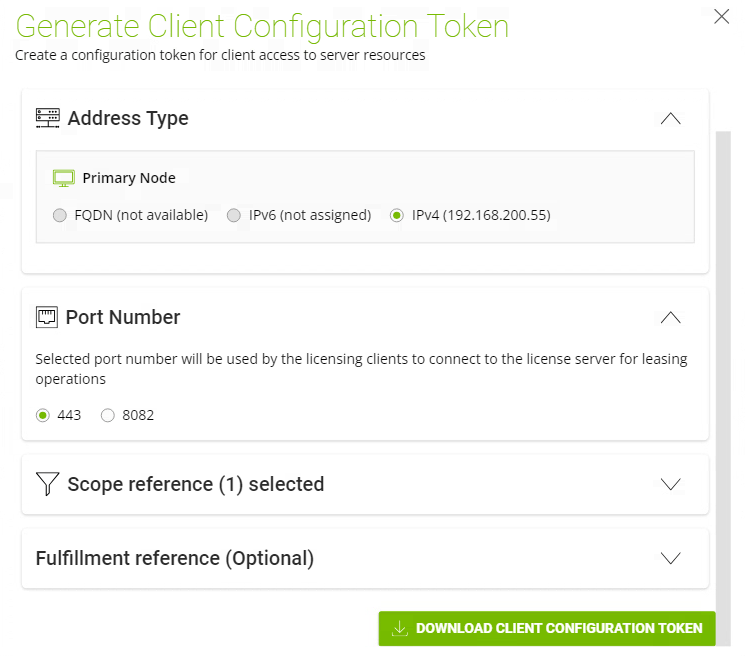
- Confirm the server IP and port number in the pop-up window. Please ensure that the correct IP address is selected(in some DHCP environments, invalid FQDN may be selected by default), and then click DOWNLOAD CLIENT CONFIGURATION TOKEN.
- Access the template or derived VM, and put the Client Configuration TOKEN file into the C:\Program Files\NVIDIA Corporation\vGPU Licensing\ClientConfigToken.

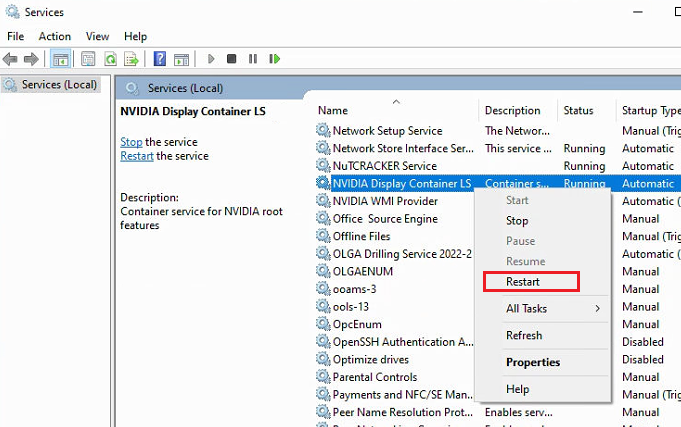
- Restart the NVIDIA Display Container LS services.
-
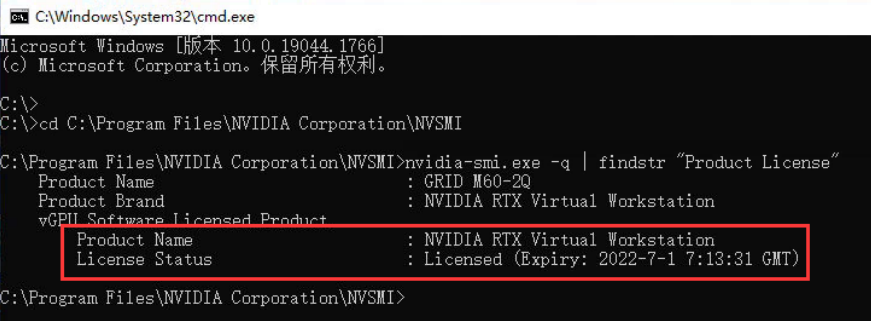
Run cmd and execute the following commands to confirm whether the license type and license status are normal.
**cd C:\Program Files\NVIDIA Corporation\NVSMI****nvidia-smi.exe -q | findstr “Product License”**
License obtained:
Unlicensed:

DLS License Management
View License Usage
The user can view the current license usage of the Nvidia server, and can manually delete the client to release the license on the web console.
- Log in to the WEB console of the DLS Nvidia server, and go to the DASHBOARD > License pools. Click on the license pool, it will show the usage of various licenses.

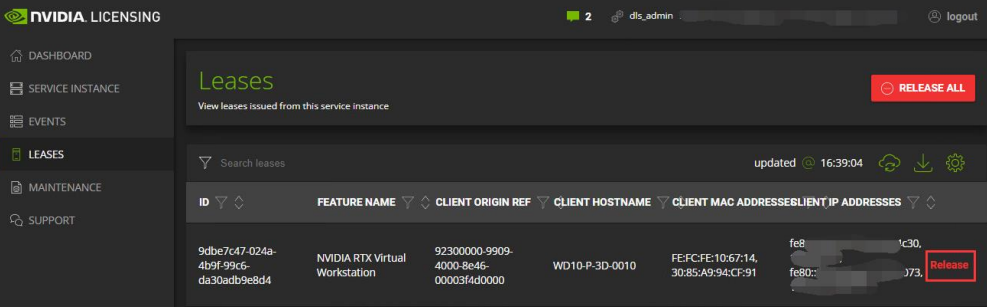
- Go to LEASES to view the list of online clients and occupation license types. Click the Release button to release the specific client license occupation.
Add License
When the user needs to increase the number of licenses assigned to a license server or add a new license that needs to be imported into the license server, the operation steps are as follows:
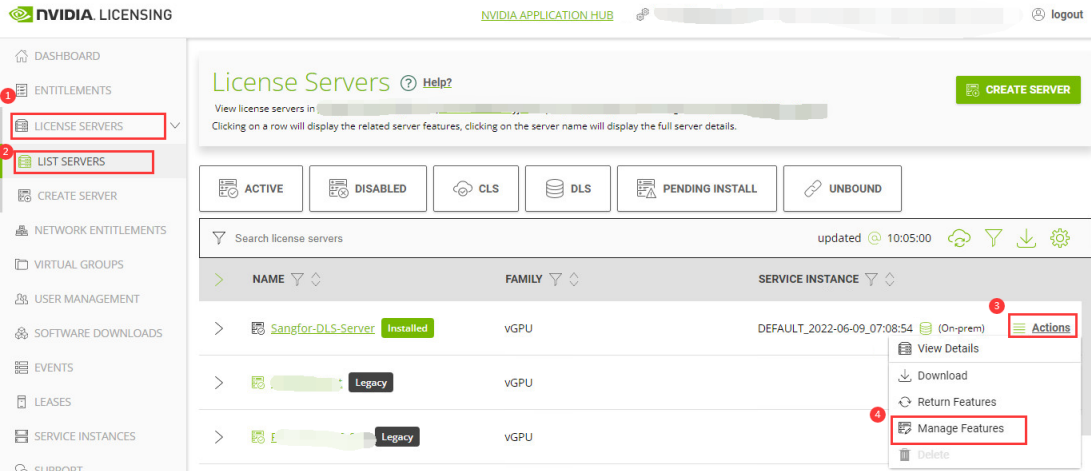
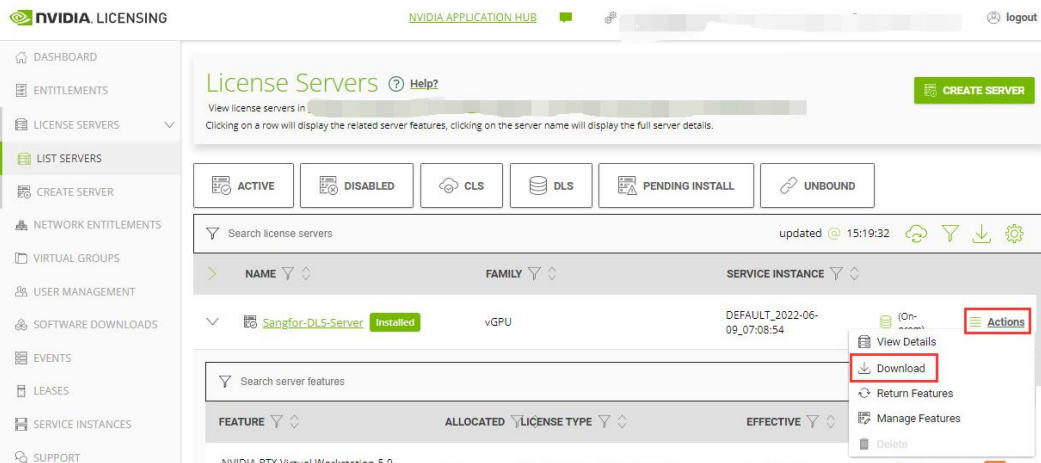
- Login to the Nvidia Application Hub portal (). Go to LICENSE SERVERS > LIST SERVERS and find the license server. Click Actions > Manage Features to enter the Manage Server Features pages.
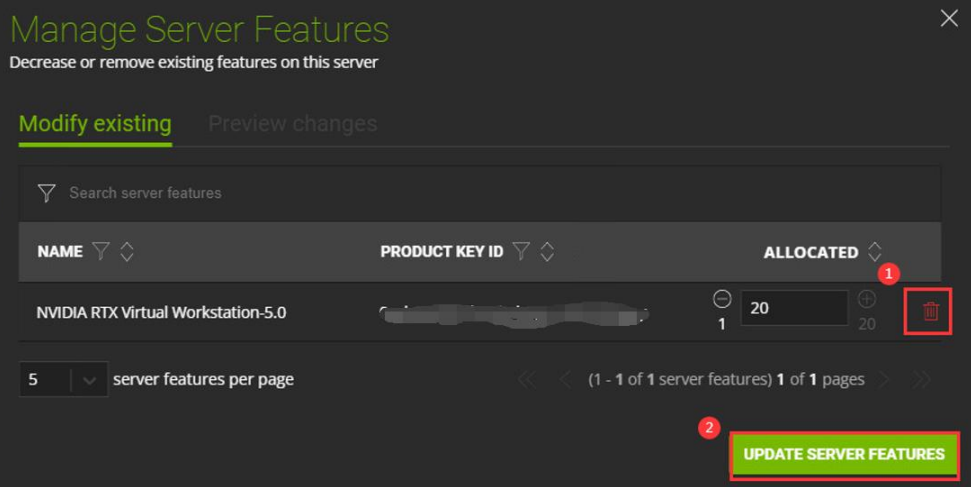
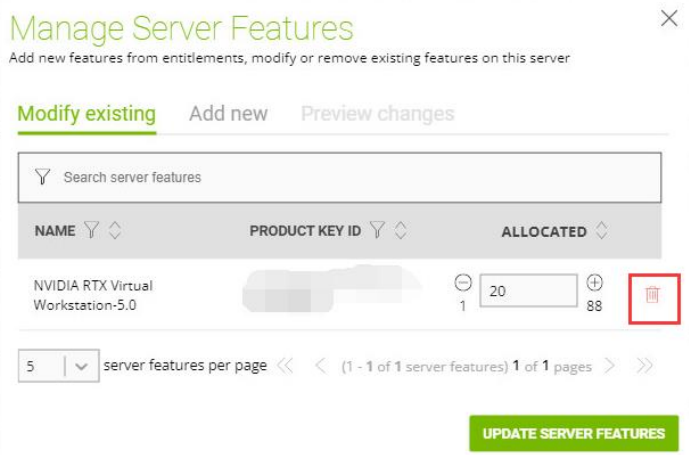
- In Modify existing tab, the user can increase the number of allocated licenses (the increase number cannot exceed the remaining available licenses).

- In Add newtab, user can select a newly purchased license to add.
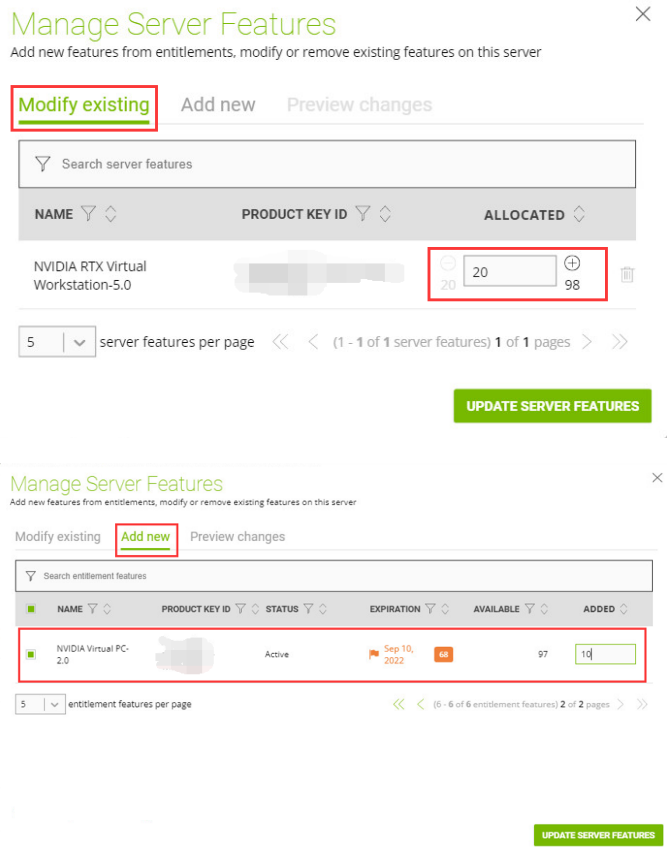
- Then, click UPDATE SERVER FEATURES to complete the license update.
1.Any modification to the license license needs to regenerate the BIN file.
2.On the Modify existing tab, it only supports increasing the number of allocated licenses but does not support reclaiming the allocated licenses.
- Select Actions > Download to download the updated license BIN file.
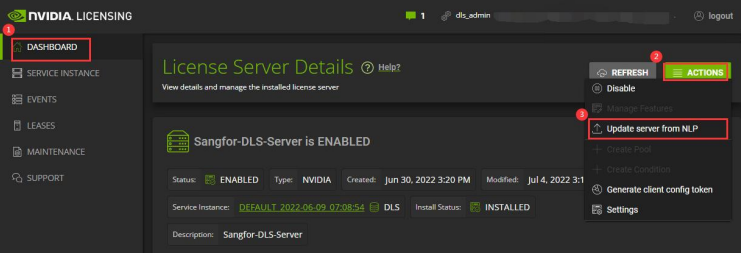
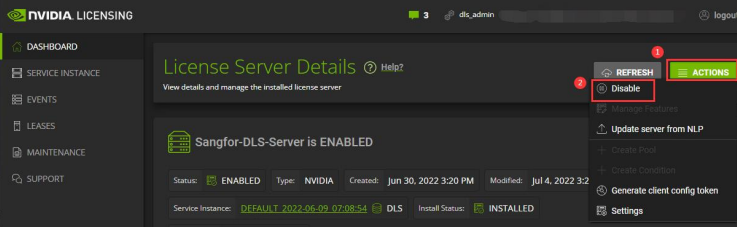
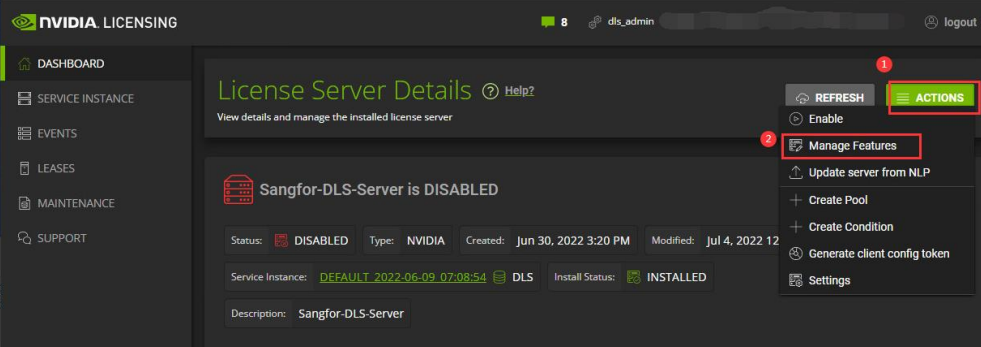
- Log in to the WEB console of the DLS Nvidia server, go to DASHBOARD > ACTIONS > Update server from NLP corresponding to License Server Details.
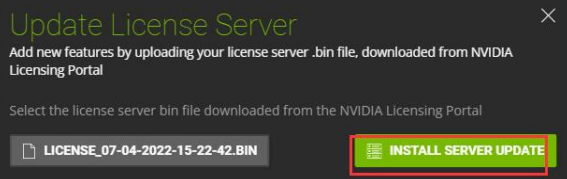
- Select the new license BIN file and click INSTALL SERVER UPDATE.
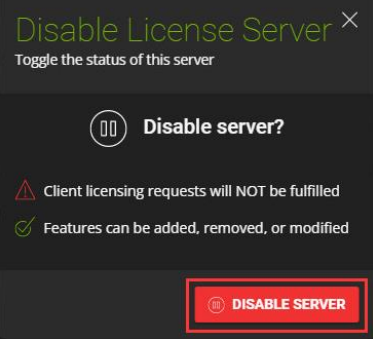
- Go to DASHBOARD > ACTIONS > Disable and click the DISABLE SERVER button to stop the license server service.


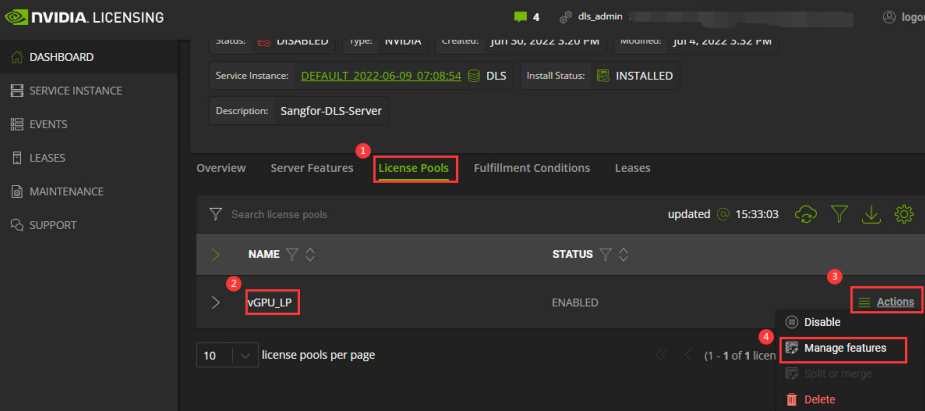
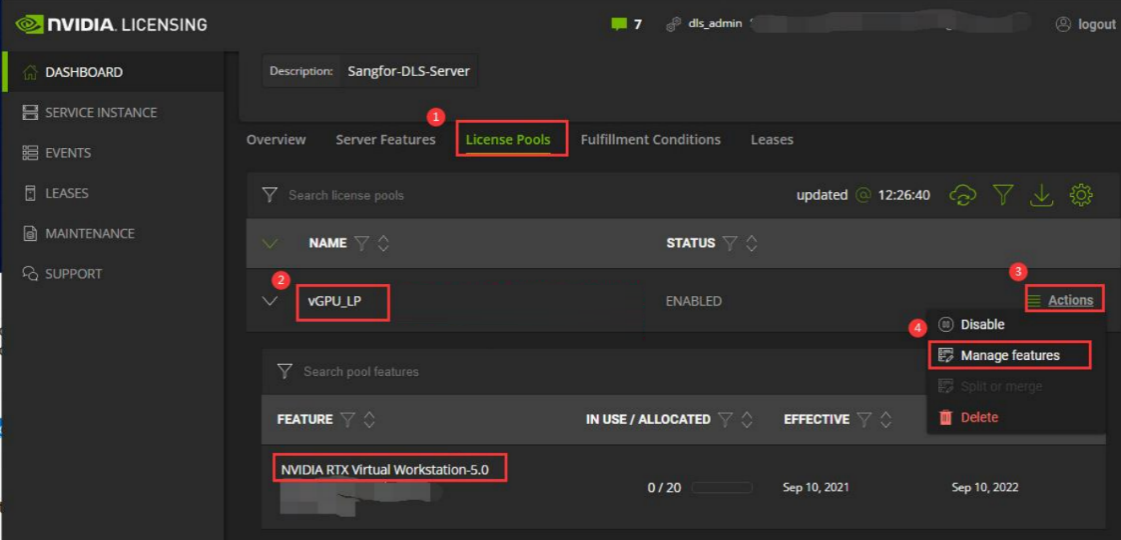
- Go to DASHBOARD > License Pools tab, select the license pool to which license allocation is to be added and click Actions > Manage Features.
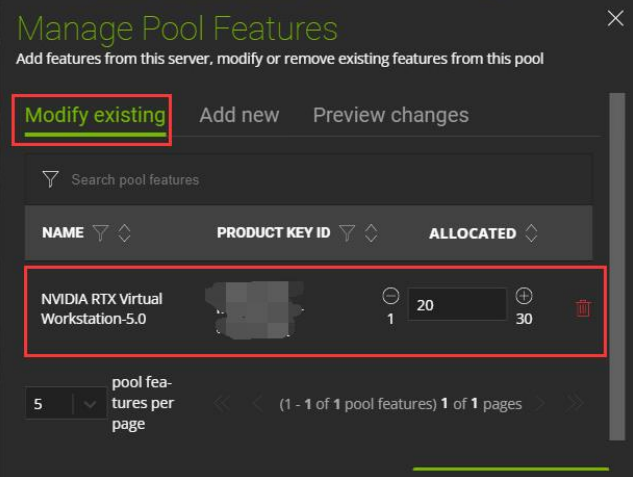
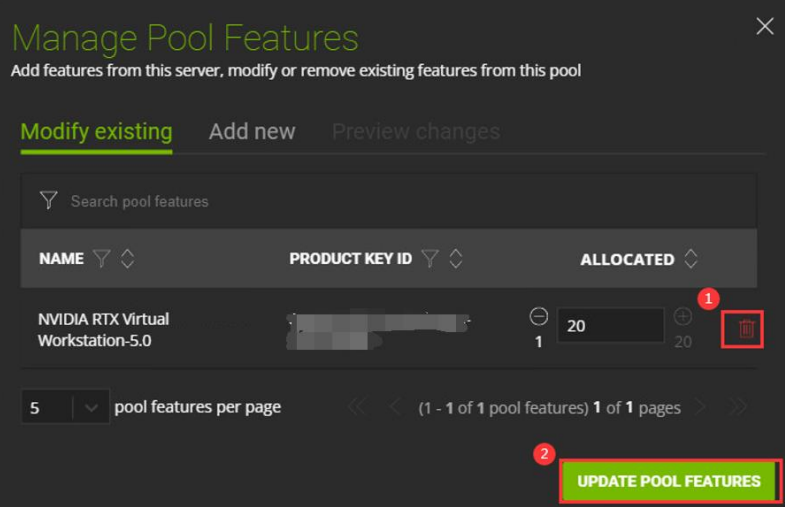
- In the Modify existing tab page, the user can increase the number of allocated licenses.
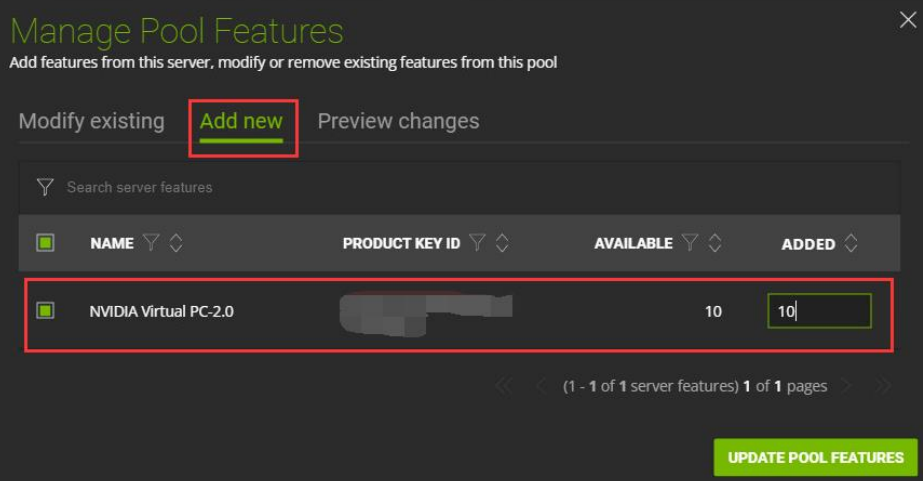
- In Add new tab, the user can select a newly purchased license to add. Then, click the UPDATE POOL FEATURES to complete the license addition.
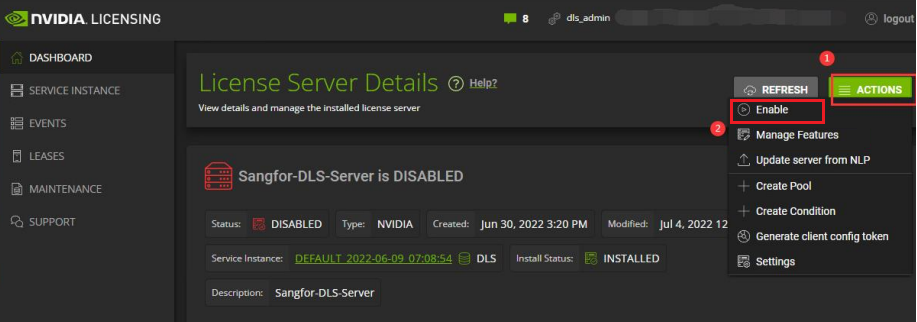
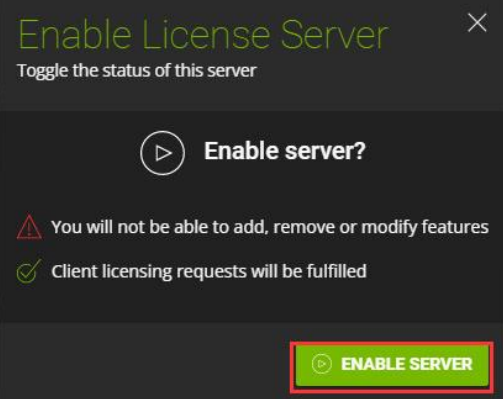
- Go to DASHBOARD > ACTIONS > Enable and click the ENABLE SERVER button to restore the license server service.

Reclaim License
- Log in to the WEB console of the DLS Nvidia server, go to DASHBOARD > ACTIONS > Disable and click the DISABLE SERVER button to stop the license server service.
- Go to DASHBOARD, select the corresponding License Pools > ACTIONS > Manage Features.
- In the Modify existing tab, delete the license to be reclaimed and click UPDATE POOL FEATURES button to complete the license pool reclaim.
- Go to DASHBOARD, select the corresponding License Server Details > ACTIONS > Manage Features.
- In the Modify existing tab, delete the license to be reclaimed and click UPDATE SERVER FEATURES button to complete the license reclaim.
- Go to DASHBOARD > ACTIONS > Enable and click the ENABLE SERVER button to restore the license server service.

- Go to the MAINTENANCE** page and click Export Feature Retur**ns to download the license reclaim bin file.
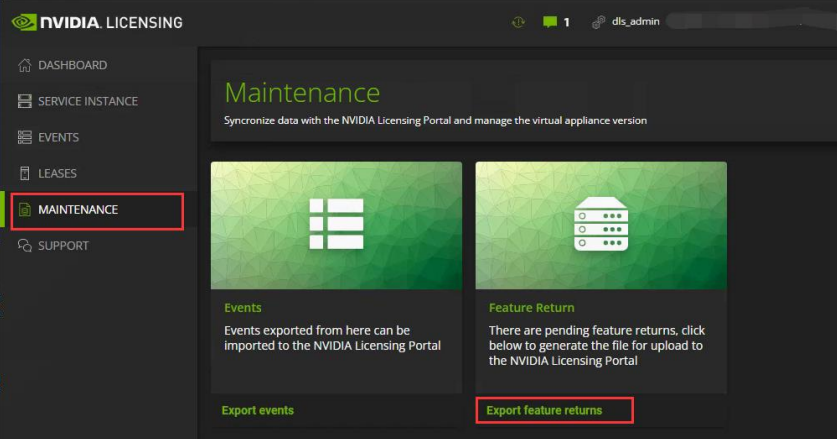 The naming format of BIN file is as follows:
a. on-premises_feature_return_mm-dd-yyyy-hh-mm-ss.bin
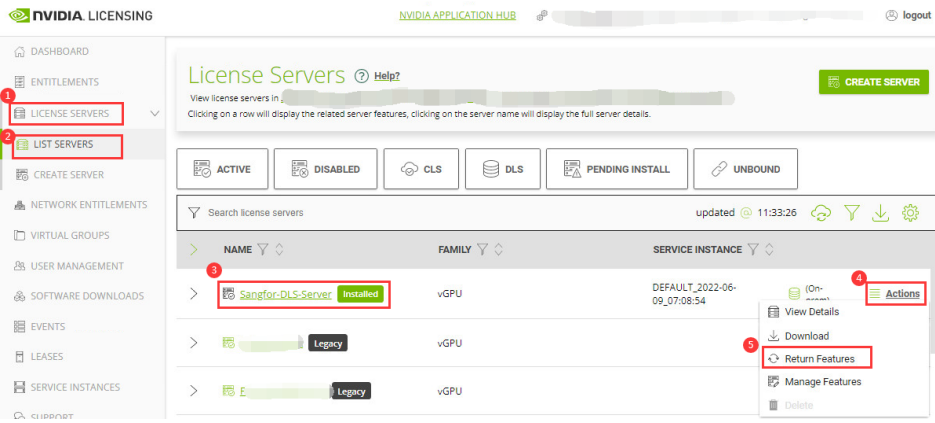
- Login to the Nvidia Application Hub portal, select the license server to be reclaimed and click the Actions > Return Features button.
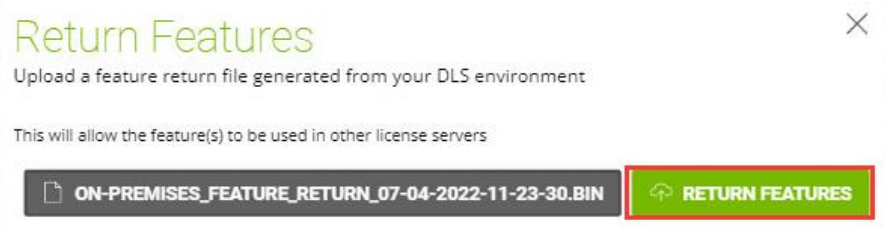
- Select the previously downloaded reclaim license BIN file and upload it. Then, click RETURN FEATURES to complete the license reclaim.

Migrate from Legacy Server to DLS Server
To solve the Nvidia legacy licensing server EOL problem, customers should migrate the license from the legacy server to the DLS server after upgrading the VDI to version 5.5.6_EN and above. At the same time, upgrading the VMP platform and virtual machine driver to Grid13.2 is required.
The migration steps are as follows:
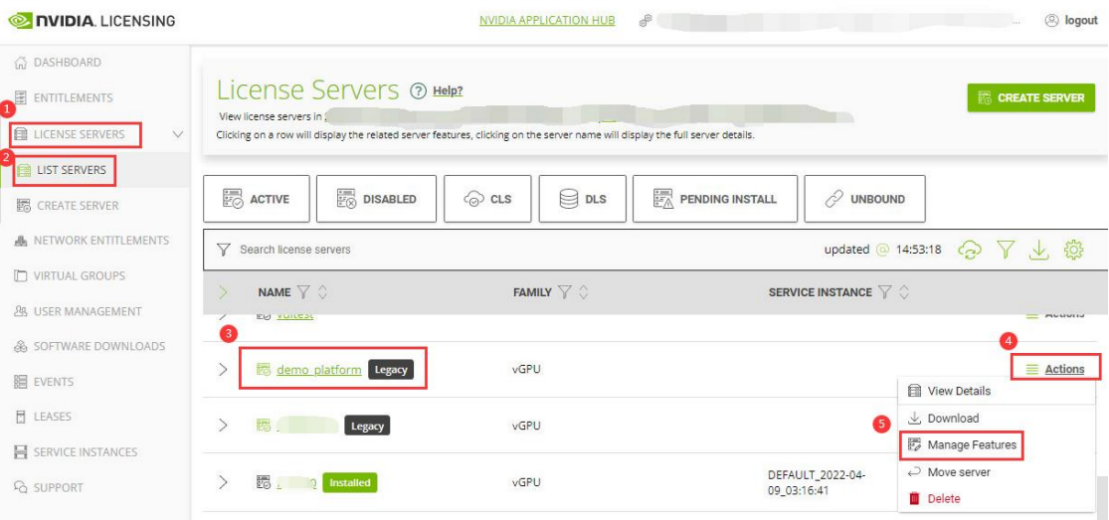
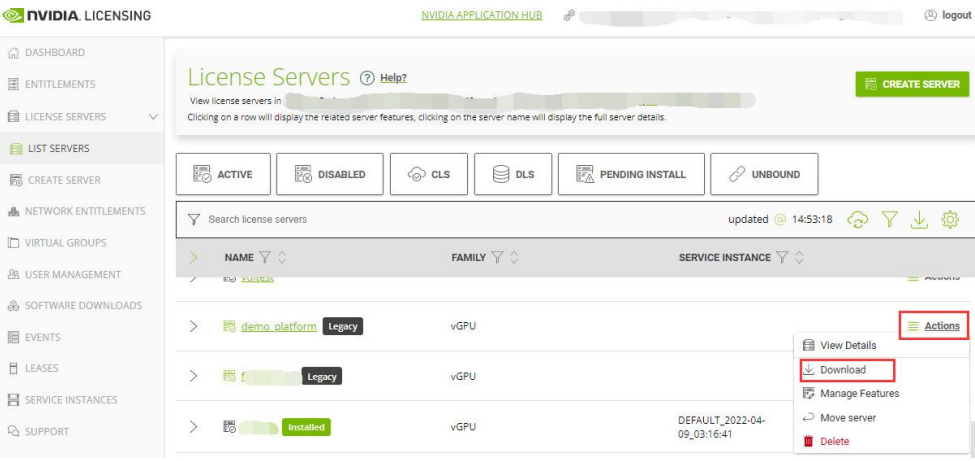
- Login to the Nvidia Application Hub portal, go to LICENSE SERVERS > LIST SERVERS, and find the old server (with the Legacy logo) to migrate the license. Then, click Actions > Manage Features.
- In the Modify existing tab, delete all assigned licenses and click the UPDATE SERVER FEATURES button to complete the update.
- Select the legacy server and click Actions > Download to download the empty license BIN file, and let the license reclaim take effect.
Refer to the DLS Server Deployment section of this document to complete the DLS server deployment and license activation.
Refer to the Client DLS License Configuration section of this document to configure the DLS license for the 3D virtual machine.
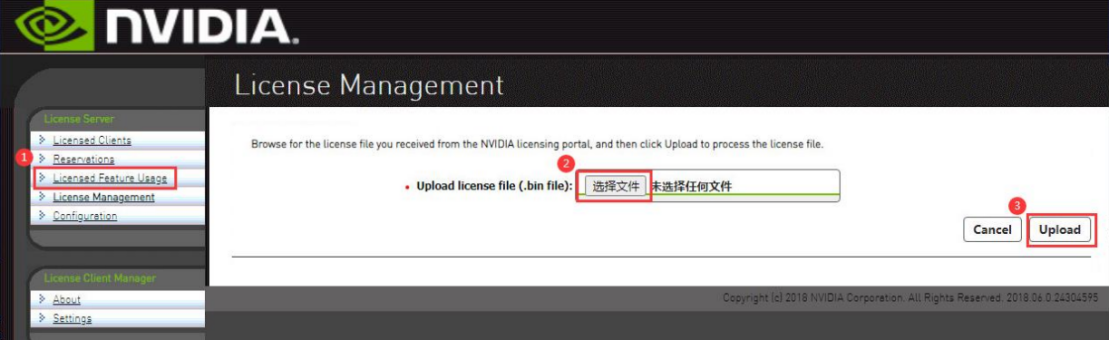
- Log in to the legacy license server’s WEB console (). Go to the Licensed Feature Usage and upload the empty license BIN file downloaded in step 3. Then, click the Upload and complete the old license server update.
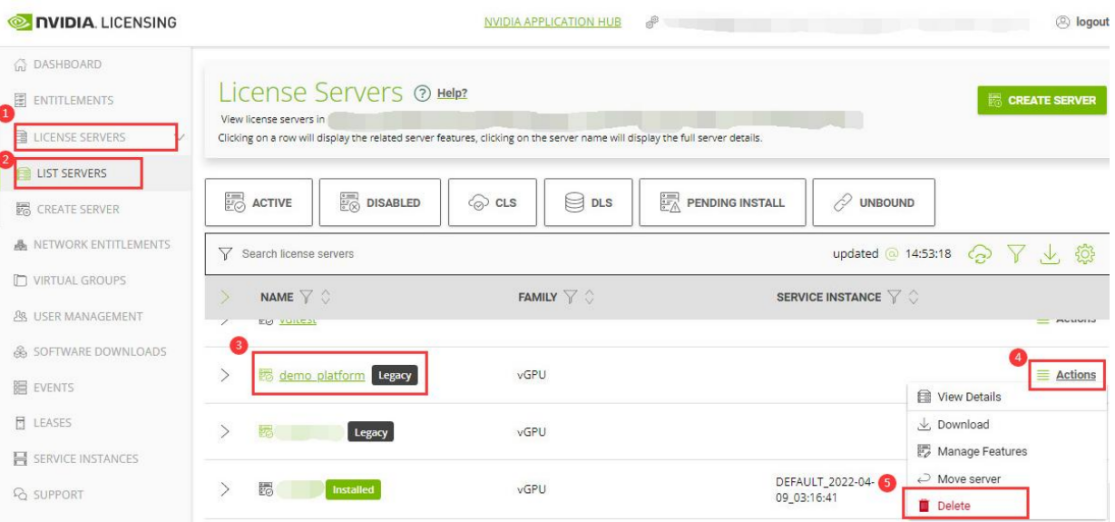
- Login to the Nvidia Application Hub portal, select LICENSE SERVERS > LIST SERVERS, find the old server (with the Legacy logo), and click Actions > Delete to delete the legacy license server.
 6. Log in to the VMP platform, shut down, and delete the legacy license server.